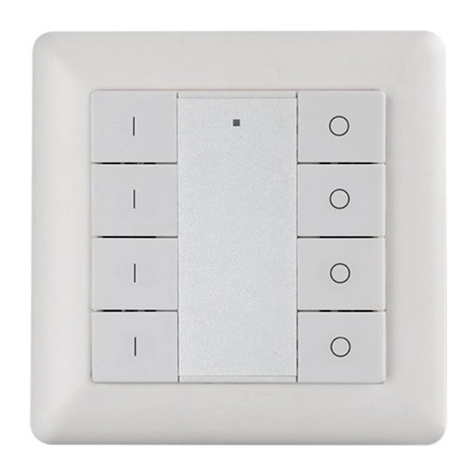
Deka FANREMOTEWH User manual

INSTRUCTION
MANUAL
FANREMOTEWH
UNIVERSAL CEILING FAN REMOTE CONTROL KIT
TO SUIT DEKA & RevelAIR AC CEILING FANS MODELS
IMPORTANT POINTS:
1. Please read these instructions, and save them for further reference.
2. Before installation, TURN OFF THE POWER TO YOUR CEILING FAN (at the main switch box or fuse box).
3. The receiver must be installed by a licensed electrician.
4. This unit is to be used in an AC220V-240V 50/60Hz supply only.
Do NOT exceed rated power input specification (Rating: Motor max. 100W,
Light max.100W).
5. Do not install in damp locations or immerse in water. (For indoor use only.)
6. Do not remove the male/female plugs, cut leads shorter or pull on any
power leads.
7. PLEASE NOTE: The battery will weaken with age and should be replaced
before leaking takes place as this will damage the remote.
8. The batteries must be removed from the remote before it is scrapped and the
batteries shall be disposed of safely.
9. The electric shock protection of the RF receiver is dependent on its installation.
10. The RF receiver shall be used within its rating range, otherwise overheating
may occur that will result in product failure and/or unexplainable operation.
11. CAUTION: To reduce the risk of fire or injury, do not use this product in
conjunction with any variable (rheostat) wall control.
12. CAUTION: Do not use a solid-state dimmer with this ceiling fan receiver.
13. WARNING: Keep new and used batteries away from children.
14. CAUTION: Do not ingest battery - chemical burn hazard.
15. Ensure the batteries are inserted as illustrated with the correct polarity.
16. Dispose of exhausted batteries immediately and safely (so they cannot be
retrieved by children). Flat batteries can still be dangerous. Contact your local
council to safely dispose of the battery.
17. Regularly check the product and make sure the battery box cover is correctly
secured. If the battery compartment does not close securely, stop using the
product and keep it away from children.
18. If you think batteries might have been swallowed or placed inside any part of the body, seek immediate medical
attention and immediately call the 24-hour Poisons Information Centre on 13 11 26 for fast, expert advice.
19. Battery Leaks: Battery contains chemicals and should be treated as any chemical would. Take precautions
when handling leaked battery chemicals. Battery chemicals should not be placed near the eyes or ingested.
Should you have any concerns, contact the Poisons Information Centre on 13 11 26 for fast, expert advice.
1
Remote control instructions_Nov20.qxp_Layout 1 20/11/20 9:07 am Page 1

2
REMOTE INSTALLATION INSTRUCTIONS:
The remote handset has been paired with the receiver at the factory. Multiple remotes can be installed
in one location without any interference.
Plug the quick connect plug sockets together and ensure a male / female match. (Fig. 1)
Slide receiver into ceiling canopy, ensuring exposed antenna (Fig.2)
Slide ceiling canopy up to ensure safe enclosure of all connections. (Fig.3)
IMPORTANT INFORMATION:
There are two common methods for controlling fan operation: (a) control by wall switch (b) control
by remote controller.
(a) Wall controller. A remote control cannot be added unless the wall controller is removed and
replaced with a single pole switch in its place as per local wiring instructions AS3000.
(b) Using a remote control kit to control the fan operation: Before using remote controller,
remove any wall control switch and replace with a single pole switch.
Fig. 1
Fig. 2 Fig. 3
Remote control instructions_Nov20.qxp_Layout 1 20/11/20 9:07 am Page 2

3
USING YOUR REMOTE CONTROL
1. LED indicator: when pressing any buttons, the LED
indicator will flash to indicate activation of the pressed button.
2. HI speed button: press it to turn on the fan at high speed.
3. MED speed button: press it to turn on the fan at medium
speed.
4. LOW speed button: press it to turn on the fan at low speed.
5. OFF speed button: press it to turn off the fan.
6. Light button: Press it to turn on/off the light
(if fan installed with light).
PAIRING OF THE FAN RECEIVER AND REMOTE
NOTE: The remote and receiver have already been paired
during manufacturing. When the ceiling fan is installed for
the first time, pairing of the remote and receiver may not be
required.
Should the remote and receiver lose pairing after installation or
during use, the remote and the receiver must be re-paired.
Below are the operating symptoms and method to
re-pair the pairing of the AC ceiling fan remote and receiver.
Issue:
Loss of control - Remote cannot communicate with the receiver.
Solution:
1. Switch off the main power to ceiling fan for 30 seconds.
2. Press and hold the “OFF” button on remote handset for 5 seconds (within 30 seconds of switching
the power ON to the receiver of the ceiling fan). A long “beep” will be heard that indicates successful
pairing. Release your finger from the “OFF” button.
3. Press the “HI” button to start the fan operation and change the speed of the ceiling fan via the remote
to check the operation and confirm successful paring.
INSTALLING/REPLACING BATTERIES IN THE REMOTE CONTROL
Loosen the screw from the battery cover and install
2 x AAA 1.5V DC battery into the compartment.
Please make sure the polarity of the batteries are correct as illustrated.
Reinstall the battery cover, ensuring the screw is firmly screwed back
into place. Fig. 4
1
2
3
4
5
6
Remote control instructions_Nov20.qxp_Layout 1 20/11/20 9:07 am Page 3

4
INSTALLING THE REMOTE WALL BRACKET
Install the remote wall bracket to the wall with the two screws provided. Once anchored correctly, place
the remote into the wall bracket for safe keeping.
WARRANTY
The remote control receiver and handset have a 12 month replacement warranty from the date of
purchase. Modifying the unit in any way voids the warranty unless done under instruction from the
service agent.
Warranty is provided by Repelec (Aust)
16 Rayben Street Glendenning NSW 2761
Website: www.repelec.com.au
This warranty is valid
in Australia only
Remote control instructions_Nov20.qxp_Layout 1 20/11/20 9:07 am Page 4
Table of contents
Popular Remote Control manuals by other brands
Abus
Abus FUBE50011 user guide
Skytech
Skytech SKY MRCK SR1001-1 Installation and operating instructions
FOR-A
FOR-A MV-42HS Quick setup guide
Silvercrest
Silvercrest SFS 18 A1 User manual and service information
One Forall
One Forall URC-5600 Cinema 5 user manual
MB QUART
MB QUART N1-RFBT Quick start installation guide
dewert okin
dewert okin RF-TOUCH System instructions
HAMPTON BAY
HAMPTON BAY COMFORT BREEZE 68131 Use and care guide
FRONIUS
FRONIUS RC Panel Pro operating instructions
Soler & Palau
Soler & Palau PLUGGIT APRC Instructions for Firmware Update
HAMPTON BAY
HAMPTON BAY COMFORT BREEZET 68108 Use and care guide

Spectravision
Spectravision PLP-REM owner's manual

