dellonda DG96 User manual

Thank you for purchasing a Dellonda product. Manufactured to a high standard, this product will, if used according to these
instructions, and properly maintained, give you years of trouble free performance.
IMPORTANT: PLEASE READ THESE INSTRUCTIONS CAREFULLY. NOTE THE SAFE OPERATIONAL REQUIREMENTS, WARNINGS & CAUTIONS. USE
THE PRODUCT CORRECTLY AND WITH CARE FOR THE PURPOSE FOR WHICH IT IS INTENDED. FAILURE TO DO SO MAY CAUSE DAMAGE AND/OR
PERSONAL INJURY AND WILL INVALIDATE THE WARRANTY. KEEP THESE INSTRUCTIONS SAFE FOR FUTURE USE.
Original Language Version
Refer to
instruction
manual
Wear protective
gloves during
assembly
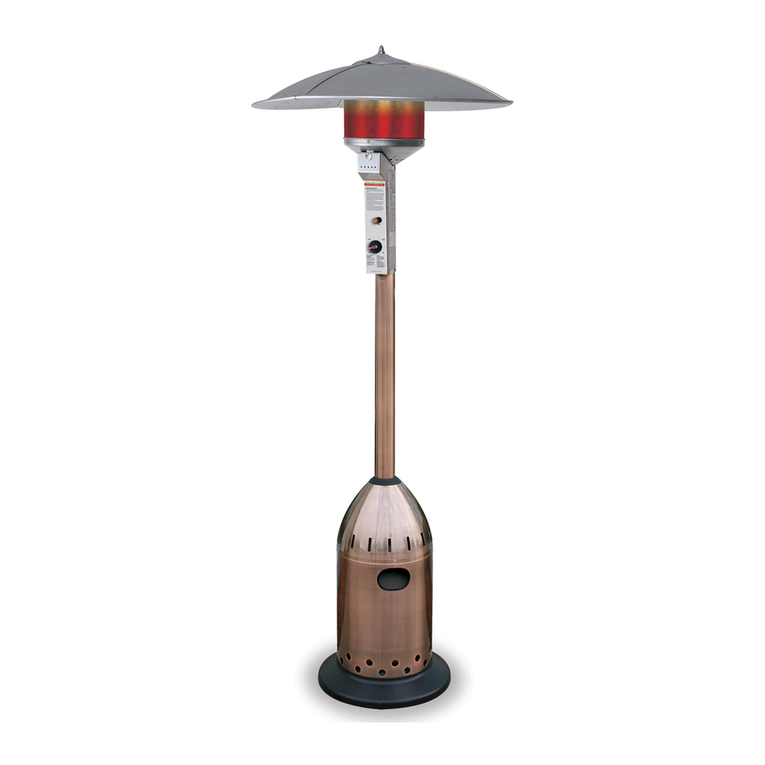
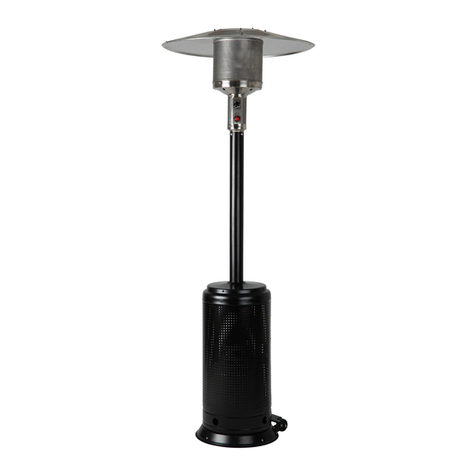
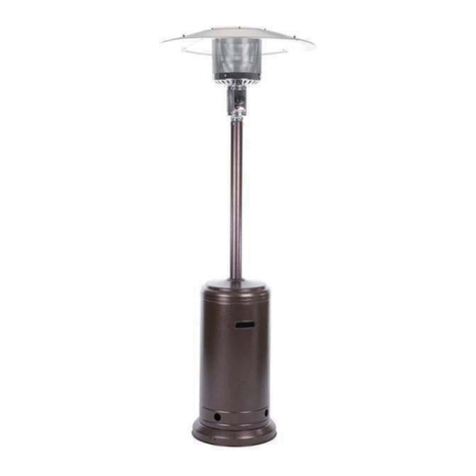
DELLONDA FREESTANDING GAS OUTDOOR
GARDEN PATIO HEATER COMMERCIAL
DOMESTIC 13KW
MODEL NO: DG96, DG97
1. SAFETY
9Read the installation, operating and maintenance instructions thoroughly before installing or using this equipment.
9 Ifthereisasmellofgas:shutothegastotheappliance,extinguishanyopenames.Ifodourcontinuescontactgassupplier.
8DO NOTstoreorusepetrolorotherammablesubstancesinsidethehousingoftheheater.
8DO NOTstoreorusepetrolorotherammableliquidsorgasesinthevicinityoftheheater.
8DO NOTstoreagascylinderthatisnotconnectedforuseinthevicinityofthisoranyotherappliance.
WARNING! DO NOTuseindoors.Foruseoutdoorsorinamplyventilatedareas.
Anamplyventilatedareaisonethathasaminimumof25%ofthesurfaceareaopen,seeg.1.
(Thesurfaceareaisthesumofthewallsurface.)
WARNING!Notintendedtobeinstalledinrecreationalvehiclesand/orboats.
WARNING!Improperinstallation,adjustment,alteration,serviceormaintenancecan
causeinjuryorpropertydamage.
9 Installationandrepairmustbecarriedoutbyaqualiedperson.
8DO NOTattempttoalterinanyway.
9 Thisproductmustbeinstalledandthegascylinderstoredinaccordancewiththelocalregulationsinforce.
8DO NOTobstructtheventilationholesofthecylinderhousing.
8DO NOTmove/transporttheappliancewheninoperation.Shutothegascylinderortheregulatorbeforemoving.
8DO NOTmove/transporttheheateruntilithascooleddown.
9 Useonlythetypeofgasandthetypeofcylinderspeciedbythemanufacturer.
TheLPcylinderusedwiththepatioheatermustmeetthefollowingsizerequirements:
diameter31.8cmxheight58cm,15kgmaximumcapacity.
9 Protecttheproductfromstrongwindtopreventtilting.
9 Onlyuseonlevelgroundcapableofwithstandingtheweightoftheheater.
8DO NOTremovetheinjector(itisnotremovable).Itisforbiddentoconverttheappliancefromonegaspressuretoanothergas
pressure.
8DO NOTconnectthegascylinderdirectlytotheappliancewithoutaregulator.Useonlythetypeofgasspeciedintheinstructions.
9 Thewholegassystem(hose,regulator,pilotorburner)shouldbeinspectedforleaksordamagebeforeuseandatleastannually,bya
suitablyqualiedperson.
9 Allleaktestingshouldbedonewithasoapsolution.Neveruseanopenametocheckforleaks,refertosection6.2.
8DO NOTusetheheateruntilallconnectionshavebeenleaktested.
9 Turnothegasimmediatelyifagassmellisdetected.TurncylindervalveOFF.Iftheleakisatthehose/regulatorconnectiontighten
theconnectionandperformanotherleaktest.Ifbubblescontinueappearingcontactyoursupplier.Iftheleakisattheregulator/
cylinderconnectiondisconnectfromcylinder,reconnectandperformanotherleakcheck.Ifsoapbubblesarestillseen,cylindervalve
isdefective.Returncylindertoitsplaceofpurchase.
9 Keeptheventilationopeningofthecylinderenclosurefreeandclearofdebris.
8DO NOTpainttheradiantscreen,controlpanelortopcanopyreector.
9 Controlcompartment,burnerandcirculationairpassagewaysoftheheatermustbekeptclean.
9 Turnogaswhilstnotinuse.
9 LPregulator/hoseassemblymustbeprotectedfromaccidentaldamage.
9 Anyguardremovedforservicing/maintenancemustbereplacedbeforeoperation.
9 Keepsadultsandchildrenawayfromthehightemperaturesurfacetoavoidburnsofignitionofclothing.
9 Childrenshouldbecarefullysupervisedwheninthevicinityoftheheater.
8DO NOThangclothingorotherammablematerialsontheheaterorplacethemneartheheater.
2. INTRODUCTION
InnovativedesignofRadiantGasTowerPatioHeater.Thistraditionalfreestandingpatioheaterproducesapleasant,heatedworking/relaxing
environmentandisidealforbothcommercialanddomesticsettingsincludingopenworkshops,boatyards,patios,forecourts,gardensand
terraces.Theburnerheadispositionedapproximately2.1mothegroundandthemetalreectordirectsradiationdownwardsandoutwards.
Variableheatoutputcontrolsmakeitfullyadjustable.Theunitfeaturesafullyenclosedgascylinderchamberandsafetytip-overswitch.
Suppliedwithwheelsforeasymanoeuvrability,regulatorandhoseassemblyforusewithpropanepatiogasbottlesandisavailableinblackor
stainlesssteel.Thisproductshouldonlybeusedinawellventilatedarea.MaximumGasBottleSize(WxH):Ø325x700mm.Someassemblyis
required.
DG96,DG97Issue:124/12/20
fig.1

3. SPECIFICATION
Model no’s..........................................................DG96,DG97
Fuel consumption....................................................... 945g/hr
Fuel...........................................................................Propane
Heated area...................................................................10m²
Output...........................................................................13kW
Dimensions(WxH)........................................850x2190mm
Max.gasbottlesize(WxH)..........................Ø325x700mm
4. CONTENTS
5. ASSEMBLY
5.1. STEP 1
5.1.1. Fixwheelbrackettobase.
5.2. STEP 2
5.2.1. Fixthe3postbracketsasshown.UseboltBBtojoinpostbracketstothestand.
5.3. STEP 3
5.3.1. Fixtheposttothe3postbrackets.UseboltsEEandnutsCC.Tightennutsandbolts.
Original Language Version
PART DESCRIPTION QTY.
A Reectorouter 3
BReectorinner 1
CBurner head assembly 1
D Cylinder housing 1
E Main pole 1
FGas hose 1
FF Reectorspacer 3
GSupport leg 3
HBase 1
I Wheelkit 1
Step 1 Step 2 Step 3
DG96,DG97Issue:124/12/20

5.4. STEP 4
5.4.1. Placethetankhousingoverthepost.
5.5. STEP 5
5.5.1. Removefourboltsfromthebaseoftheburner.
5.5.2. Passthegashosedownthroughthepost.
5.5.3. Fixtheburnertothepost,useboltDD.Tightennutsandbolts.
5.6. STEP 6
5.6.1. PlacelargewashersGGonthe3reectorspacersFF.
5.7. STEP 7
5.7.1. Fixthereectorontothereectorspacersuse3xwingnutKK.
5.8. STEP 8
5.8.1. Raisethetankhousingandrestitonthepostplate.Beawarethatit
mayfallifitisknocked.
5.8.2. Connectthegashosetotheregulator.
5.8.3. PlacetheLPGcylinderonthestand.
6. OPERATION
6.1. CONNECT GAS CYLINDER
6.1.1. Changethegascylinderinawellventilatedarea,awayfromanysource
ofignition.
6.1.2. Liftthetankhousingandpropituponthetopofthepostbrackets.
NOTE: In this instance the housing can not be propped up on the
topofthepostbrackets.Asecondpersonwillberequiredtoholdthe
tankhousingupwhilethegascylinderistted.
6.1.3. Checktheregulatorsealiscorrectlyttedandworkingcorrectly,seefig.2.
6.1.4. Usepropaneorbutaneonly.
6.1.5. Onlyusehoseandregulatorsuppliedwithheater.
6.1.6. Neveruseagascylinderwithadamagedvalveoradamagedcylinder.
6.1.7. Neverconnectanunregulatedcylindertotheheater.
6.1.8. GAS LEAKAGE
6.1.9. IntheeventofgasleakageDO NOTusetheheater.Thegassupply
shouldbeshutoandthecauseshouldbeinvestigatedbeforeitisused
again.
fig.2
Step 4 Step 5 Step 6
Step 7
Step 8
Original Language Version DG96,DG97Issue:124/12/20

6.2. LEAKAGE TEST
WARNING! Never perform leak test near sources of ignition.
6.2.1. Gasconnectionsaretestedatthefactory.Acompletegastightnesscheckmustbecompletedattheinstallationsitepriortouse.
6.2.2. Makeasolutionofonepartliquiddetergentandonepartwater. The soap solution can be applied with spraybottle,brushorrag.Soap
bubbleswillappearatthesiteofaleak.
6.2.3. Testmustbeperformedwithafullcylinder.
6.2.4. Makesurethesafetycontrolvalveisintheoposition.Turnthegassupplyon.Inthecaseofaleakturnthegassupplyo,re-tighten
anyttings,thenturnthegassupplyonandre-check.
6.3. LOCATIONOFHEATERrefertog.3
▲DANGERTheuseofthisheaterinenclosedareasisdangerousandisprohibited.
6.3.1. Ensurethatadequatefreshairventilationisprovided.
6.3.2. Alwaysmaintainproperclearancefromcombustiblematerials,i.etop100cmandsides100cmminimum.
6.3.3. Placeonlevelsolidground.
6.3.4. Neveroperateinanexplosiveatmosphereforexamplewhereexplosiveorammablesubstancesarestored.
6.3.5. Protectfromstrongwind.Anchorsecurelytothegroundwithscrews,refertog.3A.
6.4. TOTURNONTHEHEATERrefertog.4
6.4.1. Turncylindervalvefullyon.
6.4.2. PressinandturnthevariablecontrolknobtoPILOTposition(counterclockwise90°).
6.4.3. Pressdownthevariablecontrolknobandholdinfor90seconds.Whilstholdingdownthevariablecontrolknob,presstheigniter
buttonseveraltimesuntilthepilotamelights.Variablecontrolknobcanbereleasedafterthepilotamelights.
NOTE:
-Ifanewgasbottlehasbeenconnected,allowatleastoneminutefortheairinthegaspipelinetopurgeoutthroughthepilot
hole.
-Whenlightingthepilotamemakesurethevariablecontrolknobiscontinuouslypresseddown,whilstpressingtheigniterbutton.
-Variablecontrolknobcanbereleasedafterthepilotameignites.
-Pilotamecanbewatchedandcheckedfromthesmallroundwindowwiththeslidinglid,locatedatthebottomoftheamescreen
(totheleftorrightsideofthecontroller).
-Ifthepilotamedoesnotlightorgoesoutrepeat6.4.3.above.
6.4.4. Afterthepilotamelights,turnthevariableameknobtomaximumpositionandleaveittherefor5minutesormorebeforeturningthe
knobtothedesiredposition.
6.5. TO TURN OFF THE HEATER
6.5.1. Turnthevariablecontrolknobtothepilotposition.
6.5.2. Pushknobinandmoveknobtooposition.
6.5.3. Turnovalveoncylindercompletely.
6.6. CHECK HEATER IMMEDIATELY IF:
-heaterdoesnotreachtemperature,
-burnermakesapoppingnoiseduringuse(aslightnoiseisusualwhentheburnerisextinguished).
-smellofgasinconjunctionwithextremeyellowtipofburnerame.
7. STORAGE
7.1. Alwaysturnothegasvalveonthegascylinderafteruse.
7.2. Disconnectthevalvefromthecylinder.
7.3. Checkthetightnessofthegasvalve.Checkgasvalvefordamage.Ifdamageissuspectedhaveitinspected/changedbyagas
stockist.
8DO NOTstorealiquidgascylinderinacellarorinplaceswithoutadequateairventilation.
8. MAINTENANCE
8.1. GAS HOSE
8.1.1. Checkthehoseatleastonceamonth,eachtimethecylinderischanged,orafteraperiodwhentheheaterhasnotbeenused.
8.1.2. Ifitshowssignsofcracking,splittingorotherdeteriorationitmustbechangedforanewhoseofequivalentlengthandquality.
8.2. CLEANING
8.2.1. Wipesurfaceswithasoft,moistrag.DO NOTusecombustibleorcorrosivecleaners.
8.2.2. Removedebrisfromtheburnertokeepitsafeforuse.
8.2.3. Covertheburnerunitwiththeoptionalprotectivecover(Modelno.DG4)whennotinuse.
fig.3
fig.4
Original Language Version DG96,DG97Issue:124/12/20
fig.3A

ENVIRONMENT PROTECTION
Recycleunwantedmaterialsinsteadofdisposingofthemaswaste.Alltools,accessoriesandpackagingshouldbesorted,takento
arecyclingcentreanddisposedofinamannerwhichiscompatiblewiththeenvironment.Whentheproductbecomescompletely
unserviceableandrequiresdisposal,drainanyfluids(ifapplicable)intoapprovedcontainersanddisposeoftheproductandfluids
accordingtolocalregulations.
Note:Itisourpolicytocontinuallyimproveproductsandassuchwereservetherighttoalterdata,specificationsandcomponentpartswithoutprior
notice.
Important:NoLiabilityisacceptedforincorrectuseofthisproduct.
Warranty:Guaranteeis12monthsfrompurchasedate,proofofwhichisrequiredforanyclaim.
WEEE REGULATIONS
DisposeofthisproductattheendofitsworkinglifeincompliancewiththeEUDirectiveonWasteElectricalandElectronicEquipment
(WEEE).Whentheproductisnolongerrequired,itmustbedisposedofinanenvironmentallyprotectiveway.Contactyourlocalsolid
wasteauthorityforrecyclinginformation.
9. TROUBLESHOOTING
PROBLEM CAUSE SOLUTION
Pilot will not light GasvalveOFF Turn gas valve on
Gas cylinder empty Renew cylinder
Openingblocked Clean or replace opening
Air in supply system Purge air from lines
Loose connections Tighten connections
Pilot will not stay on Debris around pilot Clean dirty area
Loose connections Tighten connections
Thermocouple faulty Replace thermocouple
Gasleakintheline Checkconnections
Lackoffuelpressure Cylindernearlyempty.Renewcylinder
Burner will not light Pressure is low Cylindernearlyempty.Renewcylinder
Openingblocked Remove and clean
Control not ON Turn valve to ON
Thermocouple faulty Replace thermocouple
Pilot light assembly bent Reposition pilot light
Notincorrectlocation(toowindy) Position properly and retry
Original Language Version
Dellonda Ltd.,KempsonWay,SuffolkBusinessPark,BuryStEdmunds,Suffolk.IP327AR
01284757575 [email protected]www.dellonda.co.uk
DG96,DG97Issue:124/12/20
This manual suits for next models
1
Table of contents
Other dellonda Patio Heater manuals


