Delta OHM HD21ABE17 User manual

Operating manual
IA
Q MONITOR
HD21ABE17
www.deltaohm.com
English
Keep for future reference.

HD21ABE17 - 2- V2.0
INDEX
INTRODUCTION ........................................................................................................................................................3
THE USER INTERFACE ...........................................................................................................................................6
DISPLAY.........................................................................................................................................................................6
KEYBOARD.....................................................................................................................................................................7
OPERATION.................................................................................................................................................................9
“►/UNIT”KEY FOR THE UNIT OF MEASUREMENT .....................................................................................................9
MAXIMUM,MINIMUM AND AVERAGE VALUES OF THE CAPTURED QUANTITIES.........................................................10
INSTRUMENT SETUP....................................................................................................................................................11
START OF A NEW LOGGING SESSION.........................................................................................................................11
MAIN MENU ...............................................................................................................................................................12
INFO MENU..................................................................................................................................................................12
LOGGING MENU ..........................................................................................................................................................14
LOG INTERVAL.............................................................................................................................................................14
AUTO POWER OFF –AUTO POWER OFF MODE........................................................................................................15
START/STOP LOG –AUTOMATIC START ..................................................................................................................16
CANCEL AUTO-START.................................................................................................................................................17
LOG FILE MANAGER....................................................................................................................................................18
SERIAL MENU (SERIAL COMMUNCIATION)...............................................................................................................21
PRINT INTERVAL..........................................................................................................................................................21
SETTINGS ....................................................................................................................................................................22
CONTRAST ...................................................................................................................................................................22
BACKLIGHT..................................................................................................................................................................22
LANGUAGE...................................................................................................................................................................23
CALIBRATION...........................................................................................................................................................24
CO2CALIBRATION ......................................................................................................................................................24
COCALIBRATION........................................................................................................................................................27
RH CALIBRATION........................................................................................................................................................30
CONNECTION TO A PC.........................................................................................................................................33
STORING AND TRANSFERING DATA TO A PC ...........................................................................................................34
LOGGING FUNCTION...................................................................................................................................................34
CLEARING THE MEMORY..............................................................................................................................................35
PRINT FUNCTION.........................................................................................................................................................35
INSTRUMENT SIGNALS AND FAULTS .........................................................................................................36
BATTERY SYMBOL – MAINS POWER SUPPLY.........................................................................................37
BATTERIES RECHARGING............................................................................................................................................37
NOTES FOR THE BATTERIES USE................................................................................................................................38
REPLACEMENT OF THE BATTERY PACK .......................................................................................................................38
BATTERIES DISPOSAL.................................................................................................................................................38
INSTRUMENT STORAGE......................................................................................................................................39
SAFETY INSTRUCTIONS.....................................................................................................................................40
TECHNICAL CHARACTERISTICS.....................................................................................................................41
REPLACEMENT OF THE BATTERY PACK .......................................................................................................................42
ORDERING CODES .................................................................................................................................................44

HD21ABE17 - 3- V2.0
INTRODUCTION
HD21ABE17 IAQ Monitorsis a portable instrument for the analysis of indoor air
quality (IAQ, Indoor Air Quality).
The instrument simultaneously measures the following parameters: CO2 Carbon
Dioxide, CO Carbon Monoxide, Atmospheric Pressure, Temperature and
Relative Humidity, and it calculates Dew Point, Wet Bulb Temperature,
Absolute Humidity, Mixing Ratio and Enthalpy.
HD21ABE17 is a data logger with a memory capacity of 67600 recordings, divided in
64 blocks. It uses the DeltaLog10 software.
Reference Standards: ASHRAE 62.1, Legislative Decree 81/2008. These
regulations apply to all confined spaces that could be used by people. Kitchens, baths,
changing rooms and swimming pools are included, due to their high humidity. You
should take into account, in regard to air quality, possible chemical, physical and
biological contaminants.
The instrument has a wide Dot Matrix graphic display with a resolution of 160 x 160
dots.
The instruments typical applications are:
•Measurement of IAQ (Indoor Air Quality) and comfort conditions in schools,
offices and indoor spaces.
•Analysis and study of the Sick Building Syndrome, and of the resulting
consequences.
•Checking the HVAC (Heating, Ventilation and Air Conditioning) system
efficiency.
•Examination of IAQ conditions in factories to optimize microclimate and improve
productivity.
•Building Automation checks.
HD21ABE17 - 4- V2.0

HD21ABE17 - 5- V2.0
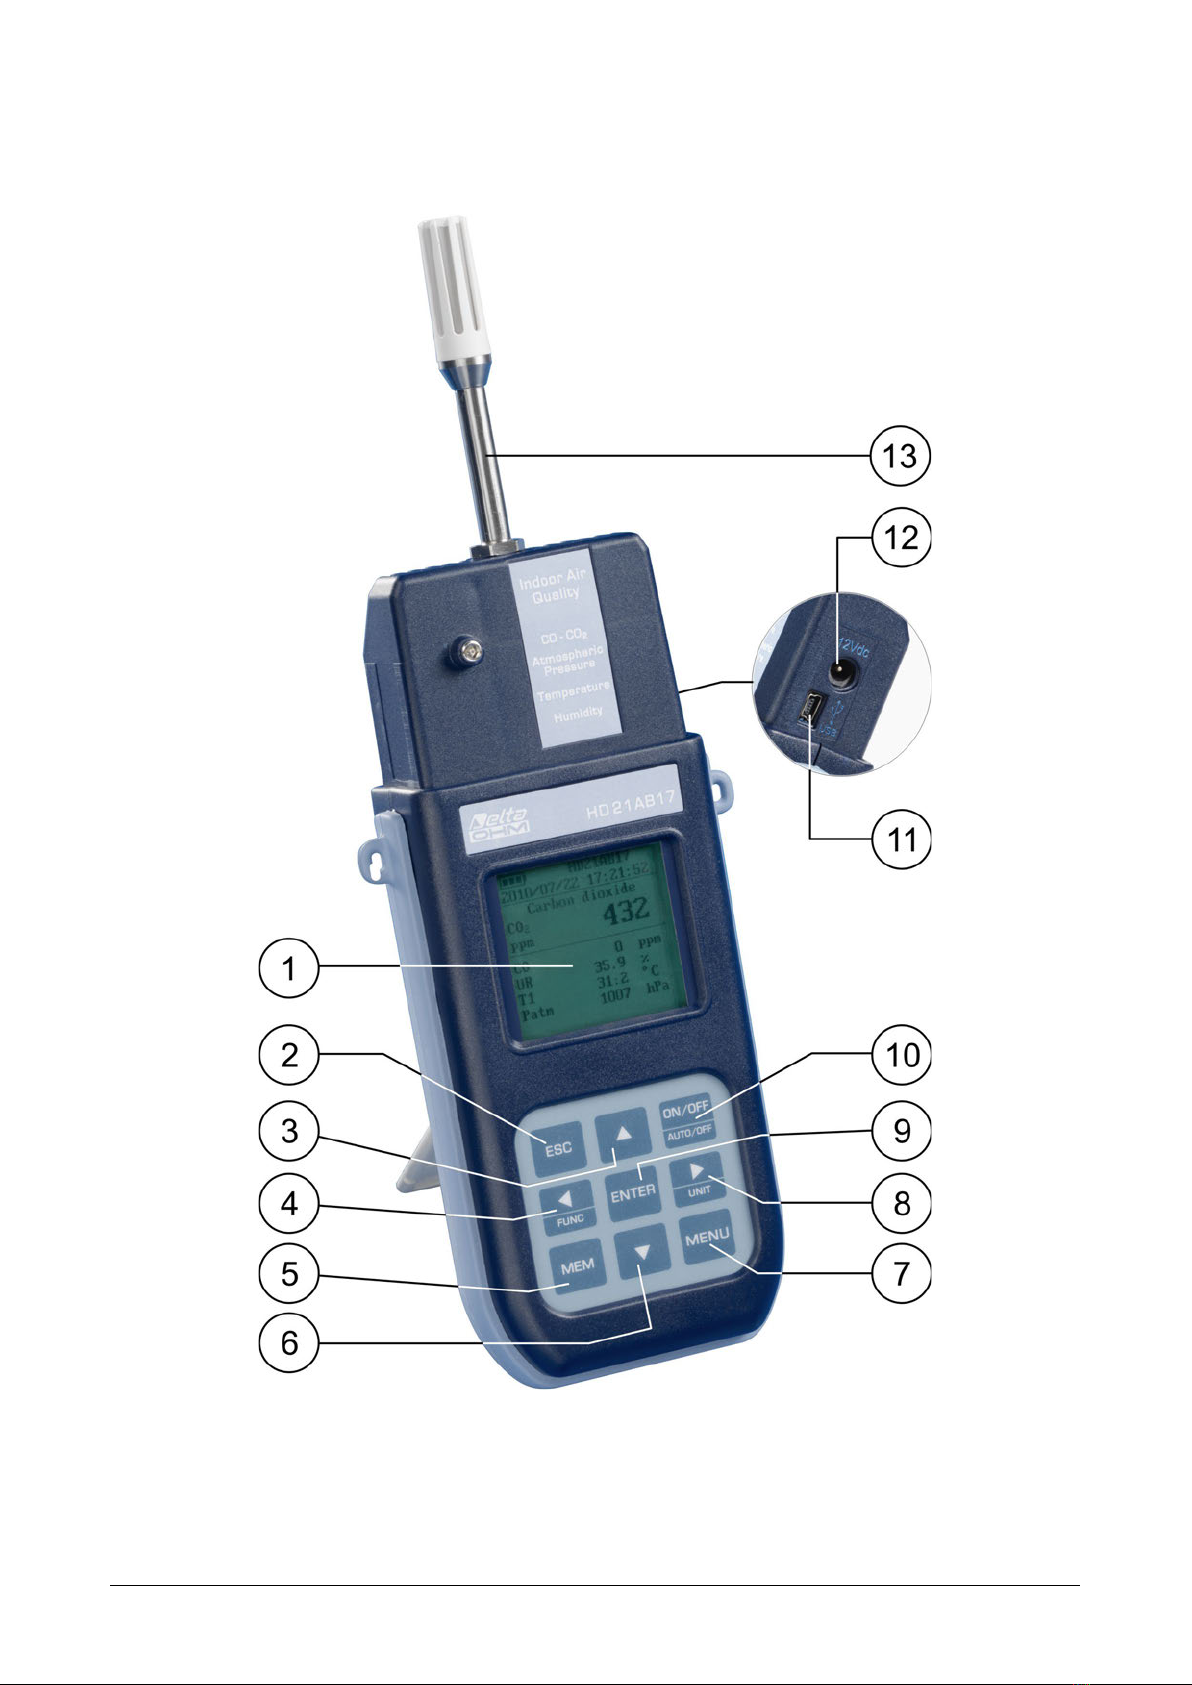
1. Backlit graphic display.
2. ESC key: It allows to exit from the menu or, in case of a submenu, to exit from
the current level display.
3. Navigation key ▲: It allows navigation through the menus. During normal
operation, it is used to select the resetting of the statistical data and to scroll the
displayed quantities upwards.
4. Navigation key ◄/Func: It allows navigation through the menus. In normal view,
it allows to display the statistical data: maximum, minimum, and average.
5. MEM key: It allows to start and end the recording of data (logging).
6. Navigation key ▼: It allows navigation through the menus. During normal
operation, it is used to cancel the resetting of the statistical data and to scroll the
displayed quantities downwards.
7. MENU key: It allows to enter and exit the instrument’s functioning parameter
setting menu.
8. Navigation key ►/ Unit: It allows navigation through the menus. During normal
operation, it changes the unit of measurement of the displayed main quantity.
9. ENTER key: In the menu, it confirms the data entered. In normal view, it allows to
reset the statistical data.
10.ON/OFF-Auto Off key: It turns the instrument on and off. When pressed together
with the ESC key, it disables the automatic turn off.
11.USB serial port (mini-USB connector).
12.Power supply input.
13.Temperature-Humidity sensors.
HD21ABE17 - 6- V2.0
THE USER INTERFACE
The user interface consists of a backlit LCD graphic display, and the power-on and
setting keys. When battery powered, and not pressing any key, the backlight turns off
after about 1 minute. To turn it back on, press any key. When using an external
power supply, the backlight is always on. Turn the instrument on and off with the
ON/OFF key. When you turn the instrument on, the logo and model will be displayed
for a few seconds, and then the main display.
The quantities detected by the instrument can be viewed with a larger character size,
at the top of the display. The parameter displayed with a larger character is called
main quantity. In order to select the parameter to be displayed as main quantity,
use the ▲▼ keys. For some quantities, you can select the unit of measurement;
temperature can be displayed as °C or °F.
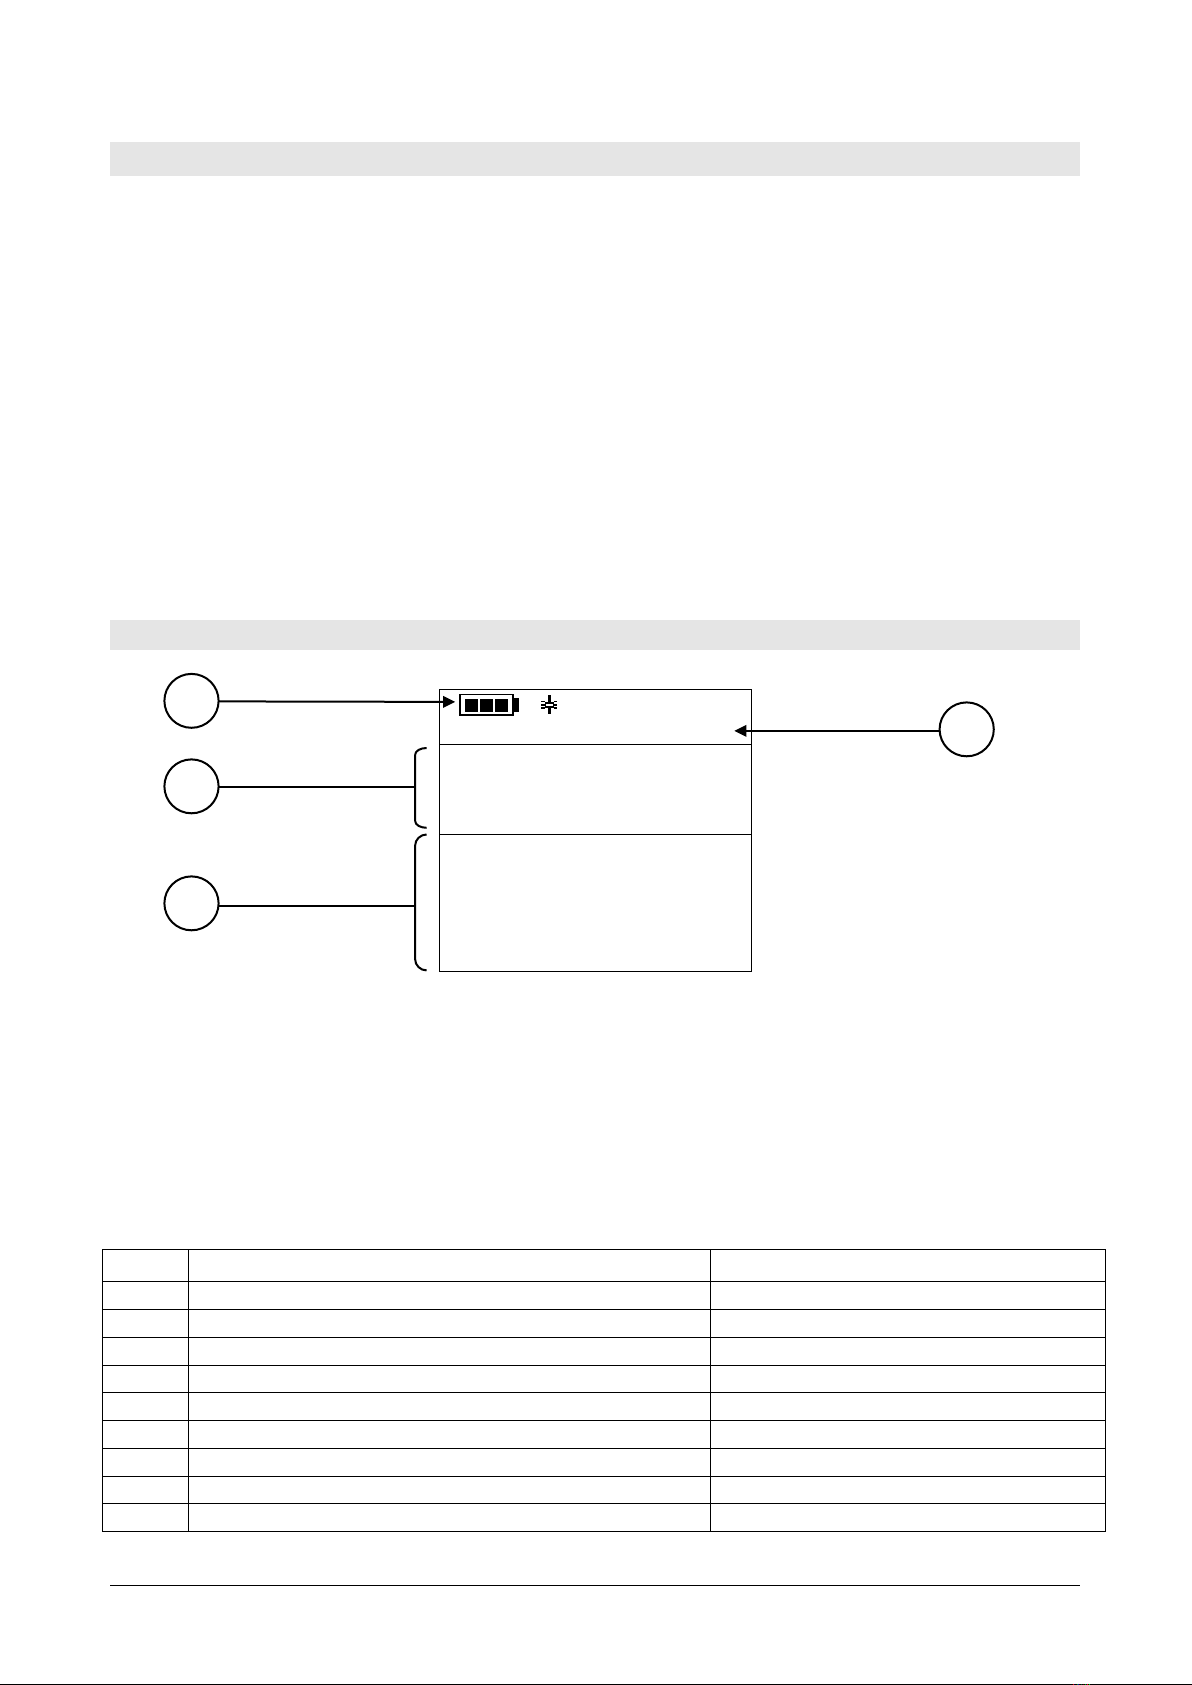
DISPLAY
HD21ABE17
2010/02/10 08:00:00
Carbon Dioxide
CO2
600
ppm
CO 0 ppm
Patm 1000 hPa
RH 25.0 %
T 17.0 °C
1. Battery’s charge status and instrument code. In case the logging function is
on, this line shows the current logging number and the time elapsed from logging
start.
2. Main quantity (in this case, CO2Carbon Dioxide).
3. Display of all other quantities.
4. Current date and time.
The detected and computed quantities are:
CO2
Carbon Dioxide
ppm
CO
Carbon Monoxide
ppm
RH
Relative Humidity
%
T
Temperature
°C – °F
Patm
Atmospheric Pressure
hPa
Td
Dew Point
°C – °F
Tw
Wet Bulb Temperature
°C – °F
AH
Absolute Humidity
g/m3
r
Mixing Ratio
g/kg
H
Enthalpy
kJ/kg
1
3
4
2
HD21ABE17 - 7- V2.0
KEYBOARD
The keys on the instrument perform the following functions:
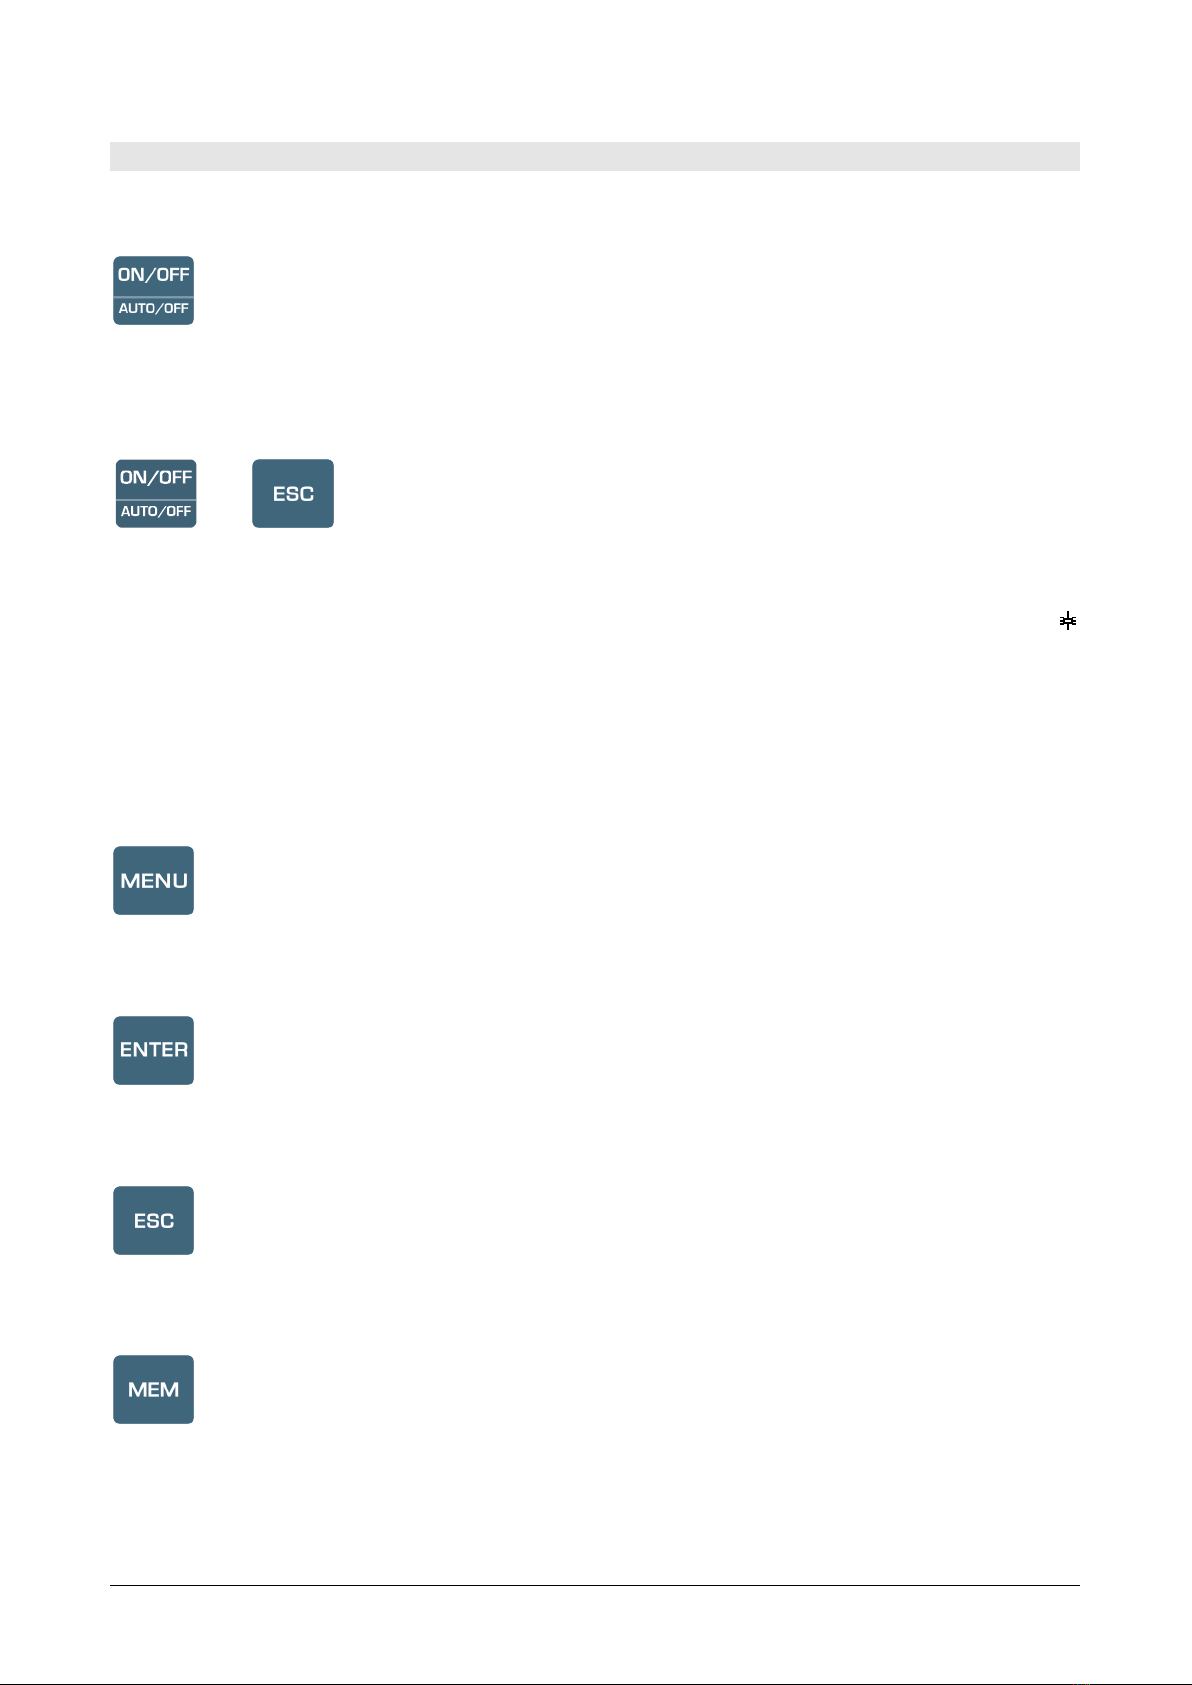
ON-OFF/AUTO-OFF key
It turns the instrument on and off.
When turning the instrument on, the first screen will be displayed. After few seconds
the measured quantities will be displayed.
+
Auto Power Off
The instrument has an AutoPowerOff function that automatically turns the instrument
off after about 8 minutes if no key is pressed. The AutoPowerOff function can be
disabled by holding the ESC key pressed down when turning the instrument on: the
symbol will appear on the first line to remind the user that the instrument can only be
turned off by pressing the ON/OFF key.
The AutoPowerOff function is disabled when:
•External power is used.
•During data download.
•During logging.
MENU key
It allows to enter to and exit from the instrument’s functioning parameter setting
menu.
ENTER key
In the menu, it confirms the entered data.
During normal operation it confirms the resetting of the statistical data.
ESC key
It allows to exit from the menu or, in case of a submenu, to exit from the current level
display.
MEM key
It allows to start and end a “logging” session; the data sending interval must be set in
the menu.
HD21ABE17 - 8- V2.0
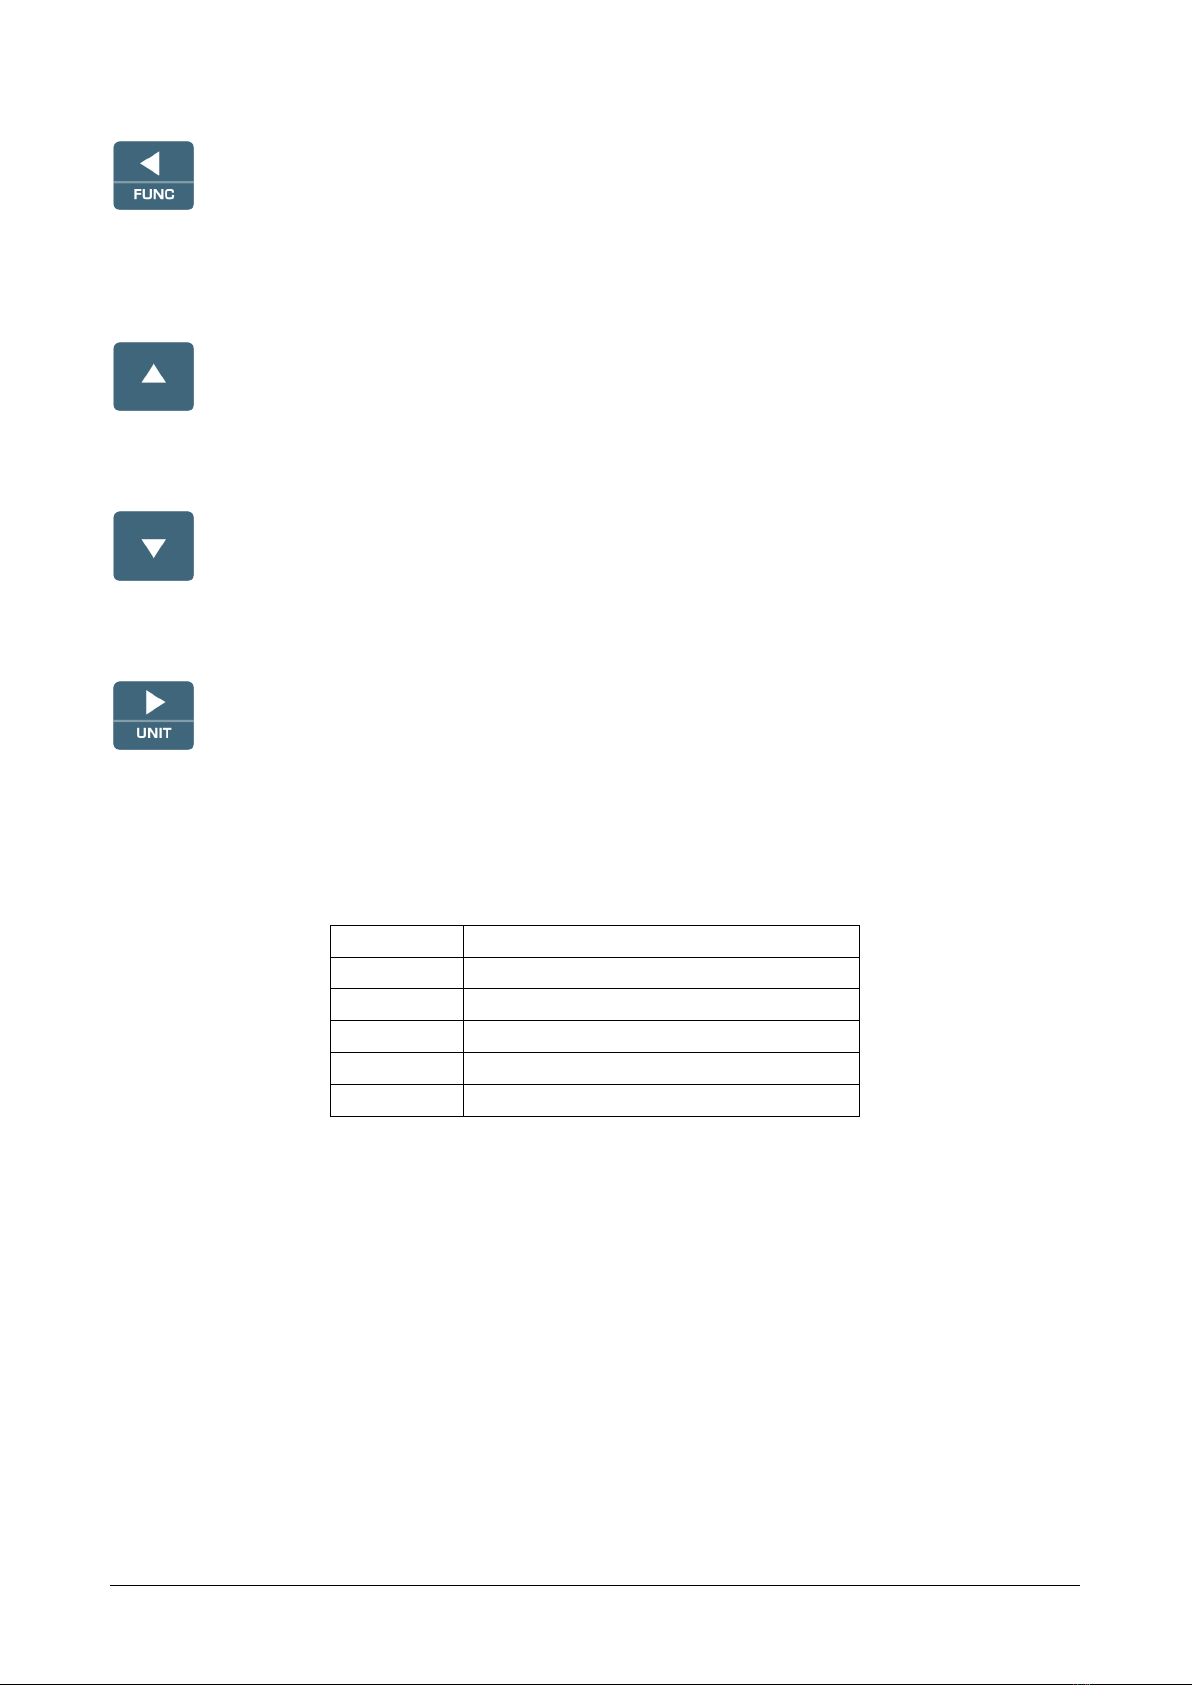
Key ◄/FUNC
◄allows navigation through the menus.
FUNC: In normal view, it allows to select the statistical data: maximum, minimum,
and average.
Key ▲
It allows navigation through the menus. During normal operation, it is used to select
the resetting of the statistical data and to scroll the displayed quantities.
Key ▼
It allows navigation through the menus. During normal operation, it is used to cancel
the resetting of the statistical data and to scroll the displayed quantities.
Key ►/UNIT
It allows navigation through the menus.
During normal operation, it changes the unit of measurement of the main quantity.
If the main quantity is Relative Humidity by repeatedly pressing the UNIT key you
can display the following quantities:
RH
Relative Humidity (%)
Td
Dew Point (°C - °F)
AH
Absolute Humidity (g/m3)
r
Mixing Ratio (g/kg)
Tw
Wet Bulb Temperature (°C - °F)
H
Enthalpy (kJ/kg)
If the main quantity is Temperature by repeatedly pressing the UNIT key you can
display the temperature in °C (Celsius degrees) or °F (Fahrenheit degrees).

HD21ABE17 - 9- V2.0
OPERATION
During turning on, the following message is displayed for about 10 seconds:
Model HD21ABE17
Indoor Air Quality
Firm.Ver.=01.00
In addition to the Delta OHM logo, the instrument code and the firmware
version are displayed.
After about 10 seconds, the measurements will appear on the display:
HD21ABE17
2010/02/10 08:00:00
Carbon Dioxide
CO2
600
ppm
CO 0 ppm
Patm 1000 hPa
RH 25.0 %
T 17.0 °C
“►/UNIT”KEY FOR THE UNIT OF MEASUREMENT
It allows navigation through the menus. During normal operation, it changes the unit
of measurement of the main quantity.
If the main quantity is Relative Humidity, by repeatedly pressing the UNIT key you
can display the following quantities:
RH
Relative Humidity (%)
Td
Dew Point (°C - °F)
AH
Absolute Humidity (g/m3)
r
Mixing Ratio (g/kg)
Tw
Wet Bulb Temperature (°C - °F)
H
Enthalpy (kJ/kg)
If the main quantity is Temperature by repeatedly pressing the UNIT key, you can
display the temperature in °C (Celsius degrees) or °F (Fahrenheit degrees).

HD21ABE17 - 10 - V2.0
MAXIMUM,MINIMUM AND AVERAGE VALUES OF THE CAPTURED QUANTITIES
By pressing the ◄/FUNC key you can display the maximum, minimum, average
(AVG) or average in 1-minute (AVG 1min) values of the measured quantities.
To reset the statistical data (except for AVG 1min function) press the ◄/FUNC key
until the “Reset? Yes No” message appears. Select Yes using the ▲▼keys and confirm
with ENTER.
Once selected, for example max, all displayed quantities indicate the maximum value.
The AVG average is calculated on the first five minutes of samples, and then
on the current average.
THE AVERAGE IN 1MINUTE FUNCTION
By pressing the ◄/FUNC key you can select the AVG 1min (Average in 1 minute)
function:
Function: AVG 1min
READY 00:00:60
Carbon Dioxide
CO2
600
ppm
CO 0 ppm
Patm 1000 hPa
RH 25.0 %
T 17.0 °C
If the function is selected, the " READY 00:00:60 " indication on the LCD blinks to
prompt the user to start the 1-minute average calculation of the acquired values.
To start the calculation, press the ENTER key. The " RUNNING " indication and a
countdown will appear on the display. During calculation, the instrument continuously
emits one short beep per second.
Function: AVG 1min
RUNNING 00:00:48
Carbon Dioxide
CO2
600
ppm
CO 0 ppm
Patm 1000 hPa
RH 25.0 %
T 17.0 °C
After 1 minute the instrument emits one long beep and displays the calculated
average on the LCD.

HD21ABE17 - 11 - V2.0
Function: AVG 1min
AVG 1min 00:00:00
Carbon Dioxide
CO2
602
ppm
CO 0 ppm
Patm 1000 hPa
RH 25.0 %
T 17.0 °C
The calculated average is frozen on the LCD until the ENTER key is pressed.
To escape the 1min average calculation during the countdown, press the ESC key.
Note: when READY indication is displayed, the measurement values appearing on the
LCD are the instant acquired values. When RUNNING indication is displayed, the
measurement values appearing on the LCD are the continuously updated average
values.
INSTRUMENT SETUP
In order to set the instrument, you have to open the main menu by pressing MENU.
See following chapter for further details.
START OF A NEW LOGGING SESSION
Press MEMto start a Logging session: This key starts and stops the logging of a data
block to be saved in the instrument’s internal memory. The data logging frequency is
set in the “Log Frequency” menu parameter. The data logged between a start and
subsequent stop represent a measurement block.
When the logging function is on, the LOG indication and the logging session
number are displayed; a beep is issued each time a logging occurs.
To end the logging, press MEM again.
The instrument can turn off during logging between one capture and the next: The
function is controlled by the AutoPowerOff parameter. When the logging interval is
less than 5 minutes, the logging instrument remains on; with an interval of at least 5
minutes, it turns off between one capture and the next.

HD21ABE17 - 12 - V2.0
MAIN MENU
To access the programming menu press MENU:
MAIN MENU
1) Informations
2) Logging
3) Serial
4) Settings
5) Probes Calibration
6) Language
▲▼ select
<ENTER> confirm
If you do not press any key within 2 minutes, the instrument goes back to the main
display.
Use the arrows ▲▼ and press ENTER to select an item.
To exit the selected item and return to the previous menu, press ESC.
To exit immediately from the main menu, press MENU again.
INFO MENU
Enter the main menu by pressing MENU. Using the ▲▼ arrows, select Informations
and confirm with ENTER.
INFORMATIONS
1) Info Instrument
2) Info Sensors
3) Time / Date
▲▼ select
<ESC> exit/cancel
<ENTER> confirm
By selecting Info Instrument, the following information on the instrument will be
displayed: instrument code, firmware date and version, serial number, instrument
calibration date, identification code.
INFO INSTRUMENT
Model HD21ABE17
Firm.Ver.=01.00
Firm.Date=2010/02/10
Ser. Number=10010000
Calib: 2010/02/10
ID: 0000000000000000

HD21ABE17 - 13 - V2.0
To change the ID, press ENTER. Use the ◄► arrows to select the item and edit it
with the ▲▼ arrows. Proceed with the other items, and finally confirm with ENTER.
By selecting Info Sensors, the following information on the sensors will be displayed:
INFO SENSORS
Type= CO2-CO Fw.V0R0
Cal = 2010/02/10
SN = 10010000
INFO SENSORS:
Firmware type and version.
Calibration date.
Serial number of the sensors board.
Press ESC to return to the main menu. Press MENU to exit the menu.
Time/Date allows setting the date and time that will be shown at the top of the
display.
To access the Time/Date submenu, proceed as follows:
1. Use the arrows ▲▼ to select Time/Date;
2. Press ENTER;
3. You will get the following message
TIME / DATE
year/mm/dd hh:mm
2010/02/10 08:00:00
set 00 seconds!
◄► select
▲▼ set
<ENTER> confirm
4. Use the arrows ◄► to select the data to be set (year/month/day and
hour:minutes);
5. Once selected, the data will start blinking;
6. Use the arrows ▼▲ to enter the correct value;
7. Press ENTER to confirm and return to the main menu;
8. Or press ESC to return to the menu without making any change;
9. Press MENU to exit immediately from the main menu.
NOTE:In regard to the time, you can set hours and minutes. The seconds are always
set to 00 (set 00 seconds!).

HD21ABE17 - 14 - V2.0
LOGGING MENU
Enter the main menu by pressing MENU;
•Use the arrows ▲▼ to select Logging;
•Press ENTER: The parameter setting submenu for the logging sessions (to be
captured) will be displayed.
LOGGING MENU
1) Log frequency
2) Auto switch off
3) Start/Stop Log
4) Start Log Erase
5) Log File Manager
▲▼ select
<ENTER> confirm
LOG INTERVAL
Use this item to set the LOG interval (interval between two subsequent sample
captures): To enter this setting, proceed as follows:
Once you have accessed the LOGGING submenu (previous par.) use the arrows ▲▼
to select Log frequency:
LOGGING MENU
LOG FREQUENCY
Insert interval
of memorization
h:mm:ss (1h max)
0:00:15
▲▼ set
<ENTER> confirm
1. Use the arrows ▲▼ to select the interval duration from a minimum of 15 seconds
to a maximum of one hour;
2. Press ENTER to confirm and return to the Logging menu;
3. Press ESC to return to the Logging menu without making any change;
4. Press ESC again to return to the main menu;
5. Press MENU to exit immediately from the menu.
These are the available values: 15 – 30; 1 - 2 - 5 – 10 - 15 - 20 - 30 min.; 1 hour
Logging
interval
Storage capacity
Logging
interval
Storage capacity
15 seconds
About 11 days and 17 hours
10 minutes
About 1 year and 104 days
30 seconds
About 23 days and 11 hours
15 minutes
About 1 year and 339 days
1 minute
About 46 days and 22 hours
20 minutes
About 2 years and 208 days
2 minutes
About 93 days and 21 hours
30 minutes
About 3 years and 313 days
5 minutes
About 234 days and 17 hours
1 hour
About 7 years and 261 days

HD21ABE17 - 15 - V2.0
AUTO POWER OFF –AUTO POWER OFF MODE
The Auto switch off item controls the instrument’s automatic turning off during
logging, between the capture of a sample and the next one. When the interval is
lower than 5 minutes, the instrument will always remain on. With intervals
greater than or equal to 5 minutes, it is possible to turn off the instrument between
loggings: it will turn on one minute before sampling and will turn off immediately
afterwards, thus increasing the battery life.
Once you have accessed the LOGGING submenu (previous paragraph) use the
arrows ▲▼ to select Auto switch off. During configuration, the following is
displayed:
•If the set Log Interval (see previous par.) is lower than 5 minutes, the following
will be displayed
LOGGING MENU
AUTO SWITCH OFF
Logging frequency
setted < 5 min.
During log session
the instrument
will shut ON
between two samples
<ESC> exit/cancel
If the set Log Interval (see previous par.) is greater or equal to 5 minutes, the
following will be displayed during configuration:
LOGGING MENU
AUTOPOWEROFF
Logging frequency
setted >= 5 min.
During log session
the instrument
will shut OFF
between two samples
▲▼ set
<ESC> exit/cancel
1. By using the arrows ▲▼ you can select:
ON (the instrument stays on)
OFF (the instrument stays off)
2. Press ESC to return to the Logging menu;
3. Press ESC again to return to the main menu;
4. Press MENU to exit immediately from the menu.

HD21ABE17 - 16 - V2.0
START/STOP LOG –AUTOMATIC START
The logging start and end can be programmed by entering the date and time.
Set the logging start date and time using the arrows. Confirm the logging start date
and time using ENTER. Then you are asked to set the data to end the recording. Set
the logging end date and time using the arrows. Confirm the logging end date and
time using ENTER.
To enter this setting, proceed as follows.
Once you have accessed the LOGGING submenu (previous par.) use the arrows ▲▼
to select Start/Stop Log: The following message will be displayed:
START/STOP LOG
Insert date START
def.=5m>Actual Date
2010/02/10 08:05:00
◄► select
▲▼ set
<ENTER> confirm
1. Use the arrows ◄► to select the data to be changed (year/month/day and
hour/minutes/seconds);
2. Once selected, the data will start blinking;
3. Use the arrows ▼▲ to change its value;
4. Confirm by pressing ENTER;
5. Press ESC to return to the Logging menu without making any change;
6. Press ESC again to return to the main menu;
7. Press MENU to exit immediately from the menu.
After setting the logging start time, the logging end time (Enter stop time) window will
be displayed:
START/STOP LOG
Insert END date
def.=10m>Start date
2010/02/10 08:10:00
Logging ends
at memory full
◄► select
▲▼ set
<ENTER> confirm
1. Use the arrows ◄► to select the data to be changed (year/month/day and
hour/minutes/seconds);
2. Once selected, the data will start blinking;
3. Use the arrows ▼▲ to change its value;

HD21ABE17 - 17 - V2.0
4. Confirm by pressing ENTER;
5. Press ESC to return to the Logging menu without making any change;
6. Press ESC again to return to the main menu;
7. Press MENU to exit immediately from the menu.
8. Once both values have been set, a summary will be displayed showing the start and
end time of the LOG session.
LOGGING MENU
SETTED LOG
START Date
2010/02/10 10:29:00
END Date
2010/02/10 10:39:00
<ESC> exit/cancel
<ENTER> confirm
9. Press ENTER to confirm or ESC to exit without enabling the automatic start: In
both cases, you will return to the LOGGING menu.
10. Press MENU to exit immediately from the main menu.
When the instrument automatically starts a LOG session, a beep is issued on each
capture and the blinking LOG message is shown at the top of the display.
Press MEM to stop the session before the set time.
To cancel the automatic start setting, use the Start Log Erase function as illustrated
in the following paragraph.
NOTE: The automatic logging session is started even when the instrument is
off. If it is off when the automatic logging session is started, the instrument, even if
powered by the mains, is turned on few seconds earlier and remains on at the end of
logging. If it is powered by the battery, it is turned on and off at each data capture,
except when the interval is lower than 5 minutes. At the end of logging, it is turned off
for good.
See paragraph Auto Power Off to set the automatic shut off.
CANCEL AUTO-START
Once the LOG session start and end times are set, you can inhibit the session
automatic start by using Start Log Erase.
Once you have accessed the LOGGING submenu:
1. Use the arrows ▲▼ to select Start Log Erase
2. The LOG session start and end times will be displayed:

HD21ABE17 - 18 - V2.0
MENU LOGGING
Auto-Start Erase
Setted start:
2010/02/10 10:29:00
Setted end:
2010/02/10 10:39:00
Press ▲▼ for
Auto-Start Erase
<ENTER> confirm
3. By pressing ▲the following message will be displayed:
LOGGING MENU
Auto-Start
not active
<ESC> exit/cancel
<ENTER> confirm
4. Press ENTER to cancel the automatic start;
5. Press ESC to exit without cancelling the automatic start;
6. Press ESC again to exit from the submenus;
7. Or press MENU to exit immediately from the main menu.
See the previous paragraph to set a new automatic start time after cancelling the
previous one.
LOG FILE MANAGER
This item allows managing the logs captured: The instrument allows displaying of the
captured data files and erasing the entire memory (File Log Erase).
The instrument can store up to 64 LOG sessions, progressively numbered from 00 to
63: The session list is arranged on 4 lines and 4 columns. If you have over 16
sessions, using the MEM function key you shift to the next screen. The current page
(0, 1, 2 or 3) and the total data pages are displayed in the upper right corner.
LOG FILE 0/3
00– 01– 02– 03
04– 05– 06– 07
08– 09– 10– 11
12– 13– 14– 15
START Date:
2010/02/10 08:59:40
Record: 000039
▲▼◄► select
<MEM> page change

HD21ABE17 - 19 - V2.0
Once you have accessed the LOGGING submenu:
1. Use the arrows ▲▼ to select Log File Manager: You will see the following
submenu:
LOGGING MENU
LOG FILE MANAGER
1) See File Log
2) File Log Erase
3) Log lasting
▲▼ select
<ENTER> confirm
2. Use the arrows ▲▼ to select a menu item;
3. Press ENTER to confirm;
4. Press ESC to return to the menu;
5. Press MENU to exit immediately from the main menu.
See File Log:
Selecting this item you can view the logging sessions in the instrument:
LOG FILE 0/3
00– 01– 02– 03
04– 05– 06– 07
08– 09– 10– 11
12– 13– 14– 15
START Date:
2010/02/10 08:50:40
Record: 000039
▲▼◄► select
<MEM> page change
1. Use the arrows ▲▼◄►to select the log, and the MEM key to shift page.
2. Once a file is selected, the acquisition start date and time and the number of
samples contained in the file (Rec) are displayed at the bottom of the display. The
files are stored in ascending order. Each file is only identified by the date and time,
shown on the display. In the example above, the file 00 is selected: The recording
started at 08:50:40 on 10 February 2010. The file contains 39 samples.
3. press ESC to exit this menu;
4. Press MENU to exit immediately from the main menu.

HD21ABE17 - 20 - V2.0
File Log Erase (erasing all memory)
By selecting this item, the “ERASE ALL LOGS SETTED FILES” message will be
displayed:
MENU LOGGING
MENU LOGGING
ERASE ALL LOGS
ERASE ALL LOGS
SETTED FILES
SETTED FILES
EMPTY MEMORY
<MEM> confirm
<Esc> exit
<Esc> exit
1. Press MEM to erase all files;
2. Press ESC to cancel the operation and return to the previous menu level;
3. Press MENU to exit immediately from the main menu.
Log lasting (time set for recording)
It represents the recording duration: After this set time, the recording is ended. The
recording can be stopped earlier by pressing MEM.
To disable this function, set the time to 0:00:00. In this case the recording ends by
pressing MEM or when the memory is full.
LOGGING MENU
LOG LASTING
h:mm:ss (1h max)
00:00:00
With setting:
00:00:00 Log stop
with key MEM
▲▼ set
<ESC> exit
Use the arrows to change the set time; the maximum allowed value is 1 hour.
Confirm with ENTER.
Press ESC to exit from this menu level without making changes.
Press MENU to exit immediately from the main menu.
Table of contents
Other Delta OHM Monitor manuals


