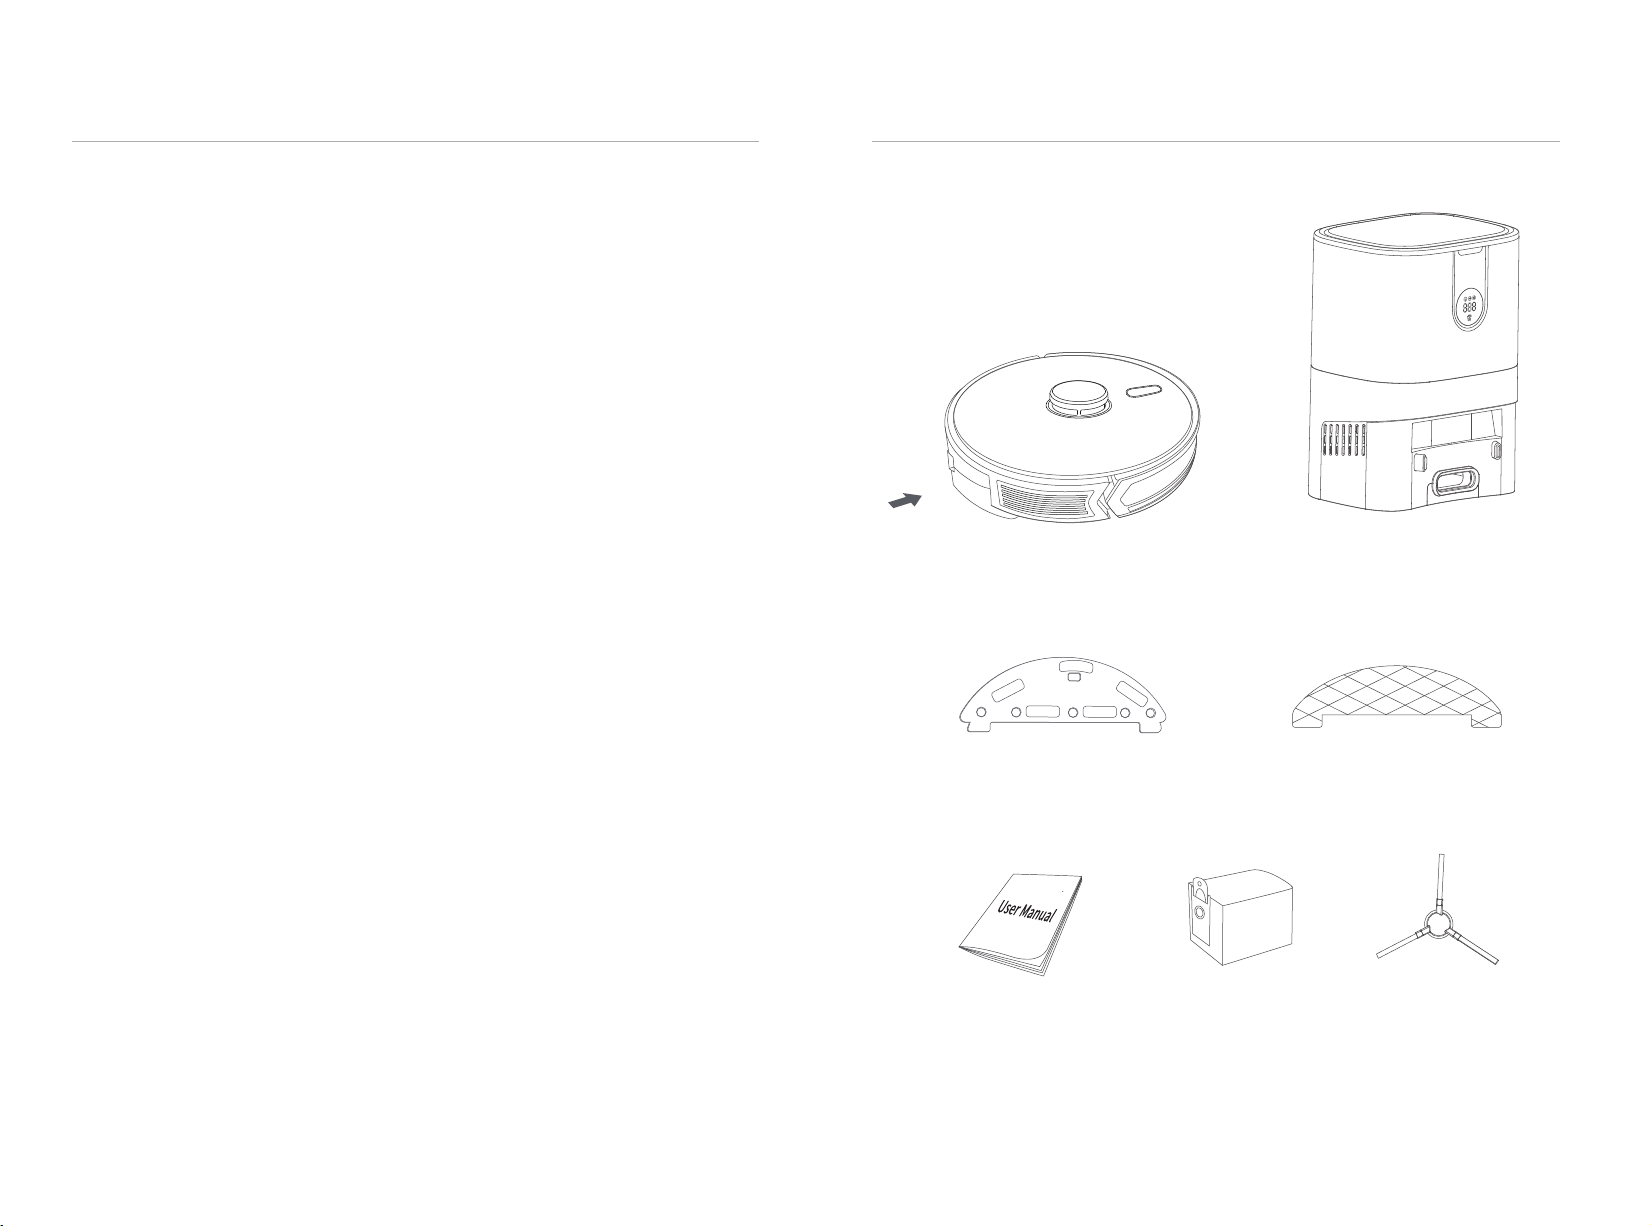
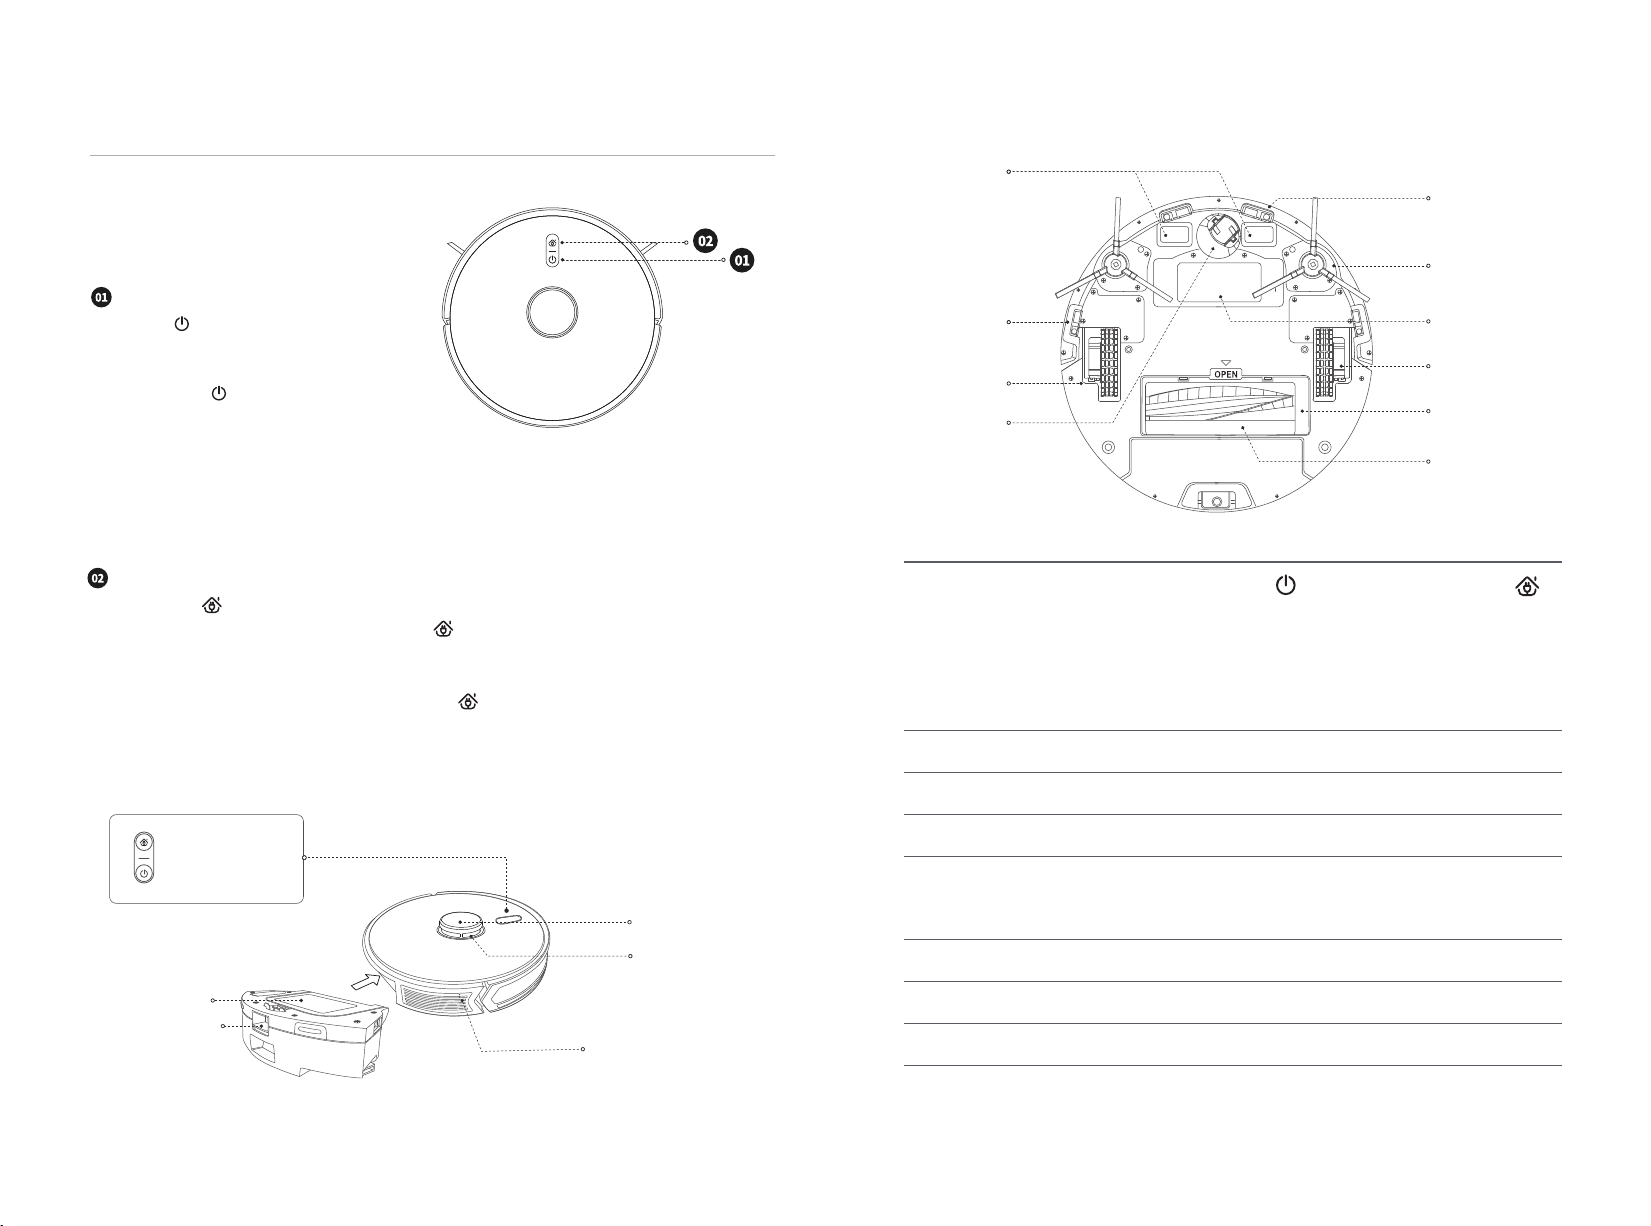
Robot
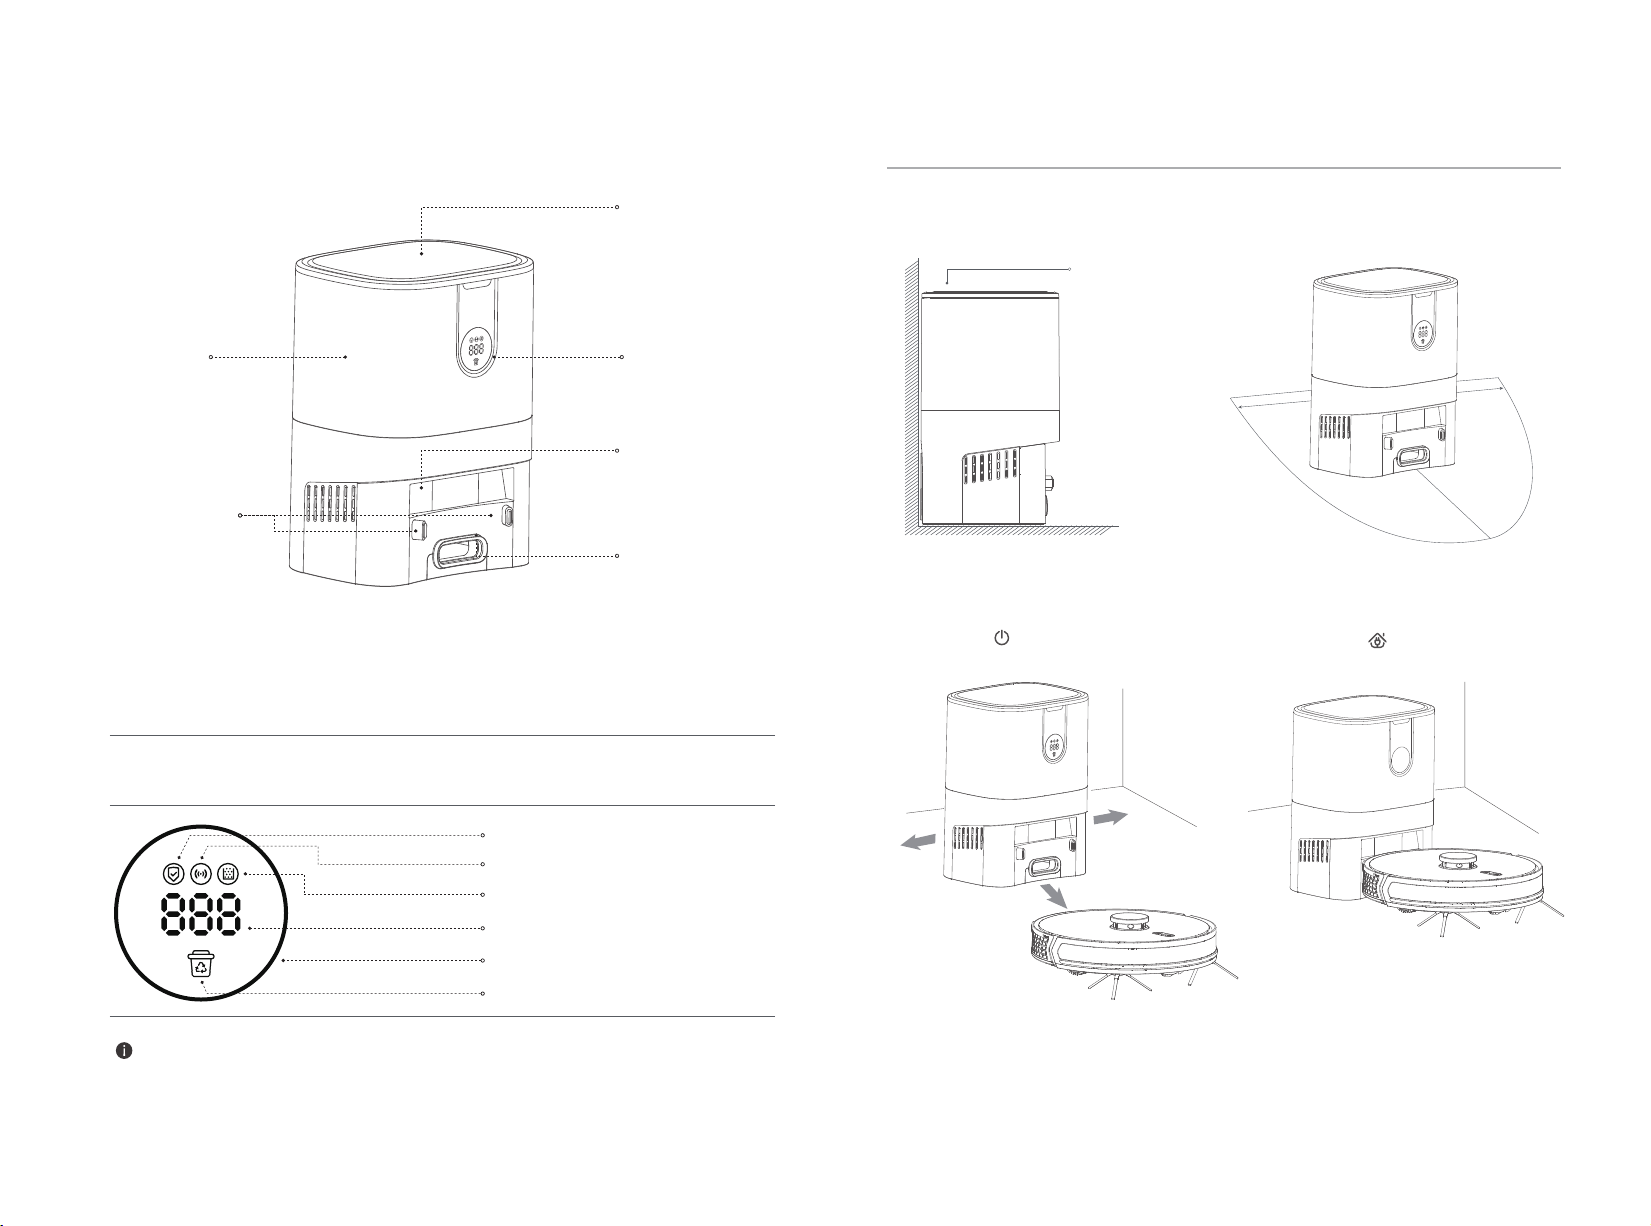
Charging dock with dust box
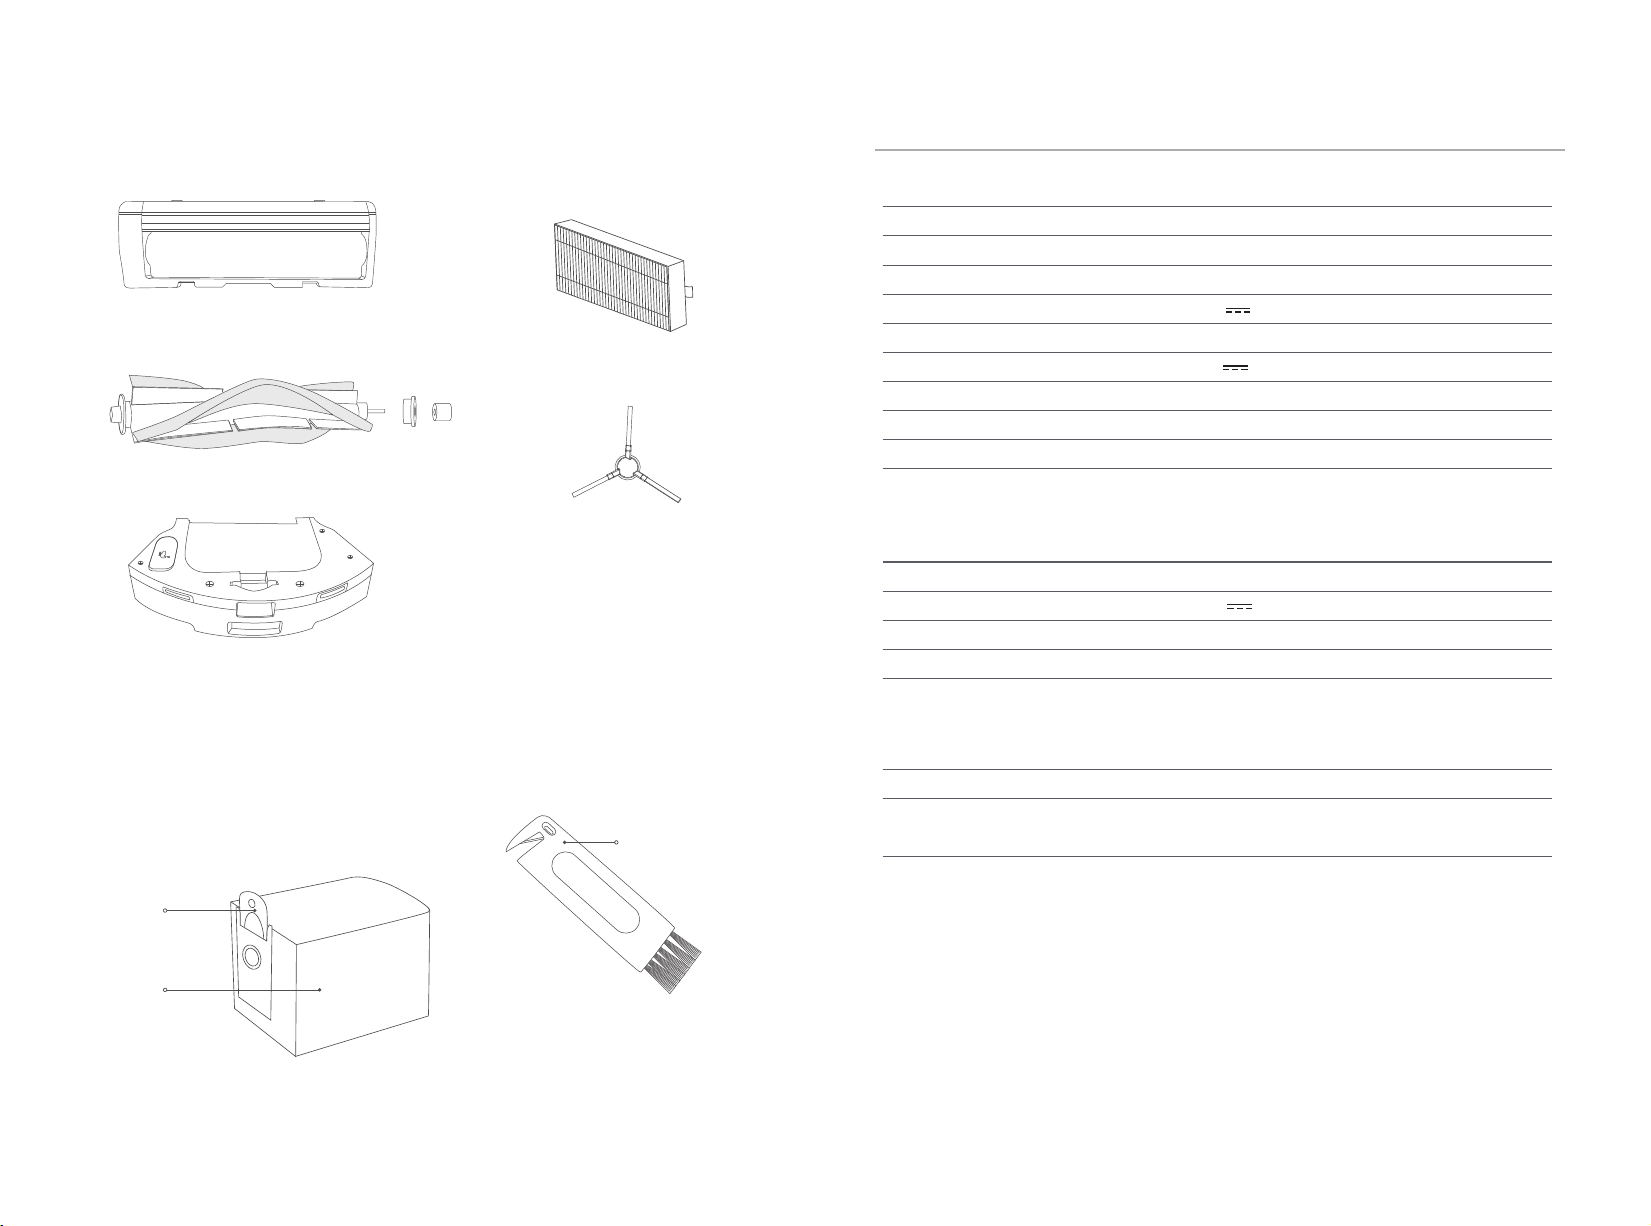
Mop
Dust bag
Safety precaution
Usage restrictions
Battery and charging
Packing list
2 3
Side brushesUser manual
Mop holder
· To avoid danger of suffocation, keep this plastic bag away from babies and children.
· This product is intended for household use only, not for outdoor surface (such as open balconies), non-floor
level (such as sofas), etc.
· Do not use this product on a surface where there is no guardrail protection (such as duplex buildings, open
balconies, and the top of furniture).
· Do not use it in an environment where the temperature is higher than 40°C, lower than 0°C, or there are any
liquids and viscous objects on the ground.
· Before use, please hang up the ground cable on the floor to prevent cable-related troubles.
· Please put away the fragile items and sundries placed on the ground (such as vases, plastic bags) to avoid the
main machine being blocked or collided during operation and cause damage to valuables.
· Do not allow persons (including children) who lack physical, sensory and intellectual capacity or
experience and common sense to use this product without supervision or guidance.
· Do not let children use this product as a toy.
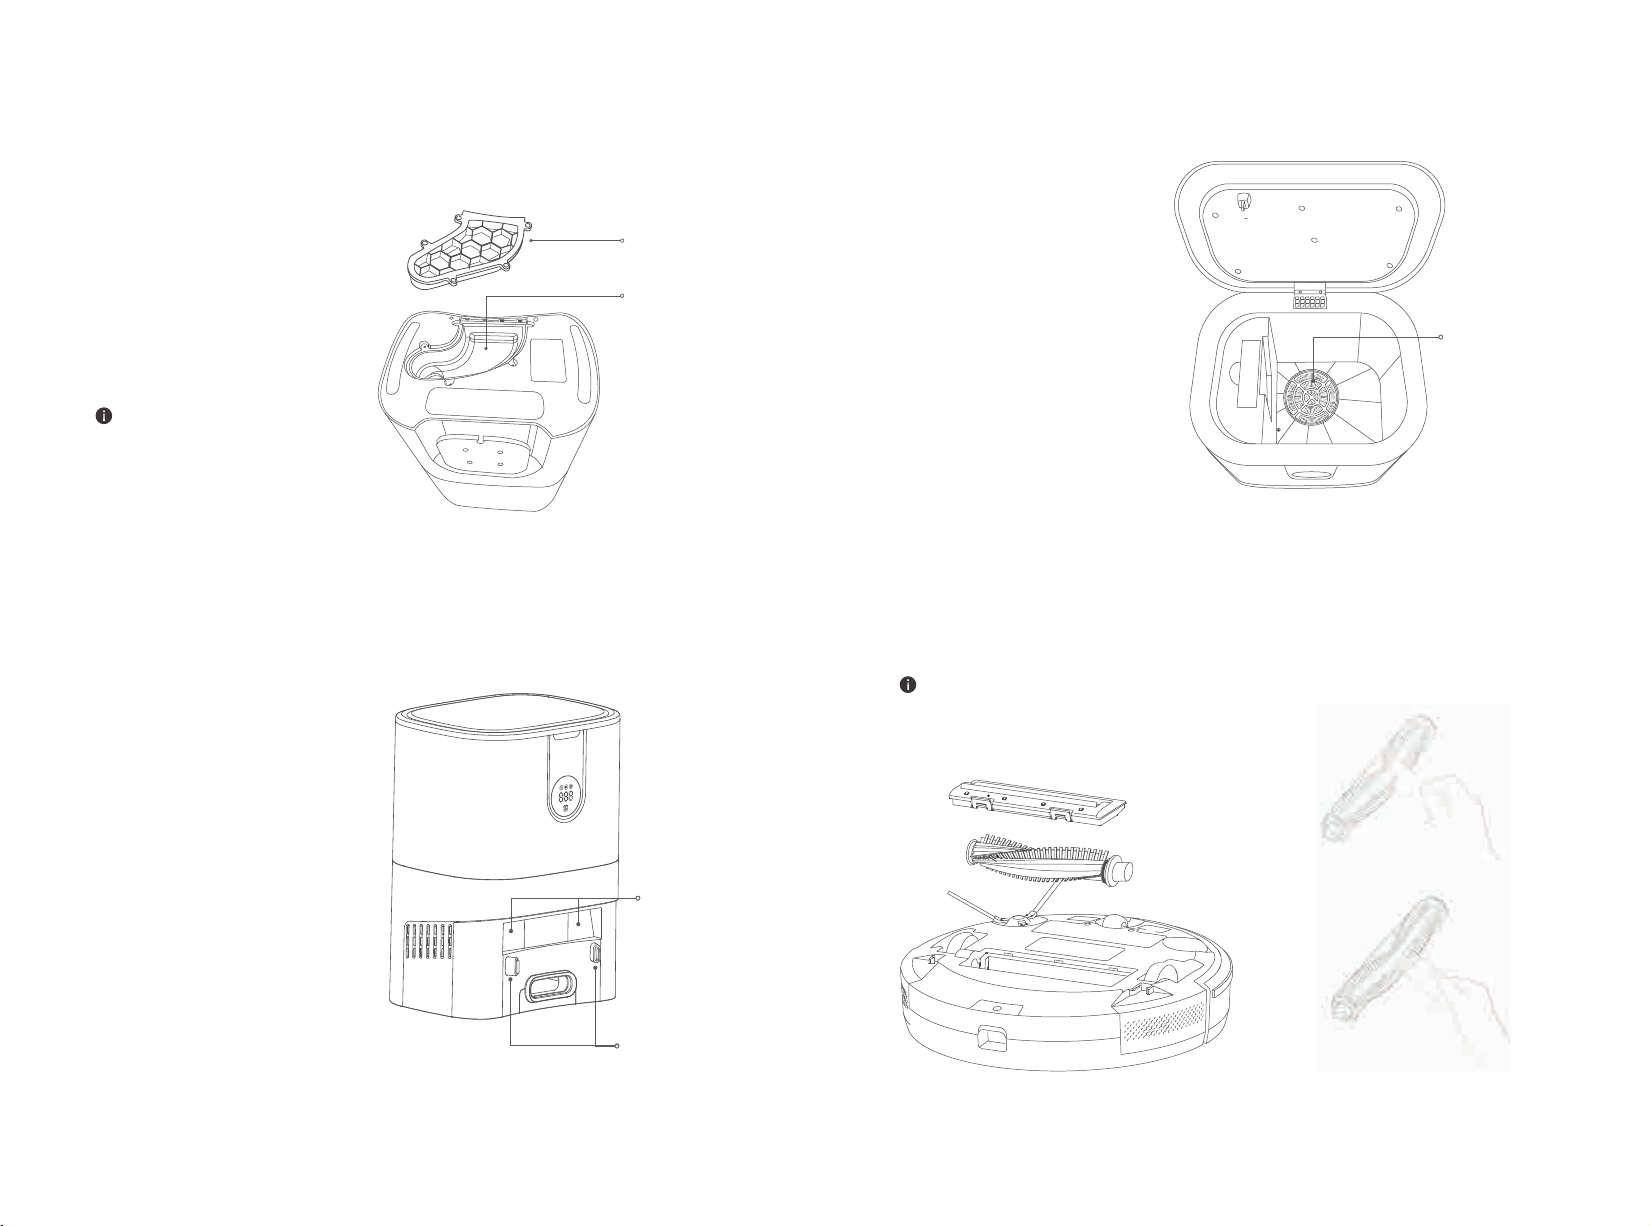
· Do not place the cleaning tool of the main brush in a child-accessible area.
· Do not let your hair, fingers and other parts close to the vacuum port of the machine
when the machine is working.
· Do not use this product to clean up any burning objects (e.g. unextinguished cigarette butts).
· Do not let the host pick up hard or sharp objects (such as decoration waste, glass, iron nails, etc.).
· Do not use the protective cover of the laser ranging sensor, the upper cover of the main unit and the collision
buffer as a handle to carry the machine.
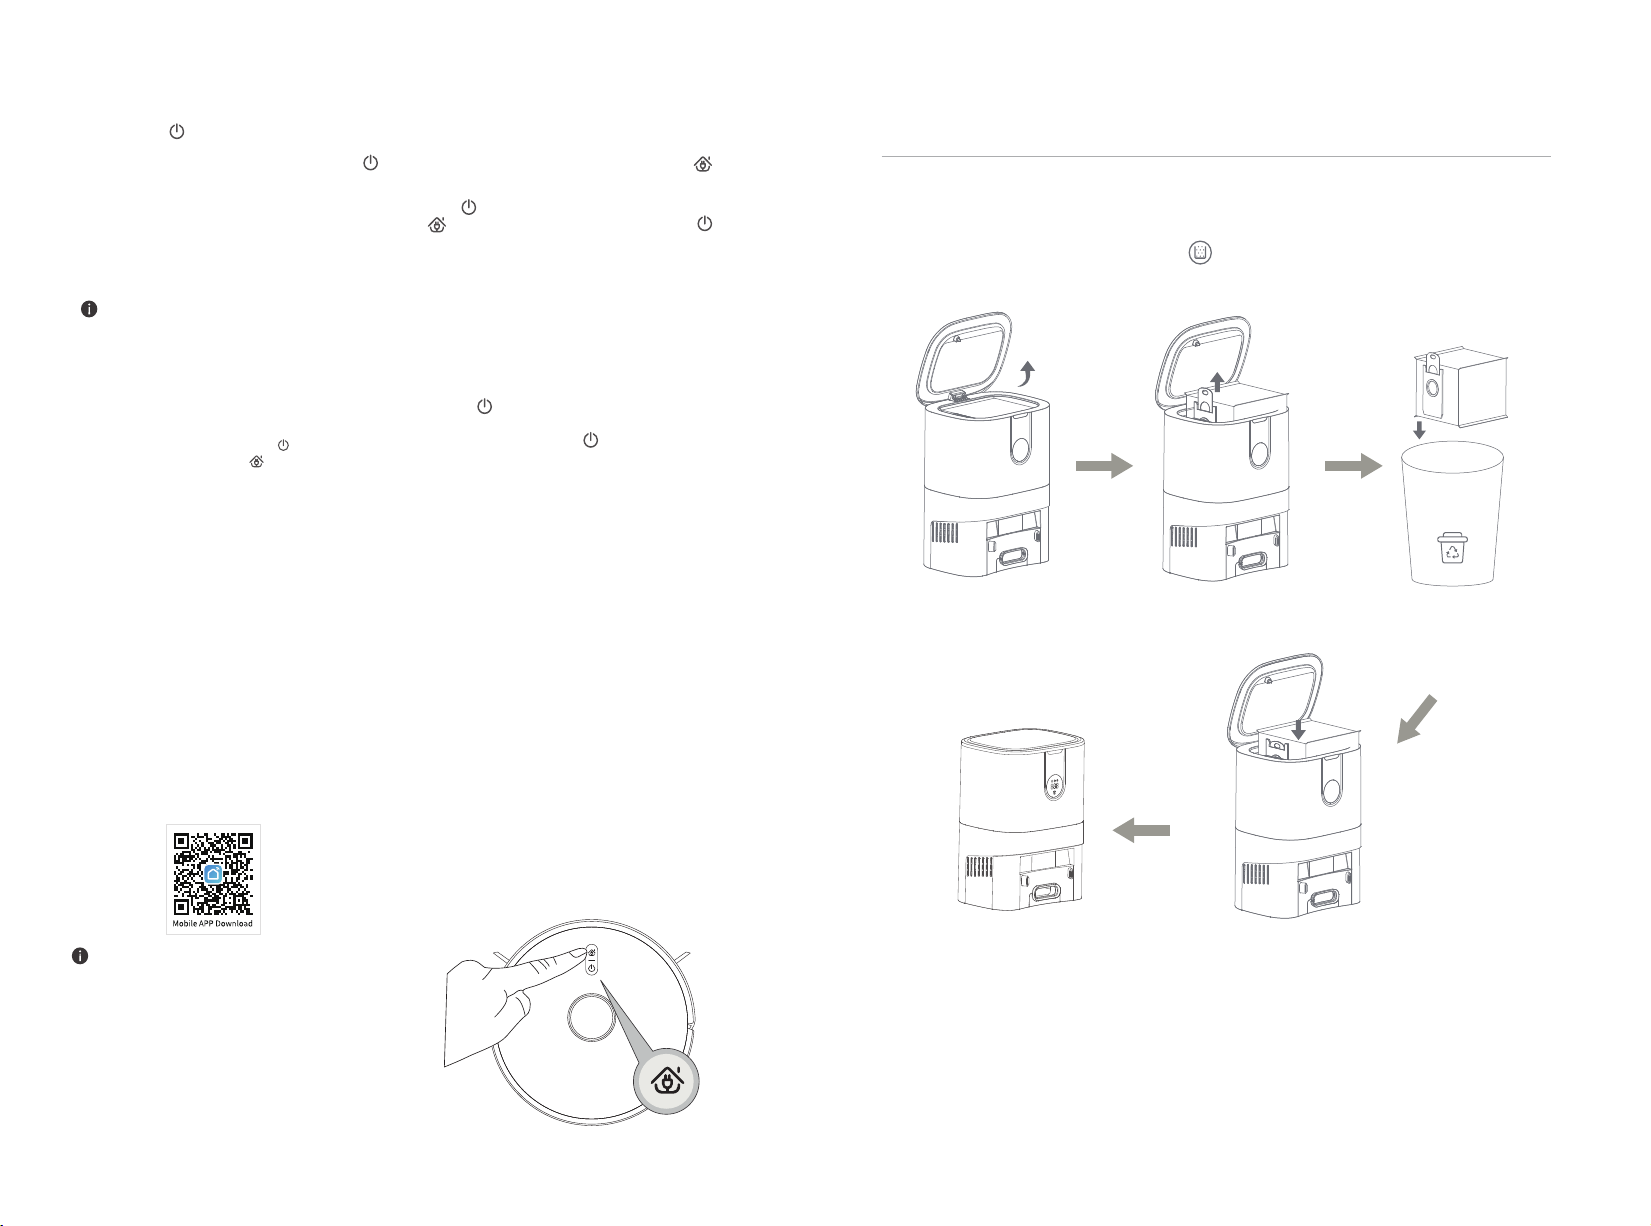
· To clean and maintain the main unit and the charging dock with dust box, first turn off the machine, pull out the
plug from the socket, and disconnect the power supply. Do not immerse the main unit and the charging dock
with dust box into water to wash or rinse it with water.
· Do not wipe any part of the product with a damp cloth or any liquid.
· Do not use the mopping mode on a carpeted floor.
· Please use this product in accordance with the instructions of this manual. Any loss and damage caused by
improper use shall be borne by the user.
● Incineration of the product is prohibited even if the
product is severely damaged, as the battery of the
product may explode.
● Do not use any third-party batteries, chargers and
charging dock.
● Do not disassemble, repair or modify batteries and
charging dock without permission.
● Do not place charging dock near heat sources (such as
radiators).
● Do not wipe or clean the electrode of the charging dock
with a damp cloth or wet hands.
● Do not throw away discarded batteries at will. Please
send the battery to professional recycling
organizations.
● If the power cord is damaged, it must be replaced by
professionals from the manufacturer, maintenance
department and similarly service department.
● If you need to transport the product, please make sure
that the main unit is turned off, and it is recommended
to use the original box.
● Do not pour water into the device, or immerse the
device in water.
● If it is not used for a long time, please turn off the main
unit after fully charged and put it in a cool and dry
place, and charge it at least once every three months
to avoid damage to the battery due to over-discharge.
● To take out the battery, you need to use the correct
tool, first remove the bottom battery cover screw, then
open the product battery cover, unplug the battery
connection terminal, and take out the battery from the
battery box.
● The battery must be removed from the appliance
before disposing of the appliance.
● The appliance must be switched off when the battery
is removed.
This product includes Class 1 lase. The lidar of this
product complies with the Class 1 laser safety
standard of GB 7247.1-2012/1EC60825-1:2014, and
will not produce dangerous laser radiation to the
human body.
The illustrations of products, accessories, user interface, etc.
in this manual are schematic diagrams and are for reference
only. Due to product updates and upgrades, the actual product
may be slightly different from the schematic diagram, please
refer to the actual product.