DEMA CHEMASTER DM-813-LLL-1T User manual

DEMA I-668 Pg. 1 of 9
Rev C-28236
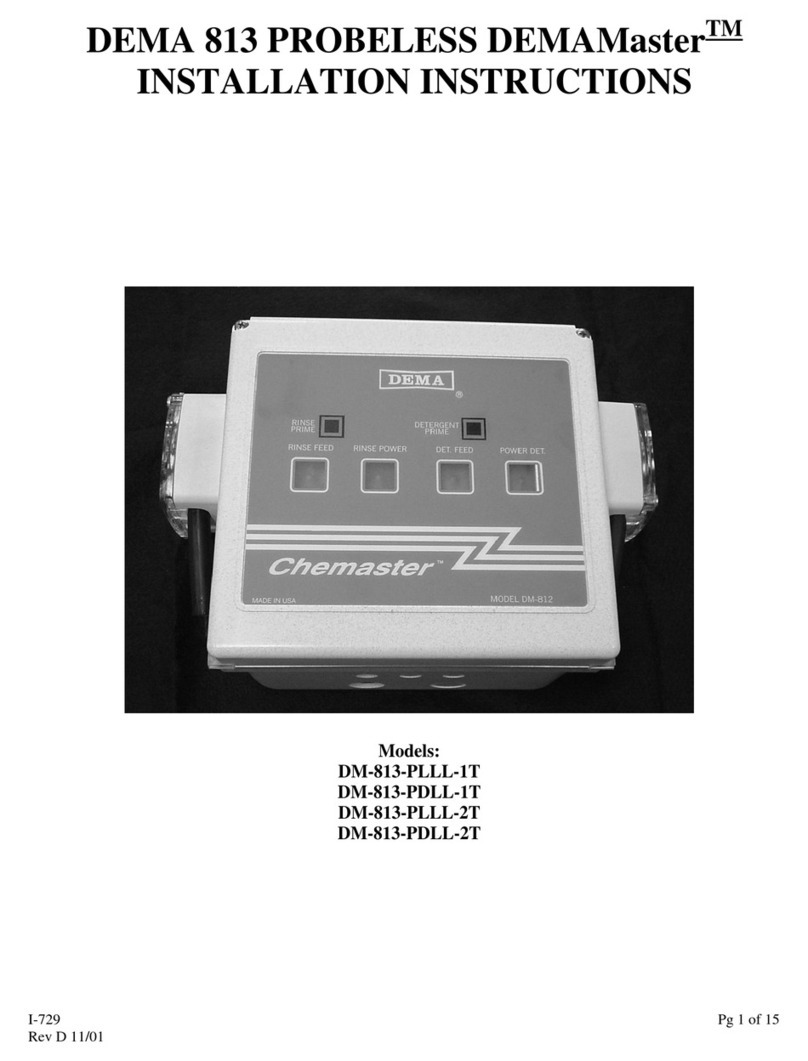
INSTRUCTION MANUAL FOR DEMA CHEMASTERTM
DM-813-LLL-1T, DM-813-LLL-2T, DM-813-DLL-1T and
DM-813-DLL-2T
Introduction
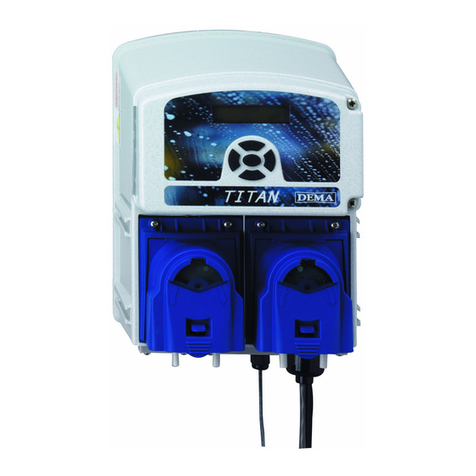
The Chemaster series is a comprehensive range of single and dual function units for Industrial
DishWashing, Trash Treatment, and Chemical Transfer etc.
Units are encased in a heavy-duty plastic housing with a sealed cover that has a Mylar label for access of
external control and visibility of indicators. Options range from powerful long lasting peristaltic pumps
for liquid products to solenoid valves for dry products.
Pumps are available in three sizes and are coupled to 15, 60 or 105 rpm motor/gear boxes that yield flow
from .02oz/min. (0.5ml/min.) to 47oz/min. (1.4 liters/min). In addition to these units, original equipment
manufactured pump/motors are available in sizes up to 1 ½ GPM (6 LPM) and are available with different
tubing material for individual applications.
.
All units are equipped with a built in transformer (single or dual) depending on the model, with primary
voltages of 120,208, 240/50-60Hz and secondary voltage of 24/50-60Hz for maximum safety and
reliability. Circuit boards for detergent control are available as probe units, variable speed and timed
units; combined with a variable speed board for the rinse (second pump). Various combinations may be
constructed from this range of components.
All units are packaged with installation kits and this instruction.
System Features
-Heavy Duty ABS Plastic Case
-Splash proof heavy duty Mylar label(Customized labels are available)
-External access to prime function
-Special low current output on Speed Control units
-Metal motor/gear boxes with 2000 plus hours of brush life
-Patent Pending on control software
-Components are interchangeable within the industry
-Separate 40VA transformer for each motor
-Longer pump tubing life due to special elastomer formula
Operating Mode
The conductivity control is designed with unique software that maintains a high degree of accuracy due to
its way of controlling the dispensing device (pump or solenoid valve).
After the controller is engaged, the indicator turns red (power on). When the indicator turns yellow, the
unit is in calculation mode. During this cycle the unit checks values received from the probe and
calculates whether or not to start the pump/solenoid valve. If additional chemical is needed, the control
operates the dispensing device in an on/off cycle mode: Green light is on for 7seconds and then off for 7

DEMA I-668 Pg. 2 of 9
Rev C-28236
seconds until the desired set point is reached. If a larger change in concentration occurs, the control will
calculate again and the yellow light comes on. This cycle is repeated until the concentration set point is
reached.
When the dispensing device is operating (green light on) the unit will go into an alarm condition and the
low detergent alarm will activate if the set point is not reached within the time set by switch #1.
Depending on the setting of switch #3, the device will keep on operating during alarm or it will shut off.
On a single tank machine, this operation will reset at each cycle’s end. If tunnel, flight or conveyor
machines are selected, the calculating mode is automatically started every 60 seconds to insure the correct
concentration level is kept.
The rinse control is connected parallel to the rinse solenoid valve or peristaltic pump for rinse aid
injection to the machine. Turning a motor speed potentiometer on the rinse control board controls the
chemical volume. This means by turning the potentiometer, the number of revolutions the pump makes or
the length of time the solenoid stays open are varied. For calibration information see “Detergent, Rinse
Aid and Sanitizer Calibration”.
Installation of the Chemaster System
Dishroom Survey
Prior to installation, take a complete survey of the dishroom to determine where to place the unit and
chemical and how the electrical connections will be made.
1. Locate the electrical connection point. The power must be 240V, 60Hz max 2A per section
(detergent and rinse). Check with the manufacturer of the machine to determine if there are
preconnected terminals available for this installation.
2. Mount the Chemaster unit on a flat vertical surface, away from splashing and steam
originating from the machine. The unit must be placed so that it can be easily observed and
serviced.
3. Locate the proper position for the probe in the wash tank. The probe must be installed below
the water level, normally 1-2” (30-50 mm) from the bottom of the tank. Probe must be kept
away from heating elements, pump intake, drains and incoming water supply.
4. Install the detergent injection fitting above the probe to obtain a rapid reading of all chemicals
entering the wash tank. Install the rinse line injection fitting into the 1/8” NPT threaded hole
normally provided by the manufacturer of the machine. If a hole in the rinse line is not
available but the wall of the pipe is thick enough, drill a hole 11/32” (8.7mm) dia. and tap to
1/8” NPT. If this is done into a thin pipe wall (copper) use a saddle clamp instead.
Note: A better mixture of the chemical and water will occur if the rinse injection is
mounted before the booster heater.

DEMA I-668 Pg. 3 of 9
Rev C-28236
Electrical Installation
This product is designed only to be used as described in this instruction sheet. Adhere to all warnings and
cautions identified in this document.
WARNING: Electrical and grounding installation of DEMA products must comply with
electrical codes and regulations established by national, city, county, parish, provincial or
other agencies. It is possible that electrical codes and regulations require that a certified
electrical contractor or engineer perform the electrical installation.
For questions, contact a certified electrician.
DISCONNECT ALL ELECTRICAL POWER TO THE DISPENSER AND THE APPLIED
MACHINE WHEN SERVICING- FOLLOW LOCKOUT / TAGOUT PROCEDURES.
WARNING: Installations must conform to all local and national plumbing codes and use
approved backflow prevention and pressure relief devices where required.
ALWAYS DISCONNECT DISPENSER FROM WATER SOURCE WHEN DISPENSER
IS NOT IN USE.
Always read SDS for all chemicals used and follow personal protective guidelines.
Note: All European installations must be carried out by a certified electrical engineer. All
other installations must be installed according to local country, city, state, or provincial
electrical codes. For questions please contact a local contractor.
1. BEFORE GOING ANY FURTHER, ALL ELECTRICAL POWER MUST BE TURNED OFF
TO THE DISH MACHINE AND ANY OTHER CIRCUIT THAT IS TO BE USED FOR THIS
INSTALLATION. LOCKOUT AND TAG PROCEDURES SHOULD BE OBSERVED WHEN
INSTALLING THIS DEVICE. NEVER OPEN THE CHEMASTER UNLESS POWER HAS
BEEN TURNED OFF. SIGNALS MAY BE PRESENT FROM DISH MACHINE, EVEN
WITH THE POWER TURNED OFF. ONLY USE ELECTRICAL CODE APPROVED
INSULATED WIRING AND ELECTRICAL FIXTURES WITH THIS INSTALLATION.
2. Install the power to the detergent board of the Chemaster, using the correct cable (refer to local
electrical code). In most applications, the pump contactor on the dish machine can be used to
power the detergent control. The power may be 120, 208 or 240V 50/60Hz. Route the cable away
from heaters and sharp edges. The cable should be mounted into the Chemaster enclosure using an
appropriate strain relief or conduit fitting. The cable should be connected to the proper detergent
terminal connections.
Note: A Nonmetallic enclosure does not provide grounding between conduit connections. Use
grounding type bushings and jumper wires.
3. Repeat step number 2 for the rinse side of the unit, connecting in parallel to the rinse solenoid
valve of the machine.
4. Route a two-core cable from the terminals on the detergent board marked Probe, through the
enclosed cable gland, to the probe. Fasten the two leads to the probe using the enclosed
compression fittings. Connection must be tight but over tightening can damage the probe.

DEMA I-668 Pg. 4 of 9
Rev C-28236
Tubing Connections
Included in the installation kit is a roll of LDPE tubing to connect from the chemical container, via the
pump, and to the fittings of the machine.
Measure the length of the tubing needed on the suction side from the container to the pump and cut the
tubing to proper length. Install the tubing to the pickup tubes (Grey PVC) through the compression nut,
and tighten the nut. Route the tubing to the suction side of the pump. An arrow on the faceplate indicates
the flow direction. Push the tubing into the pump and squeeze tube approximately1/2-3/4” (15-20mm).
Secure the tubing together by tightening a cable tie around the squeeze tube. Use the same procedure on
the outlet of the squeeze tubing and route the LDPE tubing to the injection points of the machine and
through the compression nut. Tighten the nut properly. Cut off all excess tubing and keep tubing away
from hot surfaces and sharp edges to prevent damage or leakage. At this point the installation is
complete.
System Set Up
On the concentration control circuit board there is a set of switches that must be set to their correct values
to obtain a proper operation.
Switch One=Type Dish machine
On=Single tank machine (door machine)
Off=Tunnel, Flight, or Conveyor machine
When ON is selected the low-level alarm is signaled after 30 seconds of continuous pump
operation.
When OFF is selected the alarm is signaled after 120 seconds of pump operation.
Switch Two=Operating Range
On=High range 3150 – 20,000 MHOS (Siemens)
Off=Low range 1050-6700 MHOS (Siemens)
The concentration point is set by turning the potentiometer clockwise to increase, and
counterclockwise to decrease (see figure on page 4).
Switch Three=Feed Limit Operation
On=Feed limit active (shuts off device after 240 seconds if tunnel machine is selected, when alarm
is activated.
Off=Override does not stop pump when alarm is activated.
On a single tank machine the alarm is being reset each 50-70 seconds.
Switch Four=Alarm Volume
On=High volume (approx. 50 dB)
Off=Low volume (approx. 25 dB)
(Other levels may be available upon special request)
Switch Five=Chemical Type Select
On=Liquid chemical
Off=Dry/Powder chemical
Switch Six=Solenoid Select
On=Two solenoids in use
Off=One solenoid in use

DEMA I-668 Pg. 5 of 9
Rev C-28236
The Chemaster control is designed with the ability to operate with two chemical bowls and
automatically select the full chemical bowl.
Detergent and Rinse Calibration
Detergent Feed Set Up
There are two popular methods for setting up detergent feed.
1.
a. Turn the potentiometer fully counterclockwise to the minimum position.
b. Remove the pick up tube from the chemical container, or the powder canister from the Universal
bowl. This will prevent unnecessary use of the chemical during set up.
c. Determine the correct dosage of chemical; see manufacturer’s data sheet, and the amount of water
in wash tank. If this figure is not available calculate the size of the tank, height x depth x
width=volume. Take the chemical manufacturers recommended dosage and multiply by the
amount of water in the tank. This equals the correct amount of chemical in the tank called the set
point. Manually add the correct amount of chemical to the tank.
d. Start the machine and let it run for a full cycle, and then restart. During the second cycle, slowly
turn the potentiometer clockwise until the unit starts to dispense chemicals. Continue to slowly
turn the potentiometer clockwise until the pump operation stops. This operation now has the
correct set point and the control will maintain this set point during all cycles by adding chemicals
when needed.
e. Check for the correct concentration by using an alkalinity titration test kit (DEMA #81-53) or a
separate conductivity meter if the µmho or µS level is known. Adjust as necessary.
2.
a. Turn the potentiometer counterclockwise and then turn the pot to position 7 or 8. Run the
machine through one cycle and titrate a sample of the solution using DEMA kit # 81-53.
b. If the concentration (number of drops) is not high enough turn the pot to 10 or 11 and run the
machine through another cycle. When the wash pump stops, open the door and titrate another
sample of the solution.
c. If the concentration is still not high enough turn the pot to 1 or 2. Run the machine through
another cycle.
d. Repeat this process until you achieve the concentration you are looking for.
Rinse Aid Calibration
Prior to calibration the system must be primed. The system is primed when the chemical has filled the
tubing up to the injection point. On the rinse side this can only be done during the time the rinse solenoid
is active. On the front cover there is a button called prime. By depressing this, the pump will run at
maximum speed. This may have to be done several times to ensure the chemical has filled up the entire
tubing system.
1. Place the pick up tube into a graduated cylinder and fill with chemical to an easily read level.
2. By use of the potentiometer labeled “Rinse” set the pump speed according to the chemical
manufacturer’s recommendations e.g. (2 oz/10 seconds). Calculation = 2oz x 6= 12oz/min. 12 oz
divided by the capacity of the pump per revolution (1.5) =8 revolutions per minute or 8/6=1.4
revolutions per 10 seconds (the rinse cycle).
3. Confirm the supply rate of the rinse pump using a graduated cylinder. Make any necessary
adjustments to pump rate by use of potentiometer labeled “rinse”.

DEMA I-668 Pg. 6 of 9
Rev C-28236
4. The rinse delay may be set, by adjusting the potentiometer labeled “rinse delay” on the rinse board. A
0-12 second delay may be set.
5. There are 18 seconds of rinse limit available when the “rinse limit” jumper is in the on position.
When the jumper is in the off position, there is no rinse limit. This means that the rinse pump will run
through the entire rinse cycle, when jumper is in the off position.
Sanitizer Calibration
Prior to calibration the system must be primed. The system is primed when the chemical has filled the
tubing up to the injection point. On the rinse side this can only be done during the time the rinse solenoid
is active. On the front cover there is a button called prime. By depressing this, the pump will run at
maximum speed. This may have to be done several times to ensure the chemical has filled up the entire
tubing system.
1. Place the pick up tube into a graduated cylinder and fill with chemical to an easily read level.
2. By use of the potentiometer labeled “sani” set the pump speed according to the chemical
manufacturer’s recommendations e.g. (2 oz/10 seconds). Calculation = 2oz x 6= 12oz/min. 12 oz
divided by the capacity of the pump per revolution (1.5) =8 revolutions per minute or 8/6=1.4
revolutions per 10 seconds (the rinse cycle).
3. Confirm the supply rate of the rinse pump using a graduated cylinder. Make any necessary
adjustments to pump rate by use of potentiometer labeled “sani”.
After all output of chemical products have been calibrated, the Chemaster is ready for use

DEMA I-668 Pg. 7 of 9
Rev C-28236
DM-813-LLL-1T and DM-813-DLL-1T Schematic
(1 Transformer)
24VDC RINSE OUT
+++
UNUSED
BACKUP
PROBE
24VAC
24VDC DET OUT
24VAC IN
24VAC OUT
LINE
120VAC RETURN
208VAC RETURN
240VAC RETURN
1
2
PRESSURE
SWITCH
FUSE
1A. 250V
RINSE
MOTOR
DETERGENT
MOTOR OR
SOLENOID
VALVE
(SEE DRAWING FOR PART NO.)
(SEE DRAWING FOR PART NO.)
(SEE DRAWING FOR PART NO.)
TERMINAL BLOCK &
BRACKET ASSY.
BLACK
WHITE
BLUE
RED
DETERGENT
CONCENTRATION BOARD
80-68-3
RINSE CONTROL BOARD
80-69-6
40 VA
TRANSFORMER
80-70 ORANGE
ORANGE
20774-1
(81-94-1)
20774-2
(81-94-2)
X20753-1
(81-32-1)
X20753-2
(81-32-2)
BLACK
RED
ORANGE
20774-1
(81-94-1)
BLACK
RED
ORANGE
ORANGE
X20753-1 (81-32-1) MOTOR
X20753-6 (81-32-6) VALVE
X20753-2 (81-32-2) MOTOR
X20753-7 (81-32-7) VALVE
BLACK
RED X20753-2
(81-32-2)
X20753-1
(81-32-1)
+
24VDC SANI OUT
(SEE DRAWING FOR PART NO.)
MOTOR
SANITIZER
20759-2
(81-36-2)
25457-16 (81-34-16) FUSE
20758-1 (81-35) FUSE HOLDER
24158-2 (81-16-2)
TIE WRAP
=

DEMA I-668 Pg. 8 of 9
Rev C-28236
DM-813-LLL-1T and DM-813-DLL-2T Schematic
(2 Transformers)
24VDC RINSE OUT
+++
UNUSED
24VDC SANI OUT
BACKUP
PROBE
24VAC IN
24VDC DET OUT
24VAC IN
24VAC OUT
LINE
120VAC RETURN
208VAC RETURN
240VAC RETURN
FUSE
1A. 250V
RINSE
MOTOR
DETERGENT
MOTOR OR
SOLENOID
VALVE
(SEE DRAWING
FOR PART NO.)
(SEE DRAWING FOR PART NO.)
(SEE DRAWING FOR PART NO.)
TERMINAL BLOCK &
BRACKET ASSY.
BLACK
WHITE
BLUE
RED
DETERGENT
CONCENTRATION BOARD
80-68-3
RINSE CONTROL BOARD
80-69-6
40 VA
TRANSFORMER
80-70
X20753-1
(81-32-1)
X20753-2
(81-32-2)
BLACK RED
BLACK
RED
ORANGE
ORANGE
X20753-1 (81-32-1) MOTOR
X20753-6 (81-32-6) VALVE
X20753-2 (81-32-2) MOTOR
X20753-7 (81-32-7) VALVE
25457-16 (81-34-16) FUSE
20758-1 (81-35) FUSE HOLDER
20759-2
(81-36-2)
ORANGE
ORANGE
20759-2
(81-36-2)
RED
1A. 250V
FUSE
BLUE
25457-16 (81-34-16) FUSE
20758-1 (81-35) FUSE HOLDER
WHITE
BLACK
208VAC RETURN
(SEE DRAWING FOR PART NO.)
TERMINAL BLOCK &
BRACKET ASSY.
240VAC RETURN
LINE
120VAC RETURN
40 VA
TRANSFORMER
80-70
SANITIZER
MOTOR
(SEE DRAWING FOR PART NO.)
BLACK
RED X20753-2
(81-32-2)
X20753-1
(81-32-1)
+
=24158-2 (81-16-2)
TIE WRAP

DEMA I-668 Pg. 9 of 9
Rev C-28236
Technical Specifications
Connection Voltage 250V/50-60 Hz Max. 2A/per section
Control Voltage 24V/50-60 Hz 40 VA/per section
Motor Voltage 24 VDC
Case ABS plastic with Mylar label
Size WxHxD 8.5”x 8”x4.125” (21.6x20.3x10.5cm)
(case w/out pumps and solenoids)
Shipping Weight Varies per model
Installation Method With keyhole slots to a flat vertical surface
Detergent Control
Probe Model Measures using conductivity probe C-12
Concentration Range Low 1050-6700µmhos
Concentration Range High 3150-20000µmhos
Pulse Feed Rate Dry or Liquid 5 sec. ON & 5 sec. OFF
Alarm Door Mode 30 seconds
Alarm Conveyor Mode 120 seconds
Overfeed Pump Shutoff 240 seconds (conveyor mode only)
Buzzer Volume HIGH Approx. 50 dB
Buzzer Volume LOW Approx. 25 dB
Variable Speed Model (rinse and detergent)
Operating mode Continuous with power on
Signal voltage N/A
Output voltage Approx. 30 VDC
Adjustment range % 10-100%
Peristaltic Pumps
Motor voltage 24 VDC
Power consumption Max. 40 VA 1.6 A
Motor gearbox 15, 60 or 100 rpm (depending on model)
Material Metal
Squeeze tubing material EPDM, opt. Viton, Santoprene
Squeeze tubing size ID Rinse: 1/8” (3.2mm)
Detergent: 3/16” (4.8mm)
Pump output Rinse Max. 1.15oz/min (34ml/min)
Pump output Detergent Max. 7.27oz/min (215ml/min)

DEMA I-668 Pg. 10 of 9
Rev C-28236
Chemaster Trouble Shooting Guide
UNIT DOES NOT TURN ON:
*Check power source.
*Check fuses.
*Visually inspect all electrical components for signs of over heating.
*Ensure proper power to transformers.
*Ensure proper output from transformers (24Vac).
WILL NOT DISPENSE:
*Check for power available.
*Check concentration set point.
*Check probe for corrosion and connection.
*Check power to gear/motor.
*Check pump roller block for obstruction or damage.
*Check tubing for damage.
*Verify chemical supply is sufficient.
*Ensure pick up tube is free from obstruction and in chemical.
*Inspect squeeze tube for damage.
TOO MUCH OR TOO LITTLE DETERGENT:
*Check concentration set point.
*Check supply tubing for damage or obstruction.
*Check probe for corrosion and connection.
*Is pump rotating at the proper speed?
*Is the supply tubing holding prime?
*Does the squeeze tube need to be lubricated?
SUPPLY TUBING NOT HOLDING PRIME:
*Check direction of flow from inlet and outlet for supply.
*Inspect tube for holes or cracks.
*Check compression fitting between tubing and pick up tube for tightness.
*Check connection of squeeze tube and supply tubing for air leaks.
*Is roller tightly pressed to squeeze tube?
Return Policy
No merchandise may be returned for credit without DEMA Engineering Company’s written permission.
Return Merchandise Authorization (RMA) number required in advance of return.
Warranty
DEMA products are warranted against defective material and workmanship under normal use and
service for one year from the date of manufacture. This limited warranty does not apply to products that
have a normal life shorter than one year or failure and damage caused by chemicals, corrosion, improper
voltage supply, physical abuse or misapplication. Rubber and synthetic parts such as “O”-rings,
diaphragms, squeeze tubing and gaskets are considered expendable and are not covered under warranty.
This warranty is extended only to the original buyer of DEMA products. If products are altered or
repaired without prior approval of DEMA, this warranty will be void.
Defective units or parts should be returned to the factory with transportation prepaid. If inspection
shows them to be defective, they will be repaired or replaced without charge. F.O.B. factory DEMA
assumes no liability for damages. Return merchandise authorization number to return units for repair or
replacement must be granted in advance of return.
This manual suits for next models
3
Table of contents
Other DEMA Control Unit manuals
Popular Control Unit manuals by other brands
Siemens
Siemens SCALANCE W788C-2 operating instructions
V2
V2 City7 instruction manual
The Sensor Connection
The Sensor Connection PMD2XT-XX-0XX-A Series instruction manual
Dea
Dea 400RR Operating instructions and warnings
SMC Networks
SMC Networks EX260 Series Operation manual
NCR
NCR 7358-K704 Kit instructions
