DENECKE JB-1 User manual

2018
DENECKE,INC.
DENECKE JB-1 USER’S MANUAL

Denecke JB-1 User's Manual
©2018 Denecke, Inc.
DENECKE, INC.
25209 Avenue Tibbitts * Valencia, CA 91355 * (661)607-0206
1
Rev. 01
DENECKE DCODE® JB-1 SYNCBOX®
TIMECODE GENERATOR
USER'S MANUAL
Introduction
The JB-1 features a display and menu system, which allows for ease of use and display of timecode and settings. It reads,
generates and jam syncs to all standard frame rates including 23.976 for High Definition shoots. The JB-1 features an
automatic jam sync capability, which senses the incoming timecode rate. Cross jamming of different rates can be accomplished
as well. The advanced Temperature Compensated Crystal Oscillator (TCXO) has ten times the frequency stability than previous
products, eliminating the need to jam more than once per day.
Features
•Generates and Jam Syncs to all common SMPTE Timecode frame rates.
•Cross jam regardless of incoming frame rates.
•Sunlight-readable display with backlight.
•Bidirectional BNC.
•Selectable TC output levels (6 preset, 2 user-selectable), eliminating the need for external output reduction pads.
•Easy-to-use menu system and display of timecode.
•Runs on a user replaceable internal LiPo battery cell.
•Simple to set up.
•Reprogrammable for new features and updates, via both Mac and Windows.
•Very high stability crystal ensures low drift.
•Low and Dead battery warning.
•Very compact aluminum housing.

Denecke JB-1 User's Manual
©2018 Denecke, Inc.
DENECKE, INC.
25209 Avenue Tibbitts * Valencia, CA 91355 * (661)607-0206
2
JB-1 Diagram
The figure below depicts the main external components of the JB-1.
1. Display with Backlight
2. Sync LED
3. Pushbutton
4. BNC Connector (TC IN & OUT)
5. Micro USB Connector for Updates & Battery Charging
6. Battery Charge LED
Denecke JB-1 User's Manual
©2018 Denecke, Inc.
DENECKE, INC.
25209 Avenue Tibbitts * Valencia, CA 91355 * (661)607-0206
3
Quick Start Guide
The following are Quick Start instructions which will get one started for most setups. Further details are provided in the rest
of the manual.
•Connections: Use BNC connector for Timecode: TC IN. BNC Connector also provides TC OUT once the JB-1 is jam
synced.
•Power On: Press the push button.
•Menu Unlock: To unlock the Top Menu Level, press the push button for 2 sec.
•Menu Navigation: Use the push button (Click) to scroll Down and Select by a Click & Hold 1 second.
•Set Mode: From Main Menu, select Mode, then select desired setting. If jamming without Cross Jamming, set to Auto
Jam Once. If Cross Jamming is required, use Jam Once.
•Set Frame Rate: From TC Setup Menu, select Frame Rate, then select desired rate. Note: this setting is only available
in Jam Once (JO) mode.
•User Bits: Often used for the date, will be sent in the timecode stream when jammed.
•Connect and Go: Once set up, simply connect the JB-1 to the Master Timecode Generator, and jamming occurs.
•Indications: Once jam synced (or generating), timecode will be displayed and the LED will flash once per second (on
Frame 00).
•Power Off: Powering off the unit will lose timecode sync but will preserve all User Settings. From the Main Menu,
scroll Down to Power Off, then select Turn Power Off.
•Battery Low is indicated by LED flashing twice per second.
•Battery Dead flashes the LED at three times per second.
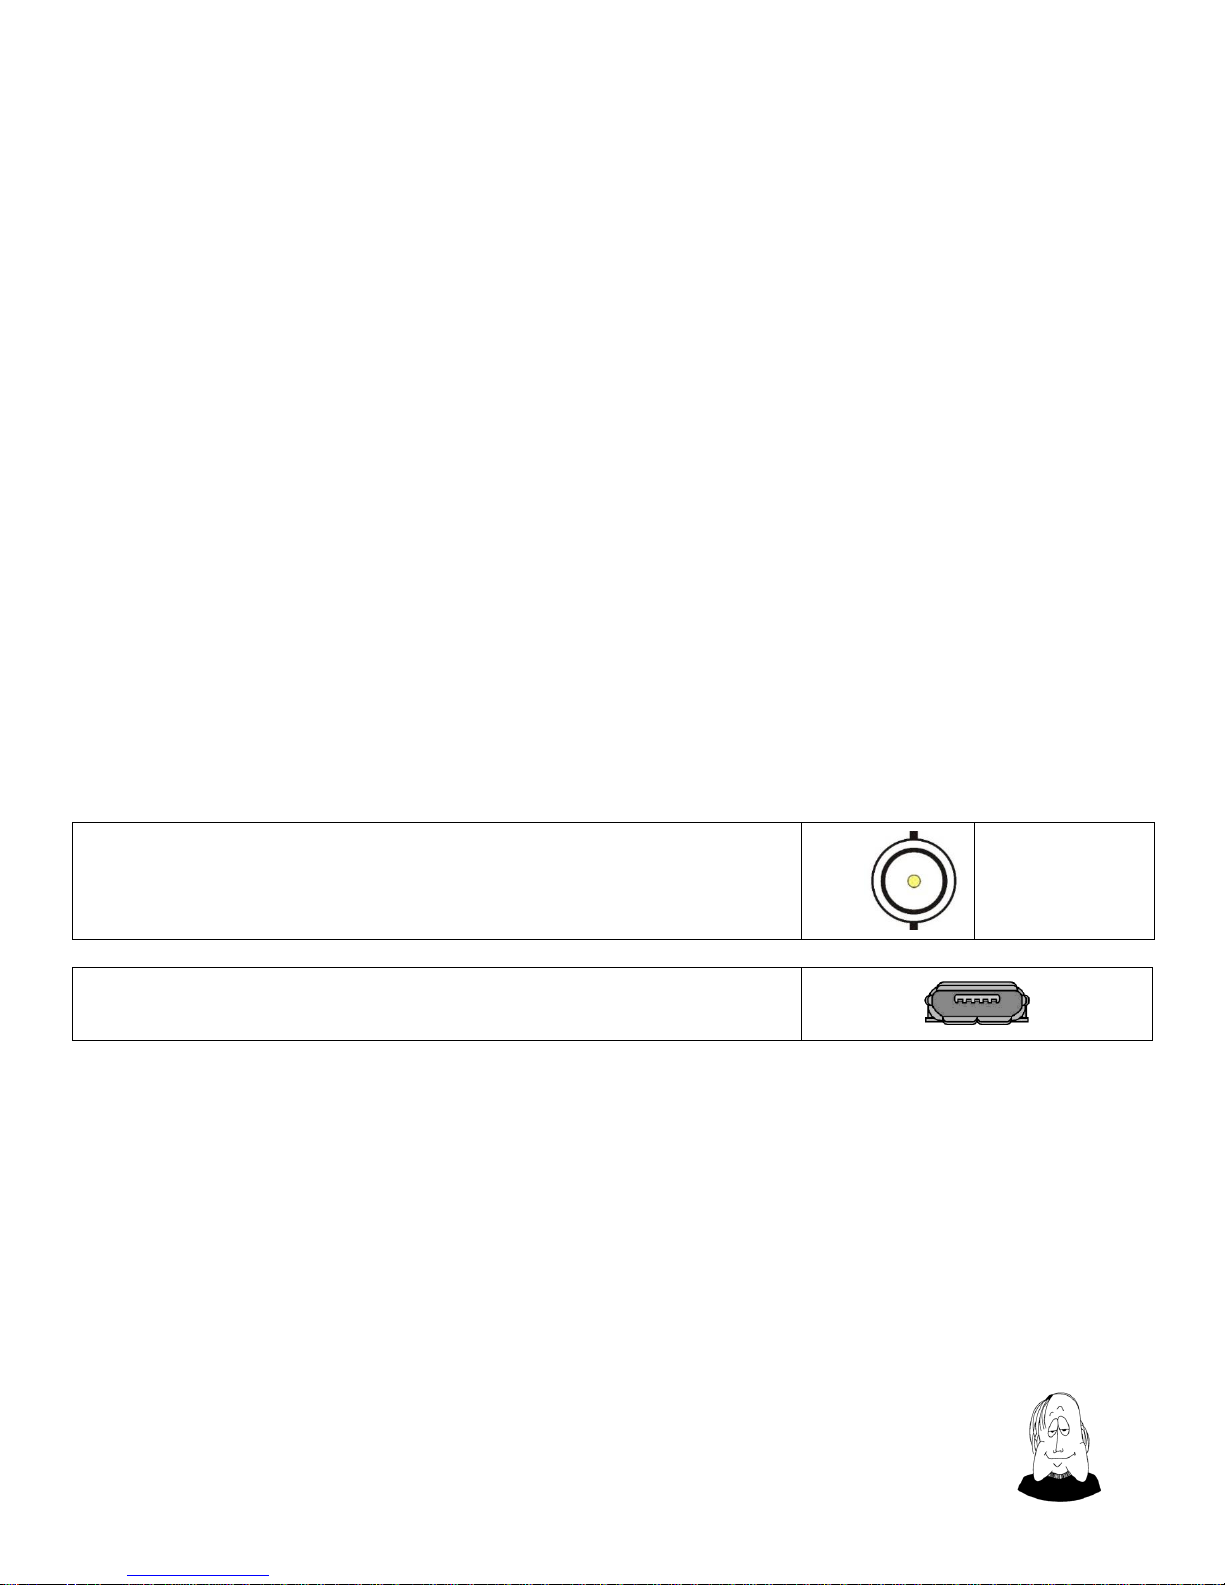
Connections
BNC Connector:
The BNC connector provides Timecode In and Out.
Tip = TC
Shield= Ground
Micro USB: A micro USB connection is provided for program updates and battery
charging.

Denecke JB-1 User's Manual
©2018 Denecke, Inc.
DENECKE, INC.
25209 Avenue Tibbitts * Valencia, CA 91355 * (661)607-0206
4
Push Button
Control of the JB-1 is achieved through a simple push button.
To turn on the unit, press the button in.
Click the push button to turn on the backlight.
At the top (main) level:
•Hold push button 2 seconds to unlock the main menu.
•Click the button to show the main menu (when menu unlocked).
In a menu:
•Click to scroll through menu items.
•Click & Hold 1 second to select the desired menu item.
LED
Indicates battery and sync/internal run status.
When the LED is off, the syncbox is not generating timecode. Note: LED
is illuminated for one second at power-up.
The LED (green) indicates when the JB-1 is generating timecode. The
LED flashes once per second (at the start of the frame 00).
1/second
Two flashes per second indicates battery low.
2/sec., double blink rate
Three flashes per second indicates battery dead. The internal battery
should be recharged as soon as possible when dead battery is indicated.
3/sec., triple blink rate

Denecke JB-1 User's Manual
©2018 Denecke, Inc.
DENECKE, INC.
25209 Avenue Tibbitts * Valencia, CA 91355 * (661)607-0206
5
Display
Here is the display with Menu shown:
TC
1
2
:
3
4
:
5
6
:
0
1
P
O
W
E
R
O
F
F
Menu
M
O
D
E
T
C
S
E
T
U
P
F
L
I
P
D
I
S
P
L
A
Y
23.976
AJO
Power
Frame Rate
Mode
:Indications
In the figure above, the first four menu selections are shown. Use the push button (Click) to scroll Down to access more
selections.
Menu Selections
THE FOLLOWING APPLIES TO ALL MENUS:
•The Main Menu is unlocked by pressing the Push Button for 2 seconds.
•The Main Menu Shown by pressing the push button in (Click) after the menu is unlocked.
•All menu selections in this section assume starting with Main Menu Shown.
•In each sub-menu, the presently-selected item is indicated by a *.
•Use the push button to scroll Down (Click) to the desired selection (indicated by white characters on a darker gray
background).
•Choose your selection by pressing the push button (Click & Hold 1 second).
•After the choice is made, Indications will appear on the last line of the display for Mode and Frame Rate, as shown in
the figure above, using abbreviations shown in the Indications section of this manual.
•After making a selection in a menu, the JB-1 automatically leaves the Menu screen (Click the push button to return to
Main Menu, if desired). If no selection is desired, select Exit to exit the Main Menu, or select Cancel, to go back up a
menu level. When the Main Menu is exited, the menu lock will engage after 10 seconds of switch inactivity.
Mode Menu
To access the Mode menu, scroll (Click) to MODE and select (Click & Hold 1 second):
M
O
D
E
The Mode menu has the following choices:
A
U
T
O
J
A
M
O
N
C
E
J
A
M
O
N
C
E
C
A
N
C
E
L
E
X
I
T
•Auto Jam Once (AJO) is the most common mode used to sync the JB-1 to a TC IN signal. Connecting TC IN in this
mode automatically jam syncs once to the Frame Rate of the incoming signal (the Frame Rate selected in the menu is
ignored). The Indication portion of the display indicates the Frame Rate, and the LED flashes once per second at
Frame 00.

Denecke JB-1 User's Manual
©2018 Denecke, Inc.
DENECKE, INC.
25209 Avenue Tibbitts * Valencia, CA 91355 * (661)607-0206
6
•Jam Once (JO) is used when the operator sets the Jam Rate (see Frame Rate section) for TC OUT, regardless of the TC
IN rate. Jamming occurs when TC IN is connected.
Cross Jam: Jamming of different frame rates can be accomplished. The JB-1 is capable of cross jamming any selected
rate to any TC IN rate.
*When Cross Jamming, the Indication changes to "XJO". The LED and TC display are, as usual, in sync with TC OUT.
* Note: Integer (24,25,30) and non-integer rates (23.976, 29.970) are not compatible with one another for Cross
Jamming.
•After making a selection, the JB-1 automatically leaves the Menu screen (Click push button to return to menu, if
desired). If no selection is desired, select Cancel to go back up to Main Menu. Select EXIT to exit the Main Menu.
When the Main Menu is exited, the menu lock will engage after 10 seconds of switch inactivity.
TC Setup Menu
To select Timecode Setup, scroll down (Click) that menu row and select (Click & Hold 1 second):
T
I
M
E
C
O
D
E
S
E
T
U
P
These choices will activate sub-menus:
F
R
A
M
E
R
A
T
E
T
C
O
U
T
P
U
T
L
E
V
E
L
U
B
R
O
L
L
O
V
E
R
C
A
N
C
E
L
E
X
I
T
To select Frame Rate, scroll down (Click) to FRAME RATE and select (Click & Hold 1 second):
*Note: this entry is only available in Jam Once Mode (JO).
F
R
A
M
E
R
A
T
E
The Frame Rate selection choices, in Frames Per Second (FPS) are shown below:
3
0
2
9
.
9
7
0
2
5
2
4
2
3
.
9
7
6
3
0
D
F
2
9
.
9
7
0
D
F
C
A
N
C
E
L
E
X
I
T
DF indicates Drop Frame Modes. Note: In AJO mode, TC OUT is automatically set to the same rate as TC IN, so this menu entry
is not available.

Denecke JB-1 User's Manual
©2018 Denecke, Inc.
DENECKE, INC.
25209 Avenue Tibbitts * Valencia, CA 91355 * (661)607-0206
7
To change TC Output levels, scroll down (Click) to TC OUTPUT LEVEL and select (Click & Hold 1 second):
T
C
O
U
T
P
U
T
L
E
V
E
L
The choices are:
0
d
B
(
2
.
0
0
V
)
-
6
d
B
(
1
.
0
0
V
)
-
1
2
d
B
(
0
.
5
0
V
)
-
2
2
d
B
(
0
.
1
6
V
)
-
2
6
d
B
(
0
.
1
0
V
)
-
4
6
d
B
(
0
.
0
1
V
)
U
S
E
R
-
A
(
X
.
X
X
V
)
U
S
E
R
-
B
(
X
.
X
X
V
)
C
H
A
N
G
E
U
S
E
R
-
A
C
H
A
N
G
E
U
S
E
R
-
B
C
A
N
C
E
L
E
X
I
T
Some external devices require reduced timecode signal levels. This feature provides that, eliminating the need for external
pads, to make the TC Level compatible. Two User Selectable TC Output levels are also available (USER-A & USER-B). The TC
output Level in these entries can be set anywhere between 0.00V to 2.40V.
To change USER-A or USER- B, scroll down (Click) to either CHANGE USER-A or CHANGE USER-B and select (Click & Hold 1
second):
C
H
A
N
G
E
U
S
E
R
-
A
C
H
A
N
G
E
U
S
E
R
-
B
When selected, the current number to change will flash. Click the push button to change the value. Click & Hold 1 second to
select the next digit. When complete (right most digit), Click & Hold 1 second to accept the setting.
Note: The new USER Setting will not take effect automatically. You must re-enter the TC OUTPUT LEVEL menu and select the
corresponding USER setting (USER-A or USER-B).
To select UB ROLLOVER, scroll down (Click) to that menu row and select (Click & Hold 1 second):
R
O
L
L
O
V
E
R
S
E
T
U
P
The UB Rollover choices available are:
U
B
F
I
E
L
D
1
U
B
F
I
E
L
D
2
U
B
F
I
E
L
D
3
U
B
F
I
E
L
D
4
N
O
U
B
R
O
L
L
O
V
E
R
C
A
N
C
E
L
E
X
I
T
It is common Industry practice to use User Bits for the date. When using American-style dates, MM-DD-YY-00, select UB Field
3 (which is the factory default) to roll the DAY field. When using the alternate style dates, DD-MM-YY-00, select UB Field 4. In
the event that User Bits are not being used for the date, it would not be desirable to have any UB field roll over after
23:59:59:xx. In this case, select No UB Rollover.

Denecke JB-1 User's Manual
©2018 Denecke, Inc.
DENECKE, INC.
25209 Avenue Tibbitts * Valencia, CA 91355 * (661)607-0206
8
Flip Display
To rotate the display 180 degrees, scroll down (Click) to FLIP DISPLAY and select (Click & Hold 1 second):
F
L
I
P
D
I
S
P
L
A
Y
Backlight Timer
To change the timer for the Backlight, scroll down (Click) to BACKLIGHT TIMER and select (Click & Hold 1 second):
B
A
C
K
L
I
G
H
T
T
I
M
E
R
The choices are:
1
0
S
E
C
O
N
D
S
3
0
S
E
C
O
N
D
S
1
M
I
N
U
T
E
1
0
M
I
N
U
T
E
S
N
O
T
I
M
E
O
U
T
C
A
N
C
E
L
E
X
I
T
The backlight timer turns off the backlight after the selected amount of time. One can always turn the backlight on at the top
level, with no menu shown by Clicking the push button. 30 seconds is the factory default, and, of course, conserves battery
power. NO TIME OUT will disable the backlight timer, so the backlight will stay on indefinitely (this will significantly reduce
battery life).
Note: when the unit is powered externally (by USB), the backlight remains on.
Power Off Menu
To power the unit off, scroll down (Click) to POWER OFF and select (Click & Hold 1 second):
P
O
W
E
R
O
F
F
Then choose Turn Power Off, if desired:
T
U
R
N
P
O
W
E
R
O
F
F
C
A
N
C
E
L
E
X
I
T
Note: powering off the JB-1 will cause it to lose sync with Timecode, but all User Settings will be retained by the unit's built-in
memory.

Denecke JB-1 User's Manual
©2018 Denecke, Inc.
DENECKE, INC.
25209 Avenue Tibbitts * Valencia, CA 91355 * (661)607-0206
9
Reprogram Menu
If needed, scroll (Click) to REPROGRAM and select (Click & Hold 1 second):
R
E
P
R
O
G
R
A
M
Choices are Return to Factory Default and Reprogram Via USB:
F
A
C
T
O
R
Y
D
E
F
A
U
L
T
S
T
A
R
T
U
S
B
C
A
N
C
E
L
To set the JB-1 to its Factory Default settings, removing User-selected settings, select Factory Default. Factory Default Settings
are shown in a table at the end of this manual.
From time to time, Denecke may make software updates available, for added features,
bug corrections, and improvements, as needed. To determine if your JB-1 needs an update, compare the Software Version
shown in the About Menu below to that shown on the Denecke website, http://www.denecke.com/,which will also provide
update details.
To update Software:
1. The JB-1 can be updated from either a Mac or Windows computer. The Denecke Firmware Update Utility can be
downloaded from http://www.denecke.com/ .
2. On your computer, go to http://www.denecke.com/ to download the latest JB-1 Software Version.
3. On the JB-1, select START USB
4. Connect a USB cable between the JB-1's Micro USB connector and a computer.
5. On the computer, start the Denecke Firmware Update Utility, select the latest JB-1 software version, and select
UPDATE.
NOTE: Do not disconnect the USB cable from the JB-1 nor computer until the update is complete, to avoid having to
send the unit back for repair.
6. The computer will indicate when update is complete.
ABOUT MENU
To determine the version, serial number, etc., scroll (Click) to ABOUT, and select (Click & Hold 1 second):
A
B
O
U
T
Information shown is:
M
O
D
E
L
:
J
B
-
1
H
W
V
E
R
:
x
.
x
S
W
V
E
R
:
x
.
x
S
N
:
n
n
n
n
W
W
W
.
D
E
N
E
C
K
E
.
C
O
M
As discussed in the Reprogram section, the S/W Version can be compared to the latest on the Denecke website, to determine if
an update is needed.

Denecke JB-1 User's Manual
©2018 Denecke, Inc.
DENECKE, INC.
25209 Avenue Tibbitts * Valencia, CA 91355 * (661)607-0206
10
HELP MENU
H
E
L
P
For online access to this manual scan the QR Code, or for information on all Denecke products, and technical support, please go
to http://www.denecke.com/
Exit
E
X
I
T
Any menu can be exited from by selecting (Click & Hold 1 second) EXIT.
Indications
Battery Life / External Power Indication:
ONE of the following battery / power indications will be shown:
USB
When on battery power, the remaining battery life will be shown as a Battery Gauge. When powered via the USB connection, it
will read USB. Note: the internal battery will charge during this time.
Frame Rate Indication:
ONE of the following Frame Rate indications will be shown:
3
0
2
9
.
9
7
0
2
5
2
4
2
3
.
9
7
6
3
0
D
F
2
9
D
F
These are in Frames Per Second, as described in the Frame Rate Menu section earlier in the manual. 30DF=30 Drop Frame and
29DF=29.970 Drop Frame.
Note: When cross jamming, the Frame Rate shown is the User-selected TC OUT Rate.
Mode Indication:
ONE of the following Mode indications will be shown:
A
J
O
J
O
X
J
O
See the Mode Selection section earlier in this manual for full explanations of modes.
AJO = Auto Jam Once, JO = Jam Once, XJO = Cross Jammed Once.

Denecke JB-1 User's Manual
©2018 Denecke, Inc.
DENECKE, INC.
25209 Avenue Tibbitts * Valencia, CA 91355 * (661)607-0206
11
Cross Jam Mode Indications:
If the JB-1 is set to Jam Once (JO) mode, it can jam sync between any TC Input Rate and any Output Rate. When this occurs and
the rates are not the same, Cross Jamming is indicated by XJO. The Frame Rate Indication will indicate the User-selected TC
OUT Frame Rate.
Factory Default Settings
Mode
Auto Jam Once
Frame Rate
23.976
Timecode Setup:
TC Output Level
0 dB
UB Setup:
Rollover Setup
UB Field 3 (for American Date Standard MM-DD-YY-00, to rollover days)
Backlight Timer
30 seconds
Specifications
TC Input:
-15dB (0.5V to 5V) @ 4.7K; BNC Connector
TC Output:
Selectable from 0 dB (2.0V), -6 dB (1.0V), -12 dB (0.50V), -22 dB (0.16V), -26dB (0.10V), -46 dB
(0.01V), and two user programable levels between 0.00V to 2.40V; BNC Connector
TCXO Crystal:
+/- 0.1PPM @ -40º to +85º C (less than a half frame drift per day)
Battery Power:
Internal LiPo cell
Battery Life:
Approx. 150 Hours (12 Hours with Back Light Continuously ON)
External Power:
5V, via Micro USB Connector
Size:
1.84” (W) x 1.36” (H) x 0.63” (D) (46.7mm x 34.5mm x 15.9mm)
Weight:
2 oz.
Contents
Included with the JB-1 is a USB cable, and Quick Start Guide.
Custom cables are available. Contact Denecke Dealers for details.

DENECKE, INC.
25209 Avenue Tibbitts * Valencia, CA 91355 * (661)607-0206
www.denecke.com * email: info@denecke.com
Table of contents
Popular Inverter manuals by other brands

Trina Solar
Trina Solar TSM-DA01A.05 installation manual

EAS Electric
EAS Electric EINSOLAR5Y Owners and installation manual

RND power
RND power RND 320-00141 user manual

Hoymiles
Hoymiles HMS-1600-4T Quick installation guide

SMA
SMA SUNNY BOY 4000-US installation guide

Drivecon
Drivecon XT Series Service manual

ESAB
ESAB EMP235ic instruction manual

Eaton
Eaton PV240 user manual

Fimer
Fimer PVS-166-175-TL-US Quick installation guide

Generac Power Systems
Generac Power Systems QuietSource 005031-2 owner's manual

Grape Solar
Grape Solar GS-400-KIT installation guide

Chicago Electric
Chicago Electric 66818 Safety and instruction manual


