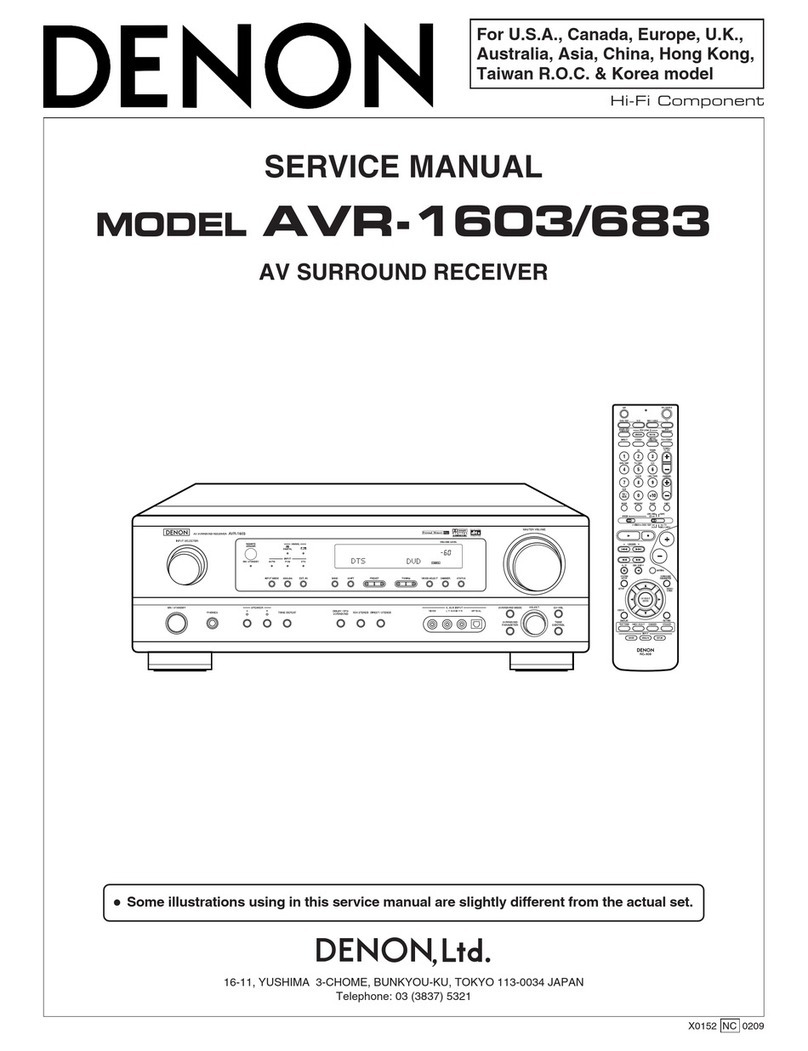
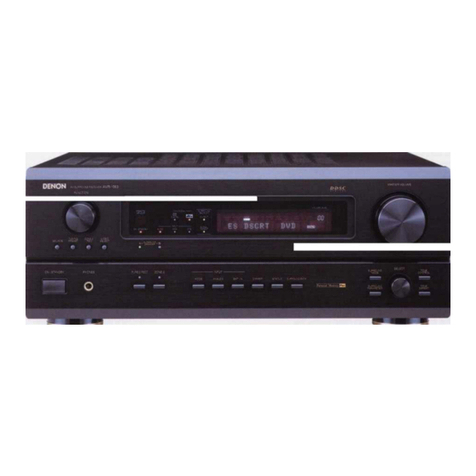
Denon ADV-1000 User manual

Hi-Fi Component
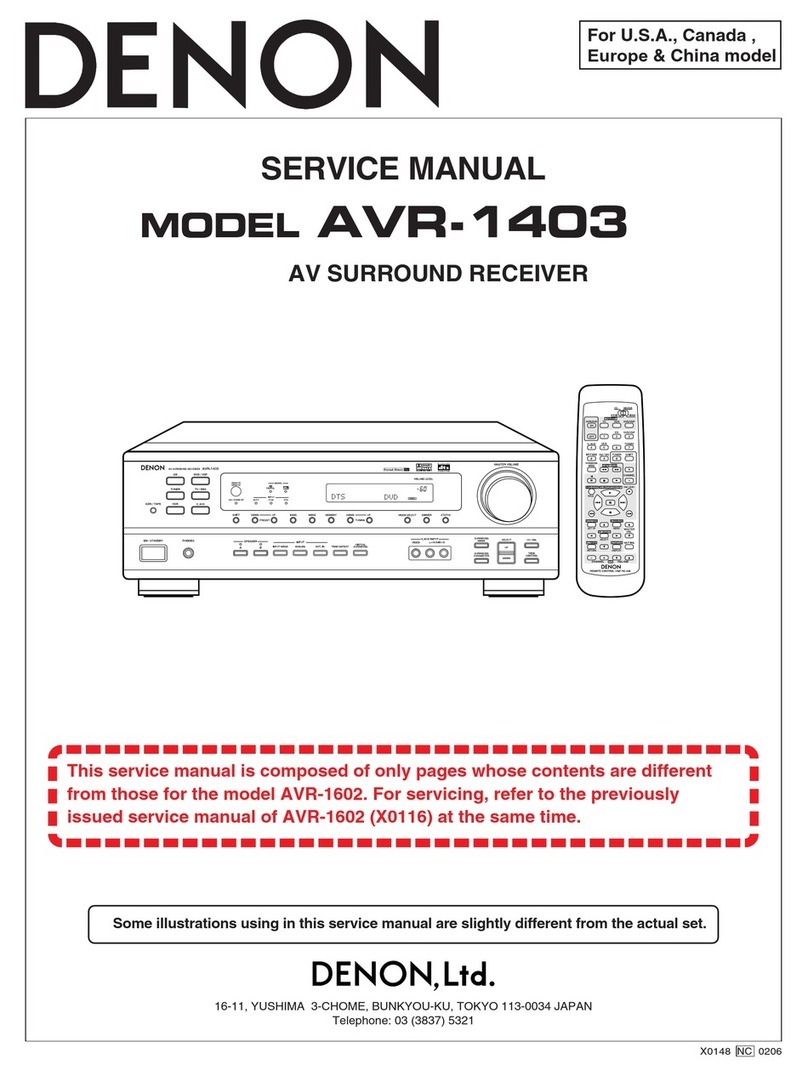
SERVICE MANUAL
MODEL
ADV-1000
DVD SURROUND RECEIVER
Some illustrations using in this service manual are slightly different from the actual set.
16-11, YUSHIMA 3-CHOME, BUNKYOU-KU, TOKYO 113-0034 JAPAN
Telephone: 03 (3837) 5321
For Europe model
X0146 NC 0207
w
w
w
.
x
i
a
o
y
u
1
6
3
.
c
o
m
Q
Q
3
7
6
3
1
5
1
5
0
9
9
2
8
9
4
2
9
8
T
E
L
1
3
9
4
2
2
9
6
5
1
3
9
9
2
8
9
4
2
9
8
0
5
1
5
1
3
6
7
3
Q
Q
TEL 13942296513 QQ 376315150 892498299
http://www.xiaoyu163.com
ADV-1000
2
SPECIFICATIONS
Audio section
• Power amplifier
Output power: Front: 55 W + 55 W (6 Ω/ohms, 1 kHz with 10% T.H.D.)
Center: 55 W (6 Ω/ohms, 1 kHz with 10% T.H.D.)
Surround: 55 W + 55 W (6 Ω/ohms, 1 kHz with 10% T.H.D.)
Subwoofer: 55 W (6 Ω/ohms, 60 Hz with 10% T.H.D.)
Output terminals:
Front, Center, Subwoofer, Surround:
6 ~16 Ω/ohms
• Analog
Input sensitivity / input impedance: 200 mV / 47 kΩ/kohms
Frequency response: 10 Hz ~ 60 kHz: +1.5, −3 dB (DIRECT mode)
S / N : 94 dB (DIRECT mode)
Rated output: 1.2 V (Subwoofer preout, 20 Hz)
• Digital
Digital input / output: Format Digital audio interface
Video section
• Standard video jacks
Input / output level and inpedance: 1 Vp-p, 75 Ω/ohms
• S-video jacks
Input / output level and inpedance: Y (brightness) signal 1 Vp-p, 75 Ω/ohms
C (color) signal 0.3 Vp-p, 75 Ω/ohms
• AV1 connector
Video output: 1Vp-p, 75Ω/ohms
S-video output: Y (brightness) signal 1 Vp-p, 75 Ω/ohms
C (color) signal 0.3 Vp-p, 75 Ω/ohms
RGB output (DVD only): R/G/B signal 0.7 Vp-p, 75 Ω/ohms
Audio output: L/R (Fixed output)
Tuner section
[FM]
(note: µV at 75 Ω/ohms, 0 dBf=1×10-15 W)
[AM]
Receiving Range: 87.50 MHz~108.00 MHz 522 kHz~1611 kHz
Usable Sensitivity: 1.5 µV (14.8 dBf) 20 µV
DVD section
Signal Format: NTSC/PAL
Applicable discs: (1) DVD-Video discs
1-layer 12 cm single-sided discs, 2-layer 12 cm single-sided discs,
2-layer 12cm double-sided discs (1 layer per side)
1-layer 8 cm single-sided discs, 2-layer 8 cm single-sided discs,
2-layer 8 cm double-sided discs (1 layer per side)
(2) Compact discs (CD-DA, Video CD)
12 cm discs, 8 cm discs
Audio output: Fixed output level: 2 Vrms, (CDR/TYPE, VCR OUT)
Clock, Timer section
Clock system: Power source synchronous system
Timer functions: Everyday timer (DVD or Tuner): 1 setting
Sleep timer: maximum 120 min.
General
Power Supply: AC 230 V, 50 Hz
Power Consumption: 70 W (Stand-by 1 W)
Maximuim external
Dimensions: 434(W) ×80 (H) ×368 (D) mm
Mass: 6.0 kg
Remote Control Unit RC-901
Type: Infrared pulse
Power Supply: DC 3V, 2 R6P batteries
SAFETY PRECAUTIONS
The following check should be performed for the continued protection of the customer and service technician.
LEAKAGE CURRENT CHECK
Before returning the unit to the customer, make sure you make either (1) a leakage current check or (2) a line to
chassis resistance check. If the leakage current exceeds 0.5 milliamps, or if the resistance from chassis to either
side of the power cord is less than 460 kohms, the unit is defective.
This product incorporates copyright protection technology that is protected by method claims of certain U.S. patents and other intellectual property rights
owned by Macrovision Corporation and other rights owners. Use of this copyright protection technology must be authorized by Macrovision Corporation,
and is intended for home and other limited viewing uses only unless otherwise authorized by Macrovision Corporation. Reverse engineering or
disassembly is prohibited.
∗Design and specifications are subject to change without notice in the course of porduct improvement.
w
w
w
.
x
i
a
o
y
u
1
6
3
.
c
o
m
Q
Q
3
7
6
3
1
5
1
5
0
9
9
2
8
9
4
2
9
8
T
E
L
1
3
9
4
2
2
9
6
5
1
3
9
9
2
8
9
4
2
9
8
0
5
1
5
1
3
6
7
3
Q
Q
TEL 13942296513 QQ 376315150 892498299
http://www.xiaoyu163.com
3
ADV-1000
DIAGNOSTICS OF OPTICAL PICKUP AND REPLACING TRAVERSE UNIT
Make failure diagnostics of the Optical Pickup as follows.
If the laser drive current becomes more than 1.5 times of the initial value, the Optical Pickup should be replaced.
The laser drive current is registered on the seal attached to the rear of the Mecha. Unit.
In case of replacing the Pickup, change the whole part of the Traverse Unit.
No mechanical adjustment is necessary after the replacement.
Disc no read,
unsteady playback, etc.
Laser drive current check
HF wave form check
(Refer to page 76, 77)
Present value exceeds
the initial value by 1.5 times
Traverse Unit replacing
(See page 10 for details)
Laser current registering
after replacement
Step: Disc playback
Write the measured value
on the seal attached to the Mecha. Unit
* As to the measuring method, refer to page 4
Label Indication of DVD Mechanism
Laser current consumption value
ex) DVD ***mA, CD ***mA
Example:
DVD 30mA
CD 30mA
w
w
w
.
x
i
a
o
y
u
1
6
3
.
c
o
m
Q
Q
3
7
6
3
1
5
1
5
0
9
9
2
8
9
4
2
9
8
T
E
L
1
3
9
4
2
2
9
6
5
1
3
9
9
2
8
9
4
2
9
8
0
5
1
5
1
3
6
7
3
Q
Q
TEL 13942296513 QQ 376315150 892498299
http://www.xiaoyu163.com
4
ADV-1000
C
B
E
C
B
E
C
B
E
C
B
E
1
114
15 28
114
15 28
LD4
(SIGNAL)
LD2
(SIGNAL)
LD1
(GND)
LD3
(GND)
Note for Handling the Laser Pick-up
The protection for the damage of laser diode.
If you want to change the optical device unit from any other units, you must keep the following.
(1) It should be done at the desk already took measures the static electricity in care of removing the OPU's
(Optical device unit) connector cable.
(2) Workers should be put on the "Earth Band".
(3) It shold be done to add the solder to the short land to prevent the broken Laser diode before removing the
24P FFC cable.
(4) Don't touch OPU's connector parts carelessly.
Replacement of the Laser Pick-up (Traverse Unit)
Check the Iop (Laser drive current).
If the present Iop (current) value exceeds +50% of the initial value, replace the Traverse unit (Laser Pick-up) with a new
one.
When measureing Laser drive current (Iop), playback the discs (CD, DVD) described below, measure Iop for CD Laser and
DVD Laser by the test point (LD1 ~ LD4) on the DVD Main P.W.B.
Test Disc : DVD/DVDT-S01 or commercially available discs.
: CD/TCD-784 (manufactured by ALMEDIO INC) or commercially available discs.
Iop Measurement Method
GU-3430 DVD Main Unit foil side
LD2
LD1
1. DVD Laser current measurement
(1) Connect the oscilloscope to LD1 of test point
for GND side and LD2 of test point for signal
side.
(2) Playback the title 1 / chapter 1 of the DVD
Test Disc.
(3) Measure the voltage between LD1 and LD2,
calculate Iop by the formula as shown below.
Iop= Measurement Voltage Value
39 (Resistance Value)
2. CD Laser current measurement
(1) Connect the oscilloscope to LD3 of test point
for GND side and LD4 of test point for signal
side.
(2) Playback the track 1 of the CD Test Disc.
(3) Measure the voltage between LD3 and LD4,
calculate Iop by the formula as shown below.
Iop= Measurement Voltage Value
39 (Resistance Value)
w
w
w
.
x
i
a
o
y
u
1
6
3
.
c
o
m
Q
Q
3
7
6
3
1
5
1
5
0
9
9
2
8
9
4
2
9
8
T
E
L
1
3
9
4
2
2
9
6
5
1
3
9
9
2
8
9
4
2
9
8
0
5
1
5
1
3
6
7
3
Q
Q
TEL 13942296513 QQ 376315150 892498299
http://www.xiaoyu163.com
5
ADV-1000
Optical Pick-up Diagnostics and Replacement
When repairing, carry out failure diagnostics by following the procedure described below.
If the present value of the laser drive current is 50% up to initial value, it is the point of the pickup replacement.
In case of the pickup replacement, replace the Traverse Unit with no adjustment.
The initial value is indicated on the label on back side of Mecha.
NO DISC indicated, Playback not smooth, etc.
Laser drive current check
HF signal check
Traverse Unit replacement (refer to page 10)
Present value: 50% up to initial value
Laser drive current check after replacement.
If the present value is less than 80mA, write on
the new label by hand, put on the new label over
the old label.
If the present value exceeds 80mA,
replace the Traverse Unit with a new one.
Cause: Damaged electrostatically when replaced.
w
w
w
.
x
i
a
o
y
u
1
6
3
.
c
o
m
Q
Q
3
7
6
3
1
5
1
5
0
9
9
2
8
9
4
2
9
8
T
E
L
1
3
9
4
2
2
9
6
5
1
3
9
9
2
8
9
4
2
9
8
0
5
1
5
1
3
6
7
3
Q
Q
TEL 13942296513 QQ 376315150 892498299
http://www.xiaoyu163.com
6
ADV-1000
DISASSEMBLY
( Follow the procedure below in reverse order when reassembling )
2. Front Panel
(1) Remove 4 bottom screws 4from the Front Panel.
(2) Disconnect FFC on the DSP Audio P.W.B. and 2
pcs of 3P connectors (white and blue) on the Power
Supply P.W.B.
(3) With releasing the hooks on both sides, detach the
Front Panel to the arrow direction together with the
Inner Panel.
1. Top Cover
(1) Remove 4 screws 1on both sides.
(2) Remove 6 screws 2on the rear panel.
(3) Remove the top screw 3.
(4) Detach the Top Cover to the arrow direction.
3
1
2
2
1
4
DSP Audio P.W.B.
Power Supply P.W.B.
3P connector (white)
3P connector (blue)
FFC
Inner Panel
Hook
w
w
w
.
x
i
a
o
y
u
1
6
3
.
c
o
m
Q
Q
3
7
6
3
1
5
1
5
0
9
9
2
8
9
4
2
9
8
T
E
L
1
3
9
4
2
2
9
6
5
1
3
9
9
2
8
9
4
2
9
8
0
5
1
5
1
3
6
7
3
Q
Q
TEL 13942296513 QQ 376315150 892498299
http://www.xiaoyu163.com
7
ADV-1000
3. DVD Mecha. Unit
(1) Remove 4 top screws 5on the DVD Mecha.
(2) Disconnect 2 FFCs and 2 pcs of 8P connectors
from the DVD Mecha.
5
8P connector
8P connector
FFC
4. Power Supply P.W.B.
(1) Disconnect FFC, 2P connector, 3P connector, and
7P connector from the Power Supply P.W.B.
(2) Disconnect 6P connector from the Amp P.W.B.
(3) Remove 4 screws 7and the screw 8fixing the
Power Supply P.W.B.
(4) Release 3 P.W.B. supports.
3P connector
7P connector
FFC
6P connector
Amp P.W.B.
7
2P connector
P.W.B. support
Power Supply P.W.B.
7
8
w
w
w
.
x
i
a
o
y
u
1
6
3
.
c
o
m
Q
Q
3
7
6
3
1
5
1
5
0
9
9
2
8
9
4
2
9
8
T
E
L
1
3
9
4
2
2
9
6
5
1
3
9
9
2
8
9
4
2
9
8
0
5
1
5
1
3
6
7
3
Q
Q
TEL 13942296513 QQ 376315150 892498299
http://www.xiaoyu163.com
8
ADV-1000
5. Back Panel
(1) Take off the cord bush.
(2) Remove 5 screws 9and 23 screws .
6. Video P.W.B.
Disconnect 3 FFCs and 3P connector.
Cord bush
9
3P connector
FFC
FFC
Video P.W.B.
9
9
9
7. DSP Audio P.W.B.
(1) Remove the screw and 3 screws .
(2) Disconnect 3 FFCs, 3P connector, and 6P connector.
3P connector
6P connector
FFC
DSP Audio P.W.B.
w
w
w
.
x
i
a
o
y
u
1
6
3
.
c
o
m
Q
Q
3
7
6
3
1
5
1
5
0
9
9
2
8
9
4
2
9
8
T
E
L
1
3
9
4
2
2
9
6
5
1
3
9
9
2
8
9
4
2
9
8
0
5
1
5
1
3
6
7
3
Q
Q
TEL 13942296513 QQ 376315150 892498299
http://www.xiaoyu163.com
9
ADV-1000
8. Amp P.W.B.
(1) Remove the screw ! and 4 screws " .
(2) Disconnect FFC and 6P connector.
"
6P connector
FFC
Amp P.W.B.
!
w
w
w
.
x
i
a
o
y
u
1
6
3
.
c
o
m
Q
Q
3
7
6
3
1
5
1
5
0
9
9
2
8
9
4
2
9
8
T
E
L
1
3
9
4
2
2
9
6
5
1
3
9
9
2
8
9
4
2
9
8
0
5
1
5
1
3
6
7
3
Q
Q
TEL 13942296513 QQ 376315150 892498299
http://www.xiaoyu163.com
10
ADV-1000
1
TRAVERSE UNIT DISASSEMBLY
(Follow the procedure below in reverse order when reassembling)
Caution: The optical pickup can be damaged easily by static electricity charged on human body. Take necessary anti-static
measures when repairing around the optical pickup.
1. Guide Clamp Bracket disassembly
(1) Remove 2 screws 1.
(2) Remove Guide Clamp Bracket to arrow direction.
2. Tray disassembly
(1) Remove to arrow direction.
(2) Solder the short-circuit (see in the frame).
Guide Clamp Bracket
Tr ay
Solder to Short-Circuit (DVD)
Solder to Short-Circuit (CD)
w
w
w
.
x
i
a
o
y
u
1
6
3
.
c
o
m
Q
Q
3
7
6
3
1
5
1
5
0
9
9
2
8
9
4
2
9
8
T
E
L
1
3
9
4
2
2
9
6
5
1
3
9
9
2
8
9
4
2
9
8
0
5
1
5
1
3
6
7
3
Q
Q
TEL 13942296513 QQ 376315150 892498299
http://www.xiaoyu163.com
11
ADV-1000
CAUTION IN SERVICING
Initialization
Initialization should be performed when the µcom, peripheral parts of µcom, and DVD Main P.W.B. are replaced.
How to initialize
At the player is in the state of AC OFF, turn the AC ON with pressing the PLAY ( ) and STOP ( ) buttons simultaneously.
Check that the Standby LED lights orange and the initialization has been activated. (until "INITIALIZE" disappears from
the FL display).
Note: All user settings will be lost and its factory setting will be recovered when this initialization is made. So make sure to
memorize your setting for restoring after the initialization.
Note for disassembly Traverse Unit
(1) When assembling, reverse the order of the above.
(2) When inserting Tray, confirm boss on Slide Cam set to
ditch of the Tray (Compare with right drawing).
Slide gear
Tr ay
Boss
24P FFC (CX241)
3P PH WIRE (CX031)
Damper
15P FFC (CX151)
2
3. Traverse Unit disassembly
(1) Remove 24P FFC (CX241), 15P FFC (CX151), 5P
PH WIRE (CX051) and 3P PH WIRE (CX031)
connecting with from the DVD Main P.W.B.
(2) Remove 4 screws of 2and 3fixing Damper.
(3) Remove Traverse Unit to arrow direction.
DVD Main P.W.B.
3
w
w
w
.
x
i
a
o
y
u
1
6
3
.
c
o
m
Q
Q
3
7
6
3
1
5
1
5
0
9
9
2
8
9
4
2
9
8
T
E
L
1
3
9
4
2
2
9
6
5
1
3
9
9
2
8
9
4
2
9
8
0
5
1
5
1
3
6
7
3
Q
Q
TEL 13942296513 QQ 376315150 892498299
http://www.xiaoyu163.com
12
ADV-1000
1. No power
(LED doesn't light.)
Check connector insertion.
P. SUPPLY (1U-3434-2):
[CX171/CX033]
DSP/AUDIO (1U-3435-3):
[CY171/CY191]
Re-insert the connector. When replacing µcom, µcom
peripheral parts, or Main P.W.B. in
servicing, perform initializing of the
DVD player. (AC power on while
pressing "STOP" and "PLAY" buttons
of the unit.)
Check voltage of IC907 input [+10V] on
P. SUPPLY P.W.B.
Check soldering of T901 secondary
circuit.
Check voltage of IC907 output [+5V] on
P. SUPPLY P.W.B.
Check short-circuit of power line further
CX171 connection.
Check voltage of IC303 (6)pin RESET
signal [+5V] on DSP/AUDIO P.W.B.
TROUBLESHOOTING
No
No Check soldering of IC302, IC303 on
DSP/AUDIO P.W.B. No Check after replacing IC303 on DSP/
AUDIO P.W.B. (1U-3435-3), then change
IC302 if still NG.
2. No power
(LED lights.)
Check connector insertion.
P. SUPPLY (1U-3434-2): [CX033]
DSP/AUDIO (1U-3435-3): [CY191]
Re-insert the connector.
Check voltage of FFC wire.
[CY191] 19P FFC for DSP/AUDIO P.W.B.:
3
+5V/
1 2
GND
Refer to "6. Switching power no output".
Check voltage of power wire.
[CX033] 3P PH for DISPLAY P.W.B.: 1+5V/ 2
3
GND
Refer to "6. Switching power no output".
Perform check from the step where is marked in the item 3.
No
No
No
No
No
w
w
w
.
x
i
a
o
y
u
1
6
3
.
c
o
m
Q
Q
3
7
6
3
1
5
1
5
0
9
9
2
8
9
4
2
9
8
T
E
L
1
3
9
4
2
2
9
6
5
1
3
9
9
2
8
9
4
2
9
8
0
5
1
5
1
3
6
7
3
Q
Q
TEL 13942296513 QQ 376315150 892498299
http://www.xiaoyu163.com
13
ADV-1000
3. DVD no operation
(MECHA ERR display)
Check connector insertion.
P. SUPPLY (1U-3434-2):
[CX171/CW035]
DVD MAIN (GU-3430):
[CX081/CX082]
Mecha. Unit: [CX241/CX151/CX051]
Re-insert the connector.
Check voltage of power wire.
[CX071] 7P PH for P. SUPPLY P.W.B.:
+5V/ +12V/ GND]
Refer to "6. Switching power no output".
Perform operation check after
changing DVD MAIN P.W.B.
(GU-3430) with a perfect one.
There is something wrong in DVD MAIN
P.W.B. (GU-3430).
Check IC101(49)XIN, (105)CLK,
(116)PCLK2X 27MHz output on DVD
MAIN P.W.B.
No
No
No
After checking soldering of IC106 and
IC101 on DVD MAIN P.W.B. (GU-3430),
replace IC101 if NG. Then change IC106
if still NG.
There is something wrong in DVD MAIN
P.W.B. (GU-3430).
Check IC101(39)MCLK 94.5kHz
output on DVD MAIN P.W.B.
Change IC101 on DVD MAIN P.W.B.
(GU-3430).
There is something wrong in DVD MAIN
P.W.B. (GU-3430).
Check IC101(160)AUX0, (161)AUX1
on DVD MAIN P.W.B. whether SCK and
SDA signal of IIC BUS outputted when
power on.
After checking soldering of IC108,
IC701, and IC101 on DVD MAIN P.W.B.
(GU-3430), replace IC101 if NG. Change
IC108 then IC701 if still NG.
Check soldering of IC101 (208P IC) on
DVD MAIN P.W.B. (GU-3430).
Perform re-soldering.
Check IC501(50)IDERST +5V output on
DVD MAIN P.W.B. (GU-3430).
Check soldering of R522, RA127,
and IC101(145) on DVD MAIN
P.W.B. (GU-3430).
Perform re-soldering.
Check laser drive current and HF
waveform.
Criterion: Iop exceeds 1.5 times of the
initial value.
Replace the traverse unit.
Write laser current after the replacement.
No
No
No
No
w
w
w
.
x
i
a
o
y
u
1
6
3
.
c
o
m
Q
Q
3
7
6
3
1
5
1
5
0
9
9
2
8
9
4
2
9
8
T
E
L
1
3
9
4
2
2
9
6
5
1
3
9
9
2
8
9
4
2
9
8
0
5
1
5
1
3
6
7
3
Q
Q
TEL 13942296513 QQ 376315150 892498299
http://www.xiaoyu163.com
14
ADV-1000
4. No video output (Interlace)
Check YUV signal.
Check if signals are output from
IC101(106, 107, 108, 109, 110, 113,
114, 115 pins) on P.W.B. (GU-3430).
Check soldering of RA125, RA126,
IC701, and IC101 on DVD MAIN P.W.B.
(GU-3430).
Check by replacing IC101 on DVD MAIN
P.W.B. (GU-3430).
Check analog video signal 1.
Check if signals are output from
IC701(24, 25, 29, 33, 35 pins) on
P.W.B. (GU-3430).
Check soldering of IC701 on DVD MAIN
P.W.B. (GU-3430).
No
No
Check by replacing IC701 on DVD
MAIN P.W.B. (GU-3430).
Check analog video signal 2.
Check if signals are inputted to
IC206(3)C, (5)Y, (8)PY, (12)Pb, and
(14)Pr on P.W.B. (1U-3443-1).
Check analog video signal
3
.
Check if signals are output from
IC206(17)Pr, (19)Pb, (21), (22)PY,
(24), (25)Y, (29), (30)Composite, and
(32)C on P.W.B. (1U-3443-1).
Check analog video signal 4.
Check if signals are output from 1-pin
of IC201 (Composite), IC202(C), and
IC203(Y) on P.W.B. (1U-3443-1).
No Check soldering of components (Tr, C,
R) in the Y-sig. Amp circuit, C-sig. Amp
circuit, and Component Amp circuit.
No Check soldering of IC206 on P.W.B.
(1U-3443-1).
Check soldering of IC201, IC202, or
IC203 causing NG on P.W.B. (1U-3443-1)
No
No
No
No Check by replacing NG IC (201 ~ 203)
on P.W.B. (1U-3443-1).
Check by replacing IC206 on P.W.B.
(1U-3443-1).
No
w
w
w
.
x
i
a
o
y
u
1
6
3
.
c
o
m
Q
Q
3
7
6
3
1
5
1
5
0
9
9
2
8
9
4
2
9
8
T
E
L
1
3
9
4
2
2
9
6
5
1
3
9
9
2
8
9
4
2
9
8
0
5
1
5
1
3
6
7
3
Q
Q
TEL 13942296513 QQ 376315150 892498299
http://www.xiaoyu163.com
15
ADV-1000
5. No analog signal output (Audio)
Check audio digital signal.
Check if signals are output from
IC101(32)TWS, (33)TSD0, (39)MCLK,
and (40)TBCK.
Check soldering of chip emi-fil put in
series to IC101 on DVD MAIN P.W.B.
(GU-3430).
Check analog audio signal
1
.
Check if signals are output from IC401
(12)R-sig., (13)R-sig., (16)L-sig., and
(17)L-sig.
Check soldering of IC401 on DSP/
AUDIO P.W.B. (1U-3435-3).
Check analog audio signal
2
.
Check if signals are output from
IC404 (7)R-sig. and (1)L-sig.
Check if 12V power is supplied to
IC402 on DSP/AUDIO P.W.B. (1U-3435-3).
Check soldering of IC402 on DSP/
AUDIO P.W.B. (1U-3435-3).
6. Switching power no output
Check fuse
Check if F901 (6.3A/125V) is blown out.
Check soldering of IC201 and primary
rectifier diode on P. SUPPLY P.W.B.
(1U-3434-2).
Check by replacing IC901 on P. SUPPLY
P.W.B. (1U-3434-2).
Check actuating voltage.
[IC201]: 4+17~18VDC/5GND
Check if the secondary regulator circuit
in P. SUPPLY P.W.B. (1U-3434-2) is
shorted or solder-touched.
Check if the power lines of CX071,
CW035, CW061, CX171, and CX033 on
P. SUPPLY P.W.B. (1U-3434-2) are
short-circuited further their connections.
No
No
No
No
No
No
No
No
No
No
No Check by replacing IC101 on DVD MAIN
P.W.B. (GU-3430).
Check by replacing IC401 on DSP/
AUDIO P.W.B. (1U-3435-3).
Check by replacing IC402 on DSP/
AUDIO P.W.B. (1U-3435-3).
Refer to "6. Switching power no output".
Check by replacing shorted or solder-
touched element in the secondary
regulator circuit in P. SUPPLY P.W.B.
(1U-3434-2).
w
w
w
.
x
i
a
o
y
u
1
6
3
.
c
o
m
Q
Q
3
7
6
3
1
5
1
5
0
9
9
2
8
9
4
2
9
8
T
E
L
1
3
9
4
2
2
9
6
5
1
3
9
9
2
8
9
4
2
9
8
0
5
1
5
1
3
6
7
3
Q
Q
TEL 13942296513 QQ 376315150 892498299
http://www.xiaoyu163.com

1U-3435-1
DISPLAY UNIT
FL TUBE
15-ST-36GN
FL DRIVER
M66005FP
KEY
REMOCON
RPM6938-V4
RDS
TUNER PACK
OPT OUT
OPT IN1
TV/DBS
OPT IN2
V.AUX
VCR IN
V.AUX IN
TV/DBS IN
L/R
VVCR OUT
DIGITAL IN/OUT
AUDIO IN/OUT
PRE OUT
ROTARY ENCODER
LC72720NM
SUB WOOFER OUT
DVD ENGINE UDVD-10
DVD MECHA FRONT-END CIRCUIT
ES4408
DVD DECODER DVD DSP VIDEO
D/A
AD7172
CPU
ROM RAM
DOWNMIX OUT
BITSTREAM OUT
CDR/TAPE IN
CDR/TAPE OUT
MUTE
1U-3435-3
AUDIO/DSP UNIT
ROM
2Mbit
DIR AUDIO DSP
LC89055W CS493292
CPU
M30624FGFP
MUTE
MUTE
MUTE
MUTE
MUTE
MUTE
FL
FR
C
SL
SR
LFE
[+6dB]
BA15218 BA15218
6ch D/A CONVERTER
CODEC
AK4527
A/D CONVERTER
BA15218
D/A CONVERTER
AD1854KSRL
MUTE
EEPROM
16k
S29590A
H/P MUTE 1U-3435-2
H/P UNIT
H/P
VR MUTE
PRE AMP
MUTE
MUTE
MUTE
LPF
ALC MUTE
MUTE
MUTE
SW MUTE
MUTE
C
Y
C
A
R
Y
C
G
B
Y
C
G
B
BH7862
VIDEO DRIVER
with Filter
BA7625
BA7626
1U-3434-1 RELAY FR
AMP UNIT RELAY C
RELAY SW
RELAY SR
CLASS-D POWER AMP
1U-3434-3
SCART UNIT
1U-3443-1
VIDEO UNIT
BA7660
BU4053
BA7660
AV1 VIDEO OUTPUT
SCART TERMINAL
MUTE
MUTE
MUTE
MUTE
MUTE
MUTE
Y
VCR IN
C
Y
TV/DBS IN
C
Y
V.AUX IN
C
Y
MONITOR OUT
C
Y
VCR OUT
C
VCR IN
TV/DBS IN
V.AUX IN
COMPOSITE VIDEO
S-VIDEO
C
Y
MONITOR OUT
VCR OUT
V
BA7625
V
H/P AMP
VR OUTPUT GAIN
SWITCHING0~+18dB
DSP/EXT/DIRECTBASS/TREBLE SDB 2dBstep
[0dB]
PASS
DATA
CLK
SUB SUM
BA15218
SP RELAY
SR
SL
SW
TC2000
PWM
Modulator
TP2050
FET
Driver
TC2000
PWM
Modulator
TP2050
FET
Driver
TC2000
PWM
Modulator
TP2050
FET
Driver
FL
SPEAKER OUT
FR
C
Max output
4.2Vrms
FUNCTION/VR/TONE/SDB
BD3811K1
[0dB]
INPUT GAIN AMP
0/+6dB
SPDIFSDATRA
LRCK
BCK
MCK
A
R
MUTE
MUTE
YUV DATA
BLOCK DIAGRAM
8
76
5
4
3
2
1
A
B
C
D
E
AVD-1000
16
w
w
w
.
x
i
a
o
y
u
1
6
3
.
c
o
m
Q
Q
3
7
6
3
1
5
1
5
0
9
9
2
8
9
4
2
9
8
T
E
L
1
3
9
4
2
2
9
6
5
1
3
9
9
2
8
9
4
2
9
8
0
5
1
5
1
3
6
7
3
Q
Q
TEL 13942296513 QQ 376315150 892498299
http://www.xiaoyu163.com
17
ADV-1000
4
32
15678
D
C
B
A
E
LEVEL DIAGRAMS
D/A
VR PRE AMP POWER AMP
+
+
SP OUT
+
D/AOUT
LPF
D/A OUT
0dBFS
-10dBFS
-20dBFS 6dB Vol:0: -18dB
(-15dB) 15.63dB
22.17dB
SP OUT
40W/6ohm
(15.5Vrms)
CENTER
REAR
Only when Dolby Prologic
ANALOG
IN
200mV
ANALOG
IN
200mVrms
+
BUFF.
AMP
D/AOUT
LPF
DIRECT
DSP
REV. AMP
A/D DSP D/A
VR PRE AMP POWER AMP
config1: OFF
config2: ON
FROM S.W
+
+
+
H/P AMP
+
SP OUT
H/P JACK
FRONT
-12dB
A/D IN D/A OUT
0dBFS
0dBFS
-10dBFS
-10dBFS
-20dBFS
-20dBFS 6dB Only when Dolby Prologic
H/P
30dB
15.63dB
22.17dB
SP OUT
40W/6ohm
(15.5Vrms)
w
w
w
.
x
i
a
o
y
u
1
6
3
.
c
o
m
Q
Q
3
7
6
3
1
5
1
5
0
9
9
2
8
9
4
2
9
8
T
E
L
1
3
9
4
2
2
9
6
5
1
3
9
9
2
8
9
4
2
9
8
0
5
1
5
1
3
6
7
3
Q
Q
TEL 13942296513 QQ 376315150 892498299
http://www.xiaoyu163.com
18
ADV-1000
4
32
15678
D
C
B
A
E
VR
+
+ +
SP OUT
SW
PRE OUT
+
D/AOUT
FROM
DSP
LPF LINE
AMP LINE
AMP
0dBFS
-10dBFS
-20dBFS
-30dBFS
-35dBFS 6dB
Config-1
Config-2
2.85dB
(8.85)
Vol: 0
-18dB
3.31dB
(12.16)
7.5dB To FRONT CH 17.84dB
(30)
22.3dB
(37.2)
-15.1dB
(14.9)
22.17dB
SP OUT
SW
PRE OUT
40W/6ohm
(15.5Vrms)
VOLMAX: 0.55Vrms
VOL"00": 0.07Vrms
SUB
WOOFER
D/A
PRE
AMP
POWER
AMP
MUTE
w
w
w
.
x
i
a
o
y
u
1
6
3
.
c
o
m
Q
Q
3
7
6
3
1
5
1
5
0
9
9
2
8
9
4
2
9
8
T
E
L
1
3
9
4
2
2
9
6
5
1
3
9
9
2
8
9
4
2
9
8
0
5
1
5
1
3
6
7
3
Q
Q
TEL 13942296513 QQ 376315150 892498299
http://www.xiaoyu163.com
20
ADV-1000
1 P94 E2P CS Chip select signal to EEPROM
2 P93 62446 LATCH Serial data latch to E. VR IC
3 P92 62446 DATA, E2P DI, FUNC DA Serial data to EEPROM/E. VR IC/Input Switch IC
4 P91 E2P DO Serial data from EEPROM
5 P90 62446 CLK, E2P SK, FUNC CLK Serial clock to EEPROM/E. VR IC/Input Switching IC
6 BYTE (VSS) GND
7 CNVSS (PullDown), FLASH CNVss Flash write mode select input
8 P87 BUS ON/OFF Serial data/clock separate command output to E. VR IC
9 P86 FUNC CE(STB) Data latch to Input Switch IC
10 RESET RESET Reset input
11 XOUT XTAL(12.5MHz) Oscillator output (12.5 MHz)
12 VSS (VSS) GND
13 XIN XTAL(12.5MHz) Oscillator input (12.5 MHz)
14 VCC (VCC) Power supply
15 P85 (PullUp) NMI, not used
16 P84 PROTECT Speaker and Drive IC abnormal detect
17 P83 /CS Comm. chip select input with DVD
M30624FG Terminal Function
SEMICONDUCTORS
M30624FG (MA: IC302)
Port Name Function
Pin
No. Symbol
P1
2
/D
10
76
P1
2
/D
9
77
P1
0
/D
8
78
P0
7
/D
7
79
P0
6
/D
6
80
P0
5
/D
5
81
P0
4
/D
4
82
P0
3
/D
3
83
P0
2
/D
2
84
P0
1
/D
1
85
P0
0
/D
0
86
P10
7
/AN
7
/KI
3
87
P10
6
/AN
6
/KI
2
88
P10
5
/AN
5
/KI
1
89
P10
4
/AN
4
/KI
0
90
P10
3
/AN
3
91
P10
2
/AN
2
92
P10
1
/AN
1
93
AV
SS
94
P10
0
/AN
0
95
V
REF
96
AV
CC
97
P9
7
/AD
TRG
/S
IN
498
P9
6
/ANEX1/S
OUT
499
P9
5
/ANEX0/SLK4 100
P4
2
/A
18
50
P4
3
/A
19
49
P4
4
/CS0
48
P4
5
/CS1
47
P4
6
/CS2
46
P4
7
/CS3
45
P5
0
/WRL/WR
44
P5
1
/WRH/BHE
43
P5
2
/RD
42
P5
3
/BCLK
41
P5
4
/HLDA
40
P5
5
/HOLD
39
P5
6
/ALE
38
P5
7
/RDY/CLK
OUT
37
P6
0
/CTS
0
/RTS
0
36
P6
1
/CLK
0
35
P6
2
/RXD
0
34
P6
3
/TXD
0
33
P6
4
/CTS
1
/RTS
1
/CTS
0
/CLKS
1
32
P6
5
/CLK
1
31
P6
6
/RXD
1
30
P6
7
/TXD
1
29
P7
0
/RXD
2
/SDA/TA0
OUT
28
P7
1
/RXD
2
/SCL/TA0
IN
/TB5
IN
27
P7
2
/CLK
2
/TA1
OUT
/V
26
P1
3
/D
11
75
P1
4
/D
12
74
P1
5
/D
13
/INT
3
73
P1
6
/D
14
/INT
4
72
P1
7
/D
15
/INT
5
71
P2
0
/A
0
(/D
0
/-)
70
P2
1
/A
1
(/D
1
/D
0
)
69
P2
2
/A
2
(/D
2
/D
1
)
68
P2
3
/A
3
(/D
3
/D
2
)
67
P2
4
/A
4
(/D
4
/D
3
)
66
P2
5
/A
5
(/D
5
/D
4
)
65
P2
6
/A
6
(/D
6
/D
5
)
64
P2
7
/A
7
(/D
7
/D
6
)
63
V
SS
62
P3
0
/A
8
(/-/D
7
)
61
V
CC
60
P3
1
/A
9
59
P3
2
/A
10
58
P3
3
/A
11
57
P3
4
/A
12
56
P3
5
/A
13
55
P3
6
/A
14
54
P3
7
/A
15
53
P4
0
/A
16
52
P4
1
/A
17
51
P9
4
/DA
1
/TB4
IN
1
P9
3
/DA
0
/TB3
IN
2
P9
4
/TB2
IN
/S
OUT
33
P9
1
/TB1
IN
/S
IN
34
P9
0
/TB0
IN
/CLK3 5
BYTE 6
CNV
SS
7
P8
7
/X
CIN
8
P8
6
/X
COUT
9
RESET 10
X
OUT
11
V
SS
12
X
IN
13
V
CC
14
P8
5
/NMI 15
P8
4
/INT
2
16
P8
3
/INT
1
17
P8
2
/INT
0
18
P8
1
/TA4
IN
/U 19
P8
0
/TA4
out
/U 20
P7
7
/TA3
IN
21
P7
6
/TA3
OUT
22
P7
5
/TA2
IN
/W 23
P7
4
/TA2
out
/W 24
P7
3
/CTS
2
/RTS
2
/TA1
IN
/V 25
IC's
Note: Abbreviation ahead of IC No. indicates the name of P.W.B.
AP: AMP / Power P.W.B.
MA: Main P.W.B.
VO: Video / Out P.W.B.
DM: DVD Main P.W.B.
w
w
w
.
x
i
a
o
y
u
1
6
3
.
c
o
m
Q
Q
3
7
6
3
1
5
1
5
0
9
9
2
8
9
4
2
9
8
T
E
L
1
3
9
4
2
2
9
6
5
1
3
9
9
2
8
9
4
2
9
8
0
5
1
5
1
3
6
7
3
Q
Q
TEL 13942296513 QQ 376315150 892498299
http://www.xiaoyu163.com
Other manuals for ADV-1000
4
Table of contents
Other Denon Stereo Receiver manuals

Denon
Denon AVR-486 User manual

Denon
Denon AVR-1907 User manual

Denon
Denon AVR-887 User manual

Denon
Denon AVR-S730H User manual

Denon
Denon AVR-X3300W User manual

Denon
Denon AVR-S510BT User manual

Denon
Denon AVR-786 User manual

Denon
Denon AVR-1612 User manual

Denon
Denon AVR-686 User manual

Denon
Denon AVR-1312 User manual

Denon
Denon AVR-686 User manual

Denon
Denon AVR-1611 User manual

Denon
Denon AVR-2308CI User manual

Denon
Denon AVR-1911 User guide

Denon
Denon DRA-900H User manual

Denon
Denon AVR-989 User manual

Denon
Denon AVR 4310CI User manual

Denon
Denon DRA-37 - AM/FM Stereo Receiver User manual

Denon
Denon AVR-990 User manual

Denon
Denon AVR-1909 User manual