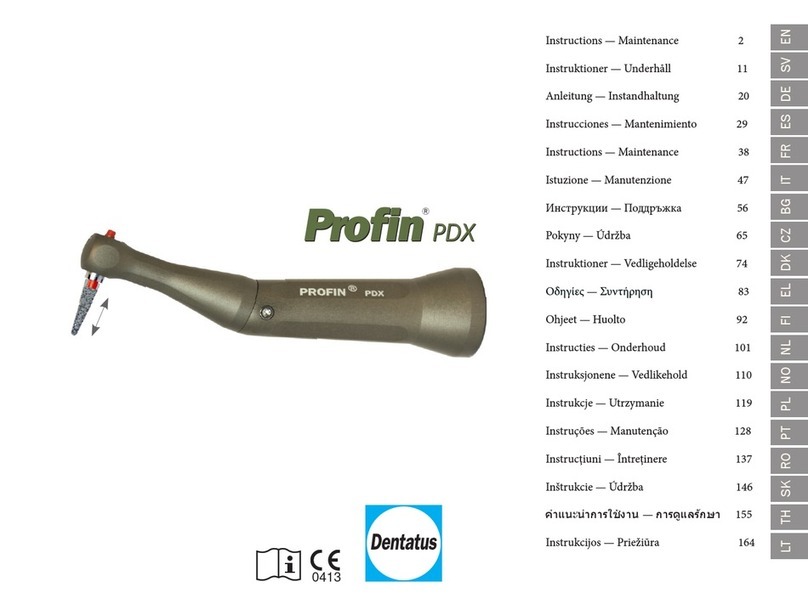
Dentatus Profin pdx User manual

1
0413
I nstructions — English 3
I nstruktioner — Svenska 13
Anleitung — Deutsch 23
I nstrucciones — Español 33
I nstructions — Français 43
I struzione — I taliano 53
Инструкции — български 63
Pokyny — Český 73
I nstruktioner — Dansk 83
Οδηγίες — Ελληνικά 93
Ohjeet — Suomi 103
I nstructies — Nederlands 113
I nstruksjonene — Norsk 123
I nstrukcje — Polski 133
I nstruções — Português 143
Instrucțiuni — Română 153
Inštrukcie — Slovenský 163
คำ�แนะนำ�ก�รใช้ง�น — ไทย 173
I nstrukcijos — Lietuvis 183
ENSVDEESFRITBGCZDKELFINLNOPLPTROSKTHLT

2
REFREF
S
S
NN
Sterilizable in a steam sterilizer (autoclave) at temperature specied
Ultrasonic bath
Do not re-use
Manufacturer
Reference/catalogue number
Batch code
Serial number
CE Mark
Consult instructions for use
Washer-disinfector for thermal disinfection
Symbols used
Caution

3
I nstructions — English
•Prior to initial use - always read the instructions for use.
•Only for US: prescription use – for use by dental clinicians only.
Indication for use
•Adjusting initial, nishing and polishing of dental surfaces and restorations.
Contraindication
•No known contraindications.
Precaution/Warning
Handpiece
Cross-contamination
•Clean, disinfect and sterilize the handpiece before rst use and between uses.
•Follow the instructions in the instructions for use. The instructions are validated by the manufacturer.
Thermal
•Do not exceed 10,000 rpm.
•Verify the recommended rpm on the motor before start using the handpiece.
•Lubricate the handpiece between each use, debris can cause clogging and excessive friction.
Small objects
•Before start working: Check for secure seating by pulling the tip with your ngers. A rm resistance should be sensed.
•If tip comes out easily, try another tip or send handpiece for service.
Malfunction
•Do not disassemble any part of the handpiece.
•Lubricate the handpiece between each use, debris can cause clogging and excessive friction.
Vibration
•Discomfort for patient and dentist if speed is lower than 5,000 rpm.
Working tips
Cross-contamination
•Clean, disinfect and sterilize between uses.
•Do not re-use the EVA-tips. They cannot be cleaned properly.
EN

4
Technical Description
Working tips to be used with Profin PDX
Lamineer tips Technical specications and recommended use, see table 3.
EVA tips Technical specications and recommended use, see table 3.
Lamineer Tips IPR Contact the manufacturer for separate instructions for use.
PER-IO-TOR Contact the manufacturer for separate instructions for use.
Table 1
Table 2
Profin®PDX
Description Contra angle handpiece.
Motor coupling E-tting according to ISO 3964. Coupling dimensions: Long.
Material Hard anodized aluminium.
Movement of working tip Reciprocating 1,2 mm axial stroke.
Chuck Collet.
Shank Dentatus Snap-in.
Maximum motor speed 10.000 rpm.
Type of motor Electrical (recommended) or air dental motor.
Recommended speed
Torque
Lamineer Tips: 5.000-10.000 rpm.
Depending on the torque of the motor.
Variation of tip movement:
- Tip in a self-steering mode
- Fixed positions
- For polishing procedure.
- For creating anatomical corrections for esthetic alignments.
Accessories
EVA-60 Plunger to eject tip.
PDX-F Water spray clip, should external water be needed.

5
Shank
Cat# Colour Shape Recommended use
LTA-150/2 Diamond Red
LTA-S150/2
LTA-100/2 Diamond Green
LTA-S100/2
LTA-75/2 Diamond Gold
LTA-S75/2
LTA-50/2 Diamond Yellow
LTA-S50/2
LTA-30/2 Dimond White
LTA-S30/2
LTA-15/2 Diamond Violet
LTA-S15/2
LTA-39/2 Tungsten Black
LTA-S36/2 Carbide
Removal of gross overhangs and shaping of all
restorative material - use tips with large particle size (150-75 µ).
For shaping and polishing all prosthetic materials
and enamel (75-50 µ).
Final polishing - use tips with small particle size (30-15 µ).
Profin®Lamineer tips - LTA
LTA-E50/2 Diamond Yellow
LTA-C50/2 Diamond Yellow
For occlusal and concave surfaces.
For nishing shoulders, bevels etc.
LTA-D150/2 Diamond Red
LTA-D100/2 Diamond Green
LTA-D50/2 Diamond Yellow
LTA-D30/2 Diamond White
LTA-T50/2 Diamond Yellow
LTA-T30/2 Diamond White
For shaping diverging surfaces
and incisal edges.
For opening incisal and gingival,
approximal areas.
EVA Tips for polishing with polishing paste (Single use plastic tips)
Universal tips, only used freely rotating.
Use with appropriate polishing paste
EVA-2000/100 Plastic Green
EVA-5000/100 Plastic Blue
LTA-
LTA-S
Tungsten Carbide does not scuff enamel. For nal nishing of
composite lling margins. (LTA-39 & LTA S36).
{
Table 3
EN

6
How to use
Prepare your Pron for work
Apply the tip in the piston. Check for secure seating by
pulling the tip with your nger. A rm resistance should be
sensed. If tip comes out easily, try another tip or send the
handpiece for service.
Mount the Pron handpiece on your dental motor.
Internal water or spray should be turned off on the unit.
Spray is under normal conditions not necessary for
cooling.
External water connection can be used with water spray
clip. This is optional.
The tip can be used in two different positions:
- In position A, the tip is free to rotate to follow contours.
- In position B, the tip is xed in a position of convenience.
To change a xed position, pull out the tip slightly, turn
and push it back into a new position.
Selection of tips
The selection of diamond grit is depending on the amount
of material that has to be reduced. A general recommen-
dation is the more material the more coarse diamonds.
The removal of material and nishing should be made in
steps.
NOTE: Never go from super-coarse to super-ne in one
step, but use intermediate medium-coarse tips.
NOTE: The black Tungsten-Carbide-coated tips can always
be used for nishing when there is a risk for abrasion on
enamel, since Tungsten Carbide does not scar or scuff
enamel.
NOTE: The wearing of the Diamond Tips is low. The dura-
bility is depending on the circumstances, for continued
efciency it is recommended not more than 30-40 times.
A
B
EVA- 60
How to eject the tip
Use the EVA-60 plunger to safely eject the tip.

7
Examples of use:
- On enamel, metallic, ceramic and composite
restorations.
- For rening gingivial and incisal embrasures to
natural forms.
- To contour and individualize anterior restorations.
- To reshape and polish tooth contacting areas.
- To chairside correction and renishing margins prior
to cementation.
Reduction of overhangs and excess cements
Apply the tip on the material to be reduced or nished
in parallell to the tooth contour (1).
Start the motor, move the handpiece slowly up and
down, or in and out in order to remove debris (2).
Change for a ner diamond when the bulk of material
has been reduced. Finish with 30 or 15 micron tip and
polish with the plastic tips together with a polishing
paste.
When cementing laminates on incisors, the excess
material in the palatinal concavity can easily and safely
be removed with a bent tip (3).
Adjustment of inlay margins
The margins can normally be nished together with
removal of excess luting material (4). The procedure
is similar to removal of overhangs. If inlays/onlays are
being made on adjacent teeth, nish each tooth after
cementation for easier access, and polish when all
have been cemented.
EN

8
Removal of subgingival excess cements
The tips are non-traumatic to soft tissue and can be
used subgingival (5). Select a suitable tip (normally
this procedure does not require super-coarse or coarse
tips). Apply the tip on the subgingival surface and start
the motor. The tips can be either xed or in a swirel
position whichever provides the best tactile sense. For
subgingival polishing the blue spatula-shaped tip
EVA -5000 may be used.
Additional uses for Pron:
- Shaping and adjustment of corners (6)
- Shaping of approximal embrasures (7)
- Shaping of contours (8)
- Shaping/adjustment of incisal edges (9)
- Adjustment of occlusion (10)
- Finishing of shoulders (11)
- Preparation of bevels (12)

9
Processing Instructions
Pron PDX
WARNINGS Do not immerse the handpiece into disinfection solutions or into ultrasonic batch. The solutions may contain chemicals that may impede or
freeze the handpiece drive mechanism.
Do not use washer disinfector. Anodized aluminium is not suitable for washer disinfector. The hand piece is not tested for repeated cycles in
washer disinfector.
The handpiece shall NOT be disassembled.
Limitations on
processing
Sterilize the handpiece for a maximum of 250 cycles. We recommend that you send the handpiece to the manufacturer for service after 250
uses/cycles, or every 12 months (whichever comes rst).
INSTRUCTIONS
Initial treatment at the
point of use
Instruction
1. Flush instrument on unit before removal from tubing.
2. Thereafter remove the tip.
Preparation before
cleaning
Instruction
Ensure the tip is removed from the handpiece.
If heavily soiled, clean rst with soaked cloth or pre-soaked wipes.
The maximum period of time between start of use and start of cleaning process shall not exceed 2 hours. 1)
Cleaning: Automated 2) Equipment
Automated machine for dental handpieces.
Detergent
In accordance with manufacturer’s specication for the use of the automated machine.
Instructions
In accordance with the manufacturer’s specication for the use of the automated machine.
If soil is visible after cleaning with automated machine, perform manual cleaning.
Cleaning: Manual External
Equipment
Non-abrasive, medium hard brush.
Detergent
Low alkaline.
Water quality
Deionized (DI) <40°C or Reverse osmosis (RO) <40°C.
Instruction
1. Brush off under non-stagnant water.
2. Rinse under non-stagnant water for 15 seconds.
EN

10
Internal
Equipment
Cleaning spray/dry spray intended for dental handpieces.
Instruction
In accordance with manufacturer’s specication for the use of the spray(s).
Hold check against clean, white wipe and repeat procedure until no visible soil remains.
Disinfection: Automated Not applicable. See WARNINGS.
Disinfection: Manual Caution: The handpiece must be cleaned both internally and externally before disinfection.
External
Equipment/Detergent
Soaked cloth or pre-soaked wipes/Disinfectants suitable for anodized aluminium.
Instruction
In accordance with manufacturer’s specication for the use of the disinfectants.
Internal
Eqiupment
Disinfection spray intended for dental handpieces.
Instruction
In accordance with manufacturer’s specication for the use of the disinfection spray.
Lubrication: Automated Equipment
Automated machine for dental handpieces.
Lubrication
In accordance with manufacturer’s specication for the use of the automated machine.
Instruction
In accordance with manufacturer’s specication for the use of the automated machine.
Lubrication: Manual Process chemicals
Lubricants intended for dental handpieces.
Instruction
1. Insert the spray can nozzle into the motor input of the handpiece.
2. Push the button of the can until the liquid coming out of the head of the handpiece is clear.
3. Wipe off excess uid with a paper towel.

11
Inspection and Testing Inspection
Visually inspect for damage and wear.
- No scratches.
- Check that there is no gap between head and body.
- Check that screws are even with surface.
Testing
Check the chuck by inserting a tip. You should not be able to easily pull out the tip with your nger.
If any of the above appears, do not use the handpiece and contact the manufacturer.
Packaging for
sterilization
Equipment
Sterile goods packing. 3)
1. Pack individually.
2. Check that the bag is not stretched.
3. Check correct sealing.
Sterilization Caution: The handpiece must be cleaned and disinfected before sterilization.
Equipment
Saturated steam sterilizer including fractionated pre-vacuum before sterilization phase and nal post-vacuum drying (B-process). 4)
Temperature
134°C (273°F)
Time
Minimum of 3 minutes.
Pressure
3.06 bar (27 psi).
Vacuum drying
Minimum 3 minutes.
Storage Protect from dust, dirt and humidity, UV-light (sunlight) and extreme temperature (above room temperature).
Before use ensure the sterile bag is dry, whole and clean.
Additional information 1) If delayed cleaning, corrosion may affect the surface.
2) Automated machine for both internal and external cleaning.
3) Sterile goods packing according to EN 868-5.
4) Steam sterilizer shall be in accordance with standards EN 13060, EN 285 and EN ISO 17665-1.
All equipment, detergents, spray, lubricants and disinfections solutions shall be CE-marked as per directive 93/42/EEC.
The instructions provided have been validated by the manufacturer of the medical device as being capable of preparing a medical device for reuse. It remains the
responsibility of the processor to ensure that the processing, as actually performed using equipment and materials in the processing facility, achieves the desired result.
This requires verication and/or validation and routine monitoring of the process.
EN

12
WARNINGS Use chemicals suitable for diamond coated stainless steel instrument.
Limitations on processing See inspection.
INSTRUCTIONS
Initial treatment at the point of use Soak in solution. If debris remains use a cleaning stone suitable for diamond instruments.
Cleaning: Automated Washer disinfector (in accordance with standard ISO 15883).
Without or with mild detergents.
Cleaning: Manual Ultrasonic bath.
Detergent. In accordance with manufacturer’s specication for the use of detergent.
Disinfection: Automated Washer disinfector (in accordance with standard ISO 15883).
Without or with mild detergents.
Disinfection: Manual Disinfection bath.
Disinfectant. In accordance with manufacturer’s specication for the use of disinfectant.
Thorough rinsing.
Inspection Visually inspection for appearance.
Packaging for sterilization Sterile goods packing according to EN 868-5.
Sterilization
Storage
Equipment
B-type steam (in accordance with standards EN 13060, EN 285 and EN ISO 17665-1).
Temperature/Time/Pressure
134°C (F 273°F)/Minimum of 3 minutes/3.06 bar (27 psi).
Vacuum drying
Minimum 3 minutes.
Protect from dust, dirt and humidity, UV-light (sunlight) and extreme temperature (above
room temperature).
Processing Instructions
Lamineer Tips

13
I nstruktioner — Svenska
•Före första användning – läs alltid instruktionerna.
•Endast för USA: receptbelagd - endast för tandläkare.
Indikationer
•Justering av preparationer, putsning och polering av tandytor och restaurationer.
Kontraindikationer
•Inga kända.
Försiktighetsåtgärder/Varning
Vinkelstycke
Korskontamination
•Rengör, smörj och sterilisera handstycket innan första användning och mellan varje användning.
•Följ instruktionerna i bruksanvisningen. Dessa är validerade av tillverkaren.
Termisk försiktighet
•Överskrid inte 10 000 varv per minut.
•Kontrollera inställningarna på motorn/enheten före användning.
•Smörj vinkelstycket mellan varje användning,, föroreningar kan orsaka igensättning och förhöjd friktion.
Små delar
•Innan användning: kontrollera spetsarnas infästning genom att dra lätt i spetsen med ngrarna. Ett fast motstånd ska kännas.
•Om spetsen lossnar lätt, byt spets eller skicka vinkelstycket till service.
Felfunktion
•Montera inte isär vinkelstycket.
•Smörj vinkelstycket mellan varje användning, föroreningar kan orsaka igensättning och förhöjd friktion.
Vibrationer
•Om hastigheten är under 5000 rpm kan patienten uppleva obehag.
Arbetsspetsar
Korskontamination
•Rengör, desincera och sterilisera mellan användningar.
•Återanvänd inte EVA-spetsar. De kan inte rengöras tillfredsställande.
SV

14
Teknisk beskrivning
Arbetsspetsar att använda med Profin PDX
Lamineer-spetsar Material och beskrivning nns på sidan 15, Tabell 3
EVA-spetsar Material och beskrivning nns på sidan 15, Tabell 3
Lamineer-spetsar IPR Kontakta tillverkare för separata instruktioner
PER-IO-TOR Kontakta tillverkare för separata instruktioner
Tabell 1
Profin®PDX
Beskrivning Vinkelstycke
Motorkoppling E-koppling enligt ISO 3964
Material Hårdeloxerad aluminium
Arbetsspetsens rörelse Axiellt fram- och återgående, 1,2 mm slaglängd
Chuck Hylsa
Skaft Snap-In Dentatus
Max motorhastighet 10 000 varv per minut
Motortyp Elektrisk (rekommenderas) eller luftdriven dentalmotor
Rekommenderad hastighet
Vridmoment
5 000–10 000 varv per minut
Beroende på motor
Variation i spetsrörelse:
- Spets i självstyrande läge
- Fasta positioner
- För polering
- För anatomiska korrigeringar för kosmetiska justeringar
Tillbehör
EVA-60 Kolv för att mata ut spets.
PDX-F Spraymunstycke/clip. Säljs separat vid behov.
Tabell 2

15
Kat-nr. Skaftfärg Modell Rekommenderad användning
LTA-150/2 Diamant Röd
LTA-S150/2
LTA-100/2 Diamant Grön
LTA-S100/2
LTA-75/2 Diamant Guld
LTA-S75/2
LTA-50/2 Diamant Gul
LTA-S50/2
LTA-30/2 Diamant Vit
LTA-S30/2
LTA-15/2 Diamant Violett
LTA-S15/2
LTA-39/2 Volfram- Svart
LTA-S36/2 karbid
Borttagning av stora överhäng och formning av allt
lagningsmaterial – använd spetsar med stor kornstorlek
(150–75 µ).
För formning och polering av alla protetiska material och
emalj (75–50 µ).
Avslutande polering – använd spetsar med liten kornstorlek
(30–15 µ).
Pron®Lamineer-spetsar LTA®
LTA-E50/2 Diamant Gul
LTA-C50/2 Diamant Gul
För ocklusala och konkava ytor.
För putsning av tandväggar, preparationsvinklar osv.
LTA-T50/2 Diamant Gul
LTA-T30/2 Diamant Vit
LTA-D150/2 Diamant Röd
LTA-D100/2 Diamant Grön
LTA-D50/2 Diamant Gul
LTA-D30/2 Diamant Vit
För formning av divergerande ytor och
incisalkanter.
För öppning av incisala och gingivala approximalområden.
EVA-spetsar för polering med putspasta (plastspetsar för engångsbruk)
Universalspetsar, används endast fritt roterande.
Använd med lämplig putspasta.
EVA-2000/100 Plast Grön
EVA-5000/100 Plast Blå
LTA-
LTA-S
Volframkarbid sliter inte på emalj. För avslutande
putsning av kompositfyllningsskarvar. (LTA-39 & LTA S36).
{
Tabell 3
SV

16
Användningsinstruktioner.
Förbered Pron för arbete
Placera spetsen i kolven. Dra i spetsen med ngrarna för att
kontrollera att den sitter säkert. Du ska känna ett fast mot-
stånd. Om spetsen kommer ut lätt ska du prova en annan
spets eller skicka handstycket på service.
Montera vinkelstycket på motorn.
Vatten och spray bör stängas av på uniten. Spray är under
normala förhållanden inte nödvändning för kylning.
Yttre anslutning till vatten kan göras med hjälp av separat
spraymunstycke/clip. Detta är valfritt.
Spetsen kan användas i två olika lägen:
- I läge A kan spetsen rotera fritt och följa konturer.
- I läge B är spetsen fast i ett lämpligt läge.
Om du vill ändra ett fast läge drar du ut spetsen, vrider på
den och skjuter tillbaka den i ett nytt läge.
Val av spets
Valet av diamantkorn beror på mängden material som
måste minskas. En allmän rekommendation är ju mer
material, desto grövre diamanter. Borttagning av material
och putsning ska göras stegvis.
OBS! Gå aldrig från supergrov till supern i ett steg –
använd en mellangrov spets däremellan.
OBS! De svarta volframkarbidbelagda spetsarna kan alltid
användas vid putsning om det nns risk för nötning av
emaljen. Volframkarbid varken rispar eller sliter på emalj.
OBS! Slitaget på diamantspetsar är litet. Hållbarheten
beror på omständigheterna, för fortsatt effektivitet rekom-
menderas inte er än 30–40 gånger.
A
B
EVA- 60
Hur du matar ut spetsen
Använd EVA-60-kolven för att mata ut spetsarna på ett
säkert sätt.

17
Användningsexempel
- På emalj-, metall- och kompositrestaurationer samt
keramiska restaurationer.
- Förning av gingivala och incisala områden ytor till
naturliga former.
- Konturering och njustering av anteriora restauratio-
ner.
- Omformning och polering av områden där tandkontakt
föreligger.
- Korrigering och efterputsning av skarvar före cemen-
tering.
Reduktion av överskott och överskottscement
Placera spetsen på det material som ska minskas eller
putsas parallellt med tandkonturen (1).
Starta motorn och ytta handstycket långsamt upp
och ner eller in och ut för att ta bort rester (2). Byt till
en nare diamant när huvuddelen av materialet har
minskats. Putsa med en spets på 30 eller 15 mikron
och polera med plastspetsarna tillsammans med
putspasta.
Vid cementering av laminat på framtänder kan över-
skottsmaterialet i den palatinala konkaviteten enkelt
och säkert tas bort med en böjd spets (3).
Marginaljustering av inlägg
Skarvarna kan normalt putsas samtidigt som överö-
digt cementeringsmaterial tas bort (4). Rutinen liknar
den för borttagning av överskott. Om inlägg/pålägg
ska göras på intilliggande tänder ska du putsa varje
tand efter cementeringen för att det ska bli enklare att
komma åt. Polera när alla tänder cementerats.
SV

18
Borttagning av subgingivalt överskottscement
Spetsen är icke-traumatisk för mjuk vävnad och kan
användas subgingivalt (5). Välj en passande spets
(normalt krävs inte supergrova eller grova spetsar för
den här rutinen). Placera spetsen på den subgingivala
ytan och starta motorn. Spetsarna kan vara antingen
fasta eller snurrande, beroende på vad som ger bäst
taktil förnimmelse. Vid subgingival polering kan den blå
spatelformade spetsen EVA-5000 användas.
Ytterligare användningsområden för Pron:
- Formning och justering av hörn (6)
- Formning av approximalytor (7)
- Formning av konturer (8)
- Formning/justering av incisalkanter (9)
- Justering av ocklusion (10)
- Putsning av tandväggar (11)
- Preparation av preparationsvinklar (12)

19
Underhållsprocess
Pron PDX
VARNINGAR Doppa inte handstycket i desinfektionslösningar eller ultraljudsbad. Sådana lösningar kan innehålla kemikalier som kan hämma eller stoppa
handstyckets drivmekanism.
Använd inte diskdesinfektor. Anodiserad aluminium är inte lämpad för detta. Vinkelstycket är inte testat för återkommande cykler i diskdesinfek-
tor.
Handstycket ska INTE tas isär av användaren.
Begränsningar för
återanvändning
Sterilisera vinkelstycket max 250 gånger. Vi rekommenderar att vinkelstycket skickas till tillverkaren för service efter 250 användningar/cykler,
eller var 12:e månad (vilket som inträffar först).
INSTRUKTIONER
Initial hantering vid
behandlingsplats
Instruktion
1. Spola igenom vinkelstycket på uniten innan den avlägsnas från slangen.
2. Därefter avlägsnas spetsen.
Före rengöring Instruktion
Säkerställ att spetsen är avlägsnad från vinkelstycket.
Vid kraftig nedsmutsning, rengör först med fuktig trasa eller våtservetter
Maximal tid från behandlingens början till början av rengöringsprocessen skall inte överstiga 2 timmar. 1)
Rengöring: Automati-
serad 2)
Utrustning
Automat för dentala vinkelstycken.
Rengöringsvätska
Enligt specikation från tillverkaren av aktuell automat.
Instruktion
Enligt instruktion från tillverkaren av aktuell automat.
Vid kvarvarande smuts efter automatrengöring, rengör manuellt.
Rengöring:
Manuell
Yttre rengöring
Utrustning
Medelhård, icke abrasiv borste.
Rengöringsvätska
Svagt alkalisk.
Vattenkvalitet
Avjoniserat (DI) <40° eller omvänt osmotiskt (RO) <40°
Instruktion
1. Borsta av under rinnande vatten.
2. Skölj av under rinnande vatten under 15 sekunder.
SV

20
Inre rengöring
Utrustning
Rengöringsspray/torkspray för dentala vinkelstycken.
Instruktion
Enligt instruktion från tillverkaren av aktuell spray(-er).
Kontrollera mot ren vit duk och repetera proceduren tills ingen synlig smuts återstår.
Desinfektion:
Automatiserad
Ej tillämplig. Se VARNINGAR.
Desinfektion: Manuell Varning: Vinkelstycket skall rengöras såväl på utsida som på insida före desinfektion.
Yttre
Utrustning/Rengöringsmedel
Fuktig trasa eller våtservetter med desinfektionsmedel lämpligt för dentala vinkelstycken.
Instruktion
Enligt instruktion från tillverkare av desinfektionsmedlet.
Inre
Utrustning
Desinfektionsspray avsett för dentala vinkelstycken.
Instruktion
Enligt instruktion från tillverkaren av desinfektionsspray.
Smörjning:
Automatiserad
Utrustning
Automatisk maskin för dentala vinkelstycken.
Smörjning
Enligt instruktion från tillverkaren av den automatiska maskinen.
Instruktion
Enligt instruktion från tillverkaren av den automatiska maskinen.
Smörjning: Manuell Processkemikalier
Smörjmedel avsedda för dentala vinkelstycken.
Instruktion
1. För in sprayaskans munstycke i motortanslutningen på vinkelstycket.
2. Tryck ner knappen på sprayaskan och spraya tills vätskan som kommer ut ur huvudet på vinkelstycket är klar.
3. Torka av överskottsvätska med pappershandduk.
Other manuals for Profin pdx
1
Table of contents
Languages:
Other Dentatus Dental Equipment manuals
Popular Dental Equipment manuals by other brands

CMS Dental
CMS Dental FlashMax P3 460 4W manual

NSK
NSK Ti-Max X450L Operation manual

Profin
Profin PDH Instructions for use and maintenance

Sirona
Sirona SIM MODULAR operating instructions

Dentsply Sirona
Dentsply Sirona Nupro Freedom Special care instructions and tips

Komet
Komet ER C-Post Series Instructions for use