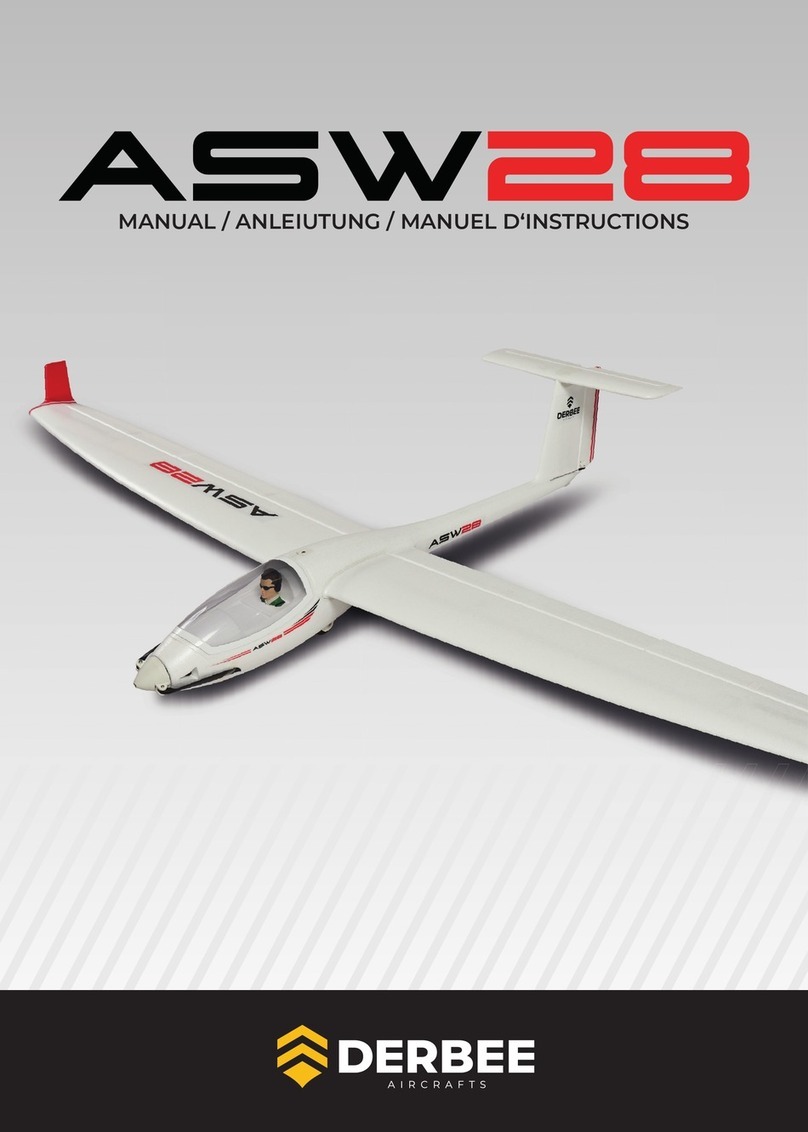
DERBEE F4U CORSAIR User manual

MANUAL / ANLEITUNG / MANUEL D‘INSTRUCTIONS
F4U CORSAIR
ITEM NO. DB001PB / DB002PG

SAFETY INSTRUCTIONS
• Always keep a safe distance in all direc-
tions from your model to avoid collisions
and injuries. This model is controlled by a
radio signal. Radio signals can be interfe-
red with from outside without you being
able to inuence it. Interference may
result in a temporary loss of control.
• Always operate your model in open areas
- away from cars, trafc and people.
• Always carefully follow the instructions
and warnings for this product and any op-
tional accessories (chargers, rechargeable
batteries, etc.).
• Always keep all chemicals, small parts and
electrical components out of the reach of
children.
• Never operate your model with weak
transmitter batteries.
WARNING: Read the entire assembly instructions to fa-
miliarise yourself with the product functions and safety
instructions before operation.
As the user of this product, you are solely responsible
for operation that does not endanger yourself or ot-
hers, or damage the product or property of others. THIS IS NOT A TOY!
Not for children under 14 years.
• Always keep the model in sight and un-
der control.
• Only use fully charged batteries.
• Always keep the transmitter switched on
when the model is powered up.
• Always remove the battery before taking
the model apart.
• Always keep moving parts clean.
• Always keep parts dry.
• Always allow parts to cool before touching
them.
• Always remove the battery after use.
• Always make sure the failsafe is properly
set before ying.
• Never operate the model with damaged
wiring.
• Never touch moving parts.
NOTES ON ENVIRONMENTAL PROTECTION
This product must not be disposed of with other waste. Instead, it is the user‘s
responsibility to take the waste equipment to a designated recycling collection
point for electrical and electronic equipment. Separate collection and recycling of
your waste equipment at the time of disposal will help to save raw materials and
ensure that its recycling protects human health and the environment. For more
information on where you can drop off your waste equipment for recycling, plea-
se contact your local council, your household waste disposal service or the point
of sale of your product.

SPECIFICATIONS
SPARE PARTS
REQUIRED
Battery LiPo 1000mAh 2S 7,4V 35C
Charger LiPo Charger
RC System 6+ Channels
FRENCHGERMANENGLISH
Item No. Name
DB001PB.1 DERBEE F4U Corsair 75cm - Fuselage blue
DB001PB.2 DERBEE F4U Corsair 75cm - Wing blue
DB001PB.3 DERBEE F4U Corsair 75cm - Rudder blue
DB001PB.4 DERBEE F4U Corsair 75cm - Elevator blue
DB001PB.5 DERBEE F4U Corsair 75cm - Rocket Set blue
DB001PB.6 DERBEE F4U Corsair 75cm - 2x Oil Tank blue
DB001PB.7 DERBEE F4U Corsair 75cm - Landing Gear blue
DB002PG.1 DERBEE F4U Corsair 75cm - Fuselage yellow
DB002PG.2 DERBEE F4U Corsair 75cm - Wing yellow
DB002PG.3 DERBEE F4U Corsair 75cm - Rudder yellow
DB002PG.4 DERBEE F4U Corsair 75cm - Elevator yellow
DB0012PBG.10 DERBEE F4U Corsair 75cm - Linkage Set
DB001PB.8 DERBEE F4U Corsair 75cm - Propeller 8x6“ blue
DB001PB.9 DERBEE F4U Corsair 75cm - Spinner blue
DB002PG.5 DERBEE F4U Corsair 75cm - Spinner yellow
DB002PG.6 DERBEE F4U Corsair 75cm - 2x Oil Tank yellow
DB002PG.7 DERBEE F4U Corsair 75cm - Rocket Set yellow
DB002PG.8 DERBEE F4U Corsair 75cm - Landing Gear yellow
DB002PG.9 DERBEE F4U Corsair 75cm - Propeller 8x6“ yellow
DB0012PBG.11 DERBEE F4U Corsair 75cm - Propeller Hub
DB0056PGB.14 DERBEE 20A Brushless ESC
DB0056PGB.12 DERBEE Servo 9g 150mm Cable
DB0045PGB.12 DERBEE Servo 9g 250mm Cable
DB0012PGB.14 DERBEE Brushless Motor DST-1300
750 mm
610 mm
420 g
DERBEE BL DST-1300KV
20A
4x 9g

ASSEMBLY OF THE LANDING GEAR
To assemble the landing
gear, you will need the wing,
the two landing gear legs 2x
screws 2*8mm and an appro-
priate screwdriver.
01
Insert the two landing gear
legs into the receptacles pro-
vided on the underside of the
wing.
02
Secure both landing gear
legs with the appropriate
screws to prevent them from
slipping out.
03
Ready mounted landing gear.
04

FRENCHGERMANENGLISH
ASSEMBLY OF THE WING
To assemble the wing, you
will need the fuselage, wing,
M4*45mm screw and an ap-
propriate screwdriver.
05
Insert the wing with the front
section into the correspon-
ding receptacle on the un-
derside of the fuselage and
then place it on the rear.
06
Attach the wing to the fu-
selage with the appropriate
screw.
07

ASSEMBLY OF THE TAILS
For the assembly of the tail-
plane, the fuselage and the
tailplane are needed.
08
Apply suitable adhesive to
the tailplane mount on the
fuselage. Then place the
tailplane in the correct posi-
tion and press until it is rmly
glued to the fuselage.
09
Connect the linkage to the
elevator control horn as
shown. Connect the attach-
ment clip to the outermost
hole of the control horn.
10
Apply suitable adhesive to
the underside of the vertical
stabilizer as shown. Then in-
sert the rudder in the correct
position into the tailplane
mount and press until it is
rmly glued.
11

FRENCHGERMANENGLISH
ASSEMBLY THE ANTENNA
A suitable adhesive is requi-
red for mounting the anten-
na. Glue the antenna in the
intended position on the
fuselage.
12
Ready assembled model wit-
hout armament and auxiliary
tanks.
13

ASSEMBLY OF ARMAMENT
For the assembly of the arm-
ament will need the missiles,
auxiliary tanks and a suitable
glue.
14
Attach the rockets and auxi-
liary tanks to the designated
positions on the underside of
the wing using the glue.
15
Ready assembled model.
16

FRENCHGERMANENGLISH
RUDDER DEFLECTIONS
Function Normal
Ailerons + 9 mm / - 9 mm
Elevator + 10 mm / - 10 mm
Rudder + 25 mm / - 25 mm
ASSEMBLY FINISH
Install the remaining RC components such as receiver and battery. Now the transmitter can
be programmed. The rudder deections and the center of gravity can be taken from the
following tables. The values given are approximate values.
CENTER OF GRAVITY
The center of gravity is at about 40-45mm

SICHERHEITSHINWEISE
• Halten Sie stets einen Sicherheitsabstand
in alle Richtungen zu Ihrem Modell ein,
um Kollisionen und Verletzungen zu
vermeiden. Dieses Modell wird über ein
Funksignal gesteuert. Funksignale kön-
nen von außerhalb gestört werden, ohne
dass Sie darauf Einuss nehmen können.
Störungen können zu einem vorüberge-
henden Verlust der Steuerungskontrolle
führen.
• Betreiben Sie Ihr Modell stets auf offenen
Geländen - weit ab von Autos, Verkehr
und Menschen.
• Befolgen Sie die Anweisungen und War-
nungen für dieses Produkt und jedwedes
optionales Zubehörteil (Ladegeräte, wie-
der auadbare Akkus etc.) stets sorgfältig.
• Halten Sie sämtliche Chemikalien,
Kleinteile und elektrische Komponenten
stets außer Reichweite von Kindern.
• Betreiben Sie Ihr Modell niemals mit
WARNUNG: Lesen Sie die gesamte Montageanleitung,
um sich vor dem Betrieb mit den Produktfunktionen
und Sicherheitshinweisen vertraut zu machen.
Als Benutzer dieses Produkts sind ausschließlich Sie
für einen Betrieb verantwortlich, der weder Sie selbst
noch andere gefährdet, bzw. der weder das Produkt
noch Eigentum anderer beschädigt.
DIES IST KEIN SPIELZEUG!
Nicht für Kinder unter 14 Jahren.
schwachen Senderbatterien.
• Behalten Sie das Modell stets im Blick
und unter Kontrolle.
• Verwenden Sie nur vollständig aufgelade-
ne Akkus.
• Behalten Sie den Sender stets eingeschal-
tet, wenn das Modell eingeschaltet ist.
• Entfernen Sie stets den Akku, bevor Sie
das Modell auseinandernehmen.
• Halten Sie bewegliche Teile stets sauber.
• Halten Sie die Teile stets trocken.
• Lassen Sie die Teile stets auskühlen, bevor
Sie sie berühren.
• Entfernen Sie nach Gebrauch stets den
Akku.
• Stellen Sie immer sicher, dass der Failsafe
vor dem Flug ordnungsgemäß eingestellt
ist.
• Betreiben Sie das Modell niemals mit be-
schädigter Verkabelung.
• Berühren Sie niemals sich bewegende
Teile.
HINWEISE ZUM UMWELTSCHUTZ
Dieses Produkt darf nicht mit anderem Abfall entsorgt werden. Stattdessen ob-
liegt es dem Benutzer, das Altgerät an einer designierten Receycling-Sammel-
stelle für elektrische und elektronische Geräte abzugeben. Die getrennte Samm-
lung und Wiederverwertung Ihres Altgeräts zum Zeitpunkt der Entsorgung hilft
Rohstoffe zu sparen und sicherzustellen, dass bei seinem Receycling die mensch-
liche Gesundheit und die Umwelt geschützt werden. Weitere Informationen, wo
Sie Ihr Altgerät zum Receycling abgeben können, erhalten Sie bei Ihrer lokalen
Kommunalverwaltung, Ihrem Haushaltsabfall Entsorgungsdienst oder bei der
Verkaufsstelle Ihres Produkts.

SPEZIFIKATIONEN
ERSATZTEILE
BENÖTIGTES ZUBEHÖR
Akku LiPo 1000mAh 2S 7,4V 35C
Ladegerät Lipo Ladegerät
Fernsteuerung 6 Kanäle +
FRANZÖSISCHDEUTSCHENGLISCH
Art. Nr. Bezeichnung
DB001PB.1 DERBEE F4U Corsair 75cm - Rumpf blau
DB001PB.2 DERBEE F4U Corsair 75cm - Tragächen blau
DB001PB.3 DERBEE F4U Corsair 75cm - Seitenruder blau
DB001PB.4 DERBEE F4U Corsair 75cm - Höhenruder blau
DB001PB.5 DERBEE F4U Corsair 75cm - Lenkraketen Set blau
DB001PB.6 DERBEE F4U Corsair 75cm - 2x Zusatzöltanks blau
DB001PB.7 DERBEE F4U Corsair 75cm - Hauptfahrwerk blau
DB002PG.1 DERBEE F4U Corsair 75cm - Rumpf gelb
DB002PG.2 DERBEE F4U Corsair 75cm - Tragächen gelb
DB002PG.3 DERBEE F4U Corsair 75cm - Seitenruder gelb
DB002PG.4 DERBEE F4U Corsair 75cm - Höhenruder gelb
DB0012PBG.10 DERBEE F4U Corsair 75cm - Ruderanlenkungs Set
DB001PB.8 DERBEE F4U Corsair 75cm - Luftschrauben Set blau
DB001PB.9 DERBEE F4U Corsair 75cm - Spinner blau
DB002PG.5 DERBEE F4U Corsair 75cm - Spinner gelb
DB002PG.6 DERBEE F4U Corsair 75cm - 2x Zusatzöltanks gelb
DB002PG.7 DERBEE F4U Corsair 75cm - Lenkraketen Set gelb
DB002PG.8 DERBEE F4U Corsair 75cm - Hauptfahrwerk gelb
DB002PG.9 DERBEE F4U Corsair 75cm - Luftschraube gelb
DB0012PBG.11 DERBEE F4U Corsair 75cm - Luftschraubennabe
DB0056PGB.14 DERBEE 20A ESC/BEC Brushless Regler
DB0056PGB.12 DERBEE Servo 9g Kabel 150mm
DB0045PGB.12 DERBEE Servo 9g Kabel 250mm
DB0012PGB.14 DERBEE Brushless Motor DST-1300
750 mm
610 mm
420 g
DERBEE BL DST-1300KV
20A
4x 9g

MONTAGE DES FAHRWERKS
Für die Montage des Fahr-
werks werden die Tragäche,
die beiden Fahrwerksbeine
2x Schrauben 2*8mm sowie
ein entsprechender Schrau-
bendreher benötigt.
01
Die beiden Fahrwerksbeine
in die vorgesehenen Auf-
nahmen auf der Tragächen-
unterseite stecken.
02
Beide Fahrwerksbeine mit
den entsprechenden Schrau-
ben gegen Herausrutschen
sichern.
03
Fertig montiertes Fahrwerk.
04

MONTAGE DER TRAGFLÄCHE
FRANZÖSISCHDEUTSCHENGLISCH
Für die Montage der Tragä-
che werden der Rumpf, Trag-
äche, Schraube M4*45mm
sowie ein entsprechender
Schraubendreher benötigt.
05
Die Tragäche mit dem
vorderen Bereich in die ent-
sprechende Aufnahme auf
der Rumpfunterseite stecken
und dann hinten auegen.
06
Die Tragäche mit der ent-
sprechenden Schraube am
Rumpf befestigen.
07

MONTAGE DER LEITWERKE
Für die Montage der Leitwer-
ke werden der Rumpf, Sei-
tenleitwerk, Höhenleitwerk
sowie ein geeigneter Kleber
benötigt.
08
Die Aufnahme am Rumpf für
das Höhenleitwerk mit ge-
eignetem Klebstoff benetzen.
Dann das Höhenleitwerk in
der richtigen Position aufset-
zen und andrücken bis es fest
mit dem Rumpf verklebt ist.
09
Das Anlenkgestänge wie
abgebildet mit dem Ruder-
horn des Höhenleitwerks
verbinden. Der Befestigungs-
clip wird mit dem Äußersten
Loch des Ruderhorns verbun-
den.
10
Die Unterseite des Seitenleit-
werks wie abgebildet mit ge-
eignetem Klebstoff benetzen.
Dann das Seitenleitwerk in
der richtigen Position in die
Aufnahme vom Höhenleit-
werk einstecken und andrü-
cken bis es fest verklebt ist.
11

MONTAGE DER ANTENNE
FRANZÖSISCHDEUTSCHENGLISCH
Für die Montage der Antenne
wird ein geeigneter Kleber
benötigt. Die Antenne in die
vorgesehene Position am
Rumpf einkleben.
12
Fertig montiertes Modell
ohne Bewaffnung und Zu-
satztanks.
13

MONTAGE DER BEWAFFNUNG
Für die Montage der Bewaff-
nung werden die Raketen,
Zusatztanks und ein geeigne-
ter Kleber benötigt.
14
Die Raketen und Zusatztanks
mit Hilfe des Klebers an den
vorgesehenen Positionen auf
der Tragächenunterseite be-
festigen.
15
Fertig montiertes Modell.
16

RUDERAUSSCHLÄGE
Funktion Normal
Querruder + 9 mm / - 9 mm
Höhenruder + 10 mm / - 10 mm
Seitenruder + 25 mm / - 25 mm
FRANZÖSISCHDEUTSCHENGLISCH
MONTAGEABSCHLUSS
Die noch übrigen RC Komponenten wie Empfänger und Akku einbauen. Nun kann der Sen-
der programmiert werden. Die Ruderausschläge und der Schwerpunkt können den nach-
stehenden Tabellen entnommen werden. Bei den angegebenen Werten handelt es sich um
Richtwerte.
SCHWERPUNKT
Der Schwerpunkt bendet sich bei etwa 40-45mm

CONSIGNES DE SÉCURITÉ
• Gardez toujours une distance de sécurité
autour de votre modèle dans toutes les
directions an d’éviter les collisions et les
blessures. Ce modèle est contrôlé par un
signal radioélectrique. Les signaux radio-
électriques peuvent être perturbés par
des facteurs externes sur lesquels vous ne
pouvez intervenir. Une interférence peut
conduire à une perte de contrôle tempo-
raire.
• Utilisez toujours votre modèle dans des
espaces dégagés, à l’écart des voitures, du
trac ou de personnes.
• Respectez toujours les instructions et
avertissements concernant ce produit et
tous ses accessoires (chargeur, batterie re-
chargeable, etc.)
ATTENTION : Merci de lire intégralement les instruc-
tions de montage et les consignes de sécurité avant
utilisation, an de vous familiariser avec les fonction-
nalités du produit. En tant qu’utilisateur du produit,
vous êtes seul responsable d’une utilisation qui ne
vous mette pas en danger, ni vous, ni les autres, ou des
dégâts sur le produit ou envers des tiers.
CECI N‘EST PAS UN JOUET !
Non destiné à des enfants de
moins de 14 ans.
• Tenez toujours les produits chimiques, les
petites pièces et les composants électroni-
ques hors de portée des enfants.
• Gardez toujours le modèle en vue et sous
contrôle.
• Utilisez toujours des batteries complète-
ment chargées avant le décollage.
• L’émetteur doit toujours être allumé avant
de mettre le modèle sous tension.
• Enlevez toujours la batterie avant de ran-
ger le modèle.
• Gardez tous les éléments mobiles propres.
• Gardez toutes les pièces bien sèches.
• Laissez toujours les éléments refroidir
avant de les toucher (Moteur, contrôleur,
batterie…)
• Vériez toujours que la fonction Fail-Safe
est correctement réglée avant de voler.
• N’utilisez jamais le modèle avec un câbla-
ge endommagé.
• Ne touchez jamais les parties mobiles.
CONSEILS POUR LA PROTECTION DE L‘ENVIRONNEMENT
Ce produit ne doit pas être jeté avec les ordures ménagères. Au contraire, il est
de la responsabilité de l’utilisateur de se débarrasser de l’équipement usagé dans
un point de collecte et de recyclage conçu pour les équipements électriques et
électroniques. Le regroupement et le recyclage de votre matériel usagé aideront
à sauver des matériaux de base et assureront que ce recyclage protège la santé
humaine et l’environnement. Pour plus d’informations sur les sites où vous pou-
vez emmener votre équipement usagé pour le recycler, merci de contacter vos
autorités locales, votre déchetterie, ou l’endroit où vous avez acheté votre produit.

CARACTÉRISTIQUES
PIÈCES DE RECHANGE
MATÉRIEL NÉCESSAIRE
Batterie LiPo 1000mAh 7,4V 35C
Chargeur Chargeur pour LiPo
Ensemble radio 6 voies ou plus
FRANÇAISALLEMANDANGLAIS
750 mm
610 mm
420 g
DERBEE BL DST-1300KV
20A
4x 9g
Item No. Name
DB001PB.1 DERBEE F4U Corsair 75cm - Fuselage bleu
DB001PB.2 DERBEE F4U Corsair 75cm - Aile bleu
DB001PB.3 DERBEE F4U Corsair 75cm - Dérive bleu
DB001PB.4 DERBEE F4U Corsair 75cm - Stabilisateur horizontal bleu
DB001PB.5 DERBEE F4U Corsair 75cm - Jeu de roquettes bleu
DB001PB.6 DERBEE F4U Corsair 75cm - 2 x réservoirs d’essence bleu
DB001PB.7 DERBEE F4U Corsair 75cm - Train d’atterrissage bleu
DB002PG.1 DERBEE F4U Corsair 75cm - Fuselage jaune
DB002PG.2 DERBEE F4U Corsair 75cm - Aile jaune
DB002PG.3 DERBEE F4U Corsair 75cm - Dérive jaune
DB002PG.4 DERBEE F4U Corsair 75cm - Stabilisateur horizontal jaune
DB0012PBG.10 DERBEE F4U Corsair 75cm - Jeu de tringleries
DB001PB.8 DERBEE F4U Corsair 75cm - Hélice 8x6“ bleu
DB001PB.9 DERBEE F4U Corsair 75cm - Cône d’hélice blue
DB002PG.5 DERBEE F4U Corsair 75cm - Cône d’hélice jaune
DB002PG.6 DERBEE F4U Corsair 75cm - 2 x réservoirs d’essence jaune
DB002PG.7 DERBEE F4U Corsair 75cm - Jeu de roquettes jaune
DB002PG.8 DERBEE F4U Corsair 75cm - Train d’atterrissage jaune
DB002PG.9 DERBEE F4U Corsair 75cm - Hélice 8x6“ jaune
DB0012PBG.11 DERBEE F4U Corsair 75cm - Moyeu d’hélice
DB0056PGB.14 DERBEE Contrôleur brushless 20 A
DB0056PGB.12 DERBEE Servo 9 g cordon de 150mm
DB0045PGB.12 DERBEE Servo 9 g cordon de 250mm
DB0012PGB.14 DERBEE Moteur Brushless DST-1300

01
02
03
04
MONTAGE DU TRAIN D’ATTERRISSAGE
Pour monter le train d’atter-
rissage, il vous faut l’aile, les
deux jambes de train, deux
vis 2 x 8 mm et un tournevis
adapté.
Insérez les deux jambes de
train dans les logements pré-
sents sous les ailes.
Fixez les deux jambes de
train avec les vis adaptées
pour éviter qu’elles puissent
s’échapper.
Le train est installé.
This manual suits for next models
2
Table of contents
Languages:
Other DERBEE Toy manuals
Popular Toy manuals by other brands
Trix
Trix 57 Series manual

Oregon Scientific
Oregon Scientific Barbie B-Creative Education Center Electronic Learning... manual
Tabletop Scenics
Tabletop Scenics TTSC-WAR-081 instruction manual

Eduard
Eduard P1Y Frances / Ginga 1/72 quick start guide
The Learning Journey
The Learning Journey Techno Kids Marble Trax Fun Trax instruction manual
Seagull Models
Seagull Models T-34C MENTOR Assembly manual

