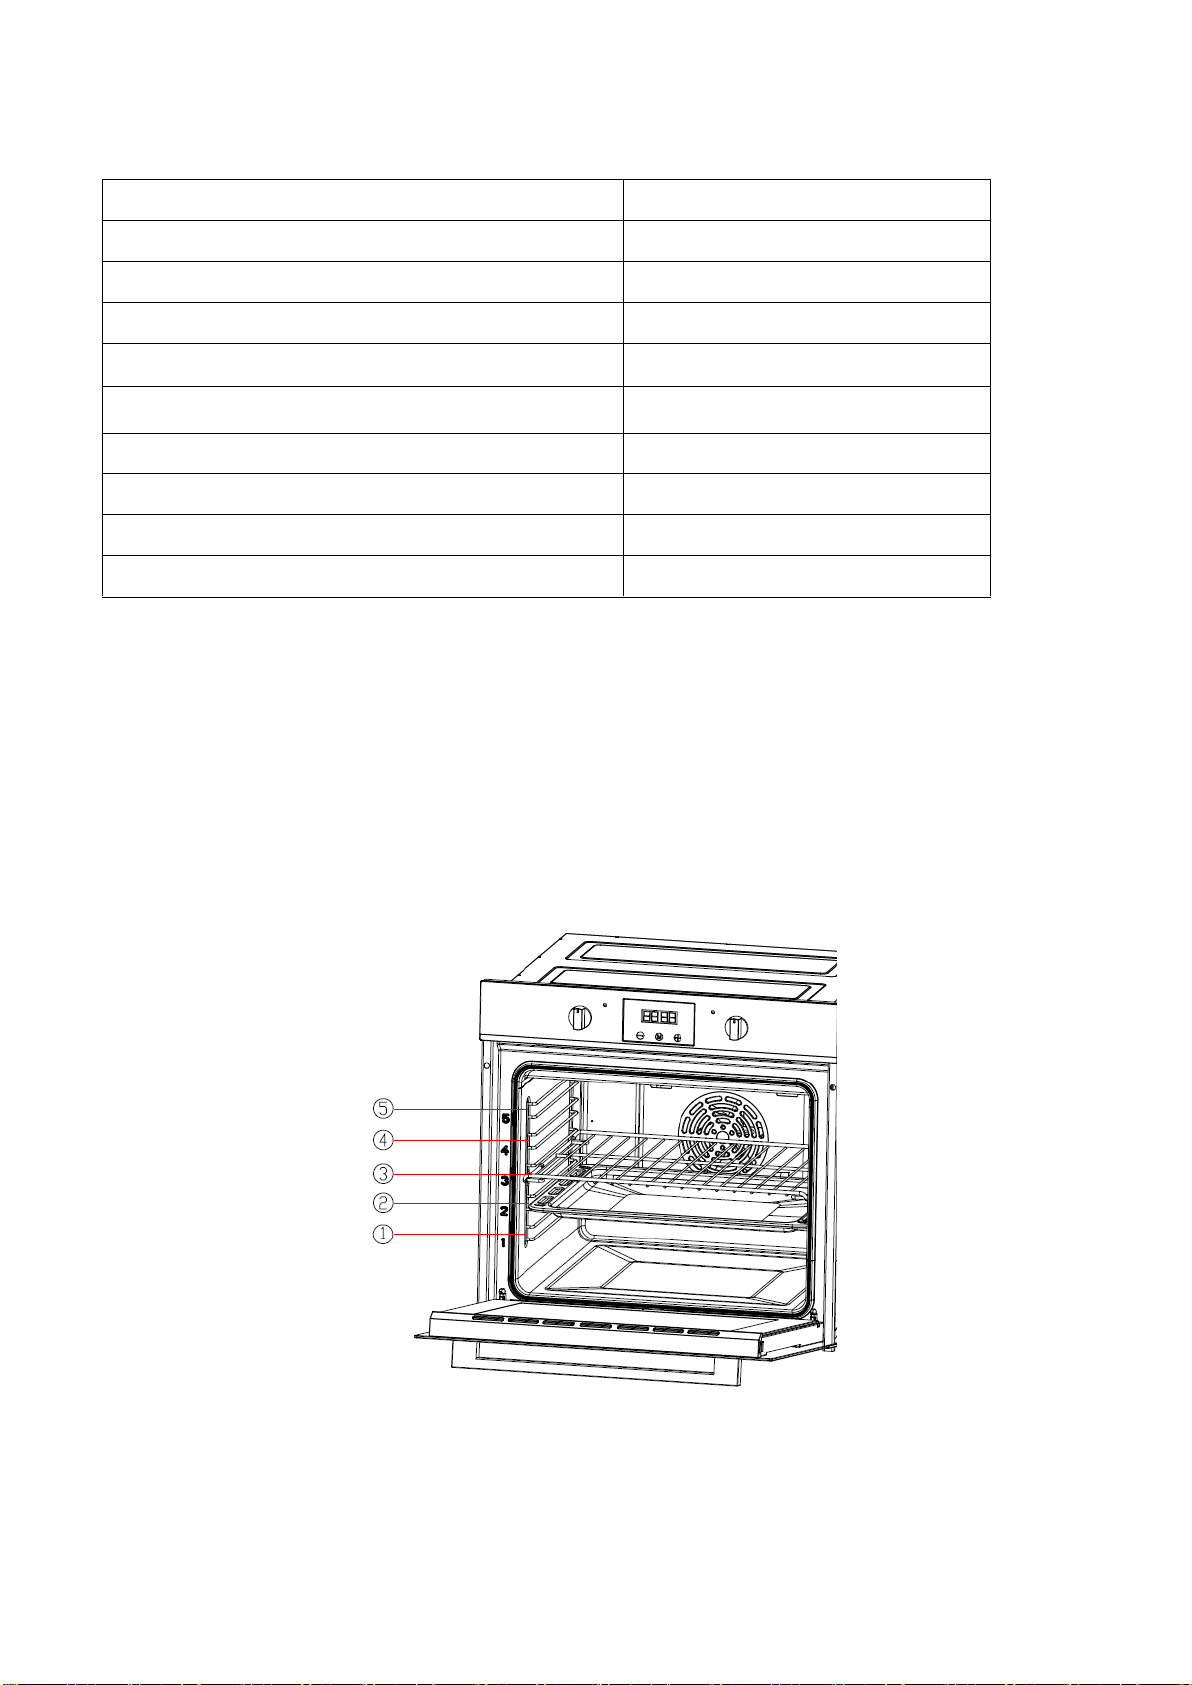
DERKOCH OWEN Guide

Model: OWEN
Installation and use manual for
Der Koch Ovens
60 cm Multifunction oven in stainless steel

2
Content
1…………………………………..…………………Important safety information
2…………………………………..…………………Installation
3…………………………………..…………………Prior to start up of the appliance
4…………………………………..…………………Your new oven
5…………………………………..…………………Program and function instruction
6…………………………………..…………………Before using the oven for the first time
7…………………………………..…………………How to operate the oven
8…………………………………..…………………Troubleshooting
9…………………………………..…………………Baking and grilling tips
10…………………………………..………………Maintenance and cleaning
11…………………………………..………………Environmental note
12…………………………………..………………Test dishes

3
Important safety information
This User Instruction Manual contains important information, including safety &
installation points, which will enable you to get the most out of your appliance. Please
keep it in a safe place so that it is easily available for future reference; for you or any
person not familiar with the operation of the appliance.
Warning:
●The appliance and its accessible
parts become hot during use. Care
should be taken to avoid touching
heating elements.
●Children less than 8 years of age shall
be kept away unless continuously
supervised.
●This appliance can be used by
children aged from 8 years and above
and persons with reduced physical,
sensory or mental capabilities or lack
of experience and knowledge or they
have been given supervision or
instruction concerning use of the
appliance in a safe way and
understand the hazards involved.
Children shall not play with the
appliance. Cleaning and user
maintenance shall not be made by
children without supervision.
●Asteam cleaner is not to be used.
●Accessible parts may become hot
during use. Young children should be
kept well away when in use.
●Do not use harsh abrasive cleaners or
metal scrapers to clean the oven door
glass as this can scratch the surface,
which may result in the oven glass
shattering.
●Do not use abrasive products to clean
the glass door panel to avoid
scratching it. Otherwise, severe failure
might happen to the appliance.
●The appliance must not be installed
behind a decorative door in order to
avoid overheating.
●The air must not be discharged into a
flue that is used for exhausting fumes
from appliances burning gas or other
fuels.
Operation:
Warning! Danger of fire!
●Do not allow paper or cloth to come
in contact with any heating element.
●Never store or use corrosive
chemicals, vapors, flammables or
nonfood products in or near oven. It is
specifically designed for use when
heating or cooking food. The use of
corrosive chemicals in heating or
cleaning will damage the appliance
and could result in injury
●If food inside an oven should ignite,
keep door closed. Switch off the oven
and disconnect from supply power.
●Exercise caution when opening the
door. Standing to the side, open the
door slowly and slightly to let hot air
and/or steam escape. Keep your face
clear of the opening and make sure
there are no children or pets near the
oven. After the release of hot air
and/or steam, proceed with your
cooking. Keep doors closed at all time

4
unless necessary for cooking or
cleaning purposes.
●Only use utensils that are suitable for
use with ovens.
Warning!
Danger of explosion!
●Liquids and other foods must not be
heated in sealed containers since they
are liable to explode.
●If smoke is observed, switch off the
oven and keep the door closed in order
to stifle any flames.
●Do not allow any accessories or electric
cables to contact the hot parts of the
appliance.
Warning!
Hot surfaces! Risk of burns!
●During use the appliance becomes hot.
Care should be taken to avoid touching
heating elements inside the oven.
●Warning! Accessible parts may become
hot during use. Young children should
be kept away.
●Never move racks or pans when they
are hot. Wait until they cool.
Safety advices:
IMPORTANT!
Always switch off the
electricity supply at the mains
during installation and maintenance.
General Information
●This appliance is designed for
domestic household use and can be
built into a standard kitchen cabinet or
housing unit.
●Certain types of vinyl or laminate
kitchen furniture are particularly prone
to heat damage or discolouration at
temperatures below the guidelines
given above.
●The appliance surfaces will become hot
during use and retain heat after
operation.
●Any damage caused by the non-
compliance of temperature tolerance of
oven during installation or by the too
close distance between the furniture
and the oven will be borne by the owner.
●This appliance is not intended for use
by persons (including children) with
reduced physical sensory, or mental
capabilities, or by those who lack
experience and knowledge, unless they
have been given supervision and
instruction concerning the use of the
appliance by a person responsible for
their safety .
Installation
●The oven must be installed in
accordance with the installation
instructions and all measurements must
be followed.
●All installation work must be carried out
by a competent person or qualified
electrician.
Children
●Please dispose of the packaging
material carefully. Packaging material
can be dangerous to children.
●Make sure to keep children away from
the appliance, children should be
supervised to ensure that they do not
play with the appliance. It might be
dangerous to allow the children to touch
the appliance.

5
General Safety
●Do not place heavy objects on the oven
door or lean them on the oven door
when it is open, as it may cause
damages to the oven door hinges.
●Do not place those baked hot oil or fat
unattended on unattended areas, as it
will be a fire risk.
●Do not place pans or baking trays
directly on the base of the oven cavity,
even if aluminum foil is placed below
them.
●Do not allow cable or plug to come into
contact with the heating areas of
appliance.
●Do not install the appliance next to
curtains or soft furnishings.
●Do not attempt to lift or move cooking
appliances by using the oven door or
handle, as this may cause damage to
the appliance or result in injury to the
person lifting the appliance.
Electrical safety
●If the supply cord is damaged, it must
be replaced by the manufacturer, its
service agent or similarly qualified
persons in order to avoid a hazard.
●The appliance must be placed in such a
way, that the power supply is
accessible at all times.
●Before connecting the appliance to the
power supply, check that the power
supply voltage and current rating
corresponds with the power supply
details shown on the appliance rating
label.
●Never use a damaged appliance!
Disconnect the appliance from the
power source and contact your supplier
if it is damaged.
●Danger of electric shock! Do not
attempt to repair the appliance yourself.
In case of malfunction, repairs are to be
conducted by qualified personnel only.
●To avoid damaging the cord, do not
squeeze, bend or chafe it on sharp
edges. Keep it away from hot surfaces
and open flames as well.
●Lay out the cord in such a way that no
unintentional pulling or tripping over it is
possible.
●Do not open the appliance casing
under any circumstances. Do not insert
any foreign objects into the inside of the
casing.
●Never use accessories which are not
recommended by the manufacturer.
They could pose a safety risk to the
user and might damage the appliance.
Only use original parts and accessories.
●Keep the appliance away from any hot
surfaces and open flames. Always
operate the appliance on a level, stable,
clean and dry surface. Protect the
appliance against heat, dust, direct
sunlight, moisture, dripping and
splashing water.
●Do not place objects with open flames,
e.g. candles, on top of or beside the
appliance.
●WARNING: Ensure that the appliance
is switched off before replacing the
lamp to avoid the possibility of electric
shock.
●The fixed wiring for applicant shall have
an all-pole disconnection device.
Safety:
●Attention, the glass is extremely
fragile.Always wear gloves when
handling.
●For your safety, this product is made of
tempered glass. This type of glass is
highly resistant but has the feature to
retain the "memory" of shocks.

6
●Therefore, it should handle the product
with the greatest care to avoid shocks
and twists, especially during installation.
●Avoid installing this type of product in
areas where it would be highly exposed
to shocks.
●Do not let children play with the product.
●Do not stick adhesive film on the glass
surface. In case of breakage, it would
generate large pieces that could be
dangerous
Electrical connection
Danger of electric shock!
●Any electrical installation must be
carried out by an authorised
professional.
●All fittings must be installed by a
competent person in accordance with
local regulations. If in doubt, consult a
qualified electrician.
●Important! Always switch off the
electricity supply at the mains during
installation and maintenance. We
recommend that the fuse is withdrawn
or circuit breaker switched off at the
distribution board whilst work is in
progress.
●This product must be earthed –if no
earth feed wire is available, consult an
electrician.
●Means for disconnection must be
incorporated in the fixed wiring in
accordance with the wiring rules. To
achieve this install appropriate switched
fused connection unit.
●Note! A switched fused connection unit
having a contact separation of at least
3mm in all poles should be connected
in fixed wiring.
●Connect the incoming positive, neutral
and earth cables to the terminals of the
switched fused connection unit. Ensure
connections are tight.
●The spur outlet must still be accessible
even when your oven is located in its
housing to enable the appliance to be
disconnected from the mains supply.
Cleaning
●Always disconnect the power supply
prior to cleaning the appliance. If the
switched fused connection unit is
difficult to reach, shut off the power
supply by using the corresponding
circuit breaker at the distribution board.
●Clean the appliance thoroughly before
first use. The oven should be cleaned
regularly and any food deposits
removed.
●Never clean the oven surfaces by
steam cleaning.
●The oven cavity should only be cleaned
with warm soapy water, using either a
sponge or soft cloth. No abrasive
cleaners should be used.
●Any stains that may appear on the
bottom of the oven will have originated
from food splashes or spilt food, these
splashes occur during the cooking
process. These could possibly be a
result of the food being cooked at an
excessively high temperature or being
placed in cookware that is too small.
●You should select a cooking
temperature and function that is
appropriate for the food that you are
cooking. You should also ensure that
the food is placed in an adequately
sized dish and that you use the drip tray
where appropriate.

7
Installation
Before installation
The appliance should be installed built in the cabinet . It should be keep safety distance with
appliance and the kitchen walls. Detail pls check below picture . (values in mm).
Surfaces, synthetic laminates and adhesives used must be heat resistant(100℃minimum),
and neighboring unit fronts up to 70℃.
Kitchen cabinets must be set level and fixed. A gap of 5 mm is required between the
appliance and surrounding unit fronts.
If there is a drawer beneath the oven, a shelf must be installed between oven and drawer.
Installation method

8
Installation and connection
▲Material damage!
The door and/or handle must not be used for lifting or moving the appliance.
For installation the appliance must be connected in accordance with all local gas and/or
electrical regulations.
Carry the appliance with at least two persons.
Use the slots or wire handles located at both sides to move the appliance.
Connection to the mains supply
This appliance must be earthed!
Our company shall not be held responsible for any damage caused by using
the appliance without an earthed socket. Risk of electric shock, short circuit or fire by
unprofessional installation! The appliance may be connected to the mains supply only
by an authorized qualified person and the appliance is only guaranteed after correct
installation.
Risk of electric shock, short circuit or fire by damage of the mains lead! The mains lead
must not be clamped, bent or trapped or come into contact with hot parts of the
appliance. If the mains lead is damaged, it must be replaced by a qualified electrician.
The mains supply must correspond to be data specified on the rating plate of the
appliance. The appliance mains cable must correspond to the specifications and the
power consumption.
Risk of electric shock!
Before starting any work on the electrical installation, please disconnect the
appliance from the mains supply.
Installation
1、Slide the oven through the cabinet aperture, align and secure.
2、Fix your oven with the 2 screws and washers as indicated in the figure.
Final check
1. Connect the appliance to the mains supply and switch on the mains supply.
2. Check function.

9
Prior to start up of the appliance
➢Once this simple operation has been carried out the oven is ready to use for cooking.
➢This appliance is exclusively for domestic use.
➢Use the oven to cook food only.
➢Before cooking,make sure all oven accessories that are not required are removed from
the oven.
➢Pre-heat the oven to the cooking temperature before using it.
➢Place the cooking trays in the center of oven and leave space in between when using
more than one,so that the air can circulate.
➢Do not put oven trays on the base of the oven or cover it with aluminium foil. This will
cause thermal accumulation. The cooking and roasting times will not coincide and the
enamel may be damaged.
➢Try to open the oven door as little as possible to see the food (the oven light remains on
during cooking).
➢Take care when opening the door to avoid contact with hot parts and steam.
Your new oven
A. Oven overview
1、Control panel 5、Side shelf
2、Fan motor( inner the cover) 6、Door
3、Wire rack 7、Handle
4、Tray

10
B.Technical specifications
Voltage/frequency
220V~/60Hz
Total power consumption
2790W
Cable type/section
H05VV-F 3*1.5mm2
Cable length
1.2m
External dimensions(height/width/depth)
595/595/593(mm)
Installation dimensions(height/width/depth)
600/600/ min 595(mm)
Main oven
Multifunction oven
Energy efficiency class
A
Oven lamp
25W/300°C
Grill power consumption
2790W
C.Your accessories
•The accessories supplied with your appliance are suitable for making many meals.
Ensure that you always insert the accessories into the cooking compartment the right
way round.
•There is also a selection of optional accessories, with which you can improve on some
of your favorite dishes, or simply to make working with your oven more convenient.
Inserting accessories
You can insert the accessories into the cooking compartment at 5 different levels. Always
insert them as far as they will go so that the accessories do not touch the door panel.
The accessories can be pulled out approximately halfway until they lock in place. This
allows dishes to be removed easily.
Note: The accessories may deform when they become hot. Once they cool down again,
they regain their original shape. This does not affect their operation.

11
Oven pan
For moist cakes, pastries, frozen meals and large roasts. It can also be used to catch
dripping fat when you are grilling directly on the wire rack.
Oven deep pan (Only for some models)
Used for pastries, large roasts, juicy dishes, and for collecting the fat while grilling.
Wire rack
Used for roasting and for placing the food to be baked, roasted or cooked in casserole
dishes to the desired rack.
Side shelf (Only for some models)
①②③④⑤ on behalf of five different height positions for your choosing.For removable
side shelf, you can adjust four different height positions to bake food.

12
D.Control panel
Here, you will see an overview of the control panel. Depending on the appliance model,
individual details may differ.
Function selector
Use the function selector to set the type of heating.
This appliance have 10 grill functions available.
OVEN LIGHT: This mode switches on the oven light and other electric devices do
not work.
FAN AND BOTTOM ELEMENT: This method of cooking utilises the bottom
element in conjunction with the fan, which helps to circulate the heat. This function
is suitable for sterilizing and preserving jars.
CONVENTIONAL OVEN (top and lower element): This method of cooking
provides traditional cooking, with heat from the top and lower elements. This
function is suitable for roasting and baking on one shelf only.
INTENSIVE BAKE: This method of cooking is a conventional cooking method, the
oven heat from top element to lower element, and the fan helps to circulate the
heat to achieve an even baking result.
HALF GRILL: This method of cooking utilises the inner part only of the top element,
which directs heat downwards onto the food. This function is suitable for grilling
small portions of bacon, toast and meat etc.
FULL GRILL: This method of cooking utilises the inner and outer parts of the top
element, which directs heat downwards onto the food. This function is suitable for
grilling medium or large portions of sausages, bacon, steaks, fish etc.
FAN AND GRILL: This method of cooking utilises the top element in conjunction
with the fan, which helps to provide a quick circulation of heat. This function is
suitable where quick browning is required and “sealing” the juices in, such as steaks,

13
hamburgers, some vegetables etc.
FAN OVEN: This method of cooking uses the circular element whilst the heat is
distributed by the fan. This results in a faster and more economical cooking process.
The fan oven allows food to be cooked simultaneously on different shelves,
preventing the transmission of smells and tastes from one dish onto another.
DEFROST: The fan runs without heat to reduce the defrosting time of frozen foods.
The time required to defrost the food will depend on the room temperature, the
quantity and type of food.
Energy saving GRILLing mode: This method of cooking uses the top outer ring and
the bottom heating element to control the temperature, making the grilling more
energy saving,mainly suitable for large food, oven temperature rises slowly, the heat
fully penetrates and the excess heat consumption is reduced.
Digital timer control
1. Control panel
Control panel diagram
1.1 Function icon instruction
Icons
Function
Minus button
Plus button/ audible signal
selecting key
Program button
1.2 Display screen icon instruction
Icons
Function
Icons
Function
1
“Auto” function symbol
4
Clock symbol
2
Oven in use symbol
5
Display the time, can display
system time, clock and cooking
time
3
Decimal point symbol

14
Display section diagram
2. Timer working status
Switching the timer status
The timer has 3 status, they are standby, function to be selected and working status.
Stand-by status: After connected to the power supply, the display screen displays the
system time, the decimal point symbol flashes, it is the status before entering cooking
function; If exceeds 10 seconds without any operation under standby mode, the display
brightness automatically reduces, press any key to recover to the original brightness.
Function to be selected status: Long press program button under standby status, the
display screen will show system time, it is the status when oven in use symbol and decimal
point symbol keep bright.
Working status: After completed setting any one of the system time, clock, cooking time or
cooking end time, the display screen will show system time, and it is the status when
corresponding working icon keep bright.
Status switching diagram refer to below:
Status switching diagram
3. Timer function mode switching
Long press program button “M” for 3s enter to system time setting status, without any
operation after 5S,system time, oven in use symbol “ ” and decimal point symbol “ ”
keep bright display; you can circularly switch the oven timer function mode by program
button “M”.
The operation flow and corresponding functional sequence are as followings:

15
Timer function mode switching diagram
4. Operation instructions
4.1 Power on
For the first time, the buzzer “beep” for one time to show that the timer enters into the
standby state. The clock shows the time of the system and starts the timing. Power-on
displays as “0·00”, the display screen displays the system time, the decimal point symbol
“ ” is flashing,1 second 1 time, like Pic 5.You can push“ ”to choose 3 kinds of ring tone,
The default is the second ring tone. Whenever user wants to adjust the ring tone again,
press “ ”.
Pic 5 Power-on default clock diagram (standby state)
4.2 Start up and time setting
When the display is flashing, press “ ”for 3 seconds to start up the oven. Then oven in
use symbol“ ”lights up and decimal point symbol “ ” twinkles. When decimal point
symbol “ ” twinkles, press “ ”or “ ” to set the system time. After choosing the time ,
lift the finger off the buttons and wait for 5 seconds, then decimal point symbol “ ” stop
twinkling. It means time is well set. Like pic 8.Whenever user wants to set the time again, In
the status of pic 7, push “ ” one time, when user sees decimal point symbol “ ”
twinkles, then can set the time again.
Pic 6 Clock setting state diagram Pic 7 Feature to be selected state diagram
(second icon flickering) (second icon always bright)

16
Press button“ ” again for 3 seconds, oven is turned off and returns to standby status.
The display of pic 6 is flashing.
Pic 8 System time well set diagram
Note 1:System time setting range is 0:00-23:59.
Note 2:When setting the time for each function of the timer, you can set the time by short
press or long press “ ” and “ ”,short press will add 1 minute or reduce 1 minute each
press of the button, while long press will quickly increase or decrease the time by 1 minute,
so it can set the time fast.
4.3 Alarm clock setting function
In the state of function to be selected, when the display shows the system time, oven in use
symbol“ ” and decimal point symbol “ ”keep bright, press “” two times, then the
clock icon“ ”twinkles, and the screen display changes to the alarm clock time(First set
default display “0·00”), alarm clock time and decimal point symbol “ ”always display ,
like pic 9.When the alarm clock icon“ ” twinkles, Press“ ”or“ ” to set the clock. Alarm
clock well set diagram like pic 10 (Set 10 minutes).
Pic 9 Alarm clock setting initial state Pic 10 Alarm clock well set
(alarm clock icon flickering) (alarm clock icon flickering)
After choosing the time , lift the finger off the buttons and wait for 5 seconds, then the alarm
clock icon“ ” stops twinkling and changes to always bright, display screen shows system
time, oven in use symbol“ ” ,decimal point symbol “ ” and system time keep bright. It
means time is well set. See Pic 11.
Whenever user wants to adjust the clock, in the working status, push “ ” two times, when
user sees the alarm clock icon“ ” twinkles, it will shows the set clock or the time left, and
user can adjust the clock again. After setting is done, the display will change back to system
time.

17
Pic 11 Alarm clock working status diagram Pic 12 Alarm clock time over diagram (alarm
clock icon always bright) (alarm clock icon flickering)
For example, set the clock 10 minutes. After10 minutes, display screen shows system time,
oven in use symbol“ ” ,decimal point symbol “ ”and system time keep bright, the
alarm clock icon “ ” twinkles, buzzer will prompt the user for 5 minutes, reminding the user
that the alarm clock time is over .Like Pic 12.Pressing any key can stop the buzzer and
extinguish alarm icon “ ”.Like Pic 13.
Pic 13 Cancel alarm clock icon display diagram(After alarm clock over)
Note :Alarm clock time setting range is 0:00-23:59.
4.4 Cooking time setting function
In the state of function to be selected, press button“ ” 3 times, then the icon “AUTO” and
oven in use symbol icon “ ” twinkle. The screen shows the cooking time(First set default
display “0·00”),cooking time and decimal point symbol “ ”keep bright display, see Pic
14.When the icon “AUTO” and oven in use symbol “ ”twinkle, user can set the cooking
time by pressing“ ”or“ ”.Well set diagram see Pic 15(Set 30 minutes).
Pic 14 Cooking time setting initial state Pic 15 Cooking time well set state
After choosing the time , lift the finger off the buttons and wait for 5 seconds, then the icon
“AUTO” and oven in use symbol “ ”stop twinkling and change to always bright display. It
means time is well set. Whenever user wants to adjust the timer, in the working status, push
“ ” three times, when user sees the icon “AUTO” and oven in use symbol “ ” twinkles,
it will shows the set timer or the time left, and user can adjust the timer again. After setting is

18
done, the display will change back to system time, decimal point symbol “ ”and system
time keep bright. See Pic 16.
Pic 16 Cooking time working status Pic 17 Cooking time over diagram
(All the icons always bright) (All the icons flickering)
Pic 18 Cancel “Auto” function symbol display diagram(After cooking time over)
For example, set the timer 30 minutes. After 30 minutes, display screen shows system time,
oven in use symbol“ ” extinguishes, system time keeps bright, decimal point symbol “ ”
and “Auto” function symbol twinkle, buzzer will prompt the user for 5 minutes, reminding the
user that the cooking time is over .Like Pic 17.Pressing any key can stop the buzzer and
extinguish“Auto” function symbol.Like Pic 18.
Note 1:Cooking time setting range is 0:00-10:00.
Note 2:Not setting cooking time after power on, the appliance will automatically shut
down after working 10 hours, without buzzer reminding function.
4.5 Cooking end time setting function
In the state of function to be selected, press button “ ” 4 times, then icon “AUTO” and
oven in use symbol “ ”twinkle, display screen shows cooking end time(The first setting
shows the current system time by default),cooking end time and decimal point symbol
“”keep bright. Display effect see Pic 19(Suppose current system time is 0:00 ). When
the icon “AUTO” and oven in use symbol “ ”twinkle, you can set cooking end time by
pressing“ ”or“ ”,well set diagram see Pic 20(Suppose cooking end time is 0:30).

19
Pic 19 Cooking end time setting initial state Pic 20 Cooking end time well set state
After choosing the time , lift the finger off the buttons and wait for 5 seconds, then the icon
“AUTO” and oven in use symbol “ ”stop twinkling and change to always bright. Display
screen will show system time, decimal point symbol “ ”and system time keep bright. It
means time is well set. See Pic 21.
Whenever user wants to adjust the timer, in the working status, push “ ” four times,
when user sees the icon “AUTO” twinkles, it will show the set cooking end time, and user
can adjust the time again. After setting is done, The display will change back to system time.
Pic 21 Cooking end time working status Pic 22 Cooking finished diagram
(All the icons always bright) (All the icons flickering)
Pic 23 Cancel “Auto” function symbol display diagram(After cooking finished)
For example, the system time is 0:00 like pic 19. Set cooking end time 0:30, like pic 20.
When the time reaches 0:30, display screen shows system time, oven in use symbol“ ”
extinguishes, system time keeps bright, decimal point symbol “ ”and “Auto” function
symbol twinkle, buzzer will prompt the user for 5 minutes, reminding the user that the
cooking is finished .Like Pic 22.Pressing any key can stop the buzzer and extinguish “Auto”
function symbol.Like Pic 23.
Note:Cooking end time is beyond current system time plus cooking time, and within 23:59.
4.6 Cooking reservation function
In the state of function to be selected, user can reserve the cooking time, by setting how
much time to cook and when to have the dish ready.

20
First, press button “ ” 3 times, then the icon “AUTO” and oven in use symbol
icon“ ”twinkle. The screen shows the cooking time (First set default display
“0·00”).When the icon “AUTO” and oven in use symbol “ ”twinkle, user can set the
cooking time by pressing“ ”or“ ”.
Pic 24 Cooking time well set diagram Pic 25 Reservation function setting initial state
Second, press “ ” one time again, when icon “AUTO” twinkles, user can set the time that
expect the cooking finishes at, by pressing“ ”or“ ”. After choosing the time , lift the
finger off the buttons and wait for 5 seconds, then the icon “AUTO” stops twinkling. It means
time is well set. Whenever user wants to adjust the timer, in the working status, press “ ”
three times to adjust the cooking period, or press “ ” four times to adjust the ending time.
After setting is done, The display will change back to system time.
For example, the system time is 0:00. First, set cooking time 30 mins like pic 25. Second,
set cooking end time 1:00, like pic 26. Then the oven is back to waiting mode. When the
time reaches 0:30, the oven automatically starts to cook. It cooks for 30 mins and stop at
the set time 1:00, display screen shows system time, oven in use symbol“ ” extinguishes,
system time keeps bright, decimal point symbol “ ”and “Auto” function symbol twinkle,
buzzer will prompt the user for 5 minutes, reminding the user that the cooking is finished .
See Pic 29. Pressing any key can stop the buzzer and extinguish“Auto” function
symbol.Like Pic 30.
Pic 26 Reservation function well set state Pic 27 Reservation function start state
Pic 28 Cooking function start diagram Pic 29 Cooking function end diagram
Table of contents