11 12
ninjakitchen.com
ninjakitchen.com
Air Fry
1 Press the BOTTOM button and turn dial until
AIR FRY illuminates. The default time and
temperature settings will display. Press the
BOTTOM button again to confirm the AIR
FRY selection.
2 Press the TIME button, then turn the dial to
select a cook time up to 4 hours. Press the
TIME button again to confirm time selection.
3 Then press the TEMP button, then turn the
dial to select a temperature between 250°F
and 450°F. Press the TEMP button again to
confirm temperature selection.
4Press START/STOP dial to begin preheating.
5 Place ingredients in the air fry basket. When
the unit beeps to signify it has preheated,
immediately place the basket on the wire rack
on level 2 in the bottom oven. If ingredients
are fatty, oily, or marinated, place the sheet
pan on the wire rack on level 1 in the bottom
oven. Close oven door.
6 When cook time is complete, the unit will
beep and END will appear on the display.
Convection Bake
1 Press the BOTTOM button and turn dial until
CONV. BAKE illuminates. The default time
and temperature settings will display. Press
the BOTTOM button again to confirm the
CONV. BAKE selection.
2 Press the TIME button, then turn the dial to
select a cook time up to 4 hours. Press the
TIME button again to confirm time selection.
3Press the TEMP button and turn the dial to
select a temperature between 180°F and
450°F. Press the TEMP button again to
confirm temperature selection.
4Press START/STOP to begin preheating.
5Place ingredients on the sheet pan, cake pan,
or casserole dish. When the unit beeps to
signify it has preheated, immediately place
the sheet pan on the wire rack on level 1 in the
bottom oven. Close oven door.
6 When cook time is complete, the unit will
beep and END will appear on the display.
Pizza
1 Press the BOTTOM button and turn dial until PIZZA
illuminates. The default time and temperature
setting will display. Press the BOTTOM button
again to confirm the PIZZA selection.
2 Press the TIME button, then turn the dial to
select a cook time up to 4 hours. Press the
TIME button again to confirm time selection.
3 Press the TEMP button, then turn the dial
to select a temperature between 180°F and
450°F. Press the TEMP button again to confirm
temperature selection.
4
Place pizza on the sheet pan or directly on the
wire rack on level 2 in the bottom oven. Close
oven door and press START/STOP dial to begin
cooking.
5 When cook time is complete, the unit will beep
and END will appear on the display.
Dehydrate
1Press the BOTTOM button and turn dial until
DEHYDRATE illuminates. The default time
and temperature settings will display. Press
the BOTTOM button again to confirm the
DEHYDRATE selection.
2Press the TIME button, then turn the dial to
select a dehydrate time up to 24 hours. Press the
TIME button again to confirm time selection.
3
Press TEMP button, then turn the dial to select a
temperature between 85°F and 200°F. Press TEMP
button again to confirm temperature selection.
4Place ingredients in the air fry basket on level 2
in the bottom oven. Close oven door and press
START/STOP dial to begin cooking.
5When dehydrating time is complete, the unit
will beep and END will appear on the display.
To order additional parts and accessories, visit ninjaaccessories.com or contact Customer Service at
1-877-646-5288. We ask that you register your product online at registeryourninja.com and have the
product on hand when you call, so we may better assist you.
REPLACEMENT PARTS
NOTE: Purchase additional dehydrate accessory
to dehydrate on two levels at one time.
NOTE: For best results, lay ingredients flat in
a single layer.
NOTE: Unit does not preheat in Dehydrate mode.
NOTE: Unit does not preheat in Pizza mode.
NOTE: The timer will start counting down as
soon as the unit has preheated. If ingredients are
not ready to go into the oven, simply press the
TIME button and turn dial to add more time.
NOTE: Food cooks faster when using the Air
Fry function. Refer to Air Fry Chart in the
Inspiration Guide for more guidance on cook
times and temperatures.
To turn on the unit, plug the power cord into an outlet and press the Power button. The unit will
automatically shut o after 10 minutes of inactivity.
NOTE: If cooking for 1 hour or less, the clock
will count down by minutes and seconds. If
cooking for more than 1 hour, the clock will
count down by hours and minutes.
USING YOUR FOODI® DOUBLE OVEN – CONT.
ACCESSORIES FOR PURCHASE
EVERYDAY CLEANING
The unit should be cleaned thoroughly after
every use.
1Unplug the unit from the outlet and allow it
to cool down before cleaning.
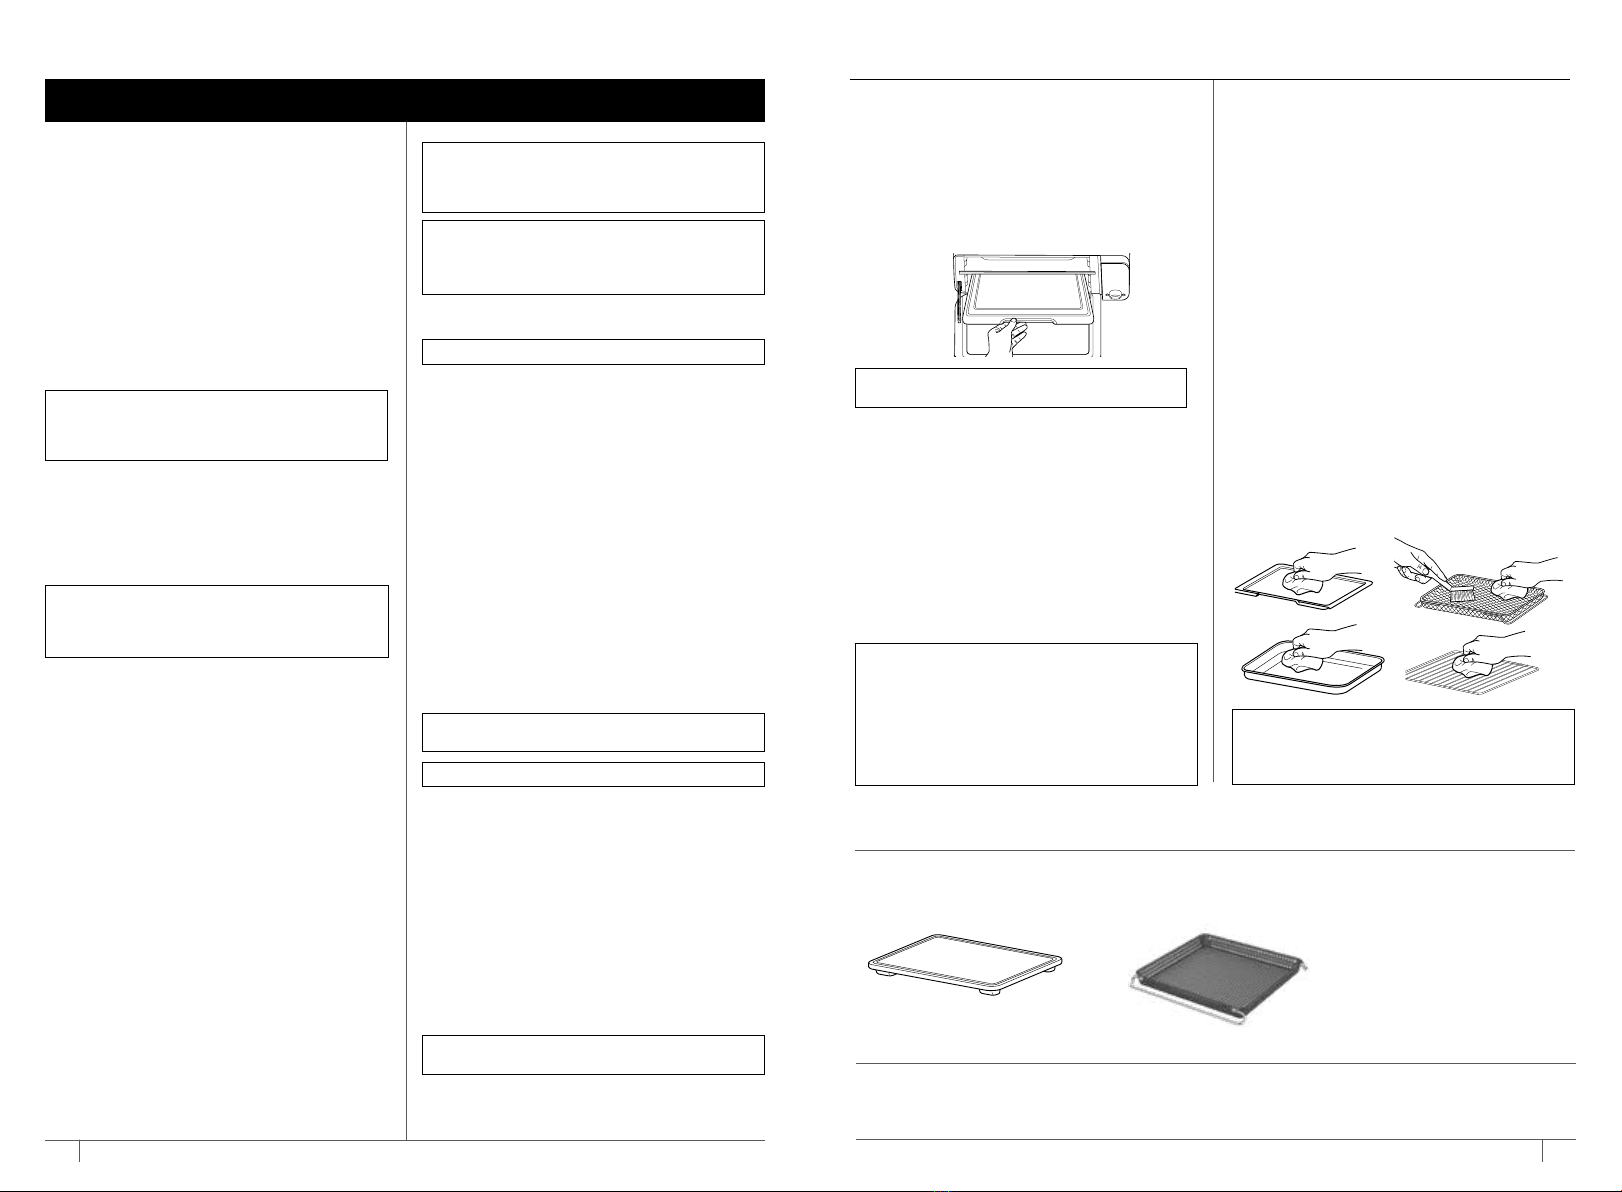
2Empty crumb tray by sliding it out of the
oven. The crumb tray can fit in both the top
and bottom ovens.
3After every use, wipe away any food splatter
on the interior walls and glass door of the
unit with a soft, damp sponge.
4To clean the exterior of the main unit and the
control panel, wipe them clean with a damp
cloth. A non-abrasive liquid cleanser or
mild spray solution may be used. Apply the
cleanser to the sponge, not the oven surface,
before cleaning.
5When using accessories, we recommend
greasing them with recommended cooking
oil, or covering them with parchment paper
or aluminum foil before placing food on top.
DEEP CLEANING
1Unplug the unit from the outlet and allow it
to cool down before cleaning.
2Remove all accessories from the unit,
including the crumb tray, and wash
separately. Use a non-abrasive cleaning brush
to more thoroughly wash the air fry basket.
Accessories are hand-wash recommended.
The air fry basket and wire racks can be put
in the dishwasher, but may wear more quickly
over time. DO NOT place sheet pan or crumb
tray in the dishwasher.
3Use warm, soapy water and a soft cloth
to wash the oven’s interior and glass door,
DO NOT use abrasive cleaners, scrubbing
brushes, or chemical cleaners, as they will
damage the oven.
CAUTION: NEVER put the main unit in the
dishwasher or immerse it in water or any
other liquid.
4 To remove tough grease, let sheet pan soak
overnight in warm, soapy water, then wash
with a non-abrasive sponge or brush.
5Thoroughly dry all parts before placing them
back in the oven.
CLEANING & MAINTENANCE
NOTE: Empty crumb tray frequently. Hand-
wash when necessary.
IMPORTANT: Place crumb tray below lower
heating elements in the top or at the very
bottom of the bottom oven. DO NOT slide
into any rack positions.
NOTE: When using parchment paper or
aluminum foil, cut to size of accessory. The
parchment paper or aluminum foil should
not touch any of the heating elements or the
inside oven walls as it could cause smoke.
DO NOT use parchment paper with the
Broil function or at temperatures above the
parchment manufacturer’s recommendations.
We oer a suite of accessories custom made for your Ninja® Double Oven. Visit ninjaaccessories.com
to expand your capabilities and take your cooking to the next level.
• Cutting Board • Nonstick Air Fry Basket
NOTE: The timer will start counting down as
soon as the unit has preheated. If ingredients
are not ready to go into the oven, simply press
the TIME button to add more time.