Design SHIFT ORWL User manual

ORWL User Guide Document
USERGUIDE
FORORWLCONFIGURATION
Version0.2

ORWL User Guide Document
Introduction 4
HardwareRequirements 4
ConfigurationofORWL 4
Step1:PoweronORWL 4
Step2:Displaypredefinedpinentrymessage 5
Step3:PresspowerbuttonontheORWL 6
Step4:Enterpredefinedpin 6
Step5:Predefinedpinverificationstatus 7
Step6:Displayuserpinentrymessage 8
Step7:PresspowerbuttonontheORWL 8
Step8:Enteruserpin 8
Step9:Displayuserpinreentrymessage 9
Step10:PresspowerbuttonontheORWL 9
Step11:Confirmtheuserpin 9
Step12:Userpinconfigurationstatus 9
Step13:Displayhashverificationmessage 10
Step14:Displayhashvalue 10
Step15:PresspowerbuttononORWL 11
Step16:DisplayPairKeyfobmessage 11
Step17:PresentKeyfobtoORWL 12
Step18:DisplayKeyfobassociationstatus 12
Step19:Displaycompletionofconfigurationstatus 13
PINverificationstepsaftercustomreboot 14
Step20:Displayverifyuserpinmessage 14
Step21:PresspowerbuttonontheORWL 14
Step22:Entercustompin 14
Step23:Userpinverificationstatus 15

ORWL User Guide Document
RevisionHistory
Version
Date
Descriptionofchanges
Author(s)
0.1
09-05-17
InitialdraftonORWLconfigurationuserguide
Chaitra
0.2
13-06-17
Document modified based on the comments
providedbyDaniel
Chaitra

ORWL User Guide Document
1. Introduction
ThisdocumentbriefsonthestepstobefollowedtoconfiguretheORWLdevice.
2. HardwareRequirements
Thehardwareequipmentsrequiredarelistedbelow:
●ORWL
●KeyFOB
3. ConfigurationofORWL
FollowingarethestepstoconfiguretheORWLdevice.
Step1:PoweronORWL
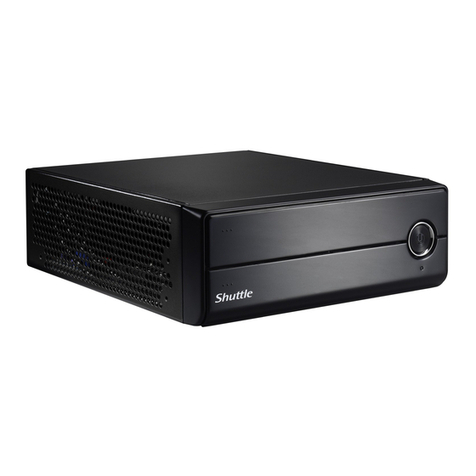
Power on the ORWL by pressing the button provided on ORWL. The position of button is shown in
below figure. ORWL logo is displayed after the ORWL device is powered. This message is displayed
forfewseconds.

ORWL User Guide Document
Following the ORWL logo, “Enter your PIN” message is displayed. If custom pin is already set by user
thenflowcontinuesfromstep20otherwiseitproceedswithstep2.
Step2:Displaypredefinedpinentrymessage
Amessage“PleaseentershippingPIN”isdisplayedforthreeseconds.

ORWL User Guide Document
Step3:PresspowerbuttonontheORWL
Followed by pin entry message, “Please press power button to proceed” message is displayed. Press
powerbuttonontheORWLtoproceedwithconfiguration.
Step4:Enterpredefinedpin
Oncepowerbuttonispressed,enterthe6-digitpredefinedPINreceivedthroughmail.
The UI contains all the digits followed by a backspace icon. A cursor pointer(^) will indicate the digit
thatiscurrentlyselected.
Selection of number for the PIN, will start at random position of digit selection, which then shifts
sequentiallyaslongasuserkeepsthepowerbuttonpressed.
Once a digit is selected by the user (by releasing the power button), as double confirmation the
selecteddigitwillbedisplayedintheboxforasecondandanentryforPINisaccepted.
If user finds that the selected digit double confirmation information displays wrong number, he can
cancelthesamebypressingthepowerbuttonquickly.
Userneedstowaituntilanasterisk(*)isdisplayedbeforechoosingthenextdigitofPINentry.

ORWL User Guide Document
Step5:Predefinedpinverificationstatus
Pin verification successful is indicated by a message on UI “Pin verified”. If pin verification is
unsuccessful, it is indicated by a message “Verification Failed! X attempt(s) remain.” X in this case
indicatesthenumberofattemptsremaining.
If retry count of 10 is already tried, then a message “ORWL LOCKED !!!” will be displayed and the
deviceneedstobesenttofactoryforunlockingit.
IfPINverificationissuccessful,thenitwillcontinuewiththenextstep.

ORWL User Guide Document
Step6:Displayuserpinentrymessage
Once PIN verification is successful, a message “Set your PIN” followed by PIN verification message is
displayed.
Step7:PresspowerbuttonontheORWL
Thisissameasstep3toproceedwithnextstep.
Step8:Enteruserpin
Enter 6-digit custom user PIN to be set. The UI contains all the digits followed by a backspace icon. A
cursor pointer is also available which shifts from digits to digits sequentially as user presses the
power button. PIN digits need to be selected by pressing the power button continuously. Once a
digit is selected by moving the cursor to that digit, stop pressing the power button for some time
untilthedigitiswrittentotheUI.TheUIisthesameasfiguredisplayedinstep4.

ORWL User Guide Document
Step9:DisplayuserPINreentrymessage
OncecustomPINentryissuccessful,amessage“Re-enterPIN”isdisplayed.
Step10:PresspowerbuttonontheORWL
Thisissameasstep3toproceedwithnextstep.
Step11:ConfirmtheuserPIN
Enter the same 6-digit PIN which is entered in step 8 to confirm the user PIN. The UI is the same as
figuredisplayedinstep4.
Step12:UserPINconfigurationstatus
If user pin configuration is successful, “Your custom PIN is set” message is displayed for three
seconds and flow continues with the next step. If PIN configuration is unsuccessful, “PIN didn’t
matchPleaseretry”messageisdisplayedandflowwillberestartedfromstep6.

ORWL User Guide Document
Step13:Displayhashverificationmessage
Message “VERIFY HASH Please press power button to confirm” is displayed to verify the hash and
ensurethesafeshipmentofORWLtoavaliduser.
Step14:Displayhashvalue
64 byte hash is displayed on the UI. User needs to verify the hash with the hash shared to them via
mail. If hash is correct, user needs to press the power button on the ORWL and flow continues with
next step. “HASH REJECTED CONTACT VENDOR OR RETRY AGAIN” message is displayed on timeout of
5minutesanddeviceneedstobeshippedbacktofactory.

ORWL User Guide Document
Step15:PresspowerbuttononORWL
User needs to press power button on ORWL to indicate proper hash verification and safe shipment
ofORWL.Amessage“HASHCONFIRMEDSAFESHIPMENT”isdisplayedforthreeseconds.

ORWL User Guide Document
Step16:DisplayPairKeyfobmessage
Amessage“PairKeyfobtoassociate”isdisplayed.
Step17:PresentKeyfobtoORWL
PresentakeyfobtoORWLtoproceedwiththeassociationprocessofkeyfobwithORWL.

ORWL User Guide Document
Step18:DisplayKeyfobassociationstatus
On successful association, an association image is shown for ten seconds and flow continues with
next step. If association does not happen in 120 sec, “Timeout Rebooting” message is displayed and
flow will be restarted from step 2. If association failed, then “Pairing Failed - Retry” message will be
displayedandtheassociationprocesswillbetriedagainbyORWL.

ORWL User Guide Document
Step19:Displaycompletionofconfigurationstatus
On completion of ORWL configuration, message “ORWL configured Rebooting” is displayed. Now
ORWLisconfiguredanditisinusermode.
4. PINverificationstepsaftercustomreboot
Following are the steps to be followed for custom reboot only if the custom PIN is already set by the
user.
Step20:DisplayverifyuserPINmessage
Amessage“EnteryourPIN”isdisplayedforthreeseconds.

ORWL User Guide Document
Step21:PresspowerbuttonontheORWL
Thisissameasstep3toproceedwithnextstep.
Step22:EntercustomPIN
Enter the 6-digit custom PIN which is configured by user to verify the user. The UI is same as figure
displayedinstep4.
Step23:Userpinverificationstatus
If user PIN verification is successful, “Login successful” message is displayed for three seconds and
flowwillproceedwithstep13.
Otherwise, “Login failed X attempts remain.” message is displayed and flow will be started again
fromstep20.Xinthiscaseindicatesthenumberofattemptsremaining.

ORWL User Guide Document
If retry count of 10 is already tried, then a message “ORWL LOCKED !!!” will be displayed and the
deviceneedstobesenttofactoryforunlockingit.
Table of contents
