4 5
4. Set Memory Positions
5. Move to the Memorized Position
6. Toggle the Display Unit Format
*Note: In inch format, the minimum height variation as the legs move up or down is 0.5 inches, while
in centimeter format is 1 centimeter.*
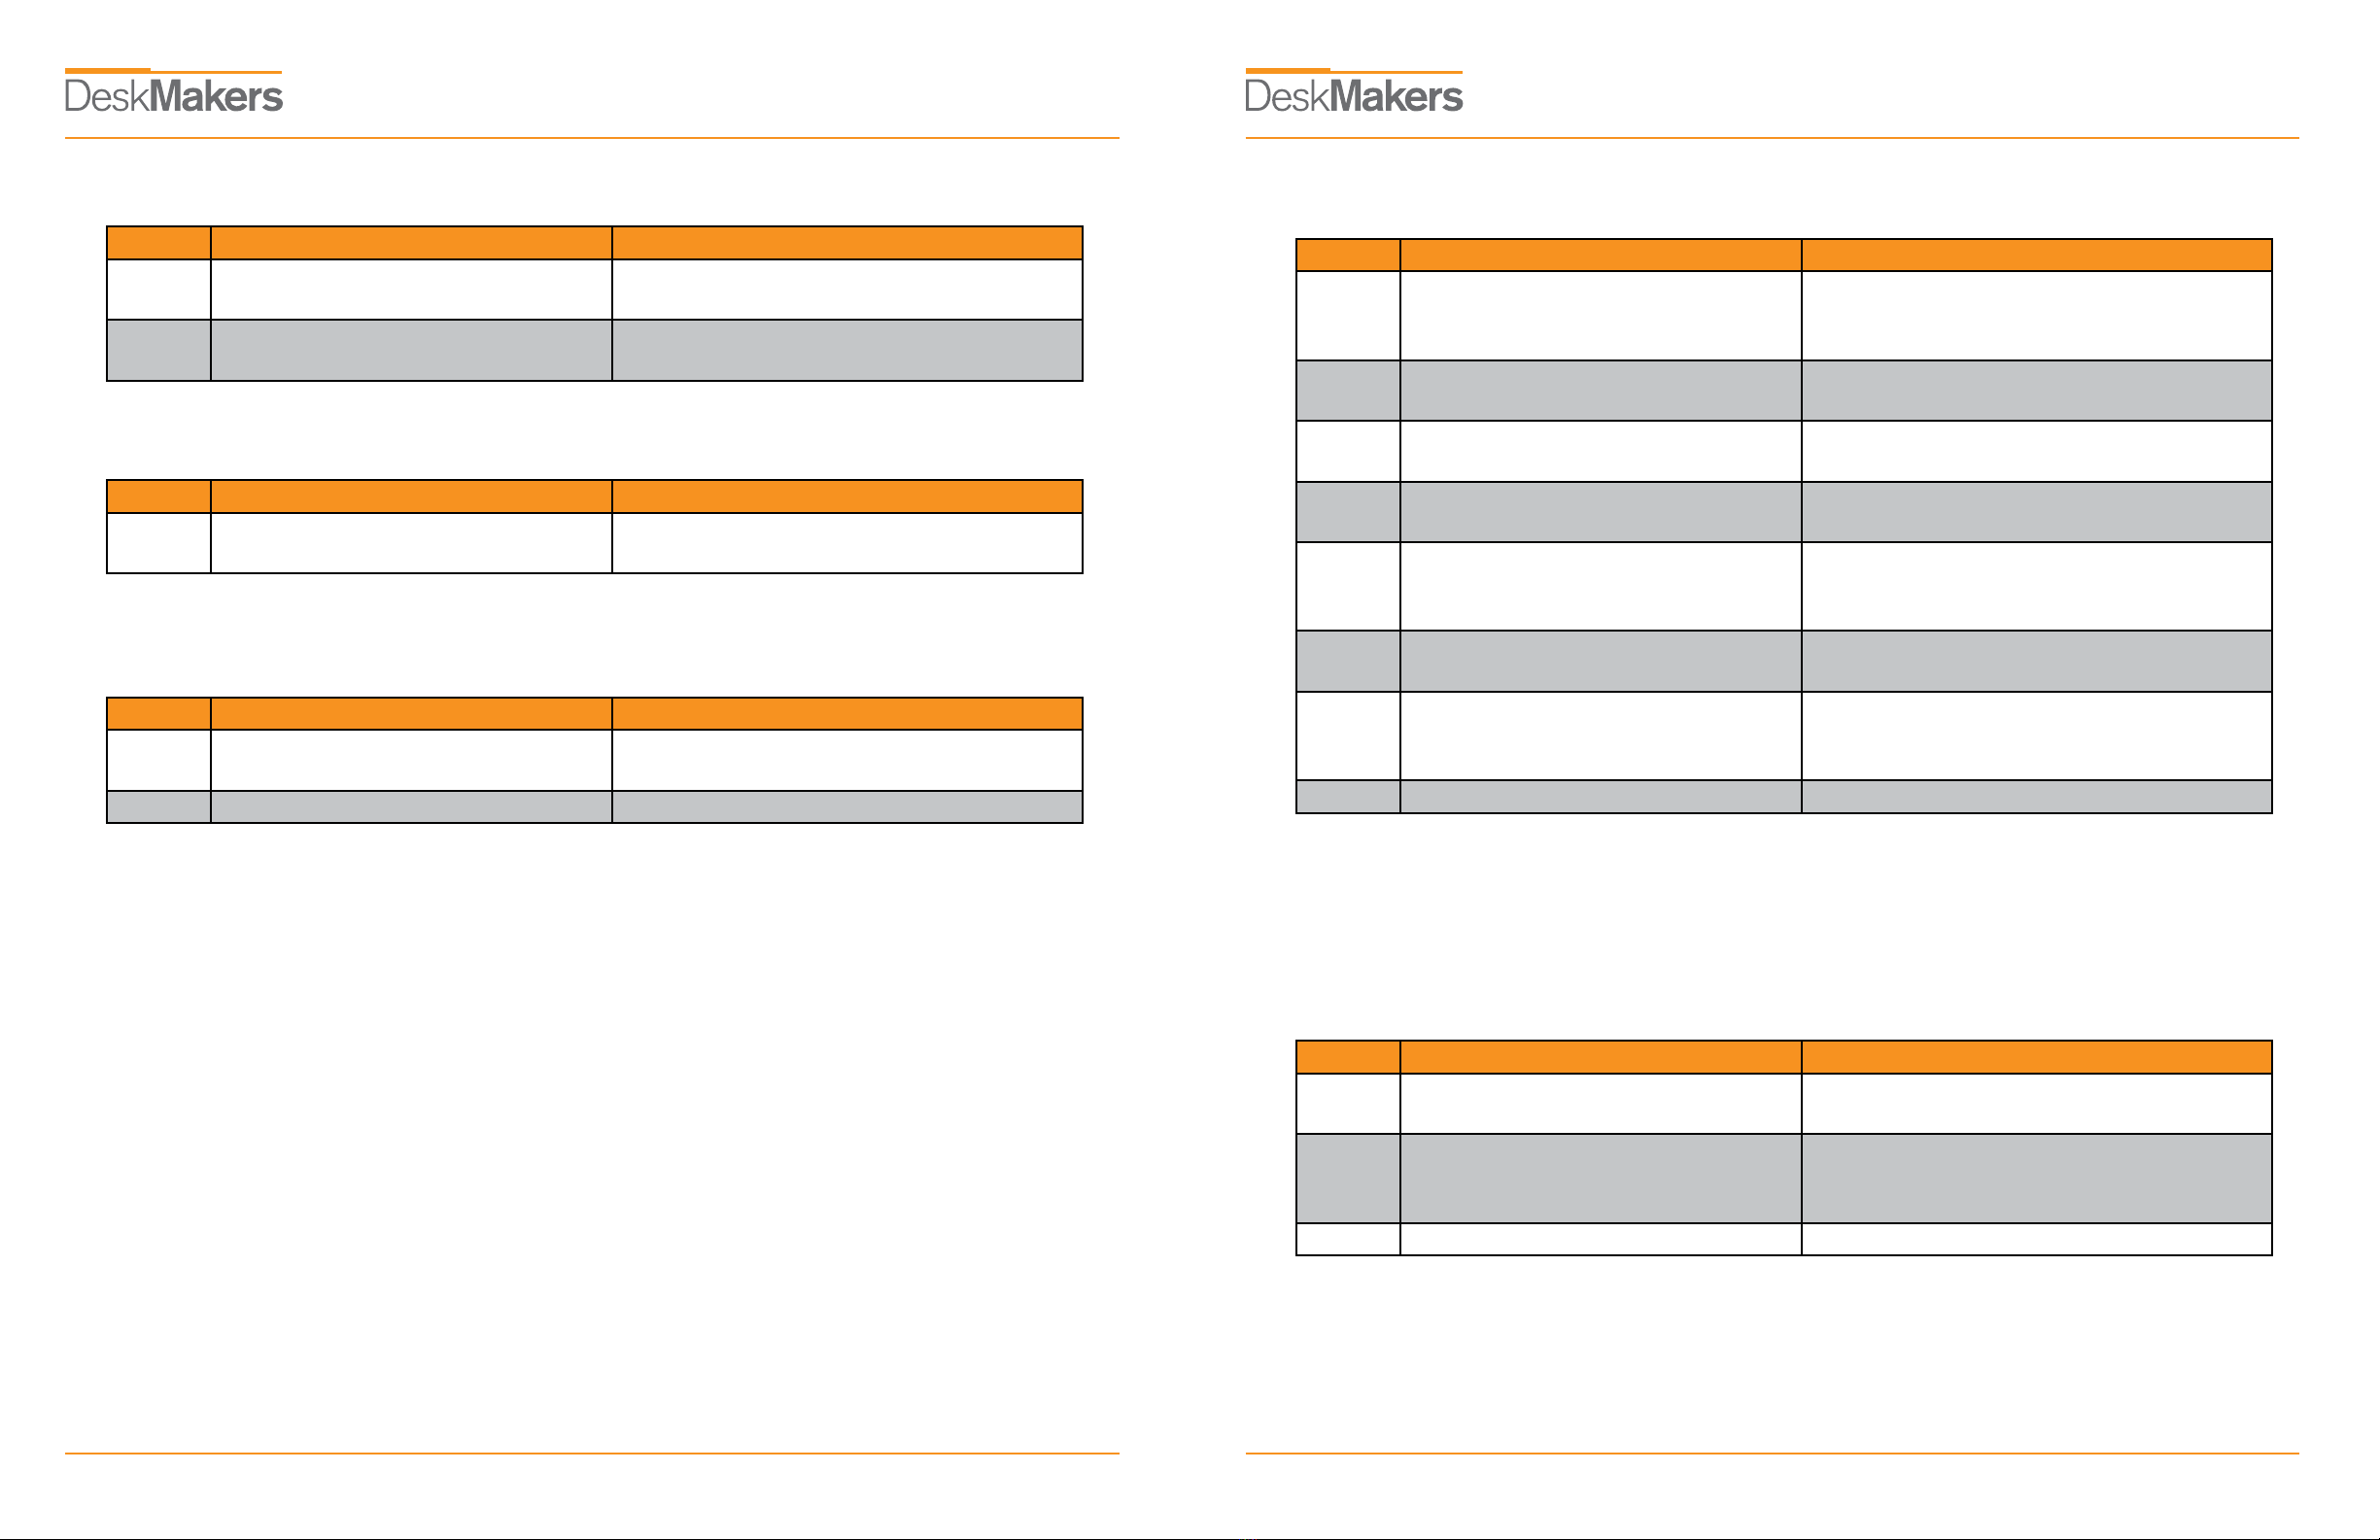
Step Operation Motion
1Press and Hold or Run the legs to the position you want the
table surface to be.
2Click button S, then click button 1, 2
or 3 within next 3 seconds
Position 1 ,2 or 3 is saved
V
V
Step Operation Motion
1Press and hold button S, then press
and hold , keep for about 3 seconds
The height information will be changed
between centimeters and inches
2 Release the buttons Completed
V
Step Operation Motion
1Press and Hold the Button 1, 2, or 3 Legs return to the corresponding position
saved
7. Verify the Display Switch Data to Table Height
*Note: Check the switch display format in inches or in centimeters and toggle to the unit you like
and match to the actual measurement. In inch format, the minimum adjustable height is 0.5 inches,
while in centimeter format is 1 centimeter.*
8. Lock the Stroke
*Note: 1. Legs aren’t able to run below the locked position
2. Memory position(s) are/is below the locked position will be lost even after the table is unlocked,
you need to follow SET MEMORY POSITIONS again to reset these memory positions.*
Step Operation Motion
1
Set the table at any height,
recommended at the bottom position
Measure the table actual height and
write down the number in inches or in
centimeters
2Press and hold button S, then press
and hold , keep for about 3 seconds
The first number starts flashing on the
screen
3Release the buttons, then click or
to change the first number
The first number is being increased or
decreased to the first number you measured
4Click button S The second number starts flashing on the
screen
5
Click or to change the number The second number is being increased
or decreased to the second number you
measured
6Click button S The third number starts flashing on the
screen
7
Click or to change the number The third number is being increased
or decreased to the third number you
measured
8 Click button S Completed
V
V
V
V
V
V
V
Step Operation Motion
1Press and hold or , then release Run the legs to the position you want the
table surface to be
2Press and hold button S, then press
and hold 1, keep for about 3 seconds
Letter “L” is indicated on the screen. That
means the position is locked at the lowest
position that the table can be moved to
3 Release the buttons Completed
V
V


 506 Motor installation instructions")
