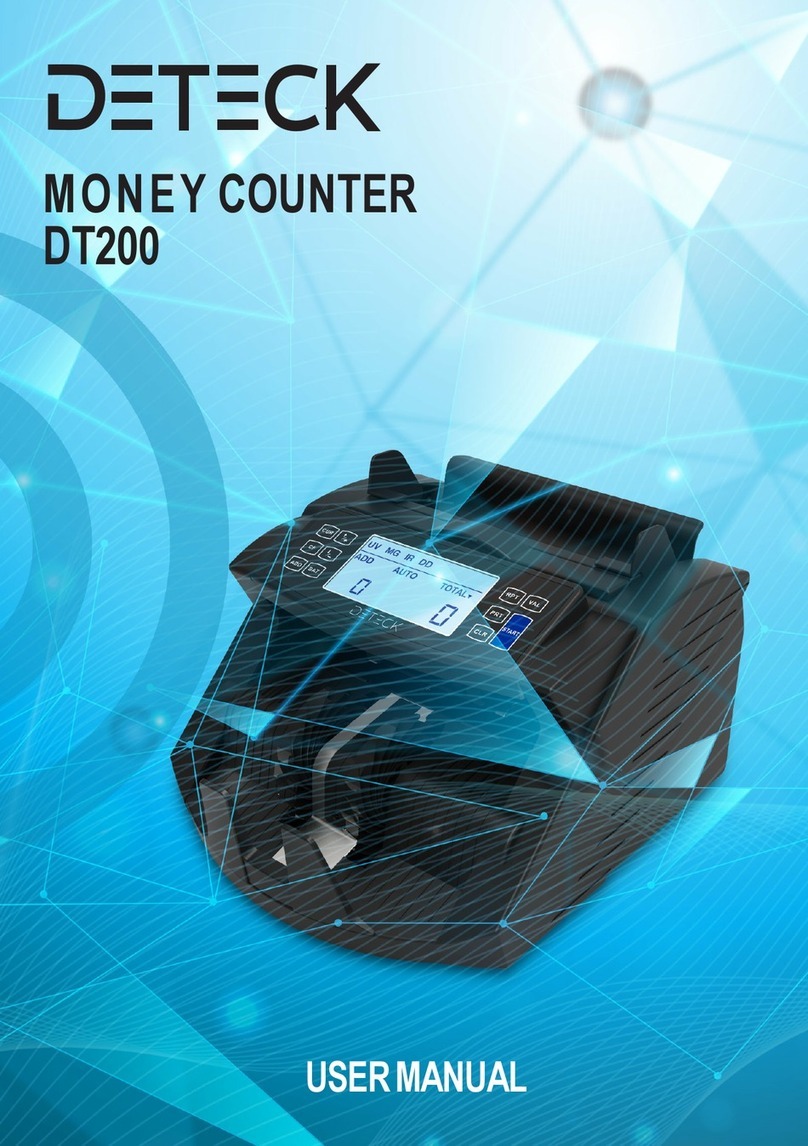
Deteck Edge DT800 Simple manual

2
INTRODUCTION
Thank you for choosing our product. The Edge DT800
Money Counter is the perfect solution for a fast,
accurate and reliable mixed-denomination & multi-
currency note value counter. We recommend reading
thoroughly all the information stipulated in this
manual in order to make the best use of this product.
PLEASE TAKE NOTICE Should the equipment be altered
in any way or used in a manner for which it was not in-
tended at the time of delivery, the supplier of the equip-
ment accepts no responsibility for injury or damage to
personnel or equipment. If the conditions for use of the
equipment are changed, the supplier must be contac-
ted or the declaration of conformity will be invalidated.
All support provided from our North
American 24/7 Support Team
1-332-228-1098

3
IMPORTANT SAFETY INSTRUCTIONS
warning
Keep the machine away from heavy humidity and high temperature as it may pre-
vent it from working properly.
Do not drop conductive objects into the machine to prevent internal short circuit.
Do not use this machine in areas where it may be exposed to water or other liquids .
Unplug this machine from the wall before opening the back cover for maintenance.
Do not clean the machine with chemical solvents. Use a damp cloth for cleaning.
Do not disassemble this machine as this may expose you to dangerous voltages as
well as electrical shocks if wrongly re-assembled. Take it to qualified personnel for
service or repair if required.
caution
When not using the machine for a prolonged period of time, please switch off the
machine and disconnect the power cord from the machine. Not following these ins-
tructions may result in fire, electrical shock or damage to the machine.
Ensure the cable is disconnected before moving the machine otherwise the power
cord may get damaged resulting in fire and electrical shock.
Do not pull the cord to unplug the power cord, but rather grip the plug to pull it out.
Do not touch the power cord with wet hands. Not following these instructions may
result in fire, electrical shock or damage to the machine.
Do not use the machine if the power cord is damaged or the plug socket is loose.
This may result in fire, electrical shock or other hazards.
Do not bend excessively the power cord as it may get damaged. This may result in
fire, electrical shock or other hazards.
Do not place heavy objects on the cord. This may result in fire, electrical shock or
other hazards.

4
content
5 safety precautions
6 instructions before the operation
7 overview of the product
10 counterfeit detection fuctions
11 technical parameters
12 operation
16 service menu
20 maintenance and troubleshoot
24 warrAnty

5
safety precautions
PLEASE READ CAREFULLY AND UNDERSTAND ALL THE SAFETY INSTRUCTIONS.
This product should not be exposed to:
• Shaky or vibrating surface.
• High temperature including but not limited to strong sunlight, radiator
or heater register. It should not be placed in a built-in installation unless properly
ventilated.
• High humidity and dust as this may damage the machine.
• Water or other liquids. In case of spilled liquid into the interior of the m
chine, please stop operating, switch off and disconnect the power cord
immediately. Contact the service center of help.
• Chemical solvents such as oil, gasoline, benzene and acidic liquids. In case of spilled
liquid into the interior of the machine, please stop operating, switch off and discon-
nect the power cord immediately. Contact the service center of help.
• Any kind of objects dropped into the machine through the case slots or openings.
Especially conductive objects such as paper clips, pins, coins, etc.
Only use the type of cable provided with this machine and ensure it’s plugged to a
grounded wall outlet or ground protection socket. This machine should only operate
from the type of power source indicated in this user’s guide technical parameters. If
you are not sure of the type of power supply in your location, consult your dealer or local
power company.
Please contact the service center for help or refer to a qualified service personnel under
the following conditions:
• Machine dropped or case damaged.
• Liquid spilled into the machine or exposed to rain or water.
• Power cord or plug is damaged (or frayed).
• Machine does not operate normally after adjusting controls covered by the opera-
ting. instructions. Improper adjustment of other controls may result in damage and
will often require extensive work by a qualified technician to restore the product.
• Noticeable change in performance.
All support provided from our North
American 24/7 Support Team
1-332-228-1098

6
instructions before the operation
A. Package contents:
e e
Ee ed
eg d ee
d
e d
e
B. UNPACKING
After unpacking the machine, please store the box and the packing material for fu-
ture use. Failing to ship the machine back in its original machine box, Styrofoam and
packing material will void the machine’s warranty.
C. installation
Please follow below step by step instructions:
1. Place the machine on a solid flat surface before using.
2. Please review the safety considerations to carefully chose an appropriate work-
space. environment to operate the machine.
3. Connect the power cord to machine power supply port (back of the machine).
4. Connect the power cord to a grounded wall outlet or ground protection socket.
5. Ensure voltage operating range: AC 100~240V / 50~60HZ.
6. Turn the machine ON and verify if its functioning properly. In case of any error
msg, please contact the service center for help.
NOTE: WHEN REPLACING FUSES, MAKE SURE TO USE THE SAME TYPE AND RA-
TING (F3A~250V). THE FUSES ARE LOCATED IN THE POWER JACK COMPARTMENT.
D. notes selection
To ensure a trouble-free operation before starting, please make sure to:
1. Tidy up the notes on an even desk.
2. Set the position of the counting guide (refer to main parts overview) to be 2mm
to 3mm longer than the notes to be counted.
3. Place the notes onto the hopper stage of the machine and start the count.
4. The results will be displayed on the screen. Press Report to get a detailed count
result.
Careful considerations
• Avoid counting wet, excessively dirty, folded or curved notes.
• Fan each bundle of notes before counting in the case the notes are slightly ad-
hesive one each other.
• Check for foreign objects mixed up with the notes like paper clips, rubber bands,
pieces of paper, etc.

7
OVERVIEW OF THE PRODUCT
A. MAIN PARTS
HOPPER
Notes stage TFT DISPLAY
Shows counting
results
SIDE COVER
Protection
REJECT STACKER
Get the rejected
notes
STACKER TRAY
NOTES BLOCK
Protection
IMPELLER
Run the notes
FRONT PANEL
Operate the
machine
COUNTING GUIDE
Align notes
UPPER BACK HANDLE
Open to remove stuck
notes and clean the
machine
RS232
Connect to printer
Get the counted
notes
THIKNESS WHEEL
Adjust notes feeding
gap
POWER JACK
Connect the power
cord
POWER SWITCH
Turn on/off power
ETHERNET PORT
LOWER BACK
HANDLE
Open to remove
stuck notes and
clean the machine
Logo and software
updates/installation
EXTERNAL
DISPLAY PORT
Connect to ee
d

8
overview of the product
DATE AND TIME
COUNTING MODE
COUNTING CURRENCY
SPEED SET
Counting functions
FACE /ORIENTATION
Sorting fuctions
/
g fuctions
TOTAL PIECES
Notes counted
TOTAL VALUE
Notes counted
B. MAIN display

9
Overview of the product
C. front panel functional keys
MODE
This button is used to switch among CNT mode (count), SDC mode (Single
Denomination Count) & MDC mode (Mixed Denomination Count)
START
This button is used to start counting when notes are placed on the Hopper. It also
allows the user to switch from Auto (default) to Manual counting by pressing the Start
button long enough (over 5 seconds) until it switches to Manual and then release the
button. Repeat this exercise If you need to switch back to Auto.
CUR
This button is used to display available currencies and allow you to choose the
required counting currency by pressing the arrow keys (Up and Down). Press Ok to
confirm your selection ege e e e d
e e ee de de
BATCH
This button is used to switch ON/OFF the batch mode. This function is used to
create stacks of an equal number of notes. When BATCH is on, 200pcs is shown as
default on the display. Use the arrow keys (Up and Down) to adjust the batch number.
Press OK to confirm your selection and start the count. You will get a notification on
the display when the batch is complete
ADD
This button is used to switch on/off the Add function. It allows you to Add an
additional stack of notes without resetting the previous count. The total value count
will be the result of multiple counts. You can use ADD along with the BATCH function
SORT
This button is used to turn on/off the face or orientation sorting function under the
main interface. The Face feature sort notes with the same side. The Orientation
feature sort notes in the same direction and side. All other notes go automatically
to the Reject Pocket.
REPORT
Press to check the counting report: the report screen shows the amount and value
per Denomination and the total quantity of notes (PCS)
Press twice to check notes Serial Numbers.
Press three times to check the Error Report.
e e e d E e ee ee e e e
e d d

10
Overview of the product
Up Arrow
This button is used to adjust speed levels upward. When BATCH is on, press this but-
ton to increase the Batch number
OK
Press to confirm the selection. Use this button to print the results in the report
interface
Down Arrow
This button is used to adjust speed levels downward. The lower the speed, the more
accurate the detecting functionalities. When BATCH is on, press this button to de-
crease the Batch number
COUNTERFEIT DETECTION FUNCTIONS
• Infrared Light (IR): Reveals invisible marks in ink that reflects or absorbs IR light.
• Ultraviolet Light (UV): Checks for any security markings that glow under UV light.
• Magnetic Ink (MG): Detects iron oxide in ink used in real money.
• Metallic Thread (MT): Identifies security threads woven into notes
• Double Dimension (DD): Note Size / Length and Width
• Double Bill (DB): Double note sensitivity, two notes stuck together (thickness)
• Image Detection (ID): Detects the authenticity of the note through the CIS sensors
(reads the denomination of the notes and the serial numbers)
BATCH BY VALUE: This function is used to create equal stacks of notes by value.
Press BATCH twice and set the value by using the arrow keys (Up and Down) to
adjust the first digit. Press CUR to select and adjust the subsequent digits. Once
the value is determined, press OK to confirm your selection and start the count.
You will get a notification on the display when the batch is complete.
This Feature can also be used with the ADD function

11
TECHNICAL PARAMETERS
dimensions
(W x D x H): 11x10x13” (28x26x32cm)
package
(W x D x H): 14x12x17” (36x31x42cm)
net weight
counting speed
800/1000 notes/min (MDC SDC and CNT MODE) 1200 notes/min (CNT MODE only)
display
LCD (TFT) 3.5
Size of Countable notes
Maximum 185x90 mm I Minimum 110x60 mm I Thickness: 0.08~0.12 mm
Available Currencies
USD, EUR, CAD, GBP and MXN
Feed system
Roller Friction System (Front Loading)
Hopper Capacity
Approx.500 notes
Stacker Capacity
200 notes
Reject Stacker Capacity
Approx.50 notes (Adjustable from 25~100 notes)
Power Supply
AC 100~240V ±10%50/60 Hz
Power Consumption
Id 0.2A(100~240 VAC) 120 W ( )
Temprature (Operating)
Ambient 32°F - 104°F (0 C - 35 C)
Usage Environment
Humidity
20%~90%(no condensation)
Printer Interface
RS-232C
USB interface
USB2.0 USB3.0
Approx. 1 lbs / .5Kg
Gross weight
Approx. 21 lbs / 9.5Kg

12
operation
A. Operation Modes
Press the MODE Button sequentially to select the desired operating mode. You can
find the selection on the top right of the display
CNT mode:This mode is used to derive the quantity of notes counted (PCs). It
works on all notes even for currencies that are not programmed on this machi-
ne. Under this mode, the machine works as a conventional note counter (note
that all the detection functions are disabled in this mode). It’s also used in case
the fitness condition of the notes is poor and not well recognized (rejected) in
MDC mode. You can select 3 different counting speeds 800, 1000 and 1200
notes/min. In this mode, you can switch ADD or BATCH or ADD+BATCH
functions
SDC mode: Press button MODE to select SDC mode. This mode is used to count
single denomination notes. The system will take the first note as the bench-
mark, and will send the different straight to the reject pocket. The result will be
the Total amount of money (Total Value) and quantity of notes (PCs) coun-ted
for the same denomination. You can select 2 different counting speeds 800
and 1000 notes/min. In this mode, you can switch ADD or BATCH or ADD
+BATCH functions
MDC mode: Press button MODE to select MDC mode. This mode is used for value
counting of Mixed Denomination notes. Press REPORT button to check the
counting details. The result is the Total amount of money (Total value) as well
as quantity of notes (PCs) counted. You can select 2 different counting speeds
800 and 1000 notes/min. In this mode, you can switch ADD or BATCH or
ADD+BATCH functions
B. Counting operation
1. Proceed to turn the machine ON.
2. The machine will start with a short Self-Test routine to confirm the proper
operation of all its module before starting the counting. If any error is reported,
check the ERROR MESSAGES section for solving the problem.
3. Select the required Currency (for multi-currency models) as well as the opera-
ting mode (CNT-SDC-MDC)
4. Set up the rest of the options like SPEED, BATCH/ADD and SORT based on your
own needs.
5. Place the notes orderly in the hopper and the machine will start counting
them automatically.
6. NOTE: If the machine is set up in MANUAL, you must press START to begin the
counting operation.

13
operation
C. printing
Plug the Printer cable in the machine printing interface (RS-232C Serial Port). Once
connected, Turn On the machine, ensure the baud rate is correctly setup (check set-
tings 1.4 section) and start the count. Press Report Button once. Press the OK Button
to print the Total value and quantity of notes result. Press Report Button twice. Press
the OK Button to print the Serial Numbers of the notes counted.
D. Miscounting errors
In case the machine is not having an accurate counting operation, proceed as follow:
• Ensure that the notes are placed orderly in the hopper.
• Check the counting sensors for dust or any other kind of malfunctioning source.
• Verify the note thickness adjustment mechanism (feeding gap) in case it needs
to be re-adjusted for improving the machine performance (use the Thickness
Wheel).
• If MG or UV or DD errors messages are reported frequently, proceed to verify the
functions sensitivity and consider reduce them in case you confirm the current
sensitivity value is too high. We highly advice to contact the support team prior to
adjusting the default factory sensitivity values.
E. Thickness Wheel Adjustment Procedure (Feeding Gap)
When the notes are improperly fed into the machine, please adjust the notes thick-
ness in the hopper by turning the note adjustment Thickness Wheel located on the
top of the machine.
Proceed with this calibration when the notes are not fed smoothly through the
machine or several error messages are occurring too often like Double Bills, Chain or
miscounting errors.
Other reasons that might require to readjust the feeding gap are:
• The counting of new or mint condition notes
• The counting of poor or bad fitness condition notes
• Polymer notes and Paper-made notes counted together

14
operation
Having the correct feeding gaadjusted will ensure a smooth counting as well
as a trouble-free operation. Trial and error attempts are recommended before
you make the final adjustment.
• When the hopper is too tight, please loosen it by toggling the wheel to “-”. It
works for used (thicker) notes and Polymer notes to increase the gap
• When the hopper is too loose, please tighten it by toggling the wheel to “+”. It
works for new (thinner) notes and Polymer notes to reduce the gap
• We advise to keep it to Neutral mode (as per picture below with the Screw-
head in the middle of the wheel gap. After-which small adjustments toward
“+” direction works best
F. Removing Jammed Notes
When notes are stuck in the machine, please open the machine from the back and
remove the notes. Once the stuck notes are removed, press start to resume the
count

15
operation
In case notes are jammed inside the transporting mechanism, please follow below
instructions:
roceed to open the back compartment pushing down the lock lever located at
the back at the same time you pull it toward you.
If you notice you can reach the note easily using your fingers, then proceed to
remove it carefully. Otherwise if it is difficult to reach or stuck with the transport-
ing rollers, then proceed to turn the machine OFF before any attempt to remove
the note.
Do not use any tool or metallic instrument to remove the note since it might da-
mage other components de.
Make sure to remove any remaining debris in case the note is broken.
Close the compartment properly after finishing to extract the note.

16
service menu
In order to access the SET MENU, Press the OK button until you e prompted to
input a password. The default password is ↓↓↓↓.
1. Settings
2. CIS Calibration
3. Time & Date
4. Version
5. Factory Reset
You can use the arrows to select a sub-menu. Press OK button to confirm your
selection and press BATCH button to return to the previous page.
1. SETTINGS
You can use the arrows to scroll through the sub-eg menu and ress ok to
confirm your selection. Press Batch if you want to return to the previous page.
e g e d d g
For each of the setting features, once adjusted, press the to
confirm d e your selection. Press if you want to go back to Settings
g.
Note any changes you make in the setting menu auto-save e
eg (ee ee e de eg e ee e
e). Please ensure you e e prior to exit.
CAUTION: Please do not change sub-settings which have the following mark [*]
without reaching out to the support team for advice and guidance.
1.1 e ge e ee
ed e e eed eee ge e e e
g e eeeg ee e e d e
e e
All support provided from our North
American 24/7 Support Team
1-332-228-1098

17
service menu
1.1. UV [*]
Allow the user to adjust the sensitivity of the UV detection function.
UV-0 is OFF / UV-9 is Highest / UV-3 default
1.2. MG1 [*]
Allow the user to adjust the sensitivity of the MG detection function.
MG-0 is OFF / MG-9 is Highest / MG-1 default
1.3. Stacker Capacity
Allow the user to adjust the value by using the Up and Down arrows.
Default setting is set at 200 notes. Maximum stacker capacity of 200 notes.
1.4. Printers Baud Rate Set
Allow the user to match the thermal printer communication. The baud rate can
change based on the printer which connects to the machine. We set to value=3 if the
baud rate is 9600, otherwise set to other values that matches with your printer baud
rate.
1.5. Width [*]
Allow the user to adjust the sensitivity of the DD detection function (Width Size).
DD-0 is OFF / DD-9 is Highest / DD-4 default
1.6. Reject Capacity
Allow the user to adjust the value by using the Up and Down arrows.
Default setting is set at 50 notes. Maximum capacity of 100notes in the Reject Pocket.
1.7. Double [*]
Allow the user to adjust the sensitivity of the DB detection function (Double Bill).
DB-0 is OFF / DB-9 is Highest / DB-5 default
1.8. Half an Alarm Count
Allow the user to count a ripped note as 1pcs or 0 pc. Set 0 as default, otherwise it will
count 1pc.
1.9. Start Sensor Threshold [*]
Allow the user to adjust the Start Sensor Sensitivity in Auto Count when the notes
color are too dark. higher values increase the sensitivity of the sensor.
1.10. IR Sensitivity [*]
Allow the user to adjust the sensitivity of the IR detection function.
IR-0 is OFF / IR-9 is Highest / IR-1 default
1.11. Backlight Time
Allow the user to set the backlight time of the display screen when the machine is idle.
1.12. Clear Sensor Threshold [*]
Allow the user to clear the data from the last count. When notes are removed from
the stacker post each count, the machine display will clear-zero. If the machine doesn’t
clear the last count display, please contact support team to advice on increasing the
sensitivity or otherwise replace the sensor
1.13. Alarm Counting Selection
This function is not applicable
1.14. SN Serial Number Switch
Allow the user to adjust the SN by using the Up and Down arrows. SN is turned ON
when Value=1 and turned off when Value=0
1.15. Brake Sensitivity [*]
Allow the user to adjust the sensitivity of brakes i.e. fast or slow break
1.16. Beeper Setup
Allow the user to adjust the value by using the Up and Down arrows. The beeper is
switch off when Value=1 and incrementally increases up to value=4.

service menu
e ee d e e eed e e d
eeed E E ee e e e
e e e
e e e
e g e de d
e e e
e e
ee e e e
eg
g e
ded e
ee
ee e
e eg e
e
g d
e e e
e de
e eed
ge e g
ee
ee e e
e d
e e e
eg e
d g
e de
ge e g
ee
e e e
eg e
d g e
e
ded
18

19
service menu
3. Time & Date
Adjust the time and date by using the Up and Down arrows. Press OK to transition
through the clock diagram. Once adjusted, press the Start key to confirm your selec-
tion and start counting.
4. Version
This function helps extract the latest version of the machine.
5. Restore factory settings
This function allows the user to restore the factory settings. Input the following pass-
word to initiate the process: ↓↓↓↓.
6. logo update
CAUTION: Ensure the machine is switched OFF before following those steps.
The Logo file e e ed ee e e
Use a formatted (USB 2.0 or 3.0) to upload e g e
Insert the USB key into the UPPER USB Port (back of the machine). Please ensure
it’s plugged in the UPPER USB Port.
Turn ON the machine and wait until the update is complete.
Please Turn OFF the machine, remove the USB Key and Turn ON the machine
again
PLEASE CONTACT THE SUPPORT TEAM FOR HELP IF YOU WOULD LIKE US TO AS
WITH FORMATTING YOUR EXISTING LOGO FILE.
All support provided from our North
American 24/7 Support Team
1-332-228-1098

20
Maintenance and troubleshooting
Following these periodic cleaning routines, will help to keep the machine in the
optimum condition for ensuring a trouble-free operation as well as to extend the
machine’s lifespan.
DAILY ROUTINE: Perform the following steps on a daily basis:
1. Turn Off the machine when not in use.
2. With a clean dry cloth or a brush remove the dust deposited on the hopper
and the stacker area.
WEEKLY ROUTINE: Perform the following steps on a weekly basis:
1. Turn off the machine and unplug its power cord.
2. Open the back cover carefully.
3. Use an air duster can and a brush to carefully remove the dust from the note
passages areas.
4. Inspect the CIS sensors to verify if they are stained with ink and use a cloth
slightly soaked in alcohol to clean the CIS sensor surface only in the case it
has residues of ink from the notes. Please refer to the Self Check Error Code
section below
1. Self-check Error codes
A. HOPPER SENSOR ERROR:
You will get notified if something
is covering the hopper Sensor
(Self-check) or if the hopper
sensor is damaged. In case of
the latter, please reach out to the
support team for advice.
B. STACKER SENSOR ERROR:
You will get notified if something
is covering the stacker sensor
(Self-check) or if the stacker
sensor is damaged. In case of
the latter, please reach out to the
support team for advice.
C. CHAIN MOTOR ERROR:
Please contact the support team
if the display shows Main Motor
Error.

21
Maintenance and troubleshooting
PLEASE REACH OUT TO THE SUPPORT TEAM IF YOU GET ANY OF THE FOLLOWING
ERROR NOTIFICATIONS
Error Code Sensor problem
CE01 UV SENSOR
CE02 SPEED SENSOR
CE03 RIGHT COUNTING SENSOR
CE04 LEFT COUNTING SENSOR
CE05 START (HOPPER)SENSOR
CE06 MG SENSOR
CE07 KEYBOARD
CE08 STACKER SENSOR
CE09 REJECT IR SENSOR
All support provided from our North
American 24/7 Support Team
1-332-228-1098
Table of contents
Other Deteck Cash Counter manuals
Popular Cash Counter manuals by other brands
Schlumberger
Schlumberger HEATH SM-128A manual

Nautilus Hyosung
Nautilus Hyosung MONiMAX7800D installation manual

Kübler
Kübler CODIX 541 operating instructions
VISIONARY DESIGNS
VISIONARY DESIGNS MOD-1701 Setup instructions
Capintec
Capintec CAPRAC-t owner's manual

TSI Instruments
TSI Instruments 3022A instruction manual
