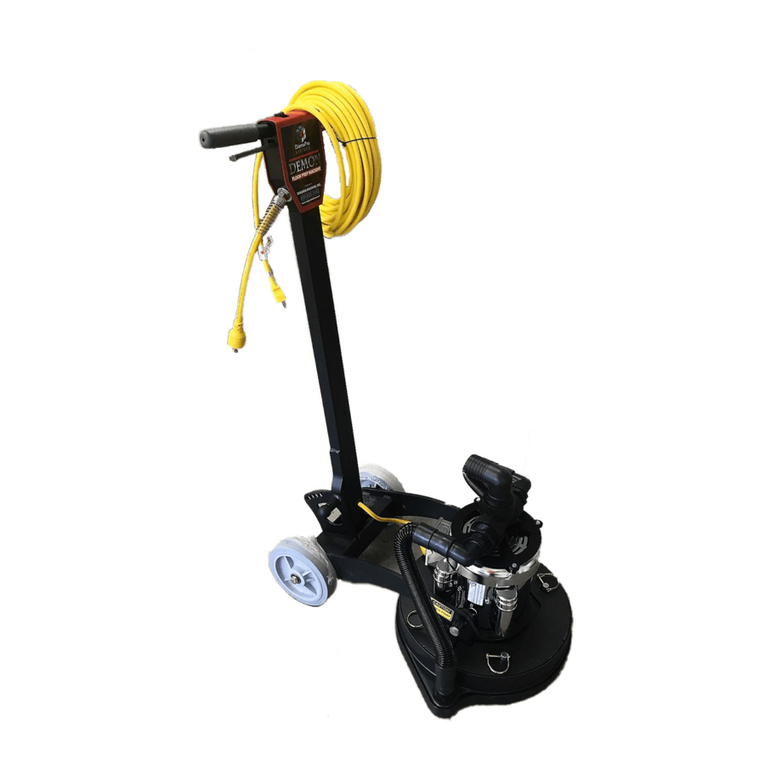
DiamaPro Systems DX26-P User manual

OWNER’S MANUAL
DX26-P
CONCRETE FLOOR GRINDER
USER & MAINTENANCE BOOK
SAVE THESE INSTRUCTIONS FOR FUTURE REFERENCE

WARRANTY REGISTRATION CARD
Form must be completed and submitted within 30 days from the date of purchase.
Customer Information
First and Last Name
Company Name
Address City State Zip Code
Phone Number Email
Machine Information
Machine Type Machine Model
Serial # Purchase Date (dd/mm/yy)
DiamaPro Systems®
3343 Peachtree Road NE
Suite 145 #24
Atlanta, GA 30326
470-977-2323 nwww.diamaprosystems.com ninfo@diamaprosystems.com

Rebar or utility lines may be buried in concrete. Disconnect the power to
any utility lines. If these dangers are present are to be missed, clearly mark
the area.
Loose debris could be thrown from crack. Make sure area to be cut is clear
from people and any loose objects, nuts, bolts, etc. Never run over any
loose objects.
Do not allow anyone to stand in line with the grinding path. Do not let chil-
dren or visitors in contact with machine or extension cord. Keep children
and visitors away from the work area.
Diamond Tooling produce heat and sparks during operation. Never
use machines in dangerous sites containing ammable, combustible or
explosive materials such as lacquer, paint, benzene, thinner, gasoline,
gases, and adhesive agents.
The Diamond tooling and shroud become hot during operation and remain
hot after stopped. Do not touch the tooling and shroud without proper hand
protection.
Keep a rm hold on the handle grips and maintain control of the machine
until the grinding completely stops.
Never use a cracked, damaged, or misaligned tooling. After mounting
check to see tooling is secure.
Running the wrong type/size of tooling can cause damage to your machine
Do not force a small grinder to do the job of a heavy-duty grinder. Do not
use the walk-behind grinder for improper applications. Never cut material
for which the tooling was not designed.
The machine and tools should be stored in a dry and secure location when
not in use. Keep equipment out of reach of children.
The grinder will do the job better and safer at the rate for which it was
designed.
This includes primers, all coatings, adhesives, tile and crack lling materi-
als, etc. Do not attempt to cut, clean out or remove material without MSDS
information. Consult MSDS sheet for hazards information. Be aware that
some materials are explosive such as dust.
Always keep proper footing and balance.
Keep machine clean and follow maintenance procedures for better and
safer performance. Keep handles dry, clean, and free from oil and grease.
Follow instructions for lubricating and changing accessories.
Thank you for purchasing a DIAMAPRO SYSTEMS®product. This manual
provides information and procedures to safely operate and maintain the
DiamaPro DX26-P. For your own safety and protection from injury, carefully
read, understand, and observe the safety instructions described in this
manual. Keep this manual or a copy of it with the machine. If you lose this
manual or need an additional copy, please contact DiamaPro Systems®.
This machine is designed and built with user safety in mind; however, it
can present hazards if improperly operated and serviced.
Please follow the operating instructions carefully. If there are any questions
regarding operating or servicing of this machine, please contact
DiamaPro Systems®.
Disclaimer: DiamaPro Systems® and its aliates take no responsibility
for any damage, injury or death resulting from the incorrect or unsafe use
of this product. Use of this product should be undertaken by competent
persons only. It is the operator’s responsibility to ensure that the following
safety procedures are followed. If you are unsure, do not operate this
product.
Most job sites have rules governing equipment use & maintenance. Before
starting at a new work location, check with the supervisor or safety coordi-
nator. Ask about any rules or regulations you need to abide by.
OSHA enforces federal laws within the United States that apply to the safe
operation, application, & maintenance of equipment on job sites. It is the
employer’s responsibility to comply with these laws.
Do not operate this machine unless you carefully read the operations and
maintenance manual.
Do not operate this machine unless you have received operational and
maintenance training from a DiamaPro Systems®representative or from an
authorized distributor for DiamaPro Systems®
Observe all applicable local, state and federal safety regulations. Wear
OSHA approved foot protection.
Observe all applicable local, state and federal safety regulations. Wear
OSHA approved safety glasses.
Breathable silica may be generated by use of this product. Silica can
cause severe and permanent lung damage, cancer, and other serious
diseases. Do not breath the dust. Do not rely on your sight or smell to
determine if dust is in the air. Silica may be in the air without a visible dust
cloud. If air monitoring equipment for silica is not provided by your employ-
er at your work site, you MUST wear appropriate respiratory protection
when using or servicing the machine. Consult your employer and OSHA
regarding the appropriate respiratory protection.
Observe all applicable local, state and federal safety regulations. Wear
OSHA approved hearing protection.
Do not wear loose clothing or jewelry that can be caught in moving parts.
Wear protective hair covering to contain long hair. Keep hair away from
motor air vent. Rubber gloves and non-skid footwear are recommended
when working outdoors.
Do not expose machine to rain. Do not use machine in wet conditions.
Keep work area well lit. When working at an elevated location, pay atten-
tion to articles and persons below.
INTRODUCTION
1. SAFETY INSTRUCTIONS
1.1 KNOW THE RULES & YOUR EQUIPMENT
1.2 RECEIVE PROPER TRAINING
1.3 PROTECT YOUR FEET
1.4 PROTECT YOUR EYES
1.5 PROTECT YOUR LUNGS
1.6 PROTECT YOUR EARS
1.7 DRESS PROPERLY
1.8 AVOID A DANGEROUS ENVIRONMENT
1.9 BEWARE OF HIDDEN DANGERS IN
CONCRETE
1.10 KEEP WORK AREA CLEAN - DO NOT RUN
OVER ANYTHING
1.11 KEEP CHILDREN AND VISITORS AWAY
1.12 AVOID FLAMMABLE LIQUIDS OR GASES
1.13 AVOID CONTACT WITH HOT TOOLING
AND SHROUD
1.14 KEEP FIRM GRIP ON MACHINE
1.15 CHECK TOOLING FOR CRACKS, DAMAGE,
AND MISALIGNMENT
1.16 DO NOT FORCE WRONG SIZE OR TYPE OF
TOOLING ONTO MACHINE
1.17 USE EQUIPMENT AND ACCESSORIES
PROPERLY
1.18 STORE IDLE EQUIPMENT
1.19 DO NOT FORCE
1.20 OBTAIN MATERIAL SAFETY DATA SHEET
(MSDS) FOR ALL WORK SURFACE
MATERIALS
1.21 DO NOT OVERREACH
1.22 MAINTAIN MACHINE WITH CARE

Form a habit of checking to see that tools such as adjusting wrenches are
removed from the machine and properly stored before starting.
Watch what you are doing. Use common sense. Do not operate machine
when you are tired or fatigued.
Do not operate machine while under the inuence of drugs, alcohol, or
any medication.
Do not operate machine with missing or improperly mounted parts.
Verify all machine guards are in good condition and will function properly
before using the machine. Check for alignment of moving parts, binding of
moving parts, breakage of parts, mounting, and any other conditions that
may aect machine operation. A guard, power switch or other part that is
damaged should be properly repaired or replaced by an authorized
service center.
Never touch moving parts such as blades, belts, and others.
Stop using machine immediately if any abnormalities are observed during
operation. Examples of abnormalities include unusual noise and vibration
When replacing a component part with a new one, use only the same type
and quality of the previous part. Never attempt to repair a machine if you
are unfamiliar with proper procedures and techniques required.
Refer to this operations and maintenance manual as well as any additional
instructions included from other manufacturers.
1.23 REMOVE ADJUSTING TOOLS
1.24 STAY ALERT
1.25 DO NOT USE DRUGS, ALCOHOL,
MEDICATION
1.26 KEEP ALL PARTS IN CORRECT POSITION
1.27 CHECK DAMAGED PARTS
1.29 STOP OPERATION IMMEDIATELY IF ANY
ABNORMALITY IS DETECTED
1.28 NEVER TOUCH MOVING PARTS
1.30 WHEN REPLACING A PART, USE THE SAME
TYPE AND QUALITY
1.31 SAVE THESE INSTRUCTIONS
CALIFORNIA PROP 65 WARNING
Thank you for purchasing a DIAMAPRO SYSTEMS®product. This manual
provides information and procedures to safely operate and maintain the
DiamaPro DX26-P. For your own safety and protection from injury, carefully
read, understand, and observe the safety instructions described in this
manual. Keep this manual or a copy of it with the machine. If you lose this
manual or need an additional copy, please contact DiamaPro Systems®.
This machine is designed and built with user safety in mind; however, it
can present hazards if improperly operated and serviced.
Please follow the operating instructions carefully. If there are any questions
regarding operating or servicing of this machine, please contact
DiamaPro Systems®.
DUST WARNING
Cutting, especially when DRY cutting, generates dust that
comes from the material being cut, which frequently contains
silica.
When dry cutting, be sure to use a HEPA ltered dust collector.
Silica is a basic component of sand, quartz, brick clay, granite and
numerous other minerals and rocks. Exposure to excessive amount
of such dust can cause:
n Respiratory diseases (aecting your ability to breath), including
chronic bronchitis, silicosis and pulmonary brosis from exposure
to silica. These diseases may be fatal;
nSkin irritation and rash; and
nCancer according to NTP* and IARC*
*National Toxicology Program, International Agency for Research
on Cancer
Take precautionary steps
nAvoid inhalation of and skin contact with dust, mist and fumes;
nWet cut when feasible, to minimize dust;
nWear and ensure that all bystanders wear appropriate respiratory
protection such as dust masks designed to lter out microscopic
particles. (See OSHA 29 CFR Part 1910.1200)
Use of this product can cause exposure to materials known to the
State of California to cause
cancer and/or birth defects or other reproductive harm.
CALIFORNIA PROP 65 WARNING
CAUTION
Respirable crystalline silica. May cause cancer.
Causes damage to lungs.
Wear respiratory protection during exposure.
Use appropriate dust control equipment to keep
dust within OSHA and local regulation limits.
!
WARNING & ATTENTION
WARNINGS
nPlease check the fastening of each component of the propane gas
system before use, tighten loose fasteners, and check whether there is
leakage at the gas cylinder, pipeline, and connection, and do not oper-
ate the equipment and repair if there I any leakage
nProper selection of propane fuel or poor fuel quality will cause engine
failure and aect the normal operation of the engine.
nDo not use tools or other metal objects to contact the two terminals of
the battery, and do not short-circuit the positive and negative terminals
of the battery, as there is a danger of explosion. The connection of
battery terminals should be rm. When the terminal is loose, there is a
danger of explosion when a spark occurs due to poor contact. Damaged
cables and wires can cause e re. Check and replace before
reconnecting.
ATTENTION
nAvoid splashing water on the engine and control box during machine
cleaning
nNever do maintenance on any part of the fuel system while the engine is
running
nIf the machine does not appear to be operating properly, it should be
shut down.
nEnsure that the tools are installed in place and securely

Battery
If not using the machine for an extended period of time, turn o
the battery circuit switch.
Battery replacement
n Turn o the battery circuit breaker
nRemove battery from holder
nRemove the positive & negative terminal connections
nRemove battery and replace with a DiamaPro Systems recommended
battery
Battery change and maintenance
When replacing the battery on the DX26-P, always remove the battery
from the battery box. When changing the battery, ensure the terminals are
rmly connected to the terminal posts (See Figure 6.6, & Figure 6.7).
When charging the battery, ALWAYS remove and disconnect from the
DX26-P. Failure to do so may cause damage to the machine.
2. MAINTENANCE & REPAIR
Before carrying out the maintenance of the DX26-P make sure
you understand the contents of this manual.
Please contact DiamaPro Systems®for further explanations
and information.
• The user shall be required to comply with the qualications of the
relevant personnel:
OPERATOR / ORDINARY MAINTENANCE TECHNICIAN:
carries out the tasks necessary for the basic functioning
of the machine:
execution of the work cycle, implementation of operator com-
mands, other operations closely linked to normal production, any cleaning
and inspection operation performed on a daily basis, enforcement of ordi-
nary maintenance operations. Works only with enabled safety functions.
MAINTENANCE TECHNICIAN SPECIALIST
(AUTHORIZED DEALER)
Involved in all operating conditions and at all protection levels.
Makes extraordinary operations that cannot be run by the user
Maintenance technicians must possess the skills required by this manual,
as well as the mental and physical requirements necessary and sucient
to maintain and operate the machine. To ensure the functionality and
durability of the machine daily maintenance must be performed, carrying
out operations in compliance with the safety requirements.
Only the authorized dealer can make adjustments and operations that are
not assigned to the operator. It is forbidden to make adjustments and in-
terventions during machine operation. Before performing any maintenance
operation disconnect the machine from the power sources and wait for the
cooling of the hot parts (engine, spark-plug area, air lter area, etc.)
nDisengage the Clutch
nBring the accelerator at idle speed.
nClose the propane tank valve.
n Stop the engine (position the ignition key to OFF).
n Turn battery switch to the o position
nCarry out maintenance operations with the machine stopped.
n Allow machine to properly cool o
Before performing maintenance:
nThoroughly clean the DX26-P. If in doubt about how to perform occa-
sional repairs, contact our Technical Support or an authorized dealer.
n Upon nishing the job perform a thorough cleaning from processing
residues.
Good maintenance requires constant and methodical control of all parts of
the machine and adaptation of tests to its actual usage. Periodic inspec-
tions are crucial to keep the machine ecient and reduce repairs and any
resulting dangers.
We recommend that you have your DX26-P serviced by an authorized
dealer or a DiamaPro Systems®technician every 500 hours.
Note: frequency is taken over considering a working day of 8 hours.
Replacement of the clutch belt
If, as a result of a visual inspection, it appears that the belts are
worn or cracked, replace them, operating as follow:
nAllow motor to cool before replacing belts
n Remove side plate located on opposite side from the battery shut o
nLoosen the six bolts on the motor mount plate
nLoosen the belt tension screw on the front under the exhaust to relive
tension to remove belt
nRemove belt under the clutch and over the gearbox pulley
nInstall new belt the same way, over the gearbox pulley and under the
clutch
nSet tension back with tension bolt
nTighten 6 side bolts on motor mount plate
nReinstall side plate
2.1 SCHEDULED MAINTENANCE
2.2 ROUTINE & ADDITIONAL MAINTENANCE
IMPORTANT!
TO AVOID DAMAGE TO THE MACHINE
STRICTLY follow the engine manufacturer’s recommended oil in
the manual provided with the machine. 10W-40 is recommended.
NOTE
Although 10W-40 engine oil is the recommended oil for most conditions,
the oil viscosity may need to be changed to accommodate atmospheric
conditions. Please contact the authorized dealer if running machine in
extreme conditions for the correct oil choice.
IMPORTANT!
Always remove the battery for charging.
Only recharge the battery in a dry environment. Protect the contacts
from dirt and moisture stagnation. Don’t spray with water.
CAUTION
!ALWAYS REPLACE TERMINAL COVERS OVER THE
TERMINALS OF THE BATTERY (Figure 6.8)
Engine oil lling
Refer to the engine manual and the MAINTENANCE CHAPTER
OF THIS PUBLICATION. The oil lling must be performed with
the machine o after hot parts have cooled.
n Remove oil ll cap
nRemove valve lock and set aside
nLower oil drain tube into an oil containment vessel and remove cap
nUnlock valve and let oil drain
n Once oil has drained, remove oil lter
n Install new oil lter, place fresh oil around lter seal before installing
nClose valve & replace lock
nAdd oil. Check level on dipstick.
n Tighten oil ll cap
nCheck for any leaks
Oil Viscosity
Choose the viscosity according to the temperature as follows:

2. MAINTENANCE & REPAIR (cont).
FREQUENCY PROCEDURES
FIRST 8 HOURS (BREAK IN PERIOD)
EVERY 50 HOURS
EVERY 100 HOURS
EVERY 250 HOURS
250 HOURS
500 HOURS
1000 HOURS
-CHANGE OIL & OIL FILTER
-INSPECT CLUTCH BELT TENSION
-TILT MACHINE BACK AND INSPECT GEARBOX SEALS AROUND EACH GRINDING HEAD
-CHANGE OIL & OIL FILTER
-CHECK & CLEAN OIL COOLER FINS
-REPLACE SPARK PLUGS
-INSPECT CLUTCH BELT TENSION
-CHECK BATTERY WITH LOAD TESTER. REPLACE IF NEEDED
-REPLACE PRIMARY & SECONDARY AIR FILTER
-CHECK VALVE CLEARANCE. ADJUST IF NEEDED.
-INSPECT RUBBER IN FLEXIBLE TOOL PLATE MOUNT FOR DAMAGE OR EXCESSIVE
WEAR. REPLACE AS NEEDED
-REPLACE CLUTCH BELT
-INSPECT ELECTROMAGNETIC CLUTCH. REPLACE IF NEEDED.
-INSPECT ANTI-ROTATION. REPLACE IF NEEDED
-REPLACE GEAR OIL
General Cleaning
Engine Air Filter
Grinding Heads
Engine Oil Level
Wheels & Wheel
Bearings
Dust Control System
Check Propane Level &
Supply
Battery
At each start
At each start
At each start
At each start
At each start
At each start
At each start
Weekly
Or every 40 hours
NAME OF
OPERATION FREQUENCY PERSON IN
CHARGE OPERATING INSTRUCTIONS STATE OF
MACHINE
MECHANICAL PARTS
Machine stopped /Power
sources disconnected
Machine stopped /Power
sources disconnected
Machine stopped /Power
sources disconnected
Machine stopped /Power
sources disconnected
Machine stopped /Power
sources disconnected
Machine stopped /Power
sources disconnected
Machine stopped /Power
sources disconnected
Machine stopped /Power
sources disconnected
Wash the dirty parts with a brush and water. Lubri-
cate the parts exposed to dust; Do not lubricate the
rubber parts subjected to motion (belts, etc).
Check and Clean engine air lter if necessary,
especially if you are working in dusty conditions or
replace it; follow the instructions given in the engine
Lift the gearbox grinding head, check whether the
abrasive positioning pins are loose or damaged,
and replace them if necessary
Add oil if low or replace oil & oil lter if needed
Inspect wheels & wheel bearings for damage or
excessive wear. Replace if needed.
Inspect dust skirt and dust hoses for damage or
excessive wear. Replace if needed.
It is recommended to make sure that the propane
contains no water and not to use mixtures or diesel.
Perform this operation in a well-ventilated envi-
ronment and away from possible sources of heat
or ames. Make use of specic P.P.E. (mask) as
shown in the residual risks table of this publication.
REFER TO THE ENGINE MANUAL
The DX26-P is equipped with a maintenance-free
battery. DO NOT TRY TO FILL.
Clean the two battery poles to remove oxidation.
It is recommended to turn o the battery via the
circuit breaker on the side of the grinder when
storing or transporting the machine

2. MAINTENANCE & REPAIR (cont).
Gearbox
Oil Cooler
Spark plugs
Clutch Belt
Safety Systems
Integrity of Pictograms
Weekly
Or every 40 hours
Weekly
Or every 40 hours
Weekly
Or every 40 hours
Weekly
Or every 40 hours
Daily
Weekly
Or every 40 hours
NAME OF
OPERATION FREQUENCY PERSON IN
CHARGE OPERATING INSTRUCTIONS STATE OF
MACHINE
MECHANICAL PARTS
Machine stopped /Power
sources disconnected
Machine stopped /Power
sources disconnected
Machine stopped /Power
sources disconnected
Machine stopped /Power
sources disconnected
Machine Stopped
Machine stopped /Power
sources disconnected
The gearboxes are sealed upon assembly; if you
notice oil leaks, carefully nd out their origin be-
cause there may be leaks from other sources. If the
leaks come from the gearbox, contact our technical
service or a qualied technician.
Clean any oil leaks at the bottom of the grinder. For
a possible change of the lubricant due to leaks or
for the topping up operations, use the following type
of lubricant: MOBIL SCH 630
Check & clean any dust or debris, especially if you
are working in dusty conditions
Inspect Spark Plugs. If you need a replacement,
refer to the engine manual.
Be careful when removing the spark plug:
• wait for the engine to cool down;
•remove the cap;
• remove the spark plug down away from the
spark plug holder (because spark may be
triggered).
Check belt for proper tension or abnormal wear.
Replace if needed
Please note the requirement to perform the
checking and recording of verications of safety
components every 6 months.
CAUTION
!DO NOT REPLACE THE GEARBOX.
CONTACT DIAMAPRO SYSTEMS OR
THE AUTHORIZED DEALER.
SAFETY SYSTEMS

GENERAL PARTS
1
2
3
4
5
6
ITEM # DESCRIPTION PART # QTY
DP-DX26-P HANDLE ASSEMBLY
DP-DX26-P HANDLE PLATEN
DP-DX26-P HOUSING BOTTOM PLATE
DP-DX26-P R PIN FIFTH WHEEL
DP-DX26-P DOWEL PIN FIFTH WHEEL
DP-DX26-P FRONT MOVING WHEEL
DP-DX26-HASM
DP-DX26-HDPL
DP-DX26-HBPL
DP-DX26-RPIN
DP-DX26-DPIN
DP-DX26-FMWH
1
1
2
1
1
1

HANDLE ASSEMBLY
1
2
3
4
5
6
7
8
9
10
11
12
13
14
15
16
17
18
19
20
21
22
ITEM # DESCRIPTION PART # QTY
DP-DX26-P HANDLE COVER
DP-DX26-P HANDLE SLEEVE
DP-DX26-P OPERATION HANDLE
DP-DX26-P OPERATION CONTROL BOX
DP-DX26-P OPERATION CONTROL BOX BASE - UPPER
DP-DX26-P HEXAGON SOCKET BOLT M6x10
DP-DX26-P M6 NUT
DP-DX26-P HEXAGON SOCKET BOLT M6x15
DP-DX26-P HEXAGON SOCKET BOLT M6x80
DP-DX26-P CONTROL BOX BASE
DP-DX26-P HANDLE PLATEN (LARGE GROOVE)
DP-DX26-P HEXAGON SOCKET BOLT M10x30
DP-DX26-P HANDLE ADJUSTMENT PIN
DP-DX26-P POSITIONING NUT
DP-DX26-P OPERATING HANDLE FRAME
DP-DX26-P HEXAGON SOCKET BOLTS M6x15
DP-DX26-P ADJUSTMENT HANDLE
DP-DX26-P SPRING POSITIONING SHAFT BUSING
DP-DX26-P SPRING (LEFT AND RIGHT SYMMETRY)
DP-DX26-P SHAFT POSITIONING SPRING
DP-DX26-P HEXAGON SOCKET BOLT M8x20
DP-DX26-P BOLT WASHER
DP-DX26-HDCV
DP-DX26-HDSL
DP-DX26-OPHD
DP-DX26-OPCB
DP-DX26-OCBB
DP-HSB-M6X10
DP-NUT-M6
DP-HSB-M6X15
DP-HSB-M6X80
DP-DX26-CNBB-B
DP-DX26-HDPL
DP-HSB-M10X30
DP-DX26-HNUU
DP-DX26-PSGG
DP-DX26-OHRR
DP-HSB-M6X15
DP-DX26-AJDD
DP-DX26-SRSS
DP-DX26-SRPP
DP-DX26-SRST
DP-HSB-M8X20
DP-BWSH-0001
1
1
1
1
1
4
1
4
1
1
1
4
1
1
1
6
1
2
2
1
2
2

PARTS SCHEMATIC
1
2
3
4
5
ITEM # DESCRIPTION PART # QTY
DP-DX26-P BODY ASSEMBLY
DP-DX26-P GEAR BOX ASSEMBLY
DP-DX26-P LED LIGHT BRACKET
DP-DX26-P LED LIGHT
DP-DX26-P FRONT MOVING WHEEL BRACKET
DP-DX26-BODY
DP-DX26-GBOX
DP-DX26-LEDB
DP-DX26-LLED
DP-DX26-BFMW
1
1
1
1
1

CARRIAGE

1
2
3
4
5
6
7
8
9
10
11
12
13
14
15
16
17
18
19
20
21
22
23
24
25
26
27
28
29
30
31
ITEM # DESCRIPTION PART # QTY
DP-DX26-P HANDLE CONNECTION SHAFT
DP-DX26-P PIN 8X7X25
DP-DX26-P HANDLE GEAR ADJUSTMENT BASE
DP-DX26-P ADJUSTMENT BASE POSITIONING NUT
DP-DX26-P HANDLE CONNECTION SHAFT BAFFLE
DP-DX26-P HANDLE CONNECTION SHAFT
POSITIONING PLATE
DP-DX26-P HEXAGON SOCKET BOLTS M8x35
DP-DX26-P HEXAGON SOCKET BOLTS M12x30
DP-DX26-P HANDLE CONNECTION SHAFT PLUG
DP-DX26-P GROUND STOP WHEEL - A
DP-DX26-P GROUND STOP WHEEL - B
DP-DX26-P FOOT PEDAL
DP-DX26-P PEDAL POSITIONING SHAFT
DP-DX26-P FOOT PEDAL POSITIONING PLUG
DP-DX26-P HEXAGON SOCKET BOLT M10x30
DP-DX26-P PEDAL STOPPER
DP-DX26-P HEXAGON SOCKET BOLT M10x30
DP-DX26-P WEIGHT WASHER
DP-DX26-P WEIGHT ASSEMBLY (1 LEFT & 1 RIGHT
SYMMETRICAL)
DP-DX26-P GAS SPRING
DP-DX26-P WEIGHT PLUG
DP-DX26-P HEXAGON SOCKET BOLT M8x25
DP-DX26-P HEXAGON SOCKET BOLT M10x55
DP-DX26-P MOUNTING EAR BASE CONNECTING PLATE
DP-DX26-P MOUNTING EAR BASE
DP-DX26-P HEXAGON SOCKET BOLT M8x25
DP-DX26-P GEAR BOX TOP ROD
DP-DX26-P RUBBER FOOT PADS
DP-DX26-P HEXAGON SOCKET BOLT M10x30
DP-DX26-P HEXAGON SOCKET BOLT M10x30
DP-DX26-P WEIGHT PIN SEAT
DP-DX26-HCST
DP-PIN-8X7X25
DP-DX26-HGAB
DP-DX26-ABPN
DP-DX26-HGSB
DP-DX26-HCSPP
DP-HSB-M8X35
DP-HSB-M12X30
DP-DX26-HCSP
DP-DX26-GSWA
DP-DX26-GSWB
DP-DX26-FTPD
DP-DX26-PPSF
DP-DX26-FPPP
DP-HSB-M10X30
DP-DX26-PSTP
DP-HSB-M10X30
DP-DX26-WWSH
DP-DX26-WABL
DP-DX26-GASS
DP-DX26-WPLG
DP-HSB-M8X25
DP-HSB-M10X55
DP-DX26-MEBP
DP-DX26-MTEB
DP-HSB-M8X25
DP-DX26-GBTR
DP-DX26-RBFT
DP-HSB-M10X30
DP-HSB-M10X30
DP-DX26-WPNS
1
2
1
1
2
2
6
2
2
2
2
1
2
4
4
2
2
2
2
2
2
6
4
2
4
4
4
4
4
6
2
CARRIAGE (CONT.)

FRAME / WHEEL ASSEMBLIES

1
2
3
4
5
6
7
8
9
10
11
12
13
14
15
16
17
18
19
20
21
22
23
24
25
26
27
28
29
30
31
32
33
34
ITEM # DESCRIPTION PART # QTY
DP-DX26-P CAM LOCK 2.5 INCH A
DP-DX26-P CAM LOCK 2.5 INCH B
DP-DX26-P VACUUM ADAPTER
DP-DX26-P BRACKET CONNECTION PLATE
DP-DX26-P DUST PIPE FIXING NUT
DP-DX26-P VACUUM HOSE A
DP-DX26-P VACUUM CLAMP 52-76
DP-DX26-P PROPANE GAS TANK
DP-DX26-P BATTERY STRAP
DP-DX26-P BATTERY
DP-DX26-P RUBBER BAND
DP-DX26-P BATTERY INSTALLATION BOX
DP-DX26-P BATTERY VOX BRACKET
DP-DX26-P FRAME
DP-DX26-P WATER VALVE SWITCH
DP-DX26-P BATTERY SWITCH BOX
DP-DX26-P BATTERY SWITCH
DP-DX26-P BATTERY INSTALLATION BOX BASE
DP-DX26-P WHEEL AXLE
DP-DX26-P AXLE CARD 52
DP-DX26-P BEARING 6205
DP-DX26-P WALKING WHEEL
DP-DX26-P OIL SEAL 32X58X8
DP-DX26-P WALKING WHEEL PLUG
DP-DX26-P GAS TANK CLAMP
DP-DX26-P VACUUM THREE WAY BRACKET
63 METAL TUBE CLIP 1.2 THICK (M8 WITHOUT NAILS)
DP-DX26-P VACUUM THREE WAY
DP-DX26-P VACUUM HOSE CLAMP 33-57
DP-DX26-P VACUUM HOSE B
DP-DX26-P WATER TANK BRACKET
DP-DX26-P WATER TANK
DP-DX26-P LOGO NAMEPLATE
DP-DX26-P PIPE CONNECTOR
DP-DX26-CLCK-A
DP-DX26-CLCK-B
DP-DX26-AVAC
DP-DX26-FRMP
DP-DX26-DPFN
DP-DX26-VHSE-A
DP-CLMP-5276
VAPOR-TANK-
SVAPOR-TANK-
STEEL-20#
DP-DX26-BSTP
DP-DX26-BTRY
DP-DX26-RBPD
DP-DX26-BBOX
DP-DX26-BVBR
DP-DX26-FRME
DP-DX26-WTVS
DP-DX26-BSBX
DP-DX26-BYSW
DP-DX26-BIBP
DP-DX26-WAXL
DP-DX26-AC52
DP-BEAR-6205
DP-DX26-WLKW
DP-OSEAL-32X58X8
DP-DX26-WWPG
DP-DX26-GTCP
DP-DX26-V3WB
DP-DX26-MTCP
DP-DX26-V3WY
DP-DX26-VACL
DP-DX26-VCHS
DP-DX26-WTBB
DP-DX26-WTNK
DP-DX26-LGLL
DP-DX26-PPCC
1
1
1
1
1
1
2
1
1
1
2
2
1
1
1
1
2
1
1
4
4
2
4
2
1
1
1
1
4
2
1
1
2
1
FRAME / WHEEL ASSEMBLIES (CONT.)

ENGINE BASE

1
2
3
4
5
6
7
8
9
10
11
12
13
14
15
16
17
18
19
20
21
22
23
24
25
26
27
28
29
30
ITEM # DESCRIPTION PART # QTY
DP-DX26-P PROPANE ENGINE
DP-DX26-P ENGINE INNER SHAFT SLEEVE BRACKET
DP-DX26-P OUTER HEX BOLTS - INCH 3/8-16x1.25
DP-DX26-P HEXAGON SOCKET BOLT M8x20
DP-DX26-P ENGINE FLANGE
DP-DX26-P ELECTROMAGNETIC CLUTCH
DP-DX26-P CLUTCH PLATE
DP-DX26-P HEXAGON SOCKET BOLT M6x20
DP-DX26-P ENGINE BUSHING
DP-DX26-P HEXAGON SOCKET BOLT M10x60
DP-DX26-P OUTER HEX BOLTS - INCH 7/16-14x1.75
DP-DX26-P HEXAGON SOCKET BOLT M8x40
DP-DX26-P HEXAGON SOCKET BOLT M8x30
DP-DX26-P ENGINE FLANGE FIXING PLATE
DP-DX26-P GEARBOX ASSEMBLY 1
DP-DX26-P HEXAGON SOCKET BOLT M8x20
DP-DX26-P SYNCHRO WHEEL STOPPER
DP-DX26-P SYNCHRONOUS WHEEL 185
DP-DX26-P SYNCHRONOUS BELT
DP-DX26-P SYNCHRONOUS WHEEL BUSHING
DP-DX26-P CONCA 80
DP-DX26-P BEARING 6208
DP-DX26-P SYNCHRONIZED WHEEL DRIVE SHAFT
DP-DX26-P BEARING BASE 6208
DP-DX26-P BEARING WASHERS
DP-DX26-P GEARBOX BODY
DP-DX26-P HEXAGON SOCKET BOLT M8x20
DP-DX26-P OUTER HEXAGON BOLT M12x60
DP-DX26-P HEXAGON SOCKET BOLT M8x30
DP-DX26-P GEARBOX ASSEMBLY 2
DP-DX26-PENG
DP-DX26-EGSL
DP-OXB-38116125
DP-HSB-M8X20
DP-DX26-EGFL
DP-DX26-CLUT
DP-DX26-CLPL
DP-HSB-M6X20
DP-DX26-ENGB
DP-HSB-M10X60
DP-OHSB-M71614175
DP-HSB-M8X40
DP-HSB-M8X30
DP-DX26-ENFP
DP-DX26-GBA1
DP-HSB-M8X20
DP-DX26-WSTP
DP-DX26-SYWH
DP-DX26-SYBT
DP-DX26-SYBS
DP-DX26-CN80
DP-BEAR-6208
DP-DX26-SWDS
DP-BEAR-6208-BASE
DP-BEAR-6208-WASH
DP-DX26-GRBB
DP-HSB-M8X20
DP-OHSB-M12X60
DP-HSB-M8X30
DP-DX26-GRA2
1
1
4
6
1
1
2
4
1
1
1
7
5
1
1
3
1
1
1
1
2
2
1
1
1
1
4
4
4
1
ENGINE BASE (CONT.)

TOP COVER
1
2
3
4
5
6
7
ITEM # DESCRIPTION PART # QTY
DP-DX26-P WEIGHT
DP-DX26-P VACUUM PIPE (1 LEFT 1 RIGHT)
DP-DX26-P HEXAGON SOCKET BOLT M10x30
DP-DX26-P RUBBER DUST COVER
DP-DX26-P DUST PLUG BASE
DP-DX26-P GEARBOX COVER
DP-DX26-P DUST LUG
DP-DX26-WGHT
DP-DX26-VCPP
DP-HSB-M10X30
DP-DX26-RBDC
DP-DX26-DPBS
DP-DX26-GBCV
DP-DX26-DTLG
2
2
4
1
4
1
4

BOTTOM COVER / DRIVE

1
2
3
4
5
6
7
8
9
10
11
12
13
14
15
16
17
18
19
20
21
22
23
24
25
26
27
28
29
30
31
32
33
34
35
36
37
38
39
ITEM # DESCRIPTION PART # QTY
DP-DX26-P OIL SEAL 55x80x8
DP-DX26-P HEXAGON SOCKET BOLT M10x30
DP-DX26-P BEARING BASE 6011
DP-DX26-P BEARING 6011
DP-DX26-P LIFT LUG BUFFER BUSHING
DP-DX26-P TRUNNION
DP-DX26-P LIFTING TRUNNION POSITIONING NUT
DP-DX26-P WATER CONNECTOR
DP-DX26-P EXHAUST VALVE
DP-DX26-P HEXAGON SOCKET BOLT M5x25
DP-DX26-P CYLINDRICAL PIN 8x45
DP-DX26-P HEXAGON SOCKET BOLT M8x40
DP-DX26-P HEXAGON SOCKET BOLT M8x25
DP-DX26-P GEAR BOX COVER
DP-DX26-P UPPER BEARING BASE 6207
DP-DX26-P BEARING 6207
DP-DX26-P SECONDARY TRANSMISSION GEAR
(2 LEFT & 2 RIGHT)
DP-DX26-P TRANSACTION GEAR ASSEMBLY
(2 LEFT & 2 RIGHT)
DP-DX26-P TRANSITION SHAFT BUSHING
DP-DX26-P MAIN DRIVE GEAR
DP-DX26-P BEARING 6010
DP-DX26-P BEARING BASE 6010
DP-DX26-P LIFTING TRUNNION BASE GASKET
DP-DX26-P GEAR BOX
DP-DX26-P HEXAGON SOCKET BOLT M10x20
DP-DX26-P TRUNNION BASE
DP-DX26-P HEXAGON SOCKET HEAD M6x25
DP-DX26-P KEY 10x8x25
DP-DX26-P SECONDARY DRIVE SHAFT
DP-DX26-P O-RING
DP-DX26-P LOWER BEARING BASE ASSEMBLY 6207
DP-DX26-P DRAIN SHAFT
DP-DX26-P HEXAGON SOCKET HEAD M6x16
DP-DX26-P SEALING STEEL RING
DP-DX26-P KEY 10x8x22
DP-DX26-P GRINDING CLAW BASE
DP-DX26-P NUT M18
DP-DX26-P GRINDING PLATE ASSEMBLY
DP-DX26-P BOLT M12x17
DP-OSEAL-55X80X8
DP-HSB-M10X30
DP-BEAR-6011-BASE
DP-BEAR-6011
DP-DX26-LLBB
DP-DX26-TUNN
DP-DX26-LFTT
DP-DX26-WTCN
DP-DX26-EXHV
DP-HSB-M5X25
DP-CPIN-8X45
DP-HSB-M8X40
DP-HSB-M8X25
DP-DX26-GBCV
DP-BEAR-6207-BASE
DP-BEAR-6207
DP-DX26-TNGA-1
DP-DX26-TNGA-2
DP-DX26-TSBS
DP-DX26-MNDG
DP-BEAR-6010
DP-BEAR-6011-BASE
DP-DX26-LTBG
DP-DX26-GBOX
DP-HSB-M10X20
DP-DX26-TRBS
DP-HSB-M6X25
DP-KEY-10X8X25
DP-DX26-2DDRS
DP-DX26-ORNG
DP-BEAR-6207-LOWER
DP-DX26-DRSH
DP-HSB-M6X16
DP-DX26-SLSR
DP-KEY-10X8X22
DP-DX26-GRCB
DP-NUT-M18
DP-DX26-GRPL
DP-HSB-M12X70
2
3
1
1
2
2
2
2
1
12
2
16
12
1
4
4
4
4
4
1
2
1
2
1
16
2
6
12
4
8
4
2
6
4
4
4
4
4
8
BOTTOM COVER / DRIVE (CONT.)

GEAR SHAFT ASSEMBLY
1
2
3
4
ITEM # DESCRIPTION PART # QTY
DP-DX26-P TRANSITION SHAFT
DP-DX26-P CONCA 47
DP-DX26-P BEARING 6204
DP-DX26-P TRANSITION GEAR
DP-DX26-TNSF
DP-DX26-CN47
DP-BEAR-6204
DP-DX26-TRNG
4
4
4
4
Table of contents
Other DiamaPro Systems Floor Machine manuals
Popular Floor Machine manuals by other brands

Tennant
Tennant 1230 Operator and parts manual

Amano
Amano Pioneer Eclipse 420GPHD Operator's manual
SCANMASKIN
SCANMASKIN Scan Combiflex 500i manual
Pullman Holt
Pullman Holt DS-20F Specifications

Kersten
Kersten KM 50 Series operating instructions

SAINT-GOBAIN ABRASIVES
SAINT-GOBAIN ABRASIVES Norton Clipper CG 250 E Operating intructions

Eagle power
Eagle power SD2000 Operations & parts manual
Nilfisk-Advance
Nilfisk-Advance SR 2000 Instructions for use
Husqvarna
Husqvarna PG 690 Operator's manual

Pacific
Pacific PX-1500 Operating & maintenance instructions

Tennant
Tennant 5500 Complete Operator's manual
Taylor Tools
Taylor Tools Bronco 260 Electric owner's manual
