DiBiQuadro 4 JupiterXTC User manual
USER MANUAL

2
INDEX
The Bringer of Joy……………………..……………………………………… 3
The perfect approach to circuit modeling……………………………… 4
About (db)2……………………………………………………………………..4
GUI: tooltips and Edit Mode…..……………………………………………..5
The Views………………………………………………………………………..5
Controls…………………………………………………………………………. 7
SET………………………………………………………………………………...8
TWEAK…………………………………………………………………………… 10
The Renderer…………………………………………………………………... 11
Command Line Mode………………………………………………………..12
3
Thanks for purchasing DiBiQuadro
JupiterXTC. This is the result of a
meticulous engineering design, passion
for perfection and unforgiving
comparisons with analog counterparts.
Please take your time to read carefully
the content of this manual.
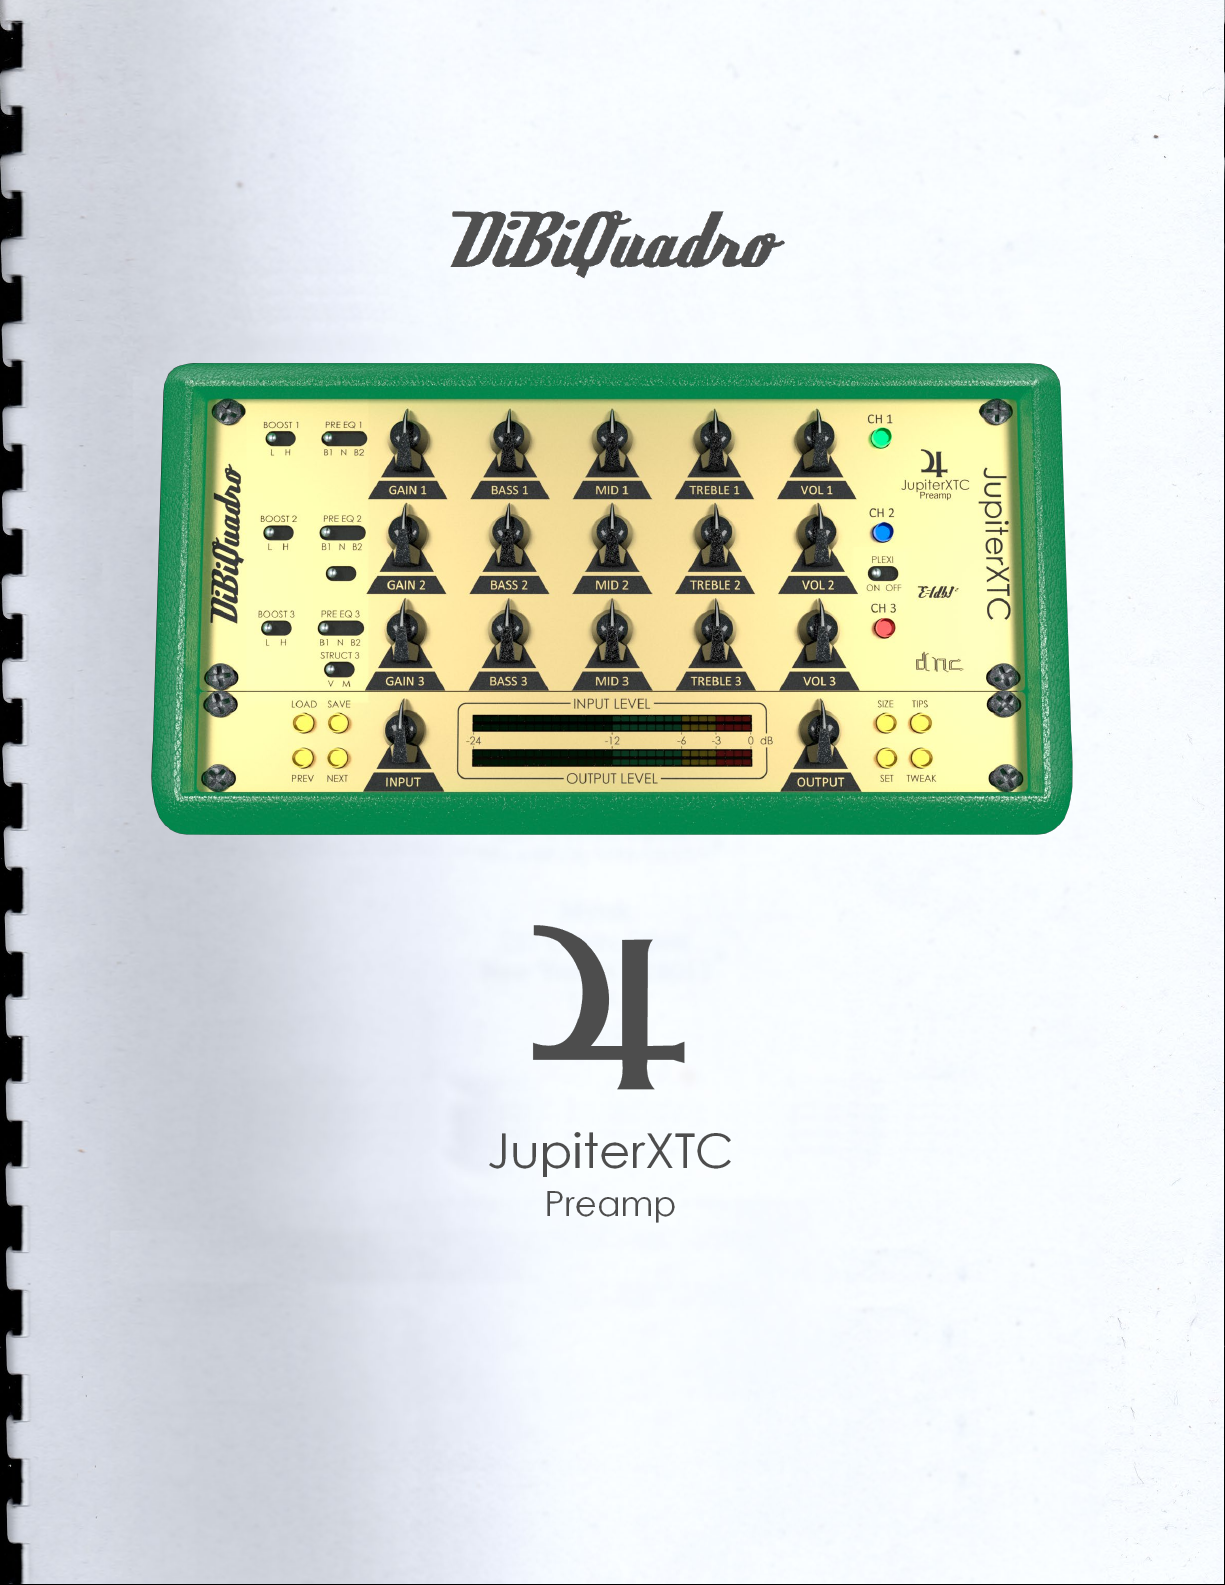
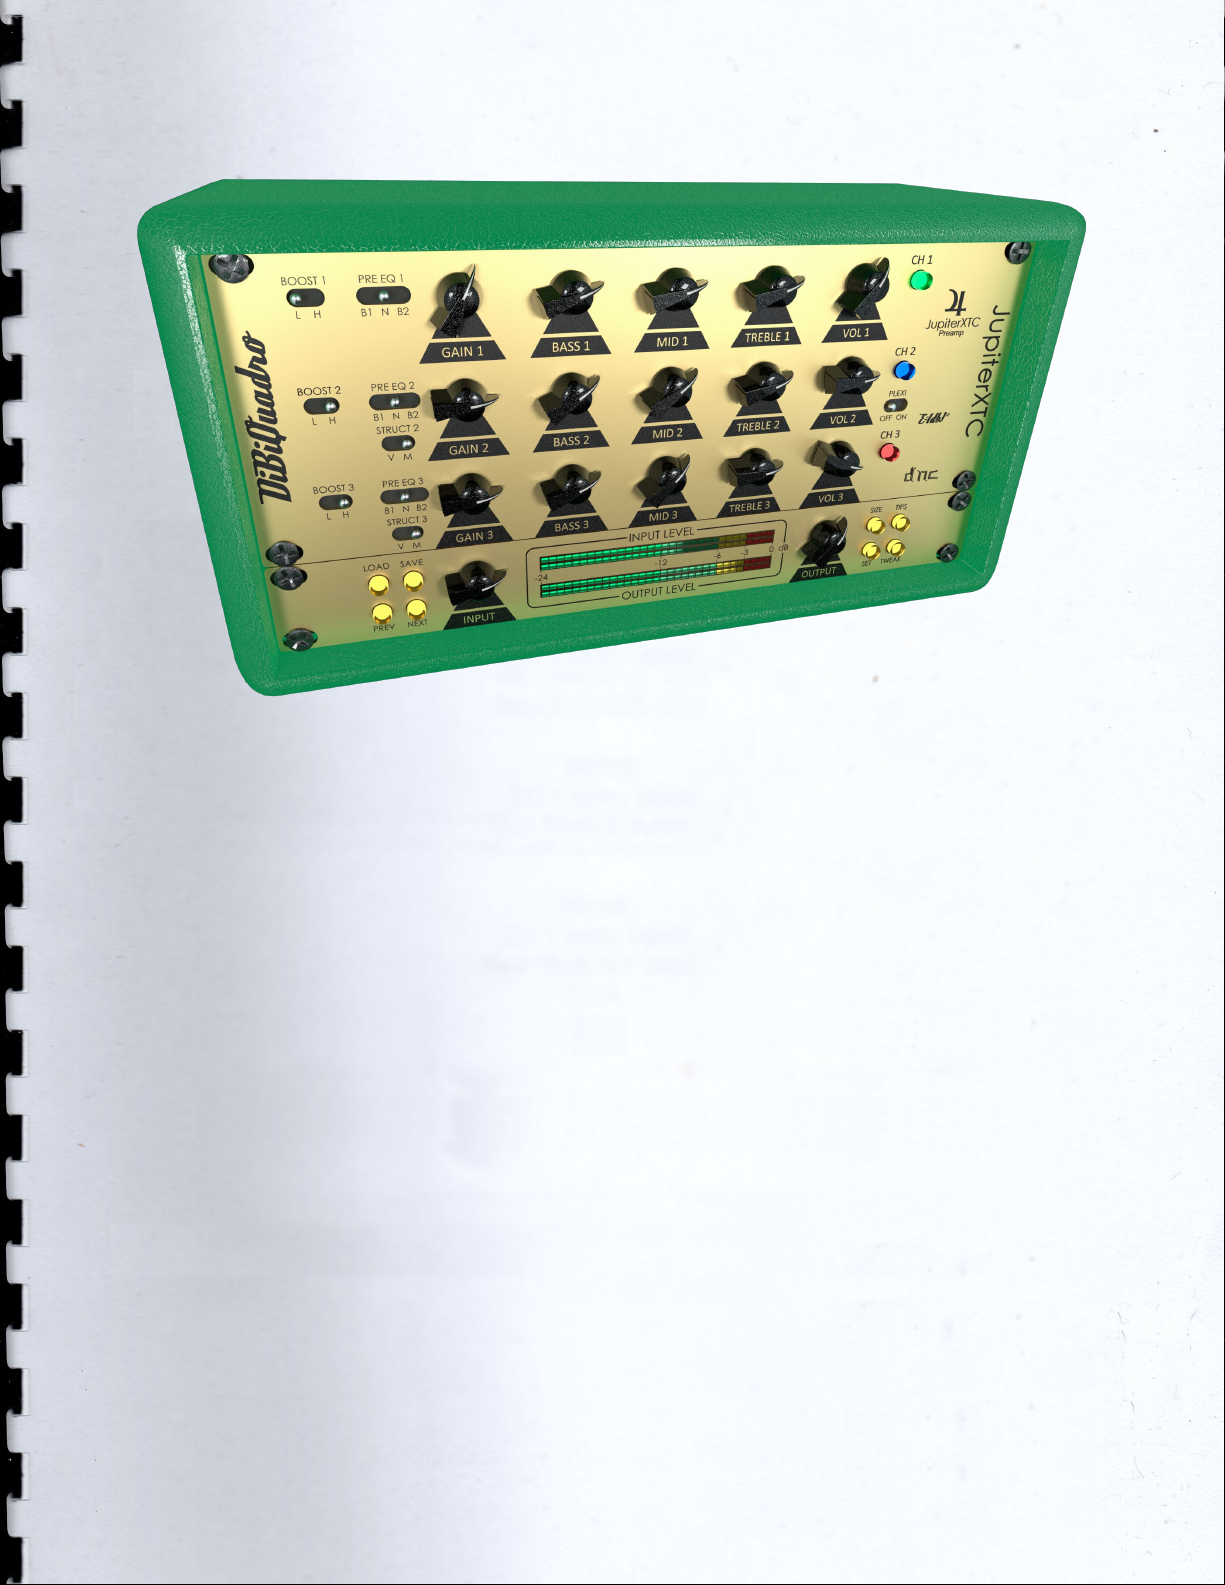
The Bringer of Joy
JupiterXTC is the representation of all
the best characteristics of modern and
vintage amps, the final pleasure for any
guitar player. It delivers three
independent preamp channels, each
one featuring its own EQ section
(contrary to only two of its hardware
counterpart) and multiple switching
options, including the Plexi mode to
engage that classic British feel.
4
The perfect approach to
circuit modeling
JupiterXTC features the same built-
from-scratch proprietary 64-bit engine
used for SaturnLO and MercuryRec
which is based on general purpose hi-
quality algorithms and the most recent
non-linear models. Particular attention
has been put on the definition of the
Non Linear Solver to get the maximum
quality and realism, without losing
details in favor of performances
(Double-Precision Non-Linear
Computing).
Our non-plus-ultra reproductions bring
a completely new philosophy to the
table: being able to shape your tone
by giving total access to the circuit
components. Managing each gain
stage level, shaping the tone-stacks or
modifying the tubes characteristics:
there is virtually no limit to what you
can achieve with our plugins!
Double-Precision Non-Linear Computing
About (db)2
DiBiQuadro is the result of the joint
forces of two italian Software Engineers
with more than 15 years of experience
in several industries including
Biomedical, Military, Insurance, Travel,
Telecommunications and Pro Audio.
Our purpose is to deliver superior results
in the Audio market with ground
breaking technology and exquisite
user-friendly graphic interfaces.
DiBiQuadro full logo
DiBiQuadro compact logo
5
GUI: tooltips and Edit
Mode
The graphic engine has been designed
with a purpose in mind: keeping a clear
indication of the status of the elements
without altering their 3D rendering on
the scene. Tooltips serve this purpose
perfectly especially when dealing with
knobs status. A typical approach to this
problem would be to compress the
height of the knobs trying to prevent
the user to commit parallax errors. As a
side effect the graphic designer would
be forced to take into account this
constraint by limiting the 3D depth of
the scene.
Another good reason to use a tooltip-
based approach is to allow the update
of the knobs status by using an Edit
Mode.
The tooltip approach
EDIT mode
When using a state-of-the-art system –
see minimum requirements in the
product webpage – the GUI is able to
deliver more than 60 FPS at a
reasonably low CPU usage for a super
fluid knob tweaking and a hyper
realistic meter response.
The Views
Two 3-dimensional views are available
with this release: a more standard “2D
like” and a “full 3D style”. These views
can be swapped by double-clicking on
“SwitchGui.bat”, which is located in
your plugin/renderer installation folder,
and then by restarting your sequencer.
This operation affects all the instances
of the plugin.
Note: SwitchGui.bat requires write
permissions on your JupiterXTC VST3
folder.

6

7
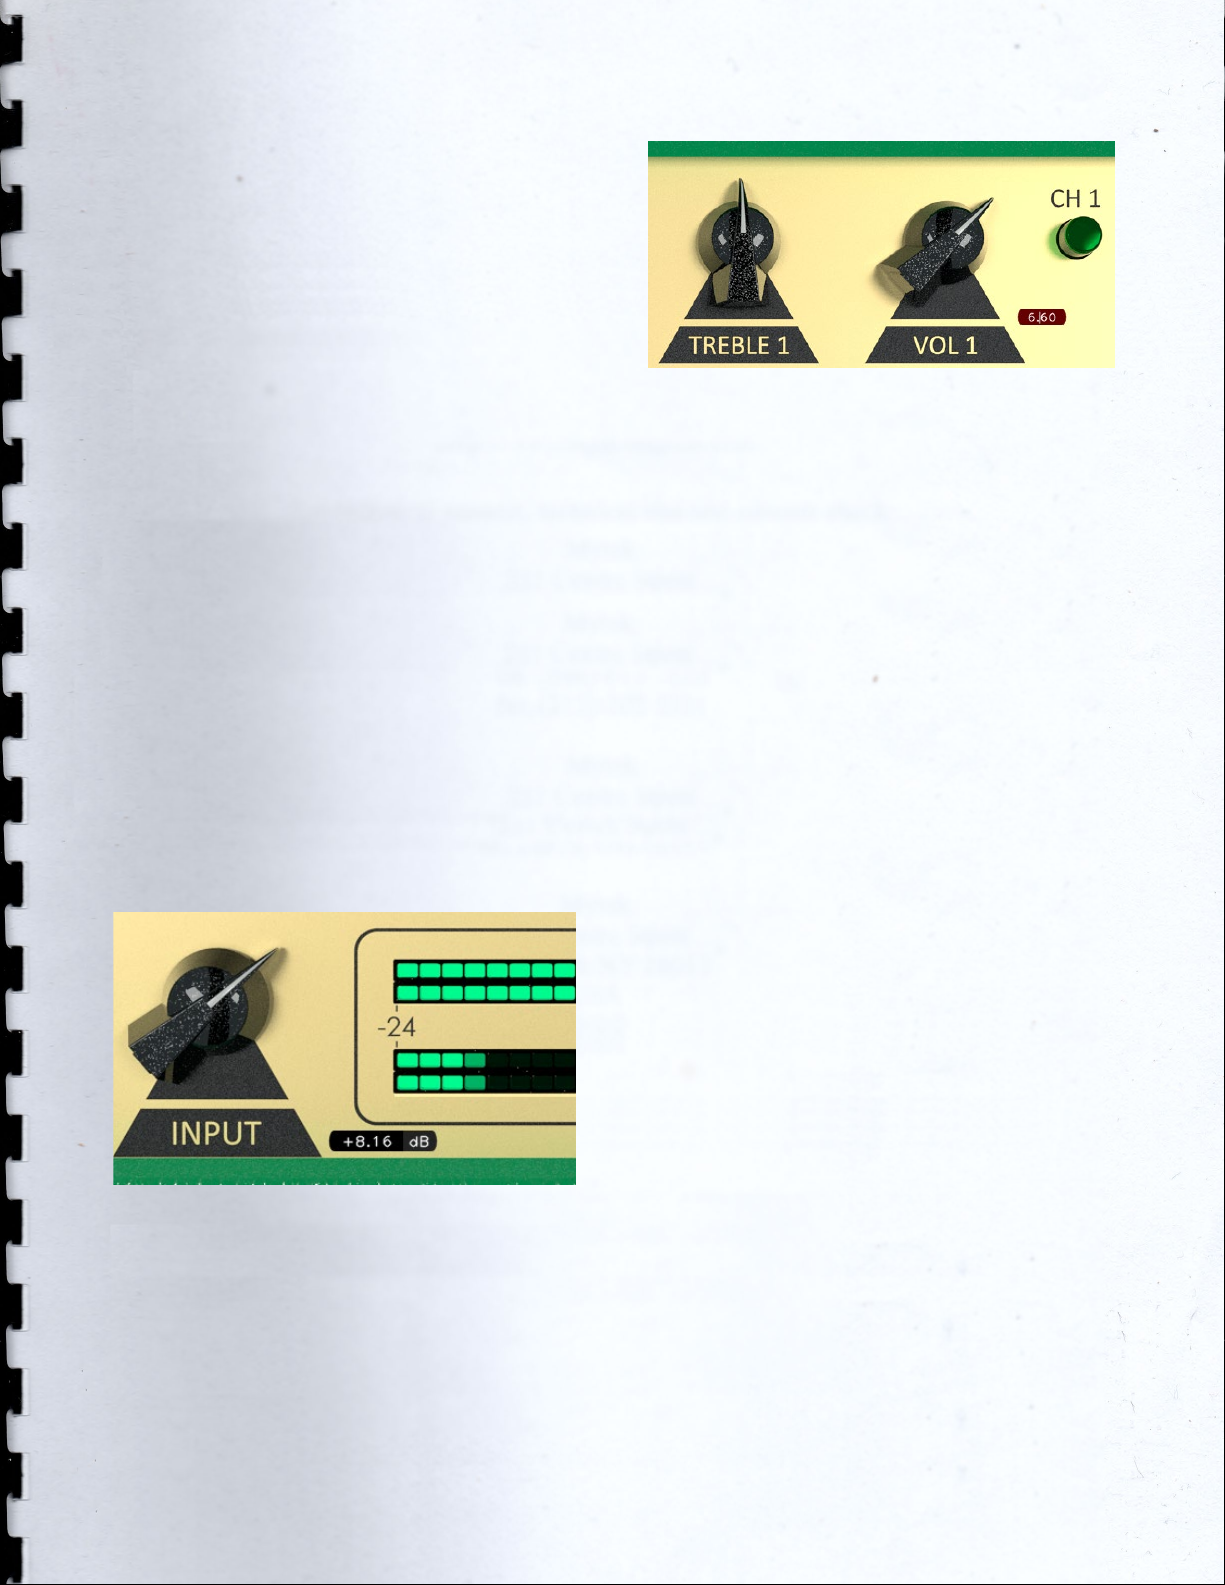
Controls
CH1 (GREEN). The clean channel: from
sparkle and crystalline to crunch, with
excellent attack; it fears no
comparison.
CH2 (BLUE). From crunch to mid/hi gain
tones, the heart and soul of JupiterXTC,
this is where the jaws drop and skirts lift.
Full of dynamics, harmonically rich and
satisfying.
CH3 (RED). The hi gain lead channel. If
you search that beautiful overdriven
and full of harmonics tone, here you
have it.
BOOST. Each channel can be boosted
independently (with the exception of
the Blue channel with the Plexi mode
engaged).
PRE EQ. Each channel provides this
switch. N means normal, B1 is bright
(more presence) and B2 is even
brighter.
STRUCT. It is the gain structure selector
for channel 2 and 3. V stands for
Vintage, low gain structure, M stands
for Modern with more gain.
GAIN. This knob adjusts the amount of
gain of the selected channel.
TONE-STACK. Simply Bass, Mid, Treble:
there is one independent tone-stack for
each channel.
INPUT [dB]. This knob adjusts the amount
of signal entering the plugin. It can be
used as a clean boost before the
preamp and safely pushed beyond the
0dB because there is no clipping
between the INPUT knob and the
preamp circuit. The INPUT LEVEL meter
displays the amount of signal in input
and it is directly affected by this knob.
OUTPUT [dB]. This is a clean volume
knob on the general output of the
plugin. Use this control to properly feed
the next plugin in the chain without
affecting the tone of JupiterXTC. The
general output level is displayed by the
OUTPUT LEVEL meter.
LOAD/SAVE. The LOAD button opens a
window to select a previously saved
preset – this includes knobs, buttons,
switches, SIZE, TWEAK and SET settings –.
The SAVE button allows to save a file
containing the current settings of the
plugin.
LOAD and SAVE windows
8
PREV/NEXT. Use these buttons to
browse back and forth through the
preset files.
SIZE. Press this button to load the
double sized graphic interface for 4K
monitors compatibility.
TIPS. When activated, it displays the
tooltip for each graphic object. Please
note that the GUI interaction is blocked
when TIPS are turned on. Press again to
restart the normal interaction. The
purpose of this button is to give an easy
way to share (i.e. via screenshot)
information of all the current GUI
settings.
SET/TWEAK. Please refer to the
dedicated sections.
Here some useful tricks to interact with
the GUI:
•use “CTRL + click” on a knob to
reset the value to its default;
•use the mouse wheel on a knob
for fine adjustments;
•press SHIFT while moving a knob
to fine adjust.
Edit Mode
The Edit Mode is accessible by double
clicking on a knob. Once done, you
can edit the value by using arrows,
digits and “.”, “+”, “-” keys. INSERT key is
supported too: INSERT status is
recognizable by checking the cursor
inside the tooltip (“|” means INSERT
disabled, “_” means INSERT enabled).
After modifying the value press ENTER
to commit or ESC to roll-back to the
latest value set before accessing the
Edit Mode.
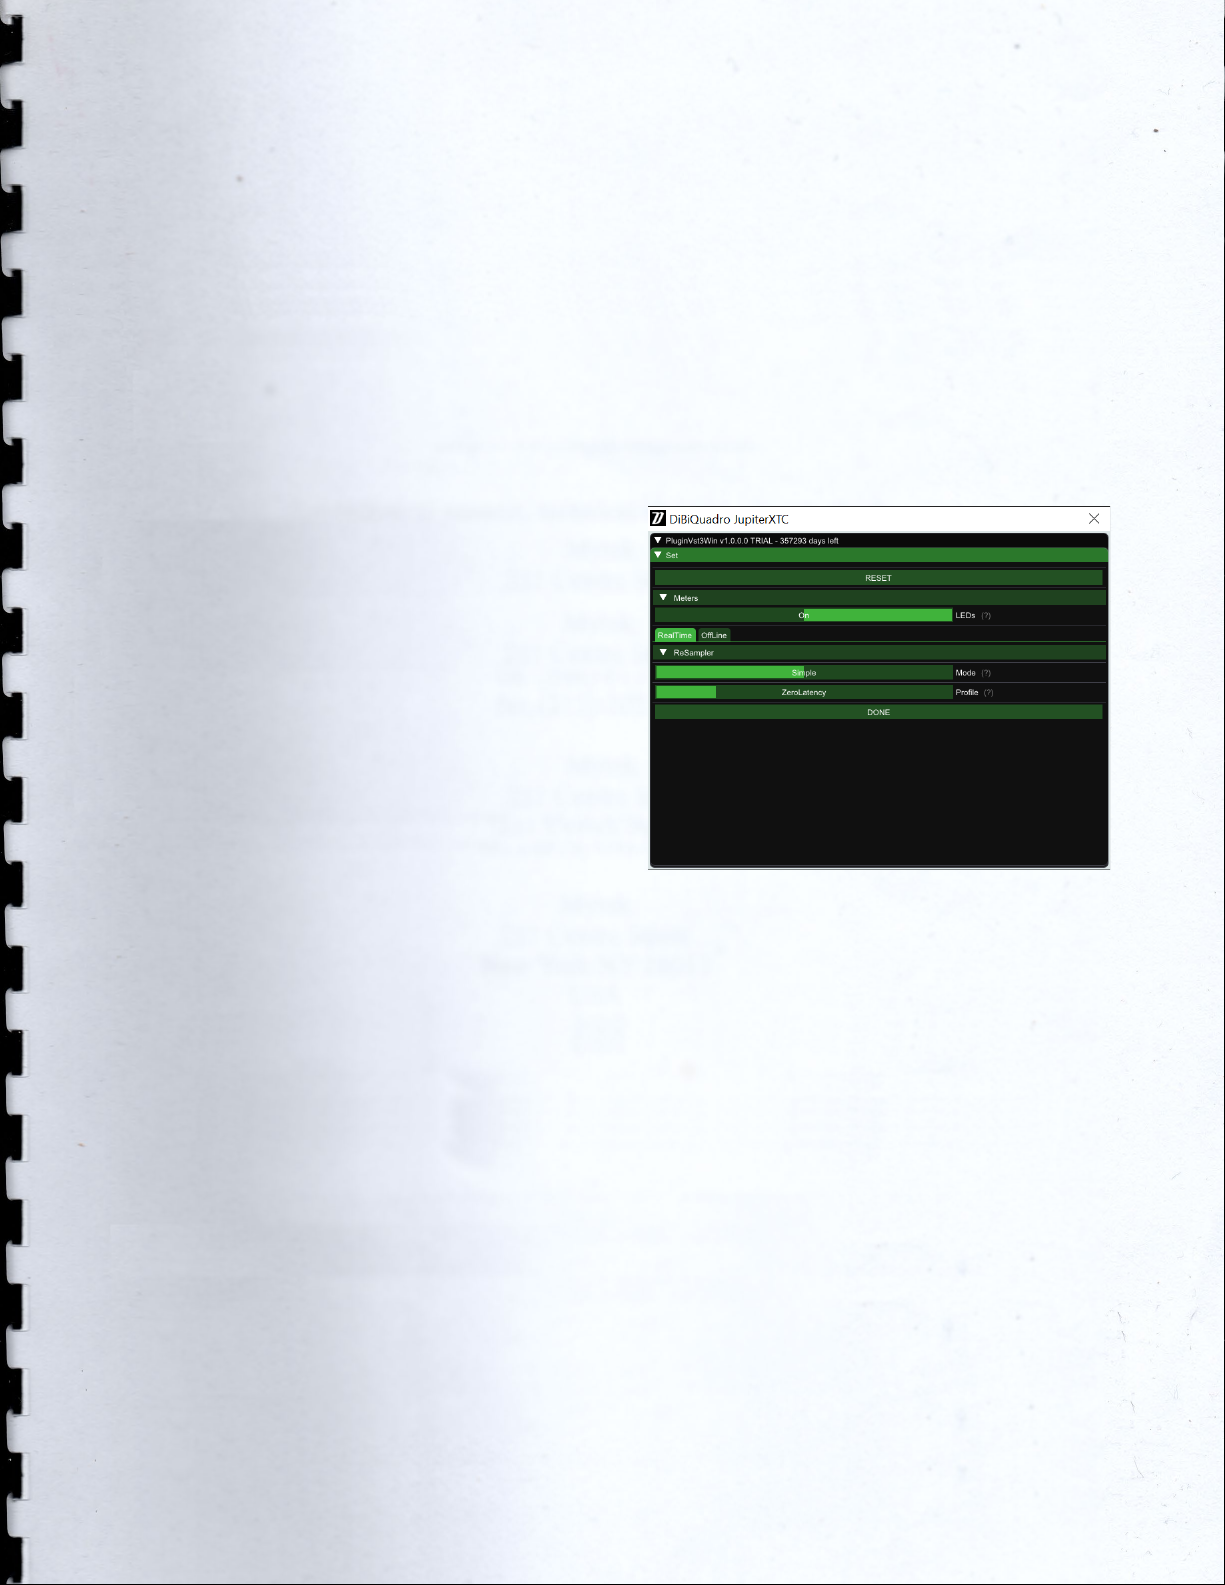
SET
SET window
You can open the SET window to
access the configuration settings for
meters, ReSampler and PreRender.
RESET. It restores the default values for
all configurations in the SET window.
LEDs. It activates / deactivates the
meter LEDs.
RealTime and OffLine tabs. These tabs
allow the user to specify different
configurations for the ReSampler, which
are taken into account depending on
the current processing mode.

9
RealTime tab. This mode is applied by
your sequencer when you are using a
plugin for monitoring, or when you are
playbacking tracks. We suggest to
keep the UpSamplingFactor at 1x in
case of monitoring, 4x in case of
playback @ 44100/48000Hz, 2x in case
of playback @ 88200/96000Hz.
OffLine tab. This mode is set by your
sequencer when you are bouncing a
track or the complete mix. If the
elaboration time is not a constraint for
you and you need to render hi-gain
guitars with the Overdrive Channel, we
suggest to set the UpSamplingFactor to
at least 128x @ 44100/48000Hz, 64x @
88200/96000Hz in order to minimize the
aliasing artifacts and get super high-
quality distortion. Try also to set a very
high PreRenderFactor (32x) to stabilize
the model in advance. For very long
renders, we strongly suggest to use the
Renderer in command line mode.
ReSamplerBufferSize. This is the
ReSampler Buffer Size in number of
samples.
UpSamplingFactor. This is the
UpSampling Factor applied to the base
input SampleRate. Use it to increase the
quality or your playbacks and renders,
but take into account that high
UpSampling factors correspond to
more samples to be processed, and
consequently longer processing times.
UpFilterTransBand. This is the
UpSampling Filter Transition Band, in
percent of the spectral space of the
input signal between filter's -3 dB point
and the Nyquist frequency.
UpFilterType. It defines the UpSampling
filter's phase response: Minimum Phase
or Linear Phase.
DownFilterTransBand. This is the
DownSampling Filter Transition Band, in
percent of the spectral space of the
output signal between filter's -3 dB
point and the Nyquist frequency. If you
are working at sample rates higher
than 44100/48000Hz, we suggest to
increase it to 43% to have a smoother
low pass filter without impacting the
audible frequencies.
DownFilterType. It defines the
DownSampling filter's phase response:
Minimum Phase or Linear Phase.
PreRenderFactor. Together with input
SampleRate and UpSamplingFactor,
PreRenderFactor affects how many
samples will be pre-rendered by the
model before the real processing. We
suggest to set it to the highest value –
32x – in Offline mode.
DONE. It closes the SET window.
TWEAK

10
TWEAK window
The TWEAK window gives you the
power to modify every single
component of the circuit. Even the
Triode model of the 12AX7 can be
tweaked in the NonLinearSolver tab.
Play with this window very carefully,
possibly in front of an analyzer, to get
exactly what you are looking for. We
do not guarantee that any possible
combination of values makes sense, so
it’s up to you to find a configuration
that works and satisfies your needs.
RESET. It restores the default values for
all configurations in the TWEAK window.
Primary tabs: Clean, Vintage, Modern
and NonLinearSolver. The primary tabs
provide access to the different
channels of the circuit and to the
12AX7 triode model. Each channel can
be tweaked independently while there
can be only one triode model for all
triodes.
TWEAK window – NonLinearSolver tab
NonLinearSolver tab. Use this section to
change characteristics of all the triodes
in the channels. The easiest way to
tweak the triode characteristcs is to:
1. Modify the name in the DtpFile
textbox.
2. Change one or more parameters
of the triode model1.
3. Press GENERATE button.
DONE. It closes the SET window.
1Have a look at https://www.dafx.de/paper-
archive/2011/Papers/76_e.pdf for more details.

11
The Renderer
Renderer window
The Renderer is provided to process an
input wave file in OffLine mode. It
collects all the controls described in the
previous sections, plus you have the
possibility to specify input and output
files.
Use the LOAD and SAVE buttons to load
and save Renderer presets. The Import
button can take a specific GUI setting
from a MercuryRec plugin preset file.
There is also an additional Output
header which allows to specify the
output wave file format.
Output header
OutputBitDepth. This is the number of
bits of information in each output
sample. It can be 16, 24, 32 or 64-bit.
OutputAudioFormat. It represents the
output encoding type: PCM (Integer)
or Floating Point.
The RENDER button will be visible only
when an existing input wave file and a
valid output wave file name have been
specified.
Renderer – RENDER button

12
Command Line Mode
The Renderer can be executed in
command line mode. With this
functionality, multiple rendering sessions
can be easily triggered in parallel by a
Windows batch file.
To launch a render from the Command
Prompt, first you need to create a
preset for the Renderer. Then you need
to execute the Renderer from the
Command Prompt with “-c” option
and to specify, in order:
1. the full path (absolute or relative
path + name) of the Renderer
preset;
2. the full path (absolute or relative
path + name) of the input wave
file;
3. the full path (absolute or relative
path + name) of the output
wave file.
Reminder:
JupiterXTCRenderer.exe –c presetFile.drp input.wav
output.wav
Example of Prompt command
Renderer – Render in progress

13
DiBiQuadro Audio S.r.l.s.
P.IVA: 09771000966
Address: Via Amendola 18, 26815
Massalengo (LO), ITALY

Table of contents
Other DiBiQuadro Amplifier manuals


