DIEBOLD NIXDORF R3 User manual

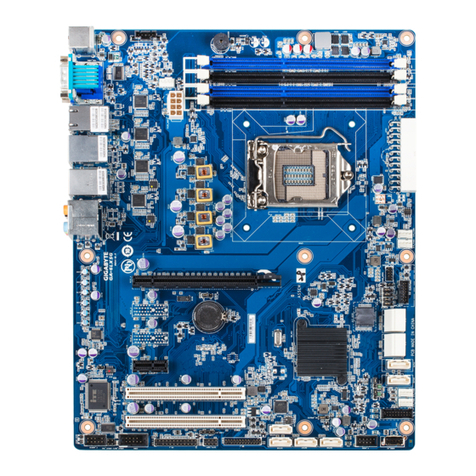
R3/R4 Motherboard (with UEFI BIOS)
User Manual
01750356875A

Table of Contents
1 Symbols ...................................................................................................................................... 1-1
2 Important notes.......................................................................................................................... 2-1
3 Warranty ..................................................................................................................................... 3-1
4 ESD (Electrostatic Sensitive Devices) ..................................................................................... 4-1
5 Specifications of R3/R4 Motherboard ...................................................................................... 5-1
6 Motherboard Variants................................................................................................................ 6-1
6.1 R3/R4 Motherboard............................................................................................................6-1
6.1.1 Front view............................................................................................................ 6-1
6.1.2 Back view............................................................................................................ 6-2
7 Block diagram ............................................................................................................................ 7-1
7.1 R3/R4 Motherboard............................................................................................................7-1
8 Central Processing Unit ............................................................................................................ 8-1
8.1 System Memory .................................................................................................................8-1
8.2 Jumpers .............................................................................................................................8-2
8.3 Connectors.........................................................................................................................8-3
8.3.1 Rear Panel Connectors....................................................................................... 8-3
8.3.2 Internal Connectors............................................................................................. 8-5
8.4 RAID...................................................................................................................................8-9
9 BIOS Setup Program ................................................................................................................. 9-1
9.1 Entering BIOS Setup at startup..........................................................................................9-1
9.2 Entering BIOS Setup after POST.......................................................................................9-1
9.3 Self-Recovering BIOS (after BIOS Update) .......................................................................9-1
9.3.1 How does the Self-Recovering BIOS work? ....................................................... 9-1
9.4 BIOS Menu Screen ............................................................................................................9-2
10 Information ................................................................................................................................. 10-1
11 Main............................................................................................................................................. 11-1
12 Advanced.................................................................................................................................... 12-1
12.1 Video Configuration............................................................................................................12-3
12.2 APM Configuration .............................................................................................................12-4
12.3 EZ-Flash.............................................................................................................................12-4
12.4 CPU Configuration .............................................................................................................12-5
12.5 Trusted Computing.............................................................................................................12-6
12.6 SATA & RST Configuration................................................................................................12-7
12.6.1 Software Feature Mask Configuration ................................................................ 12-8
12.7 NVMe Configuration...........................................................................................................12-9
12.8 USB Configuration .............................................................................................................12-10
12.8.1 USB Single Port Control ..................................................................................... 12-11
12.9 Onboard Devices Configuration .........................................................................................12-12
12.10 Super IO Configuration ......................................................................................................12-13
Copyright © 2021, Diebold Nixdorf
01750356875A
ii

Table of Contents
12.10.1 Serial Port 1 Configuration.................................................................................. 12-14
12.10.2 Serial Port 2 Configuration.................................................................................. 12-15
12.10.3 Serial Port 3 Configuration.................................................................................. 12-16
12.11 Serial Console Redirection.................................................................................................12-17
12.12 SMART Settings.................................................................................................................12-18
12.13 DN MCU Configuration ......................................................................................................12-19
12.14 IO HUB Configuration ........................................................................................................12-21
12.15 Watchdog Timer.................................................................................................................12-22
12.16 Miscellaneous ....................................................................................................................12-23
12.17 Network Stack Configuration..............................................................................................12-24
12.18 Intel(R) Ethernet Connection (7) I219-V - D8:50::DA:22:33:20..........................................12-25
12.18.1 NIC Configuration................................................................................................ 12-26
13 Hardware Monitor ...................................................................................................................... 13-1
14 Security....................................................................................................................................... 14-1
14.1 Secure Boot .......................................................................................................................14-2
14.1.1 Key Management................................................................................................ 14-3
14.2 HDD Security Configuration ...............................................................................................14-4
15 Boot............................................................................................................................................. 15-1
15.1 UEFI Hard Disk Drive BBS Priorities..................................................................................15-4
15.2 UEFI NETWORK Drive BBS Priorities ...............................................................................15-5
16 Exit .............................................................................................................................................. 16-1
17 Certifications of the Manufacturer ........................................................................................... 17-1
18 Recycling .................................................................................................................................... 18-1
Copyright © 2021, Diebold Nixdorf
01750356875A
iii

1
1 Symbols
DANGER
This warning note describes a hazard with a high degree of risk, which, if not avoided, will
result in death or grave bodily injury.
WARNING
This warning note describes a hazard with a medium degree of risk, which, if not avoided,
will result in death or grave bodily injury.
CAUTION
This warning note describes a hazard with a low degree of risk, which, if not avoided, will
result in death or grave bodily injury.
NOTE
This note provides application tips and information that help prevent errors and material
damage.
Copyright © 2021, Diebold Nixdorf
01750356875A
1-1

2
2 Important notes
Take note of the following precautions before you install motherboard components or change any moth-
erboard settings.
Unplug the power cord from the wall socket before touching any component.
Before handling components, use a grounded wrist strap or touch a safely grounded object or a metal
object, such as the power supply case, to avoid damaging them due to static electricity.
Hold components by the edges to avoid touching the ICs on them.
Whenever you uninstall any component, place it on a grounded antistatic pad or in the bag that came
with the component.
Before you install or remove any component, always remove the AC power by unplugging the power
cord from the power outlet. Failure to do so may cause severe damage to the motherboard, peripherals,
or components.
Copyright © 2021, Diebold Nixdorf
01750356875A
2-1

3
3 Warranty
Generally Diebold Nixdorf guarantees a warranty engagement for 12 months beginning with the date of
delivery. This warranty engagement covers all damages which occur despite a normal use of the prod-
uct.
Damages because of improper or insufficient maintenance, improper use of the product or unauthorized
modifications of the product, inadequate location or surroundings will not be covered by the warranty.
For further information on the stipulation consult your contract.
All parts of the product which are subject to wear and tear are not included in the warranty engagement.
For detailed warranty arrangements please consult your contract documents.
NOTE
Please contact your local service provider for all questions concerning your service con-
tract.
Copyright © 2021, Diebold Nixdorf
01750356875A
3-1

4
4 ESD (Electrostatic Sensitive Devices)
NOTE
Electrostatic sensitive devices (ESD) may be marked with this sticker.
When you handle components fitted with ESDs, you must observe the following points under all circum-
stances:
Make sure that the device is de-energized before connecting, removing or installing components with
ESD.
Always use the antistatic equipment.
Unplug the power before inserting or removing components containing ESDs.
While working with ESDs you must discharge yourself by using an ESD wrist strap or grounding cable to
connect yourself at all times to the earth connector of power socket or a grounded object.
Place all components containing ESDs on a static-safe base.
The equipment and tools you use must be free of static charges.
Always hold boards with ESDs by their edges. Do not touch the components.
Never touch pins or conductors on boards fitted with ESDs.
Copyright © 2021, Diebold Nixdorf
01750356875A
4-1

5
5 Specifications of R3/R4 Motherboard
Model Name R3 R4
Processor Support 9th/8th Generation Intel® Core™
i5 processors for LGA 1151
socket
9th/8th Generation Intel® Core™
i3 or Celeron® processors for
LGA 1151 socket
Chipset Q370 H310
Memory socket DDR4 1866/2133 MT/s SODIMM up to 32GB
Network
Wired Intel I219LM Intel I219V
Realtek RTL8153 (Multi-I/O Hub)
Wireless/Bluetooth Intel Wireless-AC 9462 / 9560 (M.2 2230 E-Key)
Super IO NCT6116D
Display Interface
Primary Display Interface EDP / LVDS
External Display Interface USB-C (Alternate Mode)
Number of Displays Supported 3 2
M.2 2280 Socket M-Key SATA/PCIE SSD
User I/O Ports 3x USB 2.0 Type A
1x USB 3.0 Type A
1x RJ12 Cash Drawer
1x RJ45 Gigabit LAN
3x RJ50 Powered COM port
1x USB Type-C, PD 2.0, DP1.2, DFP/DRP (5V/12/24V)
Copyright © 2021, Diebold Nixdorf
01750356875A
5-1

Specifications of R3/R4 Motherboard
1x USB Type-C, PD 2.0, DP 1.2, DFP (5V/12V)
TPM 2.0 Support TPM Daughter board interface
Copyright © 2021, Diebold Nixdorf
01750356875A
5-2

6
6 Motherboard Variants
6.1
6.1 R3/R4 Motherboard
6.1.1
6.1.1 Front view
1SODIMM socket 2WLAN module
3M.2 2280 socket (SSD) 4RTC battery
5Docking board interface
Copyright © 2021, Diebold Nixdorf
01750356875A
6-1

Motherboard Variants
6.1.2
6.1.2 Back view
Copyright © 2021, Diebold Nixdorf
01750356875A
6-2

Motherboard Variants
6IO Board 7Power Board
8TPM option 9CMOS clear
10 Heat sink 11 Connection for TSE/MF module
12 Heat Sink Fan 13 M.2 2280 socket (SSD)
Copyright © 2021, Diebold Nixdorf
01750356875A
6-3

7
7 Block diagram
7.1
7.1 R3/R4 Motherboard
Copyright © 2021, Diebold Nixdorf
01750356875A
7-1

8
8 Central Processing Unit
This Motherboard supports 9th/8th Generation Intel® Core™ i5/i3 or Celeron® processors for LGA 1151
socket.
8.1
8.1 System Memory
This Motherboard Supports 1 piece Double Data Rate 4 (DDR4) Small Outline Dual Inline Memory Mod-
ule (SO-DIMM). The figure below illustrates the location of the DDR4 SO-DIMM socket..
Copyright © 2021, Diebold Nixdorf
01750356875A
8-1

Central Processing Unit
8.2
8.2 Jumpers
• Clear RTC RAM (3-pin CLRTC)
This header allows you to clear the CMOS RTC RAM data.
To erase the RTC RAM:
• Turn OFF the computer and unplug the power cord.
• Move the jumper cap from pins 2-3 (default) to pins 1-2. Keep the cap on pins 1-2 for about 5~10
seconds, then move the cap back to pins 2-3.
• Plug the power cord and turn ON the computer.
• Hold down the <Del> key during the boot process and enter BIOS setup to reenter data.
NOTE
You do not need to clear the RTC when the system hangs due to overclocking. For sys-
tem failure due to overclocking, use the CPU Parameter Recall (C.P.R) feature. Shut
down and reboot the system so the BIOS can automatically reset parameter settings to
default values.
This jumper will just load BIOS defaults, and will not clear BIOS password.
Copyright © 2021, Diebold Nixdorf
01750356875A
8-2

Central Processing Unit
8.3
8.3 Connectors
8.3.1
8.3.1 Rear Panel Connectors
Port label Description of port
1LAN RJ45 LAN port
2USB2 USB 3.0 (Type C with DP and PD 5/12V)
3USB3 USB 2.0 (Type A)
4USB4 USB 2.0 (Type A)
5USB5 USB 2.0 (Type A)
6CASH RJ12 (Cash drawer)
724V IN Connection to power (24V DC Input)
8USB1 USB 3.0 (Type C with DP and PD 5/24V)
Power source/sink function
9USB6 USB 3.0 (Type A)
10 COM3 RJ50 powered COM port (5V/12V)
11 COM2 RJ50 powered COM port (5V/12V)
12 COM1 RJ50 powered COM port (5V/12V)
Copyright © 2021, Diebold Nixdorf
01750356875A
8-3

Central Processing Unit
LAN Port LED Indications
NOTE
USB 3.1 Gen 2 devices can only be used for data storage.
We strongly recommend that you connect USB 3.1 Gen 2 devices to USB
3.1 Gen 2 ports for faster and better performance from your USB 3.1 Gen 2 devices.
Due to the design of the Intel® 300 series chipset, all USB devices connected to the USB
2.0 and USB 3.1 Gen 2 ports are controlled by the xHCI controller. Some legacy USB de-
vices must update their firmware for better compatibility.
Copyright © 2021, Diebold Nixdorf
01750356875A
8-4

Central Processing Unit
8.3.2
8.3.2 Internal Connectors
1. TPM connector (10-pin TPM)
This connector supports a Trusted Platform Module (TPM) system, which can securely store keys, digital
certificates, passwords, and data. A TPM system also helps enhance network security, protects digital
identities, and ensures platform integrity.
Copyright © 2021, Diebold Nixdorf
01750356875A
8-5

Central Processing Unit
2. Connection for TSE/MF module
Copyright © 2021, Diebold Nixdorf
01750356875A
8-6

Central Processing Unit
3. M.2 sockets (M-Key SSD)
These sockets allows you to install M.2 (NGFF) SSD modules. One module is installed on back side of
Motherboard while the other is installed on the top side of Motherboard (under Heat Sink Fan)
NOTE
The M.2 SSD module is purchased separately.
This socket supports M-Key and 2260/2280 SATA/PCIe mode storage devices.
Copyright © 2021, Diebold Nixdorf
01750356875A
8-7
This manual suits for next models
1
Table of contents
Other DIEBOLD NIXDORF Motherboard manuals
