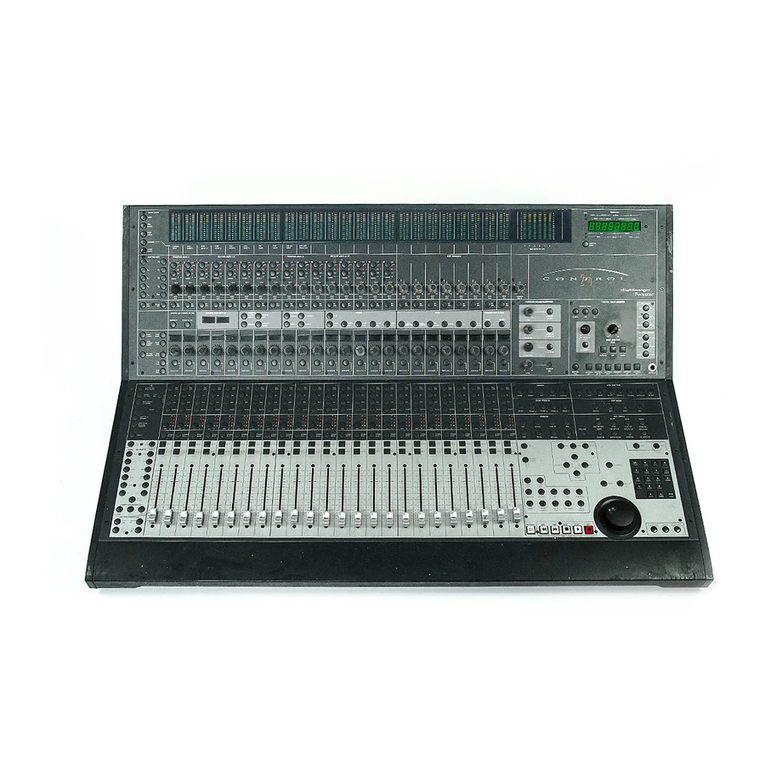
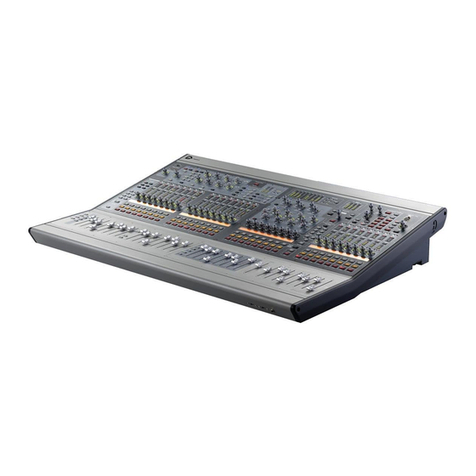
DigiDesign VENUE Profile User manual

Digidesign
2001 Junipero Serra Boulevard
Daly City, CA 94014-3886 USA
Technical Support (USA)
Visit the Digidesign Online Support Center at
www.digidesign.com/support
Product Information
For company and product information,
visit us on the web at www.digidesign.com
VENUE
Profile
™
Guide
and VENUE D-Show® Software Version 2.8.1
Guide Part Number: 9322-61364-00 REV A

Legal Notices
This guide is copyrighted ©2009 by Digidesign, a division of Avid Technology, Inc.
(hereafter “Digidesign”), with all rights reserved. Under copyright laws, this guide
may not be duplicated in whole or in part without the written consent of
Digidesign.
003, 003 Rack, 96 I/O, 96i I/O, 192 Digital I/O, 192 I/O, 888|24 I/O, 882|20
I/O, 1622 I/O, 24-Bit ADAT Bridge I/O, AudioSuite, Avid, Avid DNA, Avid Mojo,
Avid Unity, Avid Unity ISIS, Avid Unity MediaNetwork, Avid Xpress, AVoption,
AVoption|V10, Beat Detective, Bruno, C|24, Command|8, Control|24,
D-Command, D-Control, D-Fi, D-fx, D-Show, DAE, Digi 002, Digi 002 Rack,
DigiBase, DigiDelivery, Digidesign, Digidesign Audio Engine, Digidesign
Intelligent Noise Reduction, Digidesign TDM Bus, DigiDrive, DigiRack, DigiTest,
DigiTranslator, DINR, DV Toolkit, EditPack, Eleven, Impact, Interplay, M-Audio,
MachineControl, Maxim, Mbox, MediaComposer, MIDI I/O, MIX, MultiShell, OMF,
OMF Interchange, PRE, ProControl, Pro Tools M-Powered, Pro Tools,
Pro Tools|HD, Pro Tools LE, QuickPunch, Reel Tape, Reso, Reverb One, ReVibe,
RM1, RM2, RTAS, Smack!, SoundReplacer, Sound Designer II, Strike, Structure,
SYNC HD, SYNC I/O, Synchronic, TL Space, Velvet, X-Form, and Xpand! are
trademarks or registered trademarks of Digidesign and/or Avid Technology, Inc.
All other trademarks are the property of their respective owners.
Product features, specifications, system requirements, and availability are
subject to change without notice.
Guide Part Number: 9322-61364-00 REV A 04/09
Comments or suggestions regarding our documentation?
email: [email protected]
Communications & Safety Regulation Information
Compliance Statement
The model VENUE Profile complies with the following standards regulating
interference and EMC:
• FCC Part 15 Class B
• EN55103-1 E3
• EN55103-2 E3
• AS/NZS 3548 Class B
• CISPR 22 Class B
Radio and Television Interference
This equipment has been tested and found to comply with the limits for a Class
B digital device, pursuant to Part 15 of the FCC Rules.
DECLARATION OF CONFORMITY
We, Digidesign, 2001 Junipero Serra Boulevard
Daly City, CA 94014-3886, USA
650-731-6300
declare under our sole responsibility that the product
VENUE Profile
complies with Part 15 of FCC Rules.
Operation is subject to the following two conditions: (1) this device may not
cause harmful interference, and (2) this device must accept any interference
received, including interference that may cause undesired operation.
Communication Statement
NOTE: This equipment has been tested and found to comply with the limits for a
Class B digital device, pursuant to Part 15 of the FCC Rules. These limits are
designed to provide reasonable protection against harmful interference in a
residential installation. This equipment generates, uses, and can radiate radio
frequency energy and, if not installed and used in accordance with the
instructions, may cause harmful interference to radio communications. However,
there is no guarantee that interference will not occur in a particular installation.
If this equipment does cause harmful interference to radio or television
reception, which can be determined by turning the equipment off and on, the user
is encouraged to try and correct the interference by one or more of the following
measures:
• Reorient or locate the receiving antenna.
• Increase the separation between the equipment and receiver.
• Connect the equipment into an outlet on a circuit different from that to which
the receiver is connected.
• Consult the dealer or an experienced radio/TV technician for help.
Any modifications to the unit, unless expressly approved by Digidesign, could
void the user's authority to operate the equipment.
Canadian Compliance Statement:
This Class B digital apparatus complies with Canadian ICES-003
Cet appareil numérique de la classe B est conforme à la norme NMB-003 du
Canada
Australian Compliance
CE Compliance Statement:
Digidesign is authorized to apply the CE (Conformité Europénne) mark on this
compliant equipment thereby declaring conformity to EMC Directive
89/336/EEC and Low Voltage Directive 73/23/EEC.
Input Rating
I/P: 100-120V~/220-240V~, 50/60 Hz, 200W
Safety Statement
This equipment has been tested to comply with USA and Canadian safety
certification in accordance with the specifications of UL Standards: UL60065 7th
/IEC 60065 7th and Canadian CAN/CSA C22.2 60065:03. Digidesign Inc., has
been authorized to apply the appropriate UL & CUL mark on its compliant
equipment.
Warning
Important Safety Instructions
1) Read these instructions.
2) Keep these instructions.
3) Heed all warnings.
4) Follow all instructions.
5) Do not use this equipment near water.
6) Clean only with dry cloth.
7) Do not block any ventilation openings. Install in accordance with the
manufacturer’s instructions.
8) Do not install near any heat sources such as radiators, heat registers, stoves,
or other equipment (including amplifiers) that produce heat.
9) Do not defeat the safety purpose of the polarized or grounding-type plug. A
polarized plug has two blades with one wider than the other. A grounding type
plug has two blades and a third grounding prong. The wide blade or the third
prong are provided for your safety. If the provided plug does not fit into your
outlet, consult an electrician for replacement of the obsolete outlet.
10) Protect power cords from being walked on or pinched particularly at plugs,
convenience receptacles, and the point where they exit from the equipment.
11) Only use attachments/accessories specified by the manufacturer.
12) Use only with a cart, stand, tripod, bracket, or table specified by the
manufacturer, or sold with the equipment. When a cart is used, use caution when
moving the cart/equipment combination to avoid injury from tip-over.
13) Unplug this equipment during lightning storms or when unused for long
periods of time.
14) Refer all servicing to qualified service personnel. Servicing is required when
the equipment has been damaged in any way, such as power-supply cord or plug
is damaged, liquid has been spilled or objects have fallen into the equipment,
the equipment has been exposed to rain or moisture, does not operate normally,
or has been dropped.
15) The equipment shall not be exposed to dripping or splashing and no objects
filled with liquids (such as vases) shall be placed on the equipment.
Warning! To reduce the risk of fire or electric shock, do not expose this
equipment to rain or moisture.
16) The equipment should be connected to a properly-grounded (earthed)
receptacle.
17) The main power switch is located on the back panel. It should remain
accessible after installation.
18) The mains plug is used as the disconnecting device and shall remain readily
operable.
19) The equipment shall be used at a maximum ambient temperature of 40° C.
20) CAUTION! Danger of explosion if battery is incorrectly replaced.
Replace only with the same or equivalent type.


Contents v
Contents
Part I Overview and Installation
Chapter 1. Introduction to VENUE Profile . . . . . . . . . . . . . . . . . . . . . . . . . . . . . . . . . . . . . . . . . . . . . . . . . . . . . . . . . . . 3
VENUE Profile Systems and Features . . . . . . . . . . . . . . . . . . . . . . . . . . . . . . . . . . . . . . . . . . . . . . . . . . . . . . . . . . . . . . . 3
System Components . . . . . . . . . . . . . . . . . . . . . . . . . . . . . . . . . . . . . . . . . . . . . . . . . . . . . . . . . . . . . . . . . . . . . . . . . . . 5
VENUE Profile Expansion Options . . . . . . . . . . . . . . . . . . . . . . . . . . . . . . . . . . . . . . . . . . . . . . . . . . . . . . . . . . . . . . . . . . 5
Operational Requirements . . . . . . . . . . . . . . . . . . . . . . . . . . . . . . . . . . . . . . . . . . . . . . . . . . . . . . . . . . . . . . . . . . . . . . . 7
Connection Requirements . . . . . . . . . . . . . . . . . . . . . . . . . . . . . . . . . . . . . . . . . . . . . . . . . . . . . . . . . . . . . . . . . . . . . . . 7
Registration . . . . . . . . . . . . . . . . . . . . . . . . . . . . . . . . . . . . . . . . . . . . . . . . . . . . . . . . . . . . . . . . . . . . . . . . . . . . . . . . . 8
Conventions Used in This Guide . . . . . . . . . . . . . . . . . . . . . . . . . . . . . . . . . . . . . . . . . . . . . . . . . . . . . . . . . . . . . . . . . . . 8
About www.digidesign.com . . . . . . . . . . . . . . . . . . . . . . . . . . . . . . . . . . . . . . . . . . . . . . . . . . . . . . . . . . . . . . . . . . . . . . 8
Chapter 2. Configuring and Connecting Profile . . . . . . . . . . . . . . . . . . . . . . . . . . . . . . . . . . . . . . . . . . . . . . . . . . . . . . 9
Unpacking and Assembling VENUE Profile . . . . . . . . . . . . . . . . . . . . . . . . . . . . . . . . . . . . . . . . . . . . . . . . . . . . . . . . . . . . 9
Assembling the Video Monitor Mount and Trackball Mount . . . . . . . . . . . . . . . . . . . . . . . . . . . . . . . . . . . . . . . . . . . . . . . . 9
Connections for VENUE Mix Rack Systems . . . . . . . . . . . . . . . . . . . . . . . . . . . . . . . . . . . . . . . . . . . . . . . . . . . . . . . . . . . 12
Connections for VENUE Profile Systems . . . . . . . . . . . . . . . . . . . . . . . . . . . . . . . . . . . . . . . . . . . . . . . . . . . . . . . . . . . . . 15
Profile Console Connections . . . . . . . . . . . . . . . . . . . . . . . . . . . . . . . . . . . . . . . . . . . . . . . . . . . . . . . . . . . . . . . . . . . . . 20
Powering Up the System . . . . . . . . . . . . . . . . . . . . . . . . . . . . . . . . . . . . . . . . . . . . . . . . . . . . . . . . . . . . . . . . . . . . . . . 21
Powering Down the System . . . . . . . . . . . . . . . . . . . . . . . . . . . . . . . . . . . . . . . . . . . . . . . . . . . . . . . . . . . . . . . . . . . . . 21
Setting the System Clock . . . . . . . . . . . . . . . . . . . . . . . . . . . . . . . . . . . . . . . . . . . . . . . . . . . . . . . . . . . . . . . . . . . . . . . 21
Enabling a Second Stage Rack . . . . . . . . . . . . . . . . . . . . . . . . . . . . . . . . . . . . . . . . . . . . . . . . . . . . . . . . . . . . . . . . . . . 22
Digital Inputs and Sample Rate Conversion . . . . . . . . . . . . . . . . . . . . . . . . . . . . . . . . . . . . . . . . . . . . . . . . . . . . . . . . . . 22
Part II System Description
Chapter 3. VENUE Profile Control Overview . . . . . . . . . . . . . . . . . . . . . . . . . . . . . . . . . . . . . . . . . . . . . . . . . . . . . . . . 27
VENUE Profile Top Panel . . . . . . . . . . . . . . . . . . . . . . . . . . . . . . . . . . . . . . . . . . . . . . . . . . . . . . . . . . . . . . . . . . . . . . . 27
Input Channels and Faders. . . . . . . . . . . . . . . . . . . . . . . . . . . . . . . . . . . . . . . . . . . . . . . . . . . . . . . . . . . . . . . . . . . . . . 28
Assignable Channel Section . . . . . . . . . . . . . . . . . . . . . . . . . . . . . . . . . . . . . . . . . . . . . . . . . . . . . . . . . . . . . . . . . . . . . 32
Output Masters . . . . . . . . . . . . . . . . . . . . . . . . . . . . . . . . . . . . . . . . . . . . . . . . . . . . . . . . . . . . . . . . . . . . . . . . . . . . . . 34
Master and Global Controls . . . . . . . . . . . . . . . . . . . . . . . . . . . . . . . . . . . . . . . . . . . . . . . . . . . . . . . . . . . . . . . . . . . . . 35
Meters . . . . . . . . . . . . . . . . . . . . . . . . . . . . . . . . . . . . . . . . . . . . . . . . . . . . . . . . . . . . . . . . . . . . . . . . . . . . . . . . . . . . 36
Chapter 4. Basic Commands and Modes . . . . . . . . . . . . . . . . . . . . . . . . . . . . . . . . . . . . . . . . . . . . . . . . . . . . . . . . . . . 37
Control Overview . . . . . . . . . . . . . . . . . . . . . . . . . . . . . . . . . . . . . . . . . . . . . . . . . . . . . . . . . . . . . . . . . . . . . . . . . . . . . 37
Config Mode and Show Mode . . . . . . . . . . . . . . . . . . . . . . . . . . . . . . . . . . . . . . . . . . . . . . . . . . . . . . . . . . . . . . . . . . . . 38
System Lock. . . . . . . . . . . . . . . . . . . . . . . . . . . . . . . . . . . . . . . . . . . . . . . . . . . . . . . . . . . . . . . . . . . . . . . . . . . . . . . . 38
Global Modifier Switches . . . . . . . . . . . . . . . . . . . . . . . . . . . . . . . . . . . . . . . . . . . . . . . . . . . . . . . . . . . . . . . . . . . . . . . 39
Software Screen Pages and Tabs . . . . . . . . . . . . . . . . . . . . . . . . . . . . . . . . . . . . . . . . . . . . . . . . . . . . . . . . . . . . . . . . . 40

VENUE Profile Guidevi
Chapter 5. Navigating and Selecting Channels . . . . . . . . . . . . . . . . . . . . . . . . . . . . . . . . . . . . . . . . . . . . . . . . . . . . . . 43
Banking Input Channels and FX Returns . . . . . . . . . . . . . . . . . . . . . . . . . . . . . . . . . . . . . . . . . . . . . . . . . . . . . . . . . . . . . 43
Banking the Output Section. . . . . . . . . . . . . . . . . . . . . . . . . . . . . . . . . . . . . . . . . . . . . . . . . . . . . . . . . . . . . . . . . . . . . . 46
Selecting and Targeting Channels . . . . . . . . . . . . . . . . . . . . . . . . . . . . . . . . . . . . . . . . . . . . . . . . . . . . . . . . . . . . . . . . . 46
Targeting Plug-In Inserts . . . . . . . . . . . . . . . . . . . . . . . . . . . . . . . . . . . . . . . . . . . . . . . . . . . . . . . . . . . . . . . . . . . . . . . . 47
Screen Controls . . . . . . . . . . . . . . . . . . . . . . . . . . . . . . . . . . . . . . . . . . . . . . . . . . . . . . . . . . . . . . . . . . . . . . . . . . . . . . 48
Screen Shortcuts . . . . . . . . . . . . . . . . . . . . . . . . . . . . . . . . . . . . . . . . . . . . . . . . . . . . . . . . . . . . . . . . . . . . . . . . . . . . . 49
Input Channel Presets. . . . . . . . . . . . . . . . . . . . . . . . . . . . . . . . . . . . . . . . . . . . . . . . . . . . . . . . . . . . . . . . . . . . . . . . . . 52
Chapter 6. Options . . . . . . . . . . . . . . . . . . . . . . . . . . . . . . . . . . . . . . . . . . . . . . . . . . . . . . . . . . . . . . . . . . . . . . . . . . . . . . . 55
System . . . . . . . . . . . . . . . . . . . . . . . . . . . . . . . . . . . . . . . . . . . . . . . . . . . . . . . . . . . . . . . . . . . . . . . . . . . . . . . . . . . . 55
Devices . . . . . . . . . . . . . . . . . . . . . . . . . . . . . . . . . . . . . . . . . . . . . . . . . . . . . . . . . . . . . . . . . . . . . . . . . . . . . . . . . . . . 57
Other Options and Settings . . . . . . . . . . . . . . . . . . . . . . . . . . . . . . . . . . . . . . . . . . . . . . . . . . . . . . . . . . . . . . . . . . . . . . 57
Part III Signal Routing
Chapter 7. Inputs and Input Routing . . . . . . . . . . . . . . . . . . . . . . . . . . . . . . . . . . . . . . . . . . . . . . . . . . . . . . . . . . . . . . . 67
Configuring Inputs . . . . . . . . . . . . . . . . . . . . . . . . . . . . . . . . . . . . . . . . . . . . . . . . . . . . . . . . . . . . . . . . . . . . . . . . . . . . 67
Assigning Input Sources to Channels . . . . . . . . . . . . . . . . . . . . . . . . . . . . . . . . . . . . . . . . . . . . . . . . . . . . . . . . . . . . . . . 68
Routing Input Channels. . . . . . . . . . . . . . . . . . . . . . . . . . . . . . . . . . . . . . . . . . . . . . . . . . . . . . . . . . . . . . . . . . . . . . . . . 69
Using Built-In Dynamics and EQ . . . . . . . . . . . . . . . . . . . . . . . . . . . . . . . . . . . . . . . . . . . . . . . . . . . . . . . . . . . . . . . . . . . 70
Using Inserts on Channels . . . . . . . . . . . . . . . . . . . . . . . . . . . . . . . . . . . . . . . . . . . . . . . . . . . . . . . . . . . . . . . . . . . . . . . 71
Adjusting Input Controls . . . . . . . . . . . . . . . . . . . . . . . . . . . . . . . . . . . . . . . . . . . . . . . . . . . . . . . . . . . . . . . . . . . . . . . . 73
Using Input Direct. . . . . . . . . . . . . . . . . . . . . . . . . . . . . . . . . . . . . . . . . . . . . . . . . . . . . . . . . . . . . . . . . . . . . . . . . . . . . 76
Chapter 8. Outputs and Output Routing . . . . . . . . . . . . . . . . . . . . . . . . . . . . . . . . . . . . . . . . . . . . . . . . . . . . . . . . . . . . 77
Configuring Outputs . . . . . . . . . . . . . . . . . . . . . . . . . . . . . . . . . . . . . . . . . . . . . . . . . . . . . . . . . . . . . . . . . . . . . . . . . . . 77
Assigning Busses to Hardware Outputs . . . . . . . . . . . . . . . . . . . . . . . . . . . . . . . . . . . . . . . . . . . . . . . . . . . . . . . . . . . . . . 78
Routing Group Outputs to the Mains Busses . . . . . . . . . . . . . . . . . . . . . . . . . . . . . . . . . . . . . . . . . . . . . . . . . . . . . . . . . . 79
Using Inserts on Output Busses . . . . . . . . . . . . . . . . . . . . . . . . . . . . . . . . . . . . . . . . . . . . . . . . . . . . . . . . . . . . . . . . . . . 80
Adjusting Output Controls . . . . . . . . . . . . . . . . . . . . . . . . . . . . . . . . . . . . . . . . . . . . . . . . . . . . . . . . . . . . . . . . . . . . . . . 81
Adjusting Main Bus Controls . . . . . . . . . . . . . . . . . . . . . . . . . . . . . . . . . . . . . . . . . . . . . . . . . . . . . . . . . . . . . . . . . . . . . 82
Direct Outputs . . . . . . . . . . . . . . . . . . . . . . . . . . . . . . . . . . . . . . . . . . . . . . . . . . . . . . . . . . . . . . . . . . . . . . . . . . . . . . . 83
Matrix Mixers . . . . . . . . . . . . . . . . . . . . . . . . . . . . . . . . . . . . . . . . . . . . . . . . . . . . . . . . . . . . . . . . . . . . . . . . . . . . . . . . 84
Personal Q Mixers . . . . . . . . . . . . . . . . . . . . . . . . . . . . . . . . . . . . . . . . . . . . . . . . . . . . . . . . . . . . . . . . . . . . . . . . . . . . 84
Assigning and Using VCAs . . . . . . . . . . . . . . . . . . . . . . . . . . . . . . . . . . . . . . . . . . . . . . . . . . . . . . . . . . . . . . . . . . . . . . . 84
Chapter 9. Groups . . . . . . . . . . . . . . . . . . . . . . . . . . . . . . . . . . . . . . . . . . . . . . . . . . . . . . . . . . . . . . . . . . . . . . . . . . . . . . . . 87
Configuring Group Busses . . . . . . . . . . . . . . . . . . . . . . . . . . . . . . . . . . . . . . . . . . . . . . . . . . . . . . . . . . . . . . . . . . . . . . . 87
Routing Inputs to Group Busses . . . . . . . . . . . . . . . . . . . . . . . . . . . . . . . . . . . . . . . . . . . . . . . . . . . . . . . . . . . . . . . . . . . 87
Routing Group Outputs to the Main Busses . . . . . . . . . . . . . . . . . . . . . . . . . . . . . . . . . . . . . . . . . . . . . . . . . . . . . . . . . . . 87
Managing Group Bus Assignments . . . . . . . . . . . . . . . . . . . . . . . . . . . . . . . . . . . . . . . . . . . . . . . . . . . . . . . . . . . . . . . . . 88
Group Bus Signal Flow Options . . . . . . . . . . . . . . . . . . . . . . . . . . . . . . . . . . . . . . . . . . . . . . . . . . . . . . . . . . . . . . . . . . . 90
Adjusting Group Bus Output Controls . . . . . . . . . . . . . . . . . . . . . . . . . . . . . . . . . . . . . . . . . . . . . . . . . . . . . . . . . . . . . . . 90
Simple and Expert Operational Modes . . . . . . . . . . . . . . . . . . . . . . . . . . . . . . . . . . . . . . . . . . . . . . . . . . . . . . . . . . . . . . 91

Contents vii
Chapter 10. Aux Sends and Variable Groups . . . . . . . . . . . . . . . . . . . . . . . . . . . . . . . . . . . . . . . . . . . . . . . . . . . . . . . 93
Configuring Aux and Variable Group Busses . . . . . . . . . . . . . . . . . . . . . . . . . . . . . . . . . . . . . . . . . . . . . . . . . . . . . . . . . . 93
Routing Inputs to Aux Busses . . . . . . . . . . . . . . . . . . . . . . . . . . . . . . . . . . . . . . . . . . . . . . . . . . . . . . . . . . . . . . . . . . . . 94
Routing Aux Busses to Outputs and Plug-Ins . . . . . . . . . . . . . . . . . . . . . . . . . . . . . . . . . . . . . . . . . . . . . . . . . . . . . . . . . 95
Adjusting Aux Send Controls. . . . . . . . . . . . . . . . . . . . . . . . . . . . . . . . . . . . . . . . . . . . . . . . . . . . . . . . . . . . . . . . . . . . . 96
Managing Aux Bus Assignments . . . . . . . . . . . . . . . . . . . . . . . . . . . . . . . . . . . . . . . . . . . . . . . . . . . . . . . . . . . . . . . . . . 97
Chapter 11. Matrix and Personal Q Mixers . . . . . . . . . . . . . . . . . . . . . . . . . . . . . . . . . . . . . . . . . . . . . . . . . . . . . . . . . 99
Matrix Mixers . . . . . . . . . . . . . . . . . . . . . . . . . . . . . . . . . . . . . . . . . . . . . . . . . . . . . . . . . . . . . . . . . . . . . . . . . . . . . . . 99
Personal Q Mixers . . . . . . . . . . . . . . . . . . . . . . . . . . . . . . . . . . . . . . . . . . . . . . . . . . . . . . . . . . . . . . . . . . . . . . . . . . . 100
Configuring Matrix and PQ Mixers . . . . . . . . . . . . . . . . . . . . . . . . . . . . . . . . . . . . . . . . . . . . . . . . . . . . . . . . . . . . . . . . 101
Adjusting Matrix and PQ Mixer Input Controls. . . . . . . . . . . . . . . . . . . . . . . . . . . . . . . . . . . . . . . . . . . . . . . . . . . . . . . . 104
Adjusting Matrix and PQ Mixer Output Controls . . . . . . . . . . . . . . . . . . . . . . . . . . . . . . . . . . . . . . . . . . . . . . . . . . . . . . 105
Snapshot Data and Parameters for Matrix Mixers. . . . . . . . . . . . . . . . . . . . . . . . . . . . . . . . . . . . . . . . . . . . . . . . . . . . . 105
Working with a PQ Controller . . . . . . . . . . . . . . . . . . . . . . . . . . . . . . . . . . . . . . . . . . . . . . . . . . . . . . . . . . . . . . . . . . . 106
Chapter 12. Patchbay. . . . . . . . . . . . . . . . . . . . . . . . . . . . . . . . . . . . . . . . . . . . . . . . . . . . . . . . . . . . . . . . . . . . . . . . . . . 107
Accessing the Patchbay . . . . . . . . . . . . . . . . . . . . . . . . . . . . . . . . . . . . . . . . . . . . . . . . . . . . . . . . . . . . . . . . . . . . . . . 107
Overview of the Patchbay. . . . . . . . . . . . . . . . . . . . . . . . . . . . . . . . . . . . . . . . . . . . . . . . . . . . . . . . . . . . . . . . . . . . . . 107
Navigating the Patchbay . . . . . . . . . . . . . . . . . . . . . . . . . . . . . . . . . . . . . . . . . . . . . . . . . . . . . . . . . . . . . . . . . . . . . . 109
Assigning Channels in the Patchbay . . . . . . . . . . . . . . . . . . . . . . . . . . . . . . . . . . . . . . . . . . . . . . . . . . . . . . . . . . . . . . 109
Warning when Stealing Inputs or Outputs in the Patchbay. . . . . . . . . . . . . . . . . . . . . . . . . . . . . . . . . . . . . . . . . . . . . . . 111
VENUE System Information Export . . . . . . . . . . . . . . . . . . . . . . . . . . . . . . . . . . . . . . . . . . . . . . . . . . . . . . . . . . . . . . . 111
Patch List Export . . . . . . . . . . . . . . . . . . . . . . . . . . . . . . . . . . . . . . . . . . . . . . . . . . . . . . . . . . . . . . . . . . . . . . . . . . . . 112
Chapter 13. Metering . . . . . . . . . . . . . . . . . . . . . . . . . . . . . . . . . . . . . . . . . . . . . . . . . . . . . . . . . . . . . . . . . . . . . . . . . . . 113
Channel Meters. . . . . . . . . . . . . . . . . . . . . . . . . . . . . . . . . . . . . . . . . . . . . . . . . . . . . . . . . . . . . . . . . . . . . . . . . . . . . 113
ACS Input and Dynamics Meters . . . . . . . . . . . . . . . . . . . . . . . . . . . . . . . . . . . . . . . . . . . . . . . . . . . . . . . . . . . . . . . . . 114
Metering Section . . . . . . . . . . . . . . . . . . . . . . . . . . . . . . . . . . . . . . . . . . . . . . . . . . . . . . . . . . . . . . . . . . . . . . . . . . . . 115
Metering Options. . . . . . . . . . . . . . . . . . . . . . . . . . . . . . . . . . . . . . . . . . . . . . . . . . . . . . . . . . . . . . . . . . . . . . . . . . . . 116
Chapter 14. Solo and Monitor Busses . . . . . . . . . . . . . . . . . . . . . . . . . . . . . . . . . . . . . . . . . . . . . . . . . . . . . . . . . . . . 117
Solo Bus Modes . . . . . . . . . . . . . . . . . . . . . . . . . . . . . . . . . . . . . . . . . . . . . . . . . . . . . . . . . . . . . . . . . . . . . . . . . . . . 117
Selecting a Solo Mode . . . . . . . . . . . . . . . . . . . . . . . . . . . . . . . . . . . . . . . . . . . . . . . . . . . . . . . . . . . . . . . . . . . . . . . . 117
Solo Operation Options . . . . . . . . . . . . . . . . . . . . . . . . . . . . . . . . . . . . . . . . . . . . . . . . . . . . . . . . . . . . . . . . . . . . . . . 118
Solo Bus Operation . . . . . . . . . . . . . . . . . . . . . . . . . . . . . . . . . . . . . . . . . . . . . . . . . . . . . . . . . . . . . . . . . . . . . . . . . . 119
Solo Safing Channels. . . . . . . . . . . . . . . . . . . . . . . . . . . . . . . . . . . . . . . . . . . . . . . . . . . . . . . . . . . . . . . . . . . . . . . . . 119
Monitor Bus Operation . . . . . . . . . . . . . . . . . . . . . . . . . . . . . . . . . . . . . . . . . . . . . . . . . . . . . . . . . . . . . . . . . . . . . . . . 120
Talkback, 2-Track and Oscillator Controls . . . . . . . . . . . . . . . . . . . . . . . . . . . . . . . . . . . . . . . . . . . . . . . . . . . . . . . . . . 123
Routing the Oscillator . . . . . . . . . . . . . . . . . . . . . . . . . . . . . . . . . . . . . . . . . . . . . . . . . . . . . . . . . . . . . . . . . . . . . . . . 126
Chapter 15. Muting and Mute Groups . . . . . . . . . . . . . . . . . . . . . . . . . . . . . . . . . . . . . . . . . . . . . . . . . . . . . . . . . . . . 127
Muting . . . . . . . . . . . . . . . . . . . . . . . . . . . . . . . . . . . . . . . . . . . . . . . . . . . . . . . . . . . . . . . . . . . . . . . . . . . . . . . . . . . 127
Mute Groups. . . . . . . . . . . . . . . . . . . . . . . . . . . . . . . . . . . . . . . . . . . . . . . . . . . . . . . . . . . . . . . . . . . . . . . . . . . . . . . 127
Function Switches . . . . . . . . . . . . . . . . . . . . . . . . . . . . . . . . . . . . . . . . . . . . . . . . . . . . . . . . . . . . . . . . . . . . . . . . . . . 129

VENUE Profile Guideviii
Part IV Processing
Chapter 16. Dynamics . . . . . . . . . . . . . . . . . . . . . . . . . . . . . . . . . . . . . . . . . . . . . . . . . . . . . . . . . . . . . . . . . . . . . . . . . . . 133
Built-In Compressor/Limiter . . . . . . . . . . . . . . . . . . . . . . . . . . . . . . . . . . . . . . . . . . . . . . . . . . . . . . . . . . . . . . . . . . . . 133
Built-In Expander/Gate . . . . . . . . . . . . . . . . . . . . . . . . . . . . . . . . . . . . . . . . . . . . . . . . . . . . . . . . . . . . . . . . . . . . . . . . 134
Adjusting Dynamics . . . . . . . . . . . . . . . . . . . . . . . . . . . . . . . . . . . . . . . . . . . . . . . . . . . . . . . . . . . . . . . . . . . . . . . . . . 134
Channel Modes Affecting Dynamics . . . . . . . . . . . . . . . . . . . . . . . . . . . . . . . . . . . . . . . . . . . . . . . . . . . . . . . . . . . . . . . 136
Dynamics Settings and Presets . . . . . . . . . . . . . . . . . . . . . . . . . . . . . . . . . . . . . . . . . . . . . . . . . . . . . . . . . . . . . . . . . . 137
Side-Chain Keys and Filters . . . . . . . . . . . . . . . . . . . . . . . . . . . . . . . . . . . . . . . . . . . . . . . . . . . . . . . . . . . . . . . . . . . . . 137
Chapter 17. EQ . . . . . . . . . . . . . . . . . . . . . . . . . . . . . . . . . . . . . . . . . . . . . . . . . . . . . . . . . . . . . . . . . . . . . . . . . . . . . . . . . 139
Built-In EQ Parameters . . . . . . . . . . . . . . . . . . . . . . . . . . . . . . . . . . . . . . . . . . . . . . . . . . . . . . . . . . . . . . . . . . . . . . . . 139
Adjusting EQ . . . . . . . . . . . . . . . . . . . . . . . . . . . . . . . . . . . . . . . . . . . . . . . . . . . . . . . . . . . . . . . . . . . . . . . . . . . . . . . 140
Channel Modes Affecting EQ . . . . . . . . . . . . . . . . . . . . . . . . . . . . . . . . . . . . . . . . . . . . . . . . . . . . . . . . . . . . . . . . . . . . 142
Graphic EQ for Outputs . . . . . . . . . . . . . . . . . . . . . . . . . . . . . . . . . . . . . . . . . . . . . . . . . . . . . . . . . . . . . . . . . . . . . . . . 142
EQ Settings and Presets . . . . . . . . . . . . . . . . . . . . . . . . . . . . . . . . . . . . . . . . . . . . . . . . . . . . . . . . . . . . . . . . . . . . . . . 144
Chapter 18. Plug-Ins. . . . . . . . . . . . . . . . . . . . . . . . . . . . . . . . . . . . . . . . . . . . . . . . . . . . . . . . . . . . . . . . . . . . . . . . . . . . . 147
Installing and Authorizing Plug-Ins . . . . . . . . . . . . . . . . . . . . . . . . . . . . . . . . . . . . . . . . . . . . . . . . . . . . . . . . . . . . . . . . 147
Managing Plug-Ins on the System . . . . . . . . . . . . . . . . . . . . . . . . . . . . . . . . . . . . . . . . . . . . . . . . . . . . . . . . . . . . . . . . 149
Overview of Working with Plug-Ins . . . . . . . . . . . . . . . . . . . . . . . . . . . . . . . . . . . . . . . . . . . . . . . . . . . . . . . . . . . . . . . . 151
Plug-In Racks. . . . . . . . . . . . . . . . . . . . . . . . . . . . . . . . . . . . . . . . . . . . . . . . . . . . . . . . . . . . . . . . . . . . . . . . . . . . . . . 152
Assigning and Routing Plug-Ins . . . . . . . . . . . . . . . . . . . . . . . . . . . . . . . . . . . . . . . . . . . . . . . . . . . . . . . . . . . . . . . . . . 155
Adjusting Plug-Ins. . . . . . . . . . . . . . . . . . . . . . . . . . . . . . . . . . . . . . . . . . . . . . . . . . . . . . . . . . . . . . . . . . . . . . . . . . . . 157
Plug-In Presets and Snapshots. . . . . . . . . . . . . . . . . . . . . . . . . . . . . . . . . . . . . . . . . . . . . . . . . . . . . . . . . . . . . . . . . . . 160
Plug-In DSP Usage . . . . . . . . . . . . . . . . . . . . . . . . . . . . . . . . . . . . . . . . . . . . . . . . . . . . . . . . . . . . . . . . . . . . . . . . . . . 161
Plug-In Levels. . . . . . . . . . . . . . . . . . . . . . . . . . . . . . . . . . . . . . . . . . . . . . . . . . . . . . . . . . . . . . . . . . . . . . . . . . . . . . . 161
Plug-In Latency and Processing Delay. . . . . . . . . . . . . . . . . . . . . . . . . . . . . . . . . . . . . . . . . . . . . . . . . . . . . . . . . . . . . . 162
Chapter 19. Hardware Inserts . . . . . . . . . . . . . . . . . . . . . . . . . . . . . . . . . . . . . . . . . . . . . . . . . . . . . . . . . . . . . . . . . . . . 163
Assigning Hardware Inserts to Channels . . . . . . . . . . . . . . . . . . . . . . . . . . . . . . . . . . . . . . . . . . . . . . . . . . . . . . . . . . . . 163
Part V Shows
Chapter 20. Shows and File Management . . . . . . . . . . . . . . . . . . . . . . . . . . . . . . . . . . . . . . . . . . . . . . . . . . . . . . . . . 167
Creating Shows . . . . . . . . . . . . . . . . . . . . . . . . . . . . . . . . . . . . . . . . . . . . . . . . . . . . . . . . . . . . . . . . . . . . . . . . . . . . . 167
Loading Shows. . . . . . . . . . . . . . . . . . . . . . . . . . . . . . . . . . . . . . . . . . . . . . . . . . . . . . . . . . . . . . . . . . . . . . . . . . . . . . 168
Working with Presets . . . . . . . . . . . . . . . . . . . . . . . . . . . . . . . . . . . . . . . . . . . . . . . . . . . . . . . . . . . . . . . . . . . . . . . . . 169
Transferring Settings, Shows and Presets . . . . . . . . . . . . . . . . . . . . . . . . . . . . . . . . . . . . . . . . . . . . . . . . . . . . . . . . . . . 171
Undoing Changes Using the History Feature . . . . . . . . . . . . . . . . . . . . . . . . . . . . . . . . . . . . . . . . . . . . . . . . . . . . . . . . . 172

Contents ix
Chapter 21. Snapshots. . . . . . . . . . . . . . . . . . . . . . . . . . . . . . . . . . . . . . . . . . . . . . . . . . . . . . . . . . . . . . . . . . . . . . . . . . 173
Snapshots Page . . . . . . . . . . . . . . . . . . . . . . . . . . . . . . . . . . . . . . . . . . . . . . . . . . . . . . . . . . . . . . . . . . . . . . . . . . . . 173
Snapshot Controls on the Console. . . . . . . . . . . . . . . . . . . . . . . . . . . . . . . . . . . . . . . . . . . . . . . . . . . . . . . . . . . . . . . . 176
Snapshots List . . . . . . . . . . . . . . . . . . . . . . . . . . . . . . . . . . . . . . . . . . . . . . . . . . . . . . . . . . . . . . . . . . . . . . . . . . . . . 176
Creating Snapshots . . . . . . . . . . . . . . . . . . . . . . . . . . . . . . . . . . . . . . . . . . . . . . . . . . . . . . . . . . . . . . . . . . . . . . . . . . 178
Recalling Snapshots . . . . . . . . . . . . . . . . . . . . . . . . . . . . . . . . . . . . . . . . . . . . . . . . . . . . . . . . . . . . . . . . . . . . . . . . . 179
Recall Safe and Channel Automation Safe. . . . . . . . . . . . . . . . . . . . . . . . . . . . . . . . . . . . . . . . . . . . . . . . . . . . . . . . . . 180
Managing Snapshots . . . . . . . . . . . . . . . . . . . . . . . . . . . . . . . . . . . . . . . . . . . . . . . . . . . . . . . . . . . . . . . . . . . . . . . . . 183
Making Changes to Snapshots . . . . . . . . . . . . . . . . . . . . . . . . . . . . . . . . . . . . . . . . . . . . . . . . . . . . . . . . . . . . . . . . . . 185
Preview Mode . . . . . . . . . . . . . . . . . . . . . . . . . . . . . . . . . . . . . . . . . . . . . . . . . . . . . . . . . . . . . . . . . . . . . . . . . . . . . . 187
Undoing Snapshot Commands . . . . . . . . . . . . . . . . . . . . . . . . . . . . . . . . . . . . . . . . . . . . . . . . . . . . . . . . . . . . . . . . . . 189
Disabling Snapshots . . . . . . . . . . . . . . . . . . . . . . . . . . . . . . . . . . . . . . . . . . . . . . . . . . . . . . . . . . . . . . . . . . . . . . . . . 190
Adding MIDI Messages to Snapshots. . . . . . . . . . . . . . . . . . . . . . . . . . . . . . . . . . . . . . . . . . . . . . . . . . . . . . . . . . . . . . 190
Adding Tempo Data to Snapshots . . . . . . . . . . . . . . . . . . . . . . . . . . . . . . . . . . . . . . . . . . . . . . . . . . . . . . . . . . . . . . . . 191
Adding Plug-In Data to Snapshots. . . . . . . . . . . . . . . . . . . . . . . . . . . . . . . . . . . . . . . . . . . . . . . . . . . . . . . . . . . . . . . . 192
Snapshot Options . . . . . . . . . . . . . . . . . . . . . . . . . . . . . . . . . . . . . . . . . . . . . . . . . . . . . . . . . . . . . . . . . . . . . . . . . . . 194
Snapshot Data Types and Parameters. . . . . . . . . . . . . . . . . . . . . . . . . . . . . . . . . . . . . . . . . . . . . . . . . . . . . . . . . . . . . 196
Chapter 22. Events . . . . . . . . . . . . . . . . . . . . . . . . . . . . . . . . . . . . . . . . . . . . . . . . . . . . . . . . . . . . . . . . . . . . . . . . . . . . . 197
Introduction . . . . . . . . . . . . . . . . . . . . . . . . . . . . . . . . . . . . . . . . . . . . . . . . . . . . . . . . . . . . . . . . . . . . . . . . . . . . . . . 197
The Events Window . . . . . . . . . . . . . . . . . . . . . . . . . . . . . . . . . . . . . . . . . . . . . . . . . . . . . . . . . . . . . . . . . . . . . . . . . . 198
Creating Events. . . . . . . . . . . . . . . . . . . . . . . . . . . . . . . . . . . . . . . . . . . . . . . . . . . . . . . . . . . . . . . . . . . . . . . . . . . . . 200
Creating Triggers. . . . . . . . . . . . . . . . . . . . . . . . . . . . . . . . . . . . . . . . . . . . . . . . . . . . . . . . . . . . . . . . . . . . . . . . . . . . 201
Creating Actions . . . . . . . . . . . . . . . . . . . . . . . . . . . . . . . . . . . . . . . . . . . . . . . . . . . . . . . . . . . . . . . . . . . . . . . . . . . . 203
Testing Events. . . . . . . . . . . . . . . . . . . . . . . . . . . . . . . . . . . . . . . . . . . . . . . . . . . . . . . . . . . . . . . . . . . . . . . . . . . . . . 204
Resetting Events . . . . . . . . . . . . . . . . . . . . . . . . . . . . . . . . . . . . . . . . . . . . . . . . . . . . . . . . . . . . . . . . . . . . . . . . . . . . 204
Snapshots and Events . . . . . . . . . . . . . . . . . . . . . . . . . . . . . . . . . . . . . . . . . . . . . . . . . . . . . . . . . . . . . . . . . . . . . . . . 205
Default Settings, Templates and Examples . . . . . . . . . . . . . . . . . . . . . . . . . . . . . . . . . . . . . . . . . . . . . . . . . . . . . . . . . 206
Tap Tempo for Plug-ins . . . . . . . . . . . . . . . . . . . . . . . . . . . . . . . . . . . . . . . . . . . . . . . . . . . . . . . . . . . . . . . . . . . . . . . 207
Trigger Types . . . . . . . . . . . . . . . . . . . . . . . . . . . . . . . . . . . . . . . . . . . . . . . . . . . . . . . . . . . . . . . . . . . . . . . . . . . . . . 209
Action Types . . . . . . . . . . . . . . . . . . . . . . . . . . . . . . . . . . . . . . . . . . . . . . . . . . . . . . . . . . . . . . . . . . . . . . . . . . . . . . . 210
Chapter 23. Synchronization . . . . . . . . . . . . . . . . . . . . . . . . . . . . . . . . . . . . . . . . . . . . . . . . . . . . . . . . . . . . . . . . . . . . . 213
Automating Recall of Snapshots with MIDI Time Code . . . . . . . . . . . . . . . . . . . . . . . . . . . . . . . . . . . . . . . . . . . . . . . . . 213
Remote Control of Snapshot Recall. . . . . . . . . . . . . . . . . . . . . . . . . . . . . . . . . . . . . . . . . . . . . . . . . . . . . . . . . . . . . . . 215
Triggering of External Devices on Snapshot Recall . . . . . . . . . . . . . . . . . . . . . . . . . . . . . . . . . . . . . . . . . . . . . . . . . . . . 216
Sending MIDI Messages on Snapshot Recall . . . . . . . . . . . . . . . . . . . . . . . . . . . . . . . . . . . . . . . . . . . . . . . . . . . . . . . . 216
Synchronizing with Word Clock and Digital Audio Input . . . . . . . . . . . . . . . . . . . . . . . . . . . . . . . . . . . . . . . . . . . . . . . . . 216
Chapter 24. Using the Standalone Software. . . . . . . . . . . . . . . . . . . . . . . . . . . . . . . . . . . . . . . . . . . . . . . . . . . . . . . 217
System Requirements . . . . . . . . . . . . . . . . . . . . . . . . . . . . . . . . . . . . . . . . . . . . . . . . . . . . . . . . . . . . . . . . . . . . . . . . 217
Installing the Standalone Software . . . . . . . . . . . . . . . . . . . . . . . . . . . . . . . . . . . . . . . . . . . . . . . . . . . . . . . . . . . . . . . 217
Simulating a VENUE Configuration . . . . . . . . . . . . . . . . . . . . . . . . . . . . . . . . . . . . . . . . . . . . . . . . . . . . . . . . . . . . . . . 218
Transfer and Filing Quick Start . . . . . . . . . . . . . . . . . . . . . . . . . . . . . . . . . . . . . . . . . . . . . . . . . . . . . . . . . . . . . . . . . . 218
Exporting System Information and Patchbay Information . . . . . . . . . . . . . . . . . . . . . . . . . . . . . . . . . . . . . . . . . . . . . . . 220

VENUE Profile Guidex
Part VI Specifications
Chapter 25. Mechanical Specifications. . . . . . . . . . . . . . . . . . . . . . . . . . . . . . . . . . . . . . . . . . . . . . . . . . . . . . . . . . . . 223
Chapter 26. Audio Specifications . . . . . . . . . . . . . . . . . . . . . . . . . . . . . . . . . . . . . . . . . . . . . . . . . . . . . . . . . . . . . . . . . 225
Chapter 27. Signal Flow Diagrams . . . . . . . . . . . . . . . . . . . . . . . . . . . . . . . . . . . . . . . . . . . . . . . . . . . . . . . . . . . . . . . . 227
VENUE Profile Systems: Input Signal Flow . . . . . . . . . . . . . . . . . . . . . . . . . . . . . . . . . . . . . . . . . . . . . . . . . . . . . . . . . . . 227
VENUE Profile Systems: Output Signal Flow. . . . . . . . . . . . . . . . . . . . . . . . . . . . . . . . . . . . . . . . . . . . . . . . . . . . . . . . . . 228
Chapter 28. Troubleshooting . . . . . . . . . . . . . . . . . . . . . . . . . . . . . . . . . . . . . . . . . . . . . . . . . . . . . . . . . . . . . . . . . . . . . 229
Problem Solving . . . . . . . . . . . . . . . . . . . . . . . . . . . . . . . . . . . . . . . . . . . . . . . . . . . . . . . . . . . . . . . . . . . . . . . . . . . . . 229
In Case of System Failure . . . . . . . . . . . . . . . . . . . . . . . . . . . . . . . . . . . . . . . . . . . . . . . . . . . . . . . . . . . . . . . . . . . . . . 231
Performing a Soft Reset . . . . . . . . . . . . . . . . . . . . . . . . . . . . . . . . . . . . . . . . . . . . . . . . . . . . . . . . . . . . . . . . . . . . . . . 233
Hardware Monitoring Window . . . . . . . . . . . . . . . . . . . . . . . . . . . . . . . . . . . . . . . . . . . . . . . . . . . . . . . . . . . . . . . . . . . 234
Resetting Hardware Components. . . . . . . . . . . . . . . . . . . . . . . . . . . . . . . . . . . . . . . . . . . . . . . . . . . . . . . . . . . . . . . . . 234
Using the System Restore CD to Update or Restore the System . . . . . . . . . . . . . . . . . . . . . . . . . . . . . . . . . . . . . . . . . . . 235
Part VII Reference
Chapter 29. Control Surface Reference. . . . . . . . . . . . . . . . . . . . . . . . . . . . . . . . . . . . . . . . . . . . . . . . . . . . . . . . . . . . 239
VENUE Profile Console . . . . . . . . . . . . . . . . . . . . . . . . . . . . . . . . . . . . . . . . . . . . . . . . . . . . . . . . . . . . . . . . . . . . . . . . 239
GPI (General Purpose Interface). . . . . . . . . . . . . . . . . . . . . . . . . . . . . . . . . . . . . . . . . . . . . . . . . . . . . . . . . . . . . . . . . . 240
GPI Wiring Diagrams . . . . . . . . . . . . . . . . . . . . . . . . . . . . . . . . . . . . . . . . . . . . . . . . . . . . . . . . . . . . . . . . . . . . . . . . . 242
Chapter 30. ECx . . . . . . . . . . . . . . . . . . . . . . . . . . . . . . . . . . . . . . . . . . . . . . . . . . . . . . . . . . . . . . . . . . . . . . . . . . . . . . . . 245
ECx Capabilities and Features . . . . . . . . . . . . . . . . . . . . . . . . . . . . . . . . . . . . . . . . . . . . . . . . . . . . . . . . . . . . . . . . . . . 245
ECx Components . . . . . . . . . . . . . . . . . . . . . . . . . . . . . . . . . . . . . . . . . . . . . . . . . . . . . . . . . . . . . . . . . . . . . . . . . . . . 245
System Requirements. . . . . . . . . . . . . . . . . . . . . . . . . . . . . . . . . . . . . . . . . . . . . . . . . . . . . . . . . . . . . . . . . . . . . . . . . 245
Installing ECx Host Software . . . . . . . . . . . . . . . . . . . . . . . . . . . . . . . . . . . . . . . . . . . . . . . . . . . . . . . . . . . . . . . . . . . . 245
Overview of ECx Setup and Configuration . . . . . . . . . . . . . . . . . . . . . . . . . . . . . . . . . . . . . . . . . . . . . . . . . . . . . . . . . . . 247
Connecting a Computer Directly to VENUE . . . . . . . . . . . . . . . . . . . . . . . . . . . . . . . . . . . . . . . . . . . . . . . . . . . . . . . . . . 247
Connecting a Wireless Router or WAP to VENUE . . . . . . . . . . . . . . . . . . . . . . . . . . . . . . . . . . . . . . . . . . . . . . . . . . . . . . 247
Setting VENUE and Client IP Addresses. . . . . . . . . . . . . . . . . . . . . . . . . . . . . . . . . . . . . . . . . . . . . . . . . . . . . . . . . . . . . 248
Establishing a Wireless Connection . . . . . . . . . . . . . . . . . . . . . . . . . . . . . . . . . . . . . . . . . . . . . . . . . . . . . . . . . . . . . . . 251
Enabling Remote Operation. . . . . . . . . . . . . . . . . . . . . . . . . . . . . . . . . . . . . . . . . . . . . . . . . . . . . . . . . . . . . . . . . . . . . 252
Disconnecting ECx . . . . . . . . . . . . . . . . . . . . . . . . . . . . . . . . . . . . . . . . . . . . . . . . . . . . . . . . . . . . . . . . . . . . . . . . . . . 253
Changing the Ethernet Control Password . . . . . . . . . . . . . . . . . . . . . . . . . . . . . . . . . . . . . . . . . . . . . . . . . . . . . . . . . . . 253
Index . . . . . . . . . . . . . . . . . . . . . . . . . . . . . . . . . . . . . . . . . . . . . . . . . . . . . . . . . . . . . . . . . . . . . . . . . . . . . . . . . . . . . . . . . . 255

Part I: Overview and Installation


Chapter 1: Introduction to VENUE Profile 3
Chapter 1: Introduction to VENUE Profile
Welcome to VENUE™ Profile, part of Digidesign’s modular VENUE live sound environment. VENUE Profile systems offer an in-
tuitive console layout, a flexible I/O scheme, powerful digital processing, and expansion options for integrated Pro Tools record-
ing and artist-controlled monitor mixing.
VENUE Profile Systems and Features
The VENUE Profile console can be used with one Mix Rack, or with FOH Rack and Stage Rack units.
Profile Console Control Features
• 24 bankable input channel strips, each with a touch-sen-
sitive fader, one multi-purpose assignable rotary encoder,
solo, mute and select controls
• Built-In High-Pass Filter, Dynamics and EQ processors on
each input channel strip
• Level meters on each input channel strip
• Assignable Channel section with dedicated Bus Assign,
Aux Send, Direct Output, EQ and Dynamics controls.
• 8 multi-purpose Output faders strips, each with a
touch-sensitive fader, one multi-purpose encoder, solo,
mute and select controls
•1Mainsfader
• Up to 24 31-band Graphic EQs available for Outputs
• Main Busses configurable as Left–Center–Right or
Left–Right+Mono
Console I/O
• Talkback mic input, with gain and phantom power
• Headphone output
• USB inputs for keyboard, mouse/trackball, iLok USB
Smart Keys, and USB storage devices
• VGA monitor output for software screen display
• GPI ports (DB-25) providing 8 GPI inputs and 8 GPI out-
puts
Figure 1. VENUE Profile console

VENUE Profile Guide4
VENUE Mix Rack System
VENUE Profile Console with Mix Rack
Mix Rack Features
The Mix Rack provides all stage and mix position I/O for
VENUE Mix Rack systems.
Stage I/O
• 48 inputs with mic preamps. Each fully recallable input
provides phantom power and input gain.
• 16 line level analog outputs (expandable up to 32) to
connect to mains and monitors.
FOH I/O
• 8 pairs of analog I/O for hardware inserts, or for input
and output of line-level material from the mix position.
• Analog and digital (AES or S/PDIF) 2-Track inputs and
outputs.
• Com mic input, with gain control and phantom power.
• Monitor outputs for mix position near field monitors.
Synchronization and Control I/O
• MIDI In and Out ports, providing 16 channels of MIDI
input and 16 channels of MIDI output.
• Word clock I/O for digital clock synchronization.
• USB 2.0 ports for USB disks, iLoks, and other USB devices.
• 100 BaseT Ethernet (ECx) port for remote control.
CPU, DSP, and System Drives
Mix Rack houses the CPU, DSP, hard drive and CD-ROM drive
that run the VENUE D-Show software on your VENUE system.
System software is installed at the factory. The CD-ROM drive
lets you update or restore your system software, and install
compatible plug-ins from their installer discs. A standard
Mix Rack includes two Mix Engine cards providing DSP for
plug-ins. You can add one additional Mix Engine card, for a
maximum of three.
Redundant Power Supply Units (PSUs)
Each Mix Rack comes with two universal (100V to 240V nom-
inal, 50–60 Hz) PSUs with auto redundant failover and LED
status indication.
VENUE Profile System
VENUE Profile Console with FOH Rack and Stage Rack
FOH Rack Features
The FOH Rack is used with one or more Stage Racks, and pro-
vides mix position I/O for VENUE Profile systems.
Audio I/O
• 8 pairs of analog I/O for hardware inserts, or for input
and output of line-level material from the mix position.
• Analog and digital (AES or S/PDIF) 2-Track inputs and
outputs.
• Monitor outputs for mix position near field monitors.
• Intercom mic input
Synchronization and Control I/O
• MIDI In and Out ports, providing 16 channels of MIDI
input and 16 channels of MIDI output.
• Word clock I/O for digital clock synchronization.
• USB 2.0 ports for USB disks, iLoks, and other USB devices.
• 100 BaseT Ethernet (ECx) port for Ethernet-based remote
control.
• Snake connectors to enable primary and redundant (if
applicable) connection to the VENUE Stage Rack.
CPU, DSP, and System Drives
FOH Rack houses the CPU, DSP, hard drive and CD-ROM drive
that run the VENUE D-Show software on your VENUE system.
System software is installed at the factory. The CD-ROM drive
lets you update or restore your system software, and install
compatible plug-ins from their installer discs. A standard
FOH Rack includes three Mix Engine cards, which provide
DSP for plug-ins and mixing. You can add up to two addi-
tional Mix Engine cards, up to a maximum of five.
Redundant Power Supply Units (PSUs)
Each FOH Rack comes with two universal (100V to 240V nom-
inal, 50–60 Hz) PSUs with auto redundant failover and LED
status indication.

Chapter 1: Introduction to VENUE Profile 5
Stage Rack Features
Stage Racks are used with an FOH Rack, and provide all stage
audio I/O for VENUE Profile systems. Up to two Stage Racks
can be used simultaneously, supporting up to 96 total inputs.
Audio I/O
• 48 inputs with remotely controllable mic preamps and
individually selectable phantom power.
• 8 analog output channels; expandable up to 48 analog or
digital outputs per Stage Rack.
Synchronization and Control I/O
• Snake connectors to enable primary and redundant (if
applicable) connection to a VENUE FOH Rack.
System Components
Included Components
All VENUE Profile systems include the following:
• VENUE Profile console
• Two (2) IEC power cables
• Monitor mount for VGA screen (screen not included)
• Trackball mount (trackball not included)
• VENUE Mouse Pad
• VENUE Profile Guide
• Two (2) console lights
•ProtectiveDustCover
• Rack(s) (see next)
Racks, Software CDs, iLoks, and Cables
Each Mix Rack or FOH Rack includes:
• System Restore CD
• ECx Ethernet Control Software Installer CD
• Standalone Software Installer CD
• iLok USB Smart Key (for storing plug-in authorizations)
• Plug-in installer discs (if any) with pre-authorized iLok
• Two (2) IEC power cables
• One FOH Link cable for connection to a VENUE console
Each Stage Rack includes:
• Two (2) IEC power cables
Additional Required Components
The following components must be purchased separately:
• Video Display (15-inch or greater flat-panel VGA display
recommended; 1024x768 minimum resolution). VGA and
DVI supported.
• USB keyboard and trackball/mouse (Windows compatible)
Digital Snake Cable (VENUE Profile Systems Only)
• The connection between FOH Rack and Stage Rack requires
a Digital Snake cable. This cable can be purchased directly
from Digidesign or assembled by your preferred vendor.
Optional Components
The following components are optional, and must be
purchased separately:
• USB flash disk (or other portable USB storage device for
transfer of Show data; 512 MB or larger recommended)
• Near-field monitor speakers for mix position monitoring
• Headphones with 1/4-inch jack
• Dynamic or condenser microphone and XLR mic cable
(for Talkback)
• Footswitches (up to 2)
• MIDI cables (for connecting external MIDI devices)
• BNC cables (for connecting Word clock between the
VENUE system and external digital devices)
• 25-pin D-Sub cables (for connecting to GPI devices)
VENUE Profile Expansion Options
The following options can be added to VENUE Profile systems.
For details on all VENUE systems and options, visit the Digide-
sign website (www.digidesign.com).
Mix Rack Options
I/O Options
Each Mix Rack supports a maximum of 3 input cards and 2
output cards for a total of up to 48 inputs and up to 32 out-
puts. Mix Rack I/O options include:
AI16 Analog Mic/Line Input Card that provides 16 analog
mic/line level inputs
AO16 Analog Output Card that provides 16 analog line level
outputs
XO16 Analog and Digital Output Card that provides 8 analog
line level outputs, and 8 AES digital outputs.
AT16 A-Net Output Card that provides 16 channels of A-Net
output compatible with Aviom® Personal Mixers and other
Pro16™ Series devices.

VENUE Profile Guide6
DSP Expansion Options
An additional Mix Engine card can be added to the Mix Rack
(up to a maximum of three Mix Engine cards) to increase the
amount of DSP available for mixing and plug-in processing.
Record and Playback Options
FWx Record/Playback Option This FireWire-based option lets
you record or play back up to 18 channels of audio directly
from Mix Rack with a Pro Tools LE™ system.
HDx Record/Playback Option This option lets you record or
play back up to 64 channels of audio directly from Mix Rack
with a Pro Tools|HD® system.
FOH Rack Options
I/O Options
An FOH Input/Output (IOx) card can be added to the
FOH Rack, providing an additional 8 channels of analog I/O
and 8 channels of AES/EBU Digital I/O.
DSP Expansion Options
Additional Mix Engine cards can be added to the FOH Rack
(up to a maximum of 5 Mix Engine cards) for increased mixing
and plug-in processing capacity.
Snake Card Expansion
Adding a second Snake Card to the FOH Rack lets you add a
second Stage Rack to your VENUE system, giving you a total of
up to 96 channels of Stage I/O.
Record and Playback Options
FWx Record/Playback Option This FireWire-based option lets
you record or play back up to 18 channels of audio with a
Pro Tools LE™ system.
HDx Record/Playback Option This option lets you record or
play back up to 128 channels of audio directly with a
Pro Tools|HD® system.
Stage Rack Options
I/O Options
Each Stage Rack supports up to 6 input cards and 6 output
cards, for a total of up to 48 inputs and up to 48 outputs (an-
alog or digital). Stage Rack I/O options include the following:
SRI Analog Mic/Line Input Card that provides 8 analog
mic/line level inputs
SRO Analog Output Card that provides 8 analog line level out-
puts
DSI Digital Output Card that provides 8 digital outputs (AES
or ADAT)
DSO Digital Output Card that provides 8 digital outputs (AES
or ADAT)
Personal Q The Personal Q (PQ) monitoring system lets per-
formers adjust their monitor mix being sent from VENUE us-
ing a PQ Controller unit. The Stage rack can accommodate
one PQ Rack and up to 8 PQ Controllers.
A-Net Output ANO A-Net Output Card that provides 16 chan-
nels of A-Net output compatible with Aviom® Pro16™ Series
devices for personal monitoring.
Additional Stage Rack
A second Stage Rack can be added for a total of up to 96 inputs
or up to 96 outputs. (A second Stage Rack requires an addi-
tional Snake card be installed in the FOH Rack.)
Redundant Digital Snake
An optional redundant Digital Snake cable can be run be-
tween the FOH Rack and each Stage Rack. This redundant
Snake automatically takes over communication if the primary
Snake fails.
Only a single HDx Card can be installed in a Mix Rack.
Only one Record and Playback Option can be installed at
any one time (either HDx or FWx).
VENUE Profile does not support console expansion via
D-Show Sidecar units.

Chapter 1: Introduction to VENUE Profile 7
Operational Requirements
Temperature and Ventilation
VENUE units should be operated away from heat sources and
with adequate ventilation.
Storage
VENUE Profile should be stored and transported at tempera-
tures not lower than 0 degrees F (–18 degrees C) and not
exceeding 140 degrees F (60 degrees C).
Operation
VENUE Profile should be operated at temperatures not lower
than 40 degrees F (4 degrees C) and not exceeding
104 degrees F (40 degrees C).
During operation, the front and back panels of VENUE Profile
should be exposed to ambient air. Do not block the ventila-
tion holes on any VENUE system component.
Do not operate in direct sunlight or at extreme ambient
temperatures.
Water and Moisture
VENUE units should be operated away from sources of direct
moisture and should be kept clear of liquids that might spill
into the units. If condensation is present on the unit, leave the
unit to dry in ambient air for at least one hour before power-
ing the unit on.
Cleaning and Maintenance
Use a dry cloth to clean the VENUE Profile top surface when
needed. Do not apply any cleaning solutions, spray cleaners,
or abrasives to the surface.
Connection Requirements
Power Connections
Each VENUE component requires its own power connection
for primary and redundant power (if applicable).
Make sure your power source is correctly rated for the number
of units you are connecting. A surge-protected power source
(not included) is highly recommended.
VENUE Profile power supplies are capable of operating at 50 to
60 Hz across a voltage range of 100 to 240 V.
FOH Link Connection
Connection between the VENUE Profile console and the
Mix Rack or FOH Rack is made with the provided FOH Link
cable. For replacement cables, contact Digidesign Customer
Service or your VENUE dealer.
Audio Connections
All VENUE Profile system analog audio inputs and outputs
(except Headphones) are balanced XLR or balanced 1/4-inch
connections.
All external digital audio inputs and outputs are AES/EBU
(XLR), ADAT (Lightpipe) or S/PDIF (RCA) connections.
Snake Connections
VENUE Mix Rack Systems
For Mix Rack, an analog multicore snake (not provided) is rec-
ommended to bring inputs from stage to the mix position,
and return outputs back to the stage for monitor and mains
amplification.
VENUE Profile Systems
Connection between the FOH Rack and the Stage Rack is made
with the Digital Snake cable (not included). Cables can be pur-
chased directly from Digidesign or assembled by your pre-
ferred vendor. For Snake cable specifications and require-
ments, see the VENUE Stage Rack Guide.
Hardware monitoring and automatic warnings are provided
for temperature, power and other factors. For more informa-
tion, see “Hardware Monitoring Window” on page 234.
Humidity ranges for storage and operation
Storage humidity range 5% to 95%, non-condensing
Operating humidity range 20% to 80%, non-condensing
For more information, see the VENUE FOH Rack Guide.
For more information on audio connectors and specifica-
tions, see Chapter 26, “Audio Specifications.”

VENUE Profile Guide8
Registration
Review the enclosed Digidesign Registration Information
Card and follow the instructions on it to quickly register your
purchase online. Registering your purchase is the only way
you can be eligible to receive complimentary technical sup-
port and future upgrade offers. This is one of the most impor-
tant steps you can take as a new user.
Conventions Used in This Guide
Digidesign guides use the following conventions to indicate
menu choices and key commands:
:
The names of Commands, Options, and Settings that appear
on-screen are in a different font.
The following symbols are used to highlight important
information:
About www.digidesign.com
The Digidesign website (www.digidesign.com) is your best on-
line source for information to help you get the most out of
your Pro Tools system. The following are just a few of the ser-
vices and features available.
Product Registration Register your purchase online.
Support and Downloads Contact Digidesign Technical Support
or Customer Service; download software updates and the
latest online manuals; browse the Compatibility documents
for system requirements; search the online Answerbase or join
the worldwide VENUE community on the Digidesign User
Conference.
Training and Education Study on your own using courses avail-
able online or find out how you can learn in a classroom set-
ting at a certified Pro Tools training center.
Products and Developers Learn about Digidesign products;
download demo software or learn about our Development
Partners and their plug-ins, applications, and hardware.
News and Events Get the latest news from Digidesign or sign
up for a Pro Tools demo.
Pro Tools Accelerated Videos Watch the series of free tutorial
videos. Accelerated Videos are designed to help you get up and
running with Pro Tools and its plug-ins quickly.
Live Sound Webinars Watch free tutorial videos and
VENUE-specific webinars to learn from the experts.
To learn more about these and other resources available
from Digidesign, visit the Digidesign website
(www.digidesign.com).
Convention Action
Options > System Click the Options tab, then click the
System sub-tab
Control+N Hold down the Control key and press
the N key
Control-click Hold down the Control key and click
the mouse button
Right-click Click with the right mouse button
User Tips are helpful hints for getting the most from your
system.
Important Notices include information that could affect
your data or the performance of your system.
Shortcuts show you useful keyboard or mouse shortcuts.
Cross References point to related sections in this guide and
other Digidesign guides.

Chapter 2: Configuring and Connecting Profile 9
Chapter 2: Configuring and Connecting Profile
The chapter shows how to connect the components of a
VENUE Mix Rack and VENUE Profile system.
Unpacking and Assembling
VENUE Profile
Remove all components from the shipping packaging.
Place the Profile console on a table or other stable surface
that leaves full access to the front and back panel connectors
and mounts.
Make sure all components are free of any bags, padding or
other materials.
Keep cables and other included items organized, making
sure to keep them with their associated component after un-
packing.
Assembling the Video Monitor Mount
and Trackball Mount
Profile includes a Video Monitor Mount for your VGA moni-
tor, and a Trackball mount for your mouse or trackball.
Assembling the Video Monitor Mount
The Video Monitor Mount is assembled by attaching a flat
panel VGA monitor to the mounting arm. Both 100mm and
75mm VESA (FDMI) video mounting standards are supported.
Assembling the Video Monitor Mount requires the following
items:
• A VGA flat panel display with 100mm or 75mm mount-
ing compatibility
• A medium sized Phillips screwdriver
• A table or similar clear, flat area with a towel or other pad-
ded surface (big enough to safely lay your video monitor
face down)
To assemble the Video Monitor Mount:
1 Remove the Video Monitor Mount components from their
packaging.
2 Make sure your video monitor is powered off and discon-
nected, and lay it face down on a padded table.
3 Attach your monitor to the Video Monitor Mount by doing
either of the following, as appropriate for your video monitor:
100mm (MIS-D100) Attach the U bracket to the included
mounting plate using the provided hardware. To complete the
assembly, remove the 4 mounting screws from the back of the
video monitor, line up the holes of the mounting plate, and
use the screws you removed to secure the plate to the back of
your monitor.
75mm (MIS-D 75) Use the included U bracket. Remove the ap-
propriate screws from the back of your monitor and use them
to secure the U bracket to the back of the monitor.
Components of the Video Monitor Mount
Attaching a 100mm VGA monitor to the mounting plate, U bracket and
mounting arm, viewed from the top edge of the monitor
Attaching a 75 VGA monitor to the U bracket and mounting arm, viewed
from the top edge of the monitor
Mounting Arm
T-bolt (2)
Locking Nut (2)
U bracket
(top)
back
front
U bracket
Mounting arm (top)
screws
Mounting plate
screws
Video monitor
U bracket
Video monitor
Mounting arm
back
front
screws
screws

VENUE Profile Guide10
4 Hold the mounting arm face down so that the narrow (top)
end is against the back of the U bracket. Make sure the arm is
facing the correct way, and attach the arm to the U bracket us-
ing the four screws provided. Make sure all screws are tight-
ened securely.
Attaching the Video Monitor Mount the First Time
To attach the Video Monitor Mount to the console:
1 From the back of the console, locate the Video Mount slot
below the edge of the outermost back panel extrusion.
2 Take one of the T-bolts included with the Video Mount and
insert it into the wider opening at the far left end of the Video
Mount slot. Slide the T-bolt to the right along the slot until it
stays in the track.
3 Take the second T-bolt, insert it into the opening at the left
and slide it to be a few inches away from the first T-bolt.
4 Take the two silver lock nuts (thumb nuts) and thread them
loosely onto the T-bolts (do not tighten them).
5 Pick up the assembled Video Monitor Mount and hold it at
the bottom of the VGA monitor, so you can balance the unit
with one hand.
6 Position the base of the video mount under the back panel
extrusion and feed the T-bolts through the two slots on the
front edge of the arm assembly. Loosen the lock nuts if neces-
sary.
7 Tighten the lock nuts thumb nuts to secure the Video Mon-
itor Mount in position.
To move the monitor left or right:
Loosen the thumb nuts slightly and slide the Video Monitor
Mount to the left or right, being carefully not to twist it off ei-
ther of the T-bolts. (If the mount comes off the T-bolts, simply
reattach it and resume). When in the desired position, tighten
the lock nuts.
To adjust the height of the monitor:
Loosen the screws holding the monitor or U bracket to the
mounting arm, and slide it down or up to the desired height.
Tighten all screws to secure the monitor in its new position.
Using the Assembled Video Monitor Mount
To remove the Video Monitor Mount:
1 Stand at the back of the console.
2 Holding the VGA screen in one hand, loosen the lock nuts
that secure the Video Monitor Mount to the console.
3 Slide the Video Monitor Mount straight back off the T-bolts.
4 Tighten the lock nuts to secure the T-bolts.
To attach the assembled Video Monitor Mount to the console:
1 Loosen the two lock nuts securing the T-bolts in place, along
the extrusion at the back of the console.
2 Position the Video Monitor Mount so that its base slots line
up with the T-bolts, slide the Video Monitor Mount into posi-
tion, and tighten the lock nuts to secure the mount into place.
Assembling and Attaching the Trackball
Mount
The Trackball Mount provides a tray for your trackball or a
mouse. It can be placed anywhere along the front of the con-
sole, and accommodates left- or right-handed operation. A
small hook underneath the Trackball mount lets you hang a
pair of headphones.
Assembling the Trackball Mount
To attach the Trackball Mount
1 Unpack the Trackball Mount and components from their
packaging.
2 Make sure to unplug any USB or headphone connections at
the front of the console.
3 From the front of the console, locate the slot for the Track-
ball mount (located below the extrusion).
4 Take one of the T-bolts included with the Trackball Mount
and insert it into the opening at the right end of the Trackball
Mount slot. Slide the T-bolt to the left along the slot until it is
just to the left of the front panel USB and headphone ports.
5 Take the second T-bolt, insert it into the opening at the right
and slide it into place a few inches away from the first T-bolt.
6 Take the two silver lock nuts (thumb nuts) and thread them
loosely onto the T-bolts (do not tighten them).
7 Place the Trackball Mount in position so that you can feed
the T-bolts through the two slots on the lip of the Mount.
8 Tighten the lock nuts to secure the assembled Trackball
Mount to the console.
Location of the Video Mount slot
Video Mount slot
If mounting on the right, be sure to line up the opening in
the mount with the front panel USB and Headphone ports
so they remain accessible.
Table of contents
Other DigiDesign Music Mixer manuals

DigiDesign
DigiDesign Drawmer Dynamics User manual

DigiDesign
DigiDesign D-Show Profile User manual

DigiDesign
DigiDesign Control 24 User manual

DigiDesign
DigiDesign Control 24 User manual

DigiDesign
DigiDesign C24 User manual

DigiDesign
DigiDesign D-Show Profile User manual

DigiDesign
DigiDesign D-Control User manual

DigiDesign
DigiDesign Command 8 User manual

DigiDesign
DigiDesign D-Control User manual

DigiDesign
DigiDesign Command|8 User manual