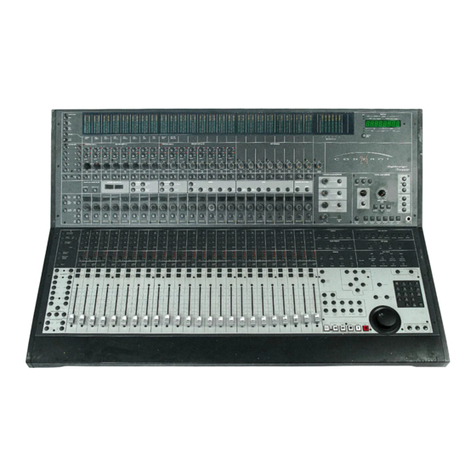
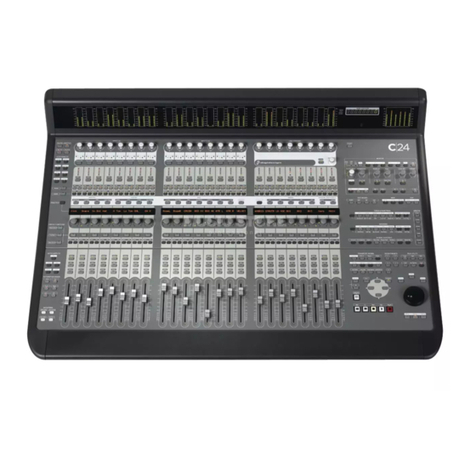
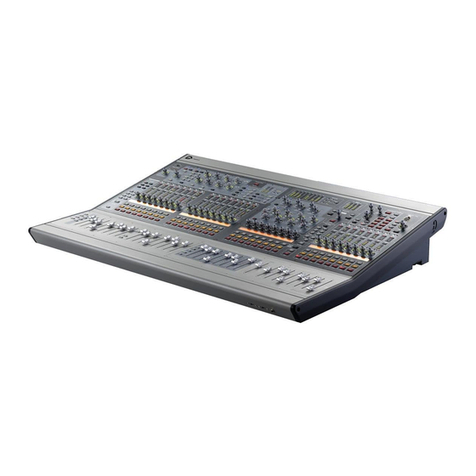
DigiDesign Control 24 User manual

Control|24™

Copyright
© 2006 Digidesign, a division of Avid Technology, Inc. All rights
reserved. This guide may not be duplicated in whole or in part
without the express written consent of Digidesign.
Avid, Control|24, Digidesign, DV Toolkit, DV Toolkit 2,
Pro Tools, and Pro Tools LE are either trademarks or registered
trademarks of Avid Technology, Inc. in the US and other
countries. All other trademarks contained herein are the
property of their respective owners.
Product features, specifications, system requirements, and
availability are subject to change without notice.
PN 9106-18918-00 REV A 03/06
Warning
This product contains chemicals, including lead, known to the
State of California to cause cancer and birth defects or other
reproductive harm.
Wash hands after handling
.
Communications & Safety Regulation Information
Compliance Statement
Control|24 complies with the following standards regulating
interference and EMC:
• FCC Part 15 Class A
• EN55103 – 1, environment E5
• EN55103 – 2, environment E5
• AS/NZS 3548 Class A
• CISPR 22 Class A
• ICES-003 Class A
Canadian Compliance Statement:
This Class A digital apparatus complies with Canadian ICES-
003
Cet appareil numérique de la classe A est conforme à la norme
NMB-003 du Canada
CE Compliance Statement:
Digidesign is authorized to apply the CE (Conformité
Europénne) mark on this compliant equipment thereby
declaring conformity to EMC Directive 89/336/EEC and Low
Voltage Directive 73/23/EEC.
Australian Compliance:
FCC Statement:
This equipment has been tested and found to comply with the
limits for a Class A digital device, pursuant to Part 15 of the
FCC Rules.
Communications Statement
This equipment has been tested to comply with the limits for a
Class A digital device. Changes or modifications to this product
not authorized by Focusrite or Digidesign, Inc., could void the
Certification and negate your authority to operate the product.
This product was tested for CISPR compliance under
conditions that included the use of peripheral devices and
shielded cables and connectors between system components.
Digidesign and Focusrite recommend the use of shielded
cables and connectors between system components to reduce
the possibility of causing interference to radios, television
sets, and other electronic devices.
Safety Statement:
This equipment has been tested to comply with
EN60065: 1998
IEC 60065: 1998
UL 6500 2nd edition: 1999
CAN/CSA-E60065-00.

Important Safety Instructions
When using electric or electronic equipment, basic precautions
should always be followed, including the following:
• Read all instructions before using this equipment.
•To avoid the risk of shock, keep this equipment away from
rain water, and other moisture. Do not use this equipment
if it is wet.
• Do not expose this apparatus to dripping or splashing.
• Do not place objects containing liquids on this apparatus.
• The equipment should only be connected to the correct
rating power supply as indicated on the product.
• Do not attempt to service the equipment. There are no
user-serviceable parts inside. Please refer all servicing to
authorized Digidesign personnel.
•Any attempt to service the equipment will expose you to a
risk of electric shock, and will void the manufacturer’s
warranty.
•The product should be connected only to the correct power
supply as indicated on the product.
• Do not install the unit near any heat sources such as
radiators, heat registers, stoves, or other apparatus
(including amplifiers) that produce heat.
• Protect the power cord from being walked on or pinched,
particularly at plugs, convenience receptacles, and the
point where they exit from the apparatus.
• Install the unit near the socket-outlet; disconnect device
shall be easily accessible.
• Clean only with a damp cloth.
• Unplug the apparatus during lightning storms or when
unused for long periods of time.
• Never set the unit on its face or rear panel.
•Allow free air flow around the heatsink on the back panel of
the unit at all times.
• Do not defeat the safety purpose of the polarized plug. A
polarized plug has two blades with one wider than the
other, and is provided for your safety. When the provided
plug does not fit your outlet, consult and electrician for
replacement of the obsolete outlet.
• DO NOT BLOCK THE VENTILATION OPENINGS.
IMPORTANT
Do not install Control|24 anywhere or in any way that
blocks free air flow at any time around the heatsink
and back panel of the unit.
SPECIAL WARNINGS REGARDING TEMPERATURE
Before powering your Control|24 on, be sure to allow
it to reach room temperature. There are some
components that are senstive to cold temperatures,
therefore it is recommended that you unpack your
unit and allow it to acclimate before turning it on for
the first time. While your unit is coming up to room
temperature, it may be a good time for you to
familiarize yourself with this guide.
This symbol on the product or its packaging indicates that this
product must not be disposed of with other waste. Instead, it
is your responsibility to dispose of your waste equipment by
handing it over to a designated collection point for the recycling
of waste electrical and electronic equipment. The separate
collection and recycling of your waste equipment at the time of
disposal will help conserve natural resources and ensure that
it is recycled in a manner that protects human health and the
environment. For more information about where you can drop
off your waste equipment for recycling, please contact your
local city recycling office or the dealer from whom you
purchased the product.
Contents
v
Contents
Part I Introduction
Chapter 1. Introduction to Control|24
. . . . . . . . . . . . . . . . . . . . . . . . . . . . . . . . . . . . . . . . . 3
Included with Control|24
. . . . . . . . . . . . . . . . . . . . . . . . . . . . . . . . . . . . . . . . . . . . . . . . . . . 3
System Requirements and Compatibility
. . . . . . . . . . . . . . . . . . . . . . . . . . . . . . . . . . . . . . . . 3
Ethernet Connections
. . . . . . . . . . . . . . . . . . . . . . . . . . . . . . . . . . . . . . . . . . . . . . . . . . . . . 4
Audio Cables for Control|24 Monitoring
. . . . . . . . . . . . . . . . . . . . . . . . . . . . . . . . . . . . . . . . 4
Digidesign Registration
. . . . . . . . . . . . . . . . . . . . . . . . . . . . . . . . . . . . . . . . . . . . . . . . . . . . 5
About This Guide
. . . . . . . . . . . . . . . . . . . . . . . . . . . . . . . . . . . . . . . . . . . . . . . . . . . . . . . . . 5
About www.digidesign.com
. . . . . . . . . . . . . . . . . . . . . . . . . . . . . . . . . . . . . . . . . . . . . . . . . 6
Chapter 2. Installing Control|24
. . . . . . . . . . . . . . . . . . . . . . . . . . . . . . . . . . . . . . . . . . . . . . . 7
Installation and Maintenance Guidelines
. . . . . . . . . . . . . . . . . . . . . . . . . . . . . . . . . . . . . . . . 7
Making Necessary Connections
. . . . . . . . . . . . . . . . . . . . . . . . . . . . . . . . . . . . . . . . . . . . . . 7
Part II Analog Connections
Chapter 3. Audio Connections
. . . . . . . . . . . . . . . . . . . . . . . . . . . . . . . . . . . . . . . . . . . . . . . 13
Input and Output Overview
. . . . . . . . . . . . . . . . . . . . . . . . . . . . . . . . . . . . . . . . . . . . . . . . . 13
Stereo Monitoring Connections
. . . . . . . . . . . . . . . . . . . . . . . . . . . . . . . . . . . . . . . . . . . . . . 18
Stereo and Surround Modes
. . . . . . . . . . . . . . . . . . . . . . . . . . . . . . . . . . . . . . . . . . . . . . . . 20
The Line Submixer Section
. . . . . . . . . . . . . . . . . . . . . . . . . . . . . . . . . . . . . . . . . . . . . . . . . 20
Footswitch
. . . . . . . . . . . . . . . . . . . . . . . . . . . . . . . . . . . . . . . . . . . . . . . . . . . . . . . . . . . . 20

Control|24 Guide
vi
Chapter 4. Mic and Line Preamps
. . . . . . . . . . . . . . . . . . . . . . . . . . . . . . . . . . . . . . . . . . . . 21
Microphone and Line Preamps
. . . . . . . . . . . . . . . . . . . . . . . . . . . . . . . . . . . . . . . . . . . . . 21
Preamp Connections
. . . . . . . . . . . . . . . . . . . . . . . . . . . . . . . . . . . . . . . . . . . . . . . . . . . . 22
Using the Mic Preamps
. . . . . . . . . . . . . . . . . . . . . . . . . . . . . . . . . . . . . . . . . . . . . . . . . . . 23
About Signal Levels
. . . . . . . . . . . . . . . . . . . . . . . . . . . . . . . . . . . . . . . . . . . . . . . . . . . . . 24
Chapter 5. Surround Setups
. . . . . . . . . . . . . . . . . . . . . . . . . . . . . . . . . . . . . . . . . . . . . . . . . 25
Surround Monitoring Mode Connections
. . . . . . . . . . . . . . . . . . . . . . . . . . . . . . . . . . . . . . . 25
5.1 Monitoring Example
. . . . . . . . . . . . . . . . . . . . . . . . . . . . . . . . . . . . . . . . . . . . . . . . . . 28
LCRS Monitoring Example
. . . . . . . . . . . . . . . . . . . . . . . . . . . . . . . . . . . . . . . . . . . . . . . . . 29
5.1 Track Layouts, Routing, and Metering
. . . . . . . . . . . . . . . . . . . . . . . . . . . . . . . . . . . . . . 30
Part III Control|24 Basics
Chapter 6. Starting Up and Configuring Control|24
. . . . . . . . . . . . . . . . . . . . . . . . . . . . 35
Starting Up and Shutting Down a System
. . . . . . . . . . . . . . . . . . . . . . . . . . . . . . . . . . . . . . 35
Software Installation
. . . . . . . . . . . . . . . . . . . . . . . . . . . . . . . . . . . . . . . . . . . . . . . . . . . . . 35
Pro Tools Configuration
. . . . . . . . . . . . . . . . . . . . . . . . . . . . . . . . . . . . . . . . . . . . . . . . . . . 36
QuickStart System Test
. . . . . . . . . . . . . . . . . . . . . . . . . . . . . . . . . . . . . . . . . . . . . . . . . . . 37
Setup and Configuration Options
. . . . . . . . . . . . . . . . . . . . . . . . . . . . . . . . . . . . . . . . . . . . 37
Troubleshooting
. . . . . . . . . . . . . . . . . . . . . . . . . . . . . . . . . . . . . . . . . . . . . . . . . . . . . . . . 38
Chapter 7. Overview and Basics
. . . . . . . . . . . . . . . . . . . . . . . . . . . . . . . . . . . . . . . . . . . . . 39
Control|24 Terminology
. . . . . . . . . . . . . . . . . . . . . . . . . . . . . . . . . . . . . . . . . . . . . . . . . . 39
Control|24 Sections
. . . . . . . . . . . . . . . . . . . . . . . . . . . . . . . . . . . . . . . . . . . . . . . . . . . . . 40
Main Section Overview
. . . . . . . . . . . . . . . . . . . . . . . . . . . . . . . . . . . . . . . . . . . . . . . . . . . 41
Fader Section Overview
. . . . . . . . . . . . . . . . . . . . . . . . . . . . . . . . . . . . . . . . . . . . . . . . . . . 49
Meter Section Overview
. . . . . . . . . . . . . . . . . . . . . . . . . . . . . . . . . . . . . . . . . . . . . . . . . . . 51
Chapter 8. Control Room Monitor Section
. . . . . . . . . . . . . . . . . . . . . . . . . . . . . . . . . . . . 53
Overview of Control|24 Monitoring
. . . . . . . . . . . . . . . . . . . . . . . . . . . . . . . . . . . . . . . . . . . 53
Stereo and Surround Monitoring Modes
. . . . . . . . . . . . . . . . . . . . . . . . . . . . . . . . . . . . . . . 54
Selecting Monitor Modes
. . . . . . . . . . . . . . . . . . . . . . . . . . . . . . . . . . . . . . . . . . . . . . . . . . 55
Control Room Monitor Level Controls
. . . . . . . . . . . . . . . . . . . . . . . . . . . . . . . . . . . . . . . . . 56

Contents
vii
Talkback and Listenback
. . . . . . . . . . . . . . . . . . . . . . . . . . . . . . . . . . . . . . . . . . . . . . . . . . 58
Chapter 9. Working with Tracks
. . . . . . . . . . . . . . . . . . . . . . . . . . . . . . . . . . . . . . . . . . . . . . 61
Fader Banks
. . . . . . . . . . . . . . . . . . . . . . . . . . . . . . . . . . . . . . . . . . . . . . . . . . . . . . . . . . . 61
Channel Faders
. . . . . . . . . . . . . . . . . . . . . . . . . . . . . . . . . . . . . . . . . . . . . . . . . . . . . . . . . 61
Scribble Strips
. . . . . . . . . . . . . . . . . . . . . . . . . . . . . . . . . . . . . . . . . . . . . . . . . . . . . . . . . 62
Mute and Solo Functions
. . . . . . . . . . . . . . . . . . . . . . . . . . . . . . . . . . . . . . . . . . . . . . . . . . 62
The SELECT Switch
. . . . . . . . . . . . . . . . . . . . . . . . . . . . . . . . . . . . . . . . . . . . . . . . . . . . . . 64
Channel Automation Controls
. . . . . . . . . . . . . . . . . . . . . . . . . . . . . . . . . . . . . . . . . . . . . . . 65
Data Encoder and LED Rings
. . . . . . . . . . . . . . . . . . . . . . . . . . . . . . . . . . . . . . . . . . . . . . . 66
INPUT and OUTPUT Switches
. . . . . . . . . . . . . . . . . . . . . . . . . . . . . . . . . . . . . . . . . . . . . . . 66
PAN/SEND Switch
. . . . . . . . . . . . . . . . . . . . . . . . . . . . . . . . . . . . . . . . . . . . . . . . . . . . . . . 67
EQ and DYN Switches
. . . . . . . . . . . . . . . . . . . . . . . . . . . . . . . . . . . . . . . . . . . . . . . . . . . . 67
INSERTS Switch
. . . . . . . . . . . . . . . . . . . . . . . . . . . . . . . . . . . . . . . . . . . . . . . . . . . . . . . . 68
REC ARM and MASTER REC Switches
. . . . . . . . . . . . . . . . . . . . . . . . . . . . . . . . . . . . . . . . . 68
DEFAULT QuickMode Switch
. . . . . . . . . . . . . . . . . . . . . . . . . . . . . . . . . . . . . . . . . . . . . . . . 69
COPY SETTINGS FROM CHANNEL and PASTE SETTING TO CHANNEL
. . . . . . . . . . . . . . . . . . . . 69
The GROUPS Section
. . . . . . . . . . . . . . . . . . . . . . . . . . . . . . . . . . . . . . . . . . . . . . . . . . . . . 70
Chapter 10. Navigation and Editing
. . . . . . . . . . . . . . . . . . . . . . . . . . . . . . . . . . . . . . . . . . . 73
Navigation and Zoom
. . . . . . . . . . . . . . . . . . . . . . . . . . . . . . . . . . . . . . . . . . . . . . . . . . . . 73
Scrub/Shuttle Wheel
. . . . . . . . . . . . . . . . . . . . . . . . . . . . . . . . . . . . . . . . . . . . . . . . . . . . . 74
Zoom Mode
. . . . . . . . . . . . . . . . . . . . . . . . . . . . . . . . . . . . . . . . . . . . . . . . . . . . . . . . . . . 77
Memory Locations and Markers
. . . . . . . . . . . . . . . . . . . . . . . . . . . . . . . . . . . . . . . . . . . . . 77
Creating On-Screen Selections
. . . . . . . . . . . . . . . . . . . . . . . . . . . . . . . . . . . . . . . . . . . . . . 78
SEL ADJ Mode
. . . . . . . . . . . . . . . . . . . . . . . . . . . . . . . . . . . . . . . . . . . . . . . . . . . . . . . . . 79
Link/Unlink Edit and Timeline
. . . . . . . . . . . . . . . . . . . . . . . . . . . . . . . . . . . . . . . . . . . . . . 80
Window Navigation Key Commands
. . . . . . . . . . . . . . . . . . . . . . . . . . . . . . . . . . . . . . . . . . 80
Creating and Editing Regions
. . . . . . . . . . . . . . . . . . . . . . . . . . . . . . . . . . . . . . . . . . . . . . . 81
Separating Regions
. . . . . . . . . . . . . . . . . . . . . . . . . . . . . . . . . . . . . . . . . . . . . . . . . . . . . . 81
Edit Tool Selection
. . . . . . . . . . . . . . . . . . . . . . . . . . . . . . . . . . . . . . . . . . . . . . . . . . . . . . . 82
Cut, Copy, Paste and Delete
. . . . . . . . . . . . . . . . . . . . . . . . . . . . . . . . . . . . . . . . . . . . . . . . 82
Edit Modes: Slip, Shuffle, Spot and Grid Modes
. . . . . . . . . . . . . . . . . . . . . . . . . . . . . . . . . . 82
Nudging Regions
. . . . . . . . . . . . . . . . . . . . . . . . . . . . . . . . . . . . . . . . . . . . . . . . . . . . . . . . 83
Editing Waveforms with the Pencil Tool
. . . . . . . . . . . . . . . . . . . . . . . . . . . . . . . . . . . . . . . . 83

Control|24 Guide
viii
Part IV Applications
Chapter 11. Recording
. . . . . . . . . . . . . . . . . . . . . . . . . . . . . . . . . . . . . . . . . . . . . . . . . . . . . . 87
Starting the Recording Process
. . . . . . . . . . . . . . . . . . . . . . . . . . . . . . . . . . . . . . . . . . . . . 87
Assigning Channel Input
. . . . . . . . . . . . . . . . . . . . . . . . . . . . . . . . . . . . . . . . . . . . . . . . . . 87
Assigning Outputs
. . . . . . . . . . . . . . . . . . . . . . . . . . . . . . . . . . . . . . . . . . . . . . . . . . . . . . 88
Assigning MIDI Outputs
. . . . . . . . . . . . . . . . . . . . . . . . . . . . . . . . . . . . . . . . . . . . . . . . . . . 89
TrackInput Monitoring
. . . . . . . . . . . . . . . . . . . . . . . . . . . . . . . . . . . . . . . . . . . . . . . . . . . . 89
Record Modes
. . . . . . . . . . . . . . . . . . . . . . . . . . . . . . . . . . . . . . . . . . . . . . . . . . . . . . . . . 90
MIDI Recording Modes
. . . . . . . . . . . . . . . . . . . . . . . . . . . . . . . . . . . . . . . . . . . . . . . . . . . 91
Arming Pro Tools for Recording
. . . . . . . . . . . . . . . . . . . . . . . . . . . . . . . . . . . . . . . . . . . . . 91
Recording
. . . . . . . . . . . . . . . . . . . . . . . . . . . . . . . . . . . . . . . . . . . . . . . . . . . . . . . . . . . . 92
Record Safe Mode
. . . . . . . . . . . . . . . . . . . . . . . . . . . . . . . . . . . . . . . . . . . . . . . . . . . . . . 92
Loop Record Mode
. . . . . . . . . . . . . . . . . . . . . . . . . . . . . . . . . . . . . . . . . . . . . . . . . . . . . . 93
QuickPunch Recording
. . . . . . . . . . . . . . . . . . . . . . . . . . . . . . . . . . . . . . . . . . . . . . . . . . . 94
TrackPunch Recording
. . . . . . . . . . . . . . . . . . . . . . . . . . . . . . . . . . . . . . . . . . . . . . . . . . . 95
Setting Up Cue Mixes
. . . . . . . . . . . . . . . . . . . . . . . . . . . . . . . . . . . . . . . . . . . . . . . . . . . . 98
Footswitch Shortcuts
. . . . . . . . . . . . . . . . . . . . . . . . . . . . . . . . . . . . . . . . . . . . . . . . . . . . 99
Chapter 12. Mixing. . . . . . . . . . . . . . . . . . . . . . . . . . . . . . . . . . . . . . . . . . . . . . . . . . . . . . . . 101
Signal Routing . . . . . . . . . . . . . . . . . . . . . . . . . . . . . . . . . . . . . . . . . . . . . . . . . . . . . . . . 101
Auxiliary Inputs . . . . . . . . . . . . . . . . . . . . . . . . . . . . . . . . . . . . . . . . . . . . . . . . . . . . . . . 101
Instrument Tracks . . . . . . . . . . . . . . . . . . . . . . . . . . . . . . . . . . . . . . . . . . . . . . . . . . . . . 102
Master Faders . . . . . . . . . . . . . . . . . . . . . . . . . . . . . . . . . . . . . . . . . . . . . . . . . . . . . . . . 102
Sends . . . . . . . . . . . . . . . . . . . . . . . . . . . . . . . . . . . . . . . . . . . . . . . . . . . . . . . . . . . . . . 103
Using Flip Mode with Sends. . . . . . . . . . . . . . . . . . . . . . . . . . . . . . . . . . . . . . . . . . . . . . . 106
Flip Mode Applications . . . . . . . . . . . . . . . . . . . . . . . . . . . . . . . . . . . . . . . . . . . . . . . . . . 108

Contents ix
Chapter 13. Plug-Ins and Inserts . . . . . . . . . . . . . . . . . . . . . . . . . . . . . . . . . . . . . . . . . . . . 109
Using Plug-Ins in Real Time . . . . . . . . . . . . . . . . . . . . . . . . . . . . . . . . . . . . . . . . . . . . . . . 109
INSERTS Section . . . . . . . . . . . . . . . . . . . . . . . . . . . . . . . . . . . . . . . . . . . . . . . . . . . . . . . 109
Assigning a Plug-In . . . . . . . . . . . . . . . . . . . . . . . . . . . . . . . . . . . . . . . . . . . . . . . . . . . . . 110
Editing Plug-Ins . . . . . . . . . . . . . . . . . . . . . . . . . . . . . . . . . . . . . . . . . . . . . . . . . . . . . . . . 111
EQ and DYN Switches and Modes . . . . . . . . . . . . . . . . . . . . . . . . . . . . . . . . . . . . . . . . . . . 113
The DEFAULT Switch . . . . . . . . . . . . . . . . . . . . . . . . . . . . . . . . . . . . . . . . . . . . . . . . . . . . 114
Targets and Focus . . . . . . . . . . . . . . . . . . . . . . . . . . . . . . . . . . . . . . . . . . . . . . . . . . . . . . 114
Copying and Pasting Plug-In Settings . . . . . . . . . . . . . . . . . . . . . . . . . . . . . . . . . . . . . . . . 115
Opening Plug-In Windows. . . . . . . . . . . . . . . . . . . . . . . . . . . . . . . . . . . . . . . . . . . . . . . . . 115
Plug-In Flip Mode . . . . . . . . . . . . . . . . . . . . . . . . . . . . . . . . . . . . . . . . . . . . . . . . . . . . . . 116
Plug-In Safe Mode. . . . . . . . . . . . . . . . . . . . . . . . . . . . . . . . . . . . . . . . . . . . . . . . . . . . . . 116
Chapter 14. Automation. . . . . . . . . . . . . . . . . . . . . . . . . . . . . . . . . . . . . . . . . . . . . . . . . . . . 117
Automation Mode . . . . . . . . . . . . . . . . . . . . . . . . . . . . . . . . . . . . . . . . . . . . . . . . . . . . . . 117
Recording Mix Automation . . . . . . . . . . . . . . . . . . . . . . . . . . . . . . . . . . . . . . . . . . . . . . . . 117
Recording Volume, Pan, or Mute Automation. . . . . . . . . . . . . . . . . . . . . . . . . . . . . . . . . . . 119
Automating Sends. . . . . . . . . . . . . . . . . . . . . . . . . . . . . . . . . . . . . . . . . . . . . . . . . . . . . . 121
Enabling Trim Mode . . . . . . . . . . . . . . . . . . . . . . . . . . . . . . . . . . . . . . . . . . . . . . . . . . . . 122
Punching Out of Automation Recording. . . . . . . . . . . . . . . . . . . . . . . . . . . . . . . . . . . . . . . 122
WRITE AUTOMATION TO Section . . . . . . . . . . . . . . . . . . . . . . . . . . . . . . . . . . . . . . . . . . . . 122
Automating Plug-Ins . . . . . . . . . . . . . . . . . . . . . . . . . . . . . . . . . . . . . . . . . . . . . . . . . . . . 124
Automating Plug-In Flip Mode. . . . . . . . . . . . . . . . . . . . . . . . . . . . . . . . . . . . . . . . . . . . . . 125
Appendix A. Pinout Tables. . . . . . . . . . . . . . . . . . . . . . . . . . . . . . . . . . . . . . . . . . . . . . . . . . 127
25-Pin Female D-Subs . . . . . . . . . . . . . . . . . . . . . . . . . . . . . . . . . . . . . . . . . . . . . . . . . . . 127
XLR and TRS Connectors . . . . . . . . . . . . . . . . . . . . . . . . . . . . . . . . . . . . . . . . . . . . . . . . . 129

Control|24 Guidex
Appendix B. Utility Functions. . . . . . . . . . . . . . . . . . . . . . . . . . . . . . . . . . . . . . . . . . . . . . . 131
Editing Parameters on UTILITY Pages . . . . . . . . . . . . . . . . . . . . . . . . . . . . . . . . . . . . . . . . 131
Sys Info Page. . . . . . . . . . . . . . . . . . . . . . . . . . . . . . . . . . . . . . . . . . . . . . . . . . . . . . . . . 132
Monitor Pages . . . . . . . . . . . . . . . . . . . . . . . . . . . . . . . . . . . . . . . . . . . . . . . . . . . . . . . . 132
Test Pages. . . . . . . . . . . . . . . . . . . . . . . . . . . . . . . . . . . . . . . . . . . . . . . . . . . . . . . . . . . 132
LED Test Pages . . . . . . . . . . . . . . . . . . . . . . . . . . . . . . . . . . . . . . . . . . . . . . . . . . . . . . . 132
Vegas Mode. . . . . . . . . . . . . . . . . . . . . . . . . . . . . . . . . . . . . . . . . . . . . . . . . . . . . . . . . . 133
Switch Test Mode . . . . . . . . . . . . . . . . . . . . . . . . . . . . . . . . . . . . . . . . . . . . . . . . . . . . . . 133
Test Modes for LED Colors. . . . . . . . . . . . . . . . . . . . . . . . . . . . . . . . . . . . . . . . . . . . . . . . 133
All LED Test Mode . . . . . . . . . . . . . . . . . . . . . . . . . . . . . . . . . . . . . . . . . . . . . . . . . . . . . 134
Display Test Page. . . . . . . . . . . . . . . . . . . . . . . . . . . . . . . . . . . . . . . . . . . . . . . . . . . . . . 134
Meter Test Mode . . . . . . . . . . . . . . . . . . . . . . . . . . . . . . . . . . . . . . . . . . . . . . . . . . . . . . 134
Timecode Display Test Mode . . . . . . . . . . . . . . . . . . . . . . . . . . . . . . . . . . . . . . . . . . . . . . 135
Scribble Strip Test Mode . . . . . . . . . . . . . . . . . . . . . . . . . . . . . . . . . . . . . . . . . . . . . . . . . 135
Fader Test Pages . . . . . . . . . . . . . . . . . . . . . . . . . . . . . . . . . . . . . . . . . . . . . . . . . . . . . . 136
Footswitch Pages . . . . . . . . . . . . . . . . . . . . . . . . . . . . . . . . . . . . . . . . . . . . . . . . . . . . . . 139
Sys Reset Page . . . . . . . . . . . . . . . . . . . . . . . . . . . . . . . . . . . . . . . . . . . . . . . . . . . . . . . 140
System Diagnostics . . . . . . . . . . . . . . . . . . . . . . . . . . . . . . . . . . . . . . . . . . . . . . . . . . . . 141
Index . . . . . . . . . . . . . . . . . . . . . . . . . . . . . . . . . . . . . . . . . . . . . . . . . . . . . . . . . . . . . . . . . . . . 143

1
Part I: Introduction

2

Chapter 1: Introduction to Control|24 3
Chapter 1: Introduction to Control|24
Welcome to the Control|24™ control surface, a
collaboration between Digidesign® and Focus-
rite®. Control|24 gives you precise, tactile con-
trol over Pro Tools® recording, mixing, and ed-
iting features.
Control|24 also includes 16 premium micro-
phone preamps, a control room monitoring sec-
tion, and a line submixer. These analog audio
features make Control|24 an ideal front end for
Pro Tools recording, as well as a complete con-
trol surface for monitoring and mixing.
Included with Control|24
Items included with Control|24 are:
• Control|24 Console
• Control|24 Guide
•15-foot Crossover Ethernet cable
• AC power cable
• Registration Information Card
System Requirements and
Compatibility
To use Control|24 with a Pro Tools system, you
need:
• An available Ethernet connection on the
host computer.
•(Optional) DigiSnakes or other audio cables
for Control|24 monitoring.
For complete system requirements, visit the
Digidesign Web site (www.digidesign.com).
Compatibility Information
Digidesign can only assure compatibility and
provide support for hardware and software it
has tested and approved. For a list of Digidesign-
qualified computers, operating systems, and
third-party devices, refer to the Digidesign Web
site (www.digidesign.com).

Control|24 Guide4
Ethernet Connections
When Control|24 is the only Ethernet device
connected to your system, it can be connected
directly to the built-in Ethernet port on all qual-
ified Mac computers, using the included “cross-
over” Ethernet cable.
If you have one or more Ethernet devices al-
ready, or if a Control|24-equipped system is to
be connected to an Ethernet network (for e-
mail, file transferring or other typical uses), you
must use a standard RJ45 Ethernet cable to con-
nect Control|24 to a powered Ethernet hub or
Ethernet card.
Control|24 can be connected to 10-, 100-, or
1000baseT hubs. 100baseT and 1000baseT hubs
must be “switching hubs” however, meaning
they can recognize and adapt their operation to
the 10baseT (the operating speed of Control|24
communication).
For a more details on Ethernet connections, see
“About Control|24 and Ethernet Performance”
on page 9.
Audio Cables for Control|24
Monitoring
The back panel of Control|24 provides numer-
ous analog inputs and outputs, such as mic
preamp inputs, submixer inputs, land line out-
puts.
Standard 25-pin D-Sub wiring harnesses are re-
quired to access the mic preamps, line submixer,
and other analog inputs and outputs available
with Control|24.
DigiSnakes for Control|24
DigiSnake cables are available from Digidesign
in kits for common Control|24 installations, or
individually for unique setups.
For more information on input and output op-
tions available in Control|24, see Chapter 3,
“Audio Connections.”
Visit the Digidesign Web site or your
Digidesign dealer for DigiSnake details and
ordering information.
The thread type of the screw connection on
the 25-pin D-Sub connectors is a US (non-
metric) 4-40 thread.

Chapter 1: Introduction to Control|24 5
Digidesign Registration
Review the enclosed Registration Information
Card and follow the instructions on it to quickly
register your purchase online. Registering your
purchase is the only way you can be eligible to
receive complimentary technical support and
future upgrade offers. It is one of the most im-
portant steps you can take as a new user.
About This Guide
This guide assumes you have already installed
Pro Tools, and that you already have an under-
standing of its features and operating conven-
tions as explained in the Pro Tools Reference
Guide.
This guide also assumes a basic understanding
of traditional recording and mixing consoles
and techniques.
Conventions Used in This Guide
All Digidesign guides use the following conven-
tions to indicate menu choices and key com-
mands:
:
Control|24 features a SHORTCUTS section that
provides the following modifier-key equiva-
lents:
The following symbols are used to highlight im-
portant information:
Convention Action
File > Save Session Choose Save Session
from the File menu
Control+N Hold down the Control
key and press the Nkey
Control-click Hold down the Control
key and click the mouse
button
Right-click (Windows) Click with the right
mouse button
Control|24
SHORTCUT Modifiers
Windows Mac
SHIFT/ADD Shift Shift
OPT(ALT)/ALL Alt Option
(CTL) Control Command
CTL/CLUTCH Start Control
User Tips are helpful hints for getting the
most out of Control|24.
Warnings include information that could
affect the performance of Control|24 hard-
ware or Pro Tools session data.
Shortcuts show you useful keyboard or
mouse shortcuts.
Cross References point to other related sec-
tions in this guide or the Pro Tools guide.

Control|24 Guide6
About www.digidesign.com
The Digidesign Web site (www.digidesign.com)
is your best source for information to help you
get the most out of your Pro Tools system. The
following are just a few of the services and fea-
tures available.
Registration Register your purchase online. See
the enclosed registration form for instructions.
Support Contact Digidesign Technical Support
or Customer Service; download software up-
dates and the latest online manuals; browse the
Compatibility documents for system require-
ments; search the online Answerbase; join the
worldwide Pro Tools community on the Digide-
sign User Conference.
Training and Education Become a certified
Pro Tools Operator or Expert; study on your
own using courses available online, or find out
how you can learn in a classroom setting at a
certified Pro Tools Training Center.
Products and Developers Learn about Digidesign
products; download demo software; learn about
our Development Partners and their plug-ins,
applications, and hardware.
News and Events Get the latest news from
Digidesign; sign up for a Pro Tools demo.

Chapter 2: Installing Control|24 7
Chapter 2: Installing Control|24
Installation and Maintenance
Guidelines
Control|24 can be mounted in studio furniture
or set on a table top. Wherever you decide to put
Control|24, be sure not to block air circulation
to the vents on the top and front of the unit.
To avoid damage to Control|24, never rest the
unit on its face or rear panel, and always allow
free air flow around the front and top of the
unit.
If you need to clean the Control|24 top surface,
use a cloth or paper towel that has been very
slightly dampened with water only, then care-
fully wipe the surface. Do not use abrasives, or
any cleaning solution that contain bleach, alco-
hol, solvents, or ammonia, as these can damage
the finish.
Making Necessary
Connections
Control|24 requires power and Ethernet connec-
tions for basic communication and control of
Pro Tools.
For audio connections, additional audio cables
and connections are required. For instructions
on audio connections and options, see
Chapter 3, “Audio Connections.”
Power Connection
The Control|24 back panel has an IEC standard
AC receptacle. This connector accepts a stan-
dard AC power cable, and is auto power-select-
ing (100V to 240V), and will automatically work
with a standard modular cable to connect to AC
power receptacles in any country.
To connect power to Control|24:
■Plug one end of a power cord (included with
Control|24) into the Control|24 AC receptacle
and plug the other end into a power source such
as a power strip or wall outlet.
Before powering up your Control|24, be sure
to allow it to reach room temperature, as
there are some components that are sensi-
tive to cold temperatures. Unpack your unit
and allow it to adjust to the room tempera-
ture for several hours before turning it on for
the first time.
Early Control|24 units (up to and including
Rev G units) include a heat sink on the back
of the unit. Allow air circulation around the
heat sink in addition to the top and front.
Power down your speaker monitor system,
and make sure the levels are all the way
down on your amplifiers before turning
Control|24 on or off. A loud pop can occur
during power cycling that could possibly
damage playback systems.

Control|24 Guide8
Ethernet Connections
Control|24 communicates with Pro Tools using
Ethernet. This connection uses a standard RJ45,
10Base-T connector.
If Control|24 is the only Ethernet device
connected to your computer:
1 Connect one end of the included crossover
Ethernet cable to the Ethernet port on the back
panel of Control|24.
2 Connect the other end of the cable to the ap-
propriate Ethernet port on the computer.
If you have more than one Ethernet device in
addition to Control|24:
1 Connect one end of a standard Ethernet cable
(not included) to the Ethernet port on the back
panel of Control|24.
2 Connect the other end of the cable to the ap-
propriate Ethernet port on a powered Ethernet
hub.
Installing Control|24 Ethernet Drivers
(Windows XP Only)
Windows systems require drivers for Ethernet
communication with Control|24. With
Pro Tools 7.1.x and lower, you must install these
drivers manually.
To install Digidesign Ethernet drivers for
Control|24:
1 Click Start, right-click My Network Places, and
then choose Properties.
2 Right-click the relevant Local Area Connec-
tion icon, and then choose Properties.
3 Click Install, select Protocol, and click Add.
4 Click Have Disk.
5 Select the DigiNet.inf file in the Control|24 di-
rectory (on your Pro Tools Installer disc in Addi-
tional Files\Controllers\Controllers), and click
OK.
The Installer installs the DigiNet.inf files in the
Control|24 directory in Digidesign\DAE\Con-
trollers.
6 Click Close.
Ethernet connections should be made when
Control|24 power is off.
If you are using an Ethernet hub, refer to the
documentation that came with it to ensure
that a connection is established in both di-
rections between Control|24 and the com-
puter on which Pro Tools is installed.

Chapter 2: Installing Control|24 9
About Control|24 and Ethernet
Performance
This section presents some general Ethernet
concepts that will help optimize system perfor-
mance.
Control|24, Ethernet and Network Traffic
If your computer is already connected to an
Ethernet network, moderate network traffic
(such as basic e-mail) should not affect commu-
nication between Control|24 and Pro Tools.
Refer to the documentation that came with your
computer or Ethernet hub for more information
about Ethernet networks.
Separate Zone Recommended for Optimal
Performance
If you are using additional Ethernet ports for
traffic-intensive network tasks while using Con-
trol|24, performance will be improved by creat-
ing a dedicated server zone for Control|24. Refer
to the operating system and Ethernet documen-
tation for details.
For optimal performance, create a dedicated
Ethernet network for Control|24 (do not
share the Ethernet port between Control|24
and other active network functions such as
e-mail or file transfers).

Control|24 Guide10
Other manuals for Control 24
1
Table of contents
Other DigiDesign Music Mixer manuals

DigiDesign
DigiDesign C24 User manual

DigiDesign
DigiDesign D-Show Profile User manual

DigiDesign
DigiDesign Venue D-show User manual

DigiDesign
DigiDesign Command|8 User manual

DigiDesign
DigiDesign Command 8 User manual

DigiDesign
DigiDesign D-Control User manual

DigiDesign
DigiDesign Control 24 User manual

DigiDesign
DigiDesign D-Show Profile User manual

DigiDesign
DigiDesign C24 User manual

DigiDesign
DigiDesign D-Control User manual