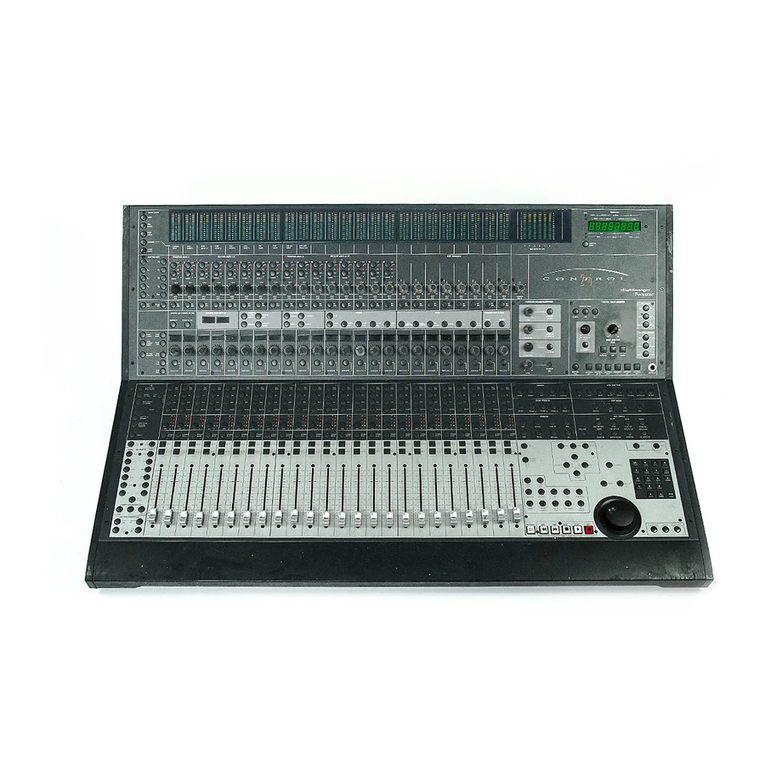
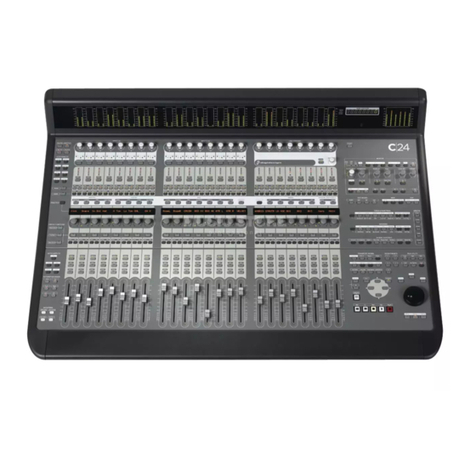
DigiDesign C24 User manual

C|24
™
Version 7.3.2

Legal Notices
This guide is copyrighted ©2007 by Digidesign, a division of
Avid Technology, Inc. (hereafter “Digidesign”), with all rights
reserved. Under copyright laws, this guide may not be
duplicated in whole or in part without the written consent of
Digidesign.
003, 003 Rack, 96 I/O, 96i I/O, 192 Digital I/O, 192 I/O,
888|24 I/O, 882|20 I/O, 1622 I/O, 24-Bit ADAT Bridge I/O,
AudioSuite, Avid, Avid DNA, Avid Mojo, Avid Unity, Avid Unity
ISIS, Avid Unity MediaNetwork, Avid Xpress, AVoption,
AVoption|V10, Beat Detective, Bruno, C|24, Command|8,
Control|24, D-Command, D-Control, D-Fi, D-fx, D-Show, DAE,
Digi 002, Digi 002 Rack, DigiBase, DigiDelivery, Digidesign,
Digidesign Audio Engine, Digidesign Intelligent Noise
Reduction, Digidesign TDM Bus, DigiDrive, DigiRack, DigiTest,
DigiTranslator, DINR, DV Toolkit, EditPack, Impact, Interplay,
M-Audio, MachineControl, Maxim, Mbox, MediaComposer,
MIDI I/O, MIX, MultiShell, OMF, OMF Interchange, PRE,
ProControl, Pro Tools M-Powered, Pro Tools, Pro Tools|HD,
Pro Tools LE, QuickPunch, Reel Tape, Reso, Reverb One,
ReVibe, RTAS, Smack!, SoundReplacer, Sound Designer II,
Strike, Structure, SYNC HD, SYNC I/O, Synchronic, TL Space,
Velvet, and X-Form are trademarks or registered trademarks of
Digidesign and/or Avid Technology, Inc. All other trademarks
are the property of their respective owners.
Product features, specifications, system requirements, and
availability are subject to change without notice.
PN 9106-58070-00 REV A 8/07
Comments or suggestions regarding our documentation?
email: [email protected]
WARNING: This product contains chemicals, including lead,
known to the State of California to cause cancer and birth
defects or other reproductive harm. Wash hands after
handling.
Communications & Safety Regulation Information
Compliance Statement
The model C|24 complies with the following standards
regulating interference and EMC:
• FCC Part 15 Class A
• EN55103 – 1, environment E4
• EN55103 – 2, environment E4
• AS/NZS 3548 Class A
•CISPR22ClassA
Radio and Television Interference
This equipment has been tested and found to comply with the
limits for a Class A digital device, pursuant to Part 15 of the
FCC Rules.
DECLARATION OF CONFORMITY
We, Digidesign,
2001 Junipero Serra Blvd.
Daly City, California 94014-3886, USA
650-731-6100
declare under our sole responsibility that the product
C|24
complies with Part 15 of FCC Rules.
Operation is subject to the following two conditions: (1) this
device may not cause harmful interference, and (2) this device
must accept any interference received, including interference
that may cause undesired operation.
Communications Statement
NOTE: This equipment has been tested and found to comply
with the limits for a Class A digital device, pursuant to Part 15
of the FCC Rules. These limits are designed to provide
reasonable protection against harmful interference when the
equipment is operated in a commercial environment. This
equipment generates, uses, and can radiate radio frequency
energy and, if not installed and used in accordance with the
instruction manual, may cause harmful interference to radio
communications. Operation of this equipment in a residential
area is likely to cause harmful interference in which case the
user will be required to correct the interference at his own
expense.
Changes or modifications to this product not authorized by
Digidesign, Inc., could void the Certification and negate your
authority to operate the product.
Canadian Compliance Statement:
This Class A digital apparatus complies with Canadian ICES-
003
Cet appareil numérique de la classe A est conforme à la norme
NMB-003 du Canada
Australian Compliance
European Compliance
Safety Statement
This equipment has been tested to comply with USA and
Canadian safety certification in accordance with the
specifications of UL Standards: UL60065 7th /IEC 60065 7th
and Canadian CAN/CSA C22.2 60065:03. Digidesign Inc., has
been authorized to apply the appropriate UL & CUL mark on its
compliant equipment.
Warning
Important Safety Instructions
1) Read these instructions.
2) Keep these instructions.
3) Heed all warnings.
4) Follow all instructions.
5) Do not use this apparatus near water.
6) Clean only with dry cloth.
7) Do not block any ventilation openings. Install in accordance
with the manufacturer’s instructions.
8) Do not install near any heat sources such as radiators, heat
registers, stoves, or other apparatus (including amplifiers) that
produce heat.
9) Do not defeat the safety purpose of the polarized or
grounding-type plug. A polarized plug has two blades with one
wider than the other. A grounding type plug has two blades and
a third grounding prong. The wide blade or the third prong are
provided for your safety. If the provided plug does not fit into
your outlet, consult an electrician for replacement of the
obsolete outlet.
10) Protect the power cord from being walked on or pinched
particularly at plugs, convenience receptacles, and the point
where they exit from the apparatus.
11) Only use attachments/accessories specified by the
manufacturer.
12) Use caution when replacing the Lithium battery in the FOH
Rack unit. There is danger of explosion if battery is incorrectly
replaced. Replace only with the same or equivalent type.
13) Unplug this apparatus during lightning storms or when
unused for long periods of time.
14) Refer all servicing to qualified service personnel. Servicing
is required when the apparatus has been damaged in any way,
such as power-supply cord or plug is damaged, liquid has been
spilled or objects have fallen into the apparatus, the apparatus
has been exposed to rain or moisture, does not operate
normally, or has been dropped.


Contents v
Contents
Part I Introduction
Chapter 1. Welcome to C|24 . . . . . . . . . . . . . . . . . . . . . . . . . . . . . . . . . . . . . . . . . . . . . . . . . 3
C|24 Features . . . . . . . . . . . . . . . . . . . . . . . . . . . . . . . . . . . . . . . . . . . . . . . . . . . . . . . . . . 3
System Requirements . . . . . . . . . . . . . . . . . . . . . . . . . . . . . . . . . . . . . . . . . . . . . . . . . . . . . 4
Operational Requirements . . . . . . . . . . . . . . . . . . . . . . . . . . . . . . . . . . . . . . . . . . . . . . . . . . 4
Connection Requirements . . . . . . . . . . . . . . . . . . . . . . . . . . . . . . . . . . . . . . . . . . . . . . . . . . 5
Digidesign Registration . . . . . . . . . . . . . . . . . . . . . . . . . . . . . . . . . . . . . . . . . . . . . . . . . . . . 5
About This Guide. . . . . . . . . . . . . . . . . . . . . . . . . . . . . . . . . . . . . . . . . . . . . . . . . . . . . . . . . 6
About www.digidesign.com . . . . . . . . . . . . . . . . . . . . . . . . . . . . . . . . . . . . . . . . . . . . . . . . . 6
Chapter 2. C|24 Overview . . . . . . . . . . . . . . . . . . . . . . . . . . . . . . . . . . . . . . . . . . . . . . . . . . . . 7
C|24 Top Panel . . . . . . . . . . . . . . . . . . . . . . . . . . . . . . . . . . . . . . . . . . . . . . . . . . . . . . . . . 7
C|24 Back Panel . . . . . . . . . . . . . . . . . . . . . . . . . . . . . . . . . . . . . . . . . . . . . . . . . . . . . . . . 9
Part II Installation
Chapter 3. Installing and Configuring C|24 . . . . . . . . . . . . . . . . . . . . . . . . . . . . . . . . . . . . 13
Installing C|24 . . . . . . . . . . . . . . . . . . . . . . . . . . . . . . . . . . . . . . . . . . . . . . . . . . . . . . . . . 13
Connecting Power to C|24 . . . . . . . . . . . . . . . . . . . . . . . . . . . . . . . . . . . . . . . . . . . . . . . . . 13
Connecting C|24 to the Computer . . . . . . . . . . . . . . . . . . . . . . . . . . . . . . . . . . . . . . . . . . . 13
Starting Up and Shutting Down a Pro Tools System . . . . . . . . . . . . . . . . . . . . . . . . . . . . . . . 14
Configuring C|24 . . . . . . . . . . . . . . . . . . . . . . . . . . . . . . . . . . . . . . . . . . . . . . . . . . . . . . . 14
Setting C|24 Preferences . . . . . . . . . . . . . . . . . . . . . . . . . . . . . . . . . . . . . . . . . . . . . . . . . 16
Chapter 4. Audio Connections . . . . . . . . . . . . . . . . . . . . . . . . . . . . . . . . . . . . . . . . . . . . . . . 17
Mic/Line/DI Preamplifiers . . . . . . . . . . . . . . . . . . . . . . . . . . . . . . . . . . . . . . . . . . . . . . . . . 17
Line Submixer. . . . . . . . . . . . . . . . . . . . . . . . . . . . . . . . . . . . . . . . . . . . . . . . . . . . . . . . . . 20
Monitor Section. . . . . . . . . . . . . . . . . . . . . . . . . . . . . . . . . . . . . . . . . . . . . . . . . . . . . . . . . 21

C|24 Guidevi
Chapter 5. Connecting Your Studio . . . . . . . . . . . . . . . . . . . . . . . . . . . . . . . . . . . . . . . . . . 25
Connections for Stereo Monitoring . . . . . . . . . . . . . . . . . . . . . . . . . . . . . . . . . . . . . . . . . . . 25
Stereo Studio Connections . . . . . . . . . . . . . . . . . . . . . . . . . . . . . . . . . . . . . . . . . . . . . . . . 27
Connections for Surround Monitoring . . . . . . . . . . . . . . . . . . . . . . . . . . . . . . . . . . . . . . . . . 28
Surround Studio Connections. . . . . . . . . . . . . . . . . . . . . . . . . . . . . . . . . . . . . . . . . . . . . . . 30
Part III Reference
Chapter 6. C|24 Pro Tools Controls . . . . . . . . . . . . . . . . . . . . . . . . . . . . . . . . . . . . . . . . . . 33
Fader Section. . . . . . . . . . . . . . . . . . . . . . . . . . . . . . . . . . . . . . . . . . . . . . . . . . . . . . . . . . 33
Global Automation Switches . . . . . . . . . . . . . . . . . . . . . . . . . . . . . . . . . . . . . . . . . . . . . . . 38
Modifier Switches . . . . . . . . . . . . . . . . . . . . . . . . . . . . . . . . . . . . . . . . . . . . . . . . . . . . . . . 40
Channel Bar. . . . . . . . . . . . . . . . . . . . . . . . . . . . . . . . . . . . . . . . . . . . . . . . . . . . . . . . . . . 41
Miscellaneous Controls . . . . . . . . . . . . . . . . . . . . . . . . . . . . . . . . . . . . . . . . . . . . . . . . . . . 45
Transport and Navigation Controls . . . . . . . . . . . . . . . . . . . . . . . . . . . . . . . . . . . . . . . . . . . 49
Meter Bridge . . . . . . . . . . . . . . . . . . . . . . . . . . . . . . . . . . . . . . . . . . . . . . . . . . . . . . . . . . 55
Chapter 7. C|24 Analog Audio Controls. . . . . . . . . . . . . . . . . . . . . . . . . . . . . . . . . . . . . . . 57
Monitor Section . . . . . . . . . . . . . . . . . . . . . . . . . . . . . . . . . . . . . . . . . . . . . . . . . . . . . . . . 57
Mic/Line/DI Preamplifier Controls . . . . . . . . . . . . . . . . . . . . . . . . . . . . . . . . . . . . . . . . . . . 63
Line Submixer Controls . . . . . . . . . . . . . . . . . . . . . . . . . . . . . . . . . . . . . . . . . . . . . . . . . . . 64
Part IV Applications
Chapter 8. Operating Views and Modes . . . . . . . . . . . . . . . . . . . . . . . . . . . . . . . . . . . . . . 67
Console Views . . . . . . . . . . . . . . . . . . . . . . . . . . . . . . . . . . . . . . . . . . . . . . . . . . . . . . . . . 67
Channel Views . . . . . . . . . . . . . . . . . . . . . . . . . . . . . . . . . . . . . . . . . . . . . . . . . . . . . . . . . 69
Mic Pre View . . . . . . . . . . . . . . . . . . . . . . . . . . . . . . . . . . . . . . . . . . . . . . . . . . . . . . . . . . 78
Groups View. . . . . . . . . . . . . . . . . . . . . . . . . . . . . . . . . . . . . . . . . . . . . . . . . . . . . . . . . . . 79
Window Configuration View . . . . . . . . . . . . . . . . . . . . . . . . . . . . . . . . . . . . . . . . . . . . . . . . 80
Memory Location View . . . . . . . . . . . . . . . . . . . . . . . . . . . . . . . . . . . . . . . . . . . . . . . . . . . 81
Fader Display Modes . . . . . . . . . . . . . . . . . . . . . . . . . . . . . . . . . . . . . . . . . . . . . . . . . . . . 82
Assign Mode . . . . . . . . . . . . . . . . . . . . . . . . . . . . . . . . . . . . . . . . . . . . . . . . . . . . . . . . . . 83

Contents vii
Chapter 9. Working with C|24 . . . . . . . . . . . . . . . . . . . . . . . . . . . . . . . . . . . . . . . . . . . . . . . 85
Working with Sessions and Tracks . . . . . . . . . . . . . . . . . . . . . . . . . . . . . . . . . . . . . . . . . . . 85
Assigning Pro Tools Paths . . . . . . . . . . . . . . . . . . . . . . . . . . . . . . . . . . . . . . . . . . . . . . . . . 87
Working with Pro Tools Windows . . . . . . . . . . . . . . . . . . . . . . . . . . . . . . . . . . . . . . . . . . . . 89
Recording. . . . . . . . . . . . . . . . . . . . . . . . . . . . . . . . . . . . . . . . . . . . . . . . . . . . . . . . . . . . . 91
Navigating and Selecting in the Edit Window . . . . . . . . . . . . . . . . . . . . . . . . . . . . . . . . . . . . 93
Editing . . . . . . . . . . . . . . . . . . . . . . . . . . . . . . . . . . . . . . . . . . . . . . . . . . . . . . . . . . . . . . . 97
Controlling Track Display on C|24. . . . . . . . . . . . . . . . . . . . . . . . . . . . . . . . . . . . . . . . . . . . 97
Mixing . . . . . . . . . . . . . . . . . . . . . . . . . . . . . . . . . . . . . . . . . . . . . . . . . . . . . . . . . . . . . . . 98
Appendix A. C|24 Connector Pinouts . . . . . . . . . . . . . . . . . . . . . . . . . . . . . . . . . . . . . . . . 103
Female DB-25 Connectors . . . . . . . . . . . . . . . . . . . . . . . . . . . . . . . . . . . . . . . . . . . . . . . . 103
XLR and TRS Connectors . . . . . . . . . . . . . . . . . . . . . . . . . . . . . . . . . . . . . . . . . . . . . . . . . 108
Appendix B. Utility Mode . . . . . . . . . . . . . . . . . . . . . . . . . . . . . . . . . . . . . . . . . . . . . . . . . . . 109
Entering and Exiting Utility Mode. . . . . . . . . . . . . . . . . . . . . . . . . . . . . . . . . . . . . . . . . . . . 109
Tests . . . . . . . . . . . . . . . . . . . . . . . . . . . . . . . . . . . . . . . . . . . . . . . . . . . . . . . . . . . . . . . 109
Preferences . . . . . . . . . . . . . . . . . . . . . . . . . . . . . . . . . . . . . . . . . . . . . . . . . . . . . . . . . . 112
System. . . . . . . . . . . . . . . . . . . . . . . . . . . . . . . . . . . . . . . . . . . . . . . . . . . . . . . . . . . . . . 114
Auto Talkback. . . . . . . . . . . . . . . . . . . . . . . . . . . . . . . . . . . . . . . . . . . . . . . . . . . . . . . . . 116

C|24 Guideviii

1
Part I: Introduction

2

Chapter 1: Welcome to C|24 3
Chapter 1: Welcome to C|24
Welcome to C|24™, Digidesign’s 24-channel
control surface for Pro Tools©.
C|24 gives you hands-on access to nearly all of
the recording, routing, editing, and mixing fea-
tures of Pro Tools.
C|24 also provides analog audio features that
make it ideal for Pro Tools recording and moni-
toring.
C|24 Features
Control Features
• 24 channel strips, each with the following
controls:
• Touch-sensitive motorized fader
• Multi-function rotary encoder
• Automation Mode selector
• Dedicated EQ and Dynamics switches
• Dedicated Insert and Send switches
• Dedicated Input and Rec Enable switches
• Channel Solo and Mute switches
• Dual-row multi-function display
• Global Automation Mode and Enable controls
• Transport and Navigation controls
• Edit and Function controls
• Pro Tools window and Global control
switches
Analog Audio Features
• 16 microphone/line/DI preamplifiers with the
following features:
• Continuously variable input gain control
• Switchable high-pass filter
• Clip indicators
• Phantom power (in 2 groups of 8 channels)
•4DIinputs
• 8x2 submixer with the following features:
• 8 inputs with independent gain
controls
• Stereo mix output with master volume
control
• Switchable output to C|24 Monitor section
• 6-channel monitor section with the following
features:
• Stereo, LCRS and 5.1 monitoring modes
• 2 (Main and Alt) Surround input sources
• 2 Stereo input sources
• Main (Surround) and Alt (Stereo) outputs
with level control
• 2 channels of Cue output
• Headphone output with level control and
cue monitoring capability
• Talkback with built-in or external source
and level control
• Listenback with external input and level
control

C|24 Guide4
System Requirements
C|24 requires the following system components:
• A Digidesign-qualified Pro Tools system
• An available Ethernet connection on the
host computer
For complete system requirements, visit the
Digidesign website (www.digidesign.com).
Compatibility Information
Digidesign can only assure compatibility and
provide support for hardware and software it has
tested and approved.
For a list of Digidesign-qualified computers, op-
erating systems, and third-party devices, visit
the Digidesign website (www.digidesign.com).
Operational Requirements
Temperature and Ventilation
C|24 should be installed and operated in a cli-
mate-controlled environment, away from heat
sources, and with adequate ventilation.
C|24 should be operated at an ambient temper-
ature that does not exceed 100 degrees F
(35 degrees C).
The back panel of the C|24 should be exposed to
ambient air. Blocking or partially blocking the
back panel of the C|24 may cause the unit to
malfunction and may void your warranty.
Water and Moisture
C|24 should be operated away from sources of
moisture or humidity and should be kept clear
of liquids that might spill into the unit.
Cleaning and Maintenance
If you need to clean the C|24 top surface, apply
a small amount of water to a cloth or paper
towel, then carefully wipe the surface. Do not
use abrasives, cleaning solutions, or spray clean-
ers.

Chapter 1: Welcome to C|24 5
Connection Requirements
Power Connections
C|24 includes an external power supply that is
auto power-selecting (90-250V, 50-60 Hz) and
will work automatically when plugged into an
AC power receptacle in any country.
Make sure your power source is correctly rated
for all of the components of your system. A
surge-protected power source (not included) is
highly recommended.
Ethernet Connections
C|24 communicates with Pro Tools using Ether-
net.
If C|24 is the only Ethernet device you are us-
ing with your computer, you can connect it di-
rectly to the Ethernet port on the computer.
If you are using other Ethernet devices (such
as a connection to a Local Area Network) in ad-
dition to C|24, a 10-BaseT Ethernet hub (not in-
cluded) is required.
Audio Connections
The analog audio inputs and outputs for the
mic/line/DI preamplifiers and the monitoring
section, and the inputs for the built-in submixer
on C|24 are DB-25 connectors.
The DI inputs for the mic/line/DI preamplifi-
ers, alternate (stereo) outputs for the monitoring
section, and the outputs for the built-in sub-
mixer on C|24 are 1/4-inch connectors.
Audio Cables for C|24 Monitoring
Digidesign offers a range of DigiSnake cabling
options for connecting Digidesign interfaces
and external sources to the C|24.
For more information on DigiSnake audio ca-
bles, visit the Digidesign website (www.digide-
sign.com).
Digidesign Registration
Review the enclosed Digidesign Registration In-
formation Card and follow the instructions on it
to quickly register your purchase online. Regis-
tering your purchase is the only way you can be
eligible to receive complimentary technical sup-
port and future upgrade offers. It is one of the
most important steps you can take as a new user.

C|24 Guide6
About This Guide
This guide explains how to install and make
connections to your C|24, and how to use it to
access Pro Tools features and commands.
For complete information on using Pro Tools
software, refer to the guides included with your
Pro Tools system.
Conventions Used in This Guide
Digidesign guides use the following conven-
tions to indicate menu choices and key com-
mands:
:
The following symbols are used to highlight im-
portant information:
About www.digidesign.com
The Digidesign website (www.digidesign.com) is
your best source for information to help you get
the most out of your Pro Tools system. The fol-
lowing are just a few of the services and features
available.
Registration Register your purchase online. See
the enclosed Digidesign Registration Informa-
tion Card for instructions.
Support Contact Digidesign Technical Support
or Customer Service; download software up-
dates and the latest online manuals; browse the
Compatibility documents for system require-
ments; search the online Answerbase; join the
worldwide Pro Tools community on the Digide-
sign User Conference.
Training and Education Become a certified
Pro Tools Operator or Expert; study on your
own using courses available online, or find out
how you can learn in a classroom setting at a
certified Pro Tools Training Center.
Products and Developers Learn about Digidesign
products; download demo software; learn about
our Development Partners and their plug-ins,
applications, and hardware.
News and Events Get the latest news from
Digidesign; sign up for a Pro Tools demo.
To learn more about these and other resources
available from Digidesign, visit the Digidesign
website (www.digidesign.com).
Convention Action
File > Save Choose Save from the File
menu
Control+N Hold down the Control key
and press the Nkey
Control-click Hold down the Control key
and click the mouse button
Right-click Click with the right mouse
button
User Tips are helpful hints for getting the
most from your system.
Important Notices include information that
could affect your data or the performance of
your system.
Shortcuts show you useful keyboard or
mouse shortcuts.
Cross References point to related sections in
this guide and other Digidesign guides.

Chapter 2: C|24 Overview 7
Chapter 2: C|24 Overview
C|24 Top Panel
Figure 1. C|24 top panel
Meter Bridge
Monitor
section
Transport and
Navigation
controls
Fader section
Mic/Line/DI Preamplifier controls Line Submixer
Miscellaneous
controls
Auto Enable
switches
Channel Bar
Modifier
switches
LCD displays
Rotary Encoders
Auto Mode
switches
Auto Write To
switches

C|24 Guide8
Meter Bridge
The Meter Bridge features a six-channel output
meter, 24 pairs of channel meters, a Pro Tools
Main Counter display, and a built-in Talkback
microphone.
Mic/Line/DI Preamplifier Controls
C|24 includes 16 analog Mic/Line preamplifiers,
with phantom power capability and a switch-
able high-pass filter. Four channels have avail-
able DI inputs that override the channel inputs.
Line Submixer
C|24 also includes an analog line submixer with
8 stereo inputs and a stereo output that can be
used to integrate analog studio equipment into
your studio. The external output of the sub-
mixer can be can be routed to a Pro Tools audio
interface. Line Submixer output can also be
routed internally to the C|24 Monitoring sec-
tion.
Monitor Section
The Control Room Monitor section supports
5.1, LCRS and stereo monitoring modes, with
selectable input sources and Main Surround and
Alternate Stereo outputs. It also provides Cue
mix output, Studio LS output, and full Talkback
and Listenback capability to facilitate studio
communication.
Miscellaneous Controls
C|24 provides one-touch access to Pro Tools Edit
modes, Edit tools, MIDI commands and opera-
tions, Pro Tools windows, Groups, Memory Lo-
cations, Window Configurations, and a range of
powerful global controls that let you apply oper-
ations to multiple tracks.
Transport and Navigation Controls
C|24 gives you full control of Pro Tools trans-
port functions with one-touch access to a range
of audition functions, plus dedicated switches
for multiple playback and recording modes. The
Scrub /Shuttle wheel and Navigation key quad-
rant allow quick navigation of Pro Tools and the
C|24 Fader section.
Channel Bar
The Channel Bar provides powerful controls for
viewing, assigning, and editing Inputs, Outputs,
Inserts, Sends, Pan controls, plug-in parameters,
and C|24 settings, using the multipurpose LCD
displays, and rotary encoders.
LCD Displays
Three multi-purpose 55x2 LCD displays provide
access to a range of track information, Channel
Bar functions, Soft Key commands, and C|24 set-
tings.
Rotary Encoders
Twenty-four multi-purpose rotary encoders let
you view and control volume and pan values,
edit plug-in parameters, and make assignments.
Automation Controls
C|24 includes dedicated controls for setting the
automation mode of individual channels, for
enabling and suspending automation types, and
setting the global automation mode.
Fader Section
Twenty-four 100mm touch-sensitive, motorized
faders allow precise control and automation of
track volume. Flip mode lets you control addi-
tional Pro Tools parameters from the faders.

Chapter 2: C|24 Overview 9
C|24 Back Panel
Submixer Section
Two DB-25 female connectors allow connection
of a total of 16 channels (8 stereo inputs). Stereo
output is available on 1/4-inch TRS connectors.
Preamp Sections
Each of the two 8-channel preamp sections has
two DB-25 female connectors that provide sepa-
rate, switchable Mic and Line inputs, plus two
DI inputs on 1/4-inch TRS connectors. A third
DC-25 connector in each section provides
preamp outputs.
Monitor Section
Five DB-25 female connectors allow connection
of two six-channel inputs, two stereo inputs,
and a pair of cue inputs. Outputs include a six-
channel Main output, stereo Alt Output (also
available on 1/4-inch TRS connectors), stereo LS
and Cue outputs, and a Talkback Slate output.
Listen Mic and External Talkback Mic
Connectors
Two XLR microphone connectors allow connec-
tion of a Listenback microphone and an op-
tional external Talkback microphone.
Footswitch Connectors
Two 1/4-inch TRS Footswitch connectors can be
assigned independently to control Pro Tools re-
cording punch in/out, Pro Tools transport
start/stop, or C|24 talkback on/off.
Ethernet Connector
C|24 communicates with Pro Tools using Ether-
net. This connection uses a standard RJ45 con-
nector.
Power Supply Connector
C|24 comes with a dedicated external power
supply that connects to this port.
Figure 2. C|24 back panel
Monitor section
Submixer section Preamps 9-16 section Preamps 1-8 section
Footswitch
connectors
Ethernet
connector
Power Supply
connector
Ext Talk Mic
connector
Listen Mic
connector

C|24 Guide10

11
Part II: Installation

12
Other manuals for C24
1
Table of contents
Other DigiDesign Music Mixer manuals

DigiDesign
DigiDesign Control 24 User manual

DigiDesign
DigiDesign D-Control User manual

DigiDesign
DigiDesign Control 24 User manual

DigiDesign
DigiDesign C24 User manual

DigiDesign
DigiDesign D-Control User manual

DigiDesign
DigiDesign Drawmer Dynamics User manual

DigiDesign
DigiDesign Command|8 User manual

DigiDesign
DigiDesign VENUE Profile User manual

DigiDesign
DigiDesign Venue D-show User manual

DigiDesign
DigiDesign Command 8 User manual