manuals.online logo
Brands
  1. Home
  2. •
  3. Brands
  4. •
  5. DigiDesign
  6. •
  7. Music Mixer
  8. •
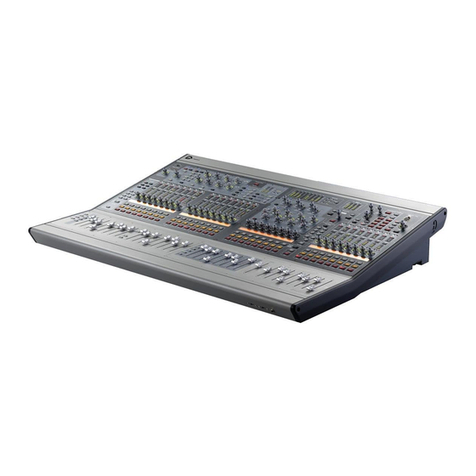
  9. DigiDesign Venue D-show User manual

DigiDesign Venue D-show User manual

INPUT FADERS
B
Multi-Select
To select multiple channels
1. Press and hold Multi-Select
(it flashes when enabled)
2. Press Select on each channel
to include
3. Adjust parameters on an selected
channel*
4. Press Cancel, or press Select on
an unselected channel to exit
*Multi-Select does not apply to
Input Gain and Pad
Default
To reset a fader, knob, or switch
parameter
1. Hold Default
2. Press Select to reset a fader;
press the knob or switch ou
want to reset
Fine
To adjust a parameter with fine
resolution
•Hold Fine while adjusting
the parameter
• Double-press the Fine button to
latch Fine mode
Make Stereo
To make two mono channels into
one stereo channel
1. Enable Config mode
2. Press Make Stereo
3. Press Select on two mono channels
4. Press Make Stereo again to confirm
To split a stereo channel into two
mono channels
1. Enable Config mode
2. Press Make Stereo
3. Press Select on a stereo channel
4. Press Make Stereo again to confirm
Fader Banks A, B, C, D
To bank Main and Sidecars to other
input channels
• Press Bank A, B, C, or D, as needed
Shortcuts &
Global Modifiers
Aux 1–8/9–16, ersonal Qs,
Matrixes, Groups, VCAs
To bank output faders
•Press an Output Faders switch
VCAs
To assign channels to a CA
1. Press VCAs in the Output Faders
section
2. Press Multi Assign on the VCA to
which ou want to assign channels
3. Press Select on each channel to
include in the VCA
4. Press Multi Assign on the VCA
again to confirm
Monitoring
To align the monitor bus to the main PA
1. Press and hold the Dela switch
2. Rotate the Select encoder in the ACS
Options & Snapshots section (C)
Mute Groups
To assign channels to a Mute Group
1. Press Assign
2. Press a Mute Group switch (1–8)
3. Press Select on each channel to
include in the Mute Group
4. Press Assign again to confirm
Talkback/ Osc
To route to outputs
1. Press Talkback, 2-Track or Oscillator
2. Press Route to Selected
3. Press Select on output channels
4. Press Route to Selected again
to confirm
5. Press On/Talk to activate; rotate
encoder to adjust level
Solo/ FL
To engage Solo In Place
•Press and hold Solo In Place
for two seconds
MASTER/G OBA SECTION
F
E
Mains controls
ASSIGNAB E OUTPUT FADERS
Quick Start Guide
Show VCA Members
To identify channels assigned to
each CA
1. Press Show VCA Members
2. Check the Bus Assign LEDs
in each channel; a flashing LED
indicates membership
SOFTWARE SCREENS
Inputs
View, adjust, name,
and configure
inputs
Filing
Transfer, save,
and load data
atchbay
Manage hardware
I/O routing and
channel assignment
Outputs
View, adjust, name,
and configure
outputs
Snapshots
Store, recall,
and edit snapshots
Options
Configure the
s stem, install plug-
ins, and customize
preferences
lug-ins
Assign, route, and
configure plug-ins
Use the View Mode switches (C)
or the Trackball (H) to displa the
different software screens
Customer Support USA | 1.650.731.6100 or 1.888.456.3444
www.digidesign.com UK | 44.(0).1753.653.322
Japan | 81.3.3505.3417
DIGIDESIGN VENUE
LIVE SOUND ENVIRONMENT
©
1/05. Digidesign, Digidesign Development Partners, Digi 002,
Digi 002 Rack, DigiLink, D-Show, Ethernet Expansion, FOH IOx,
FWx, FOH Rack, HD Core, Mbox, Personal Q Controller, PQ Link,
PQ Rack, PRE, Pro Tools, Pro Tools|HD,Pro Tools|HD Accel,
Snake, SRI, SRO, Stage Rack, and TDM Record are trademarks or
registered trademarks of Avid Technolog , Inc., or its subsidiaries
or divisions. All other trademarks contained herein are the prop-
ert of their respective owners. All features and specifications
subject to change without notice.
9328-11985-00 Rev.A
Assigning a Graphic EQ
(Outputs screen)
FX Returns
To bank the Main faders to FX
return channels
• Press FX 1–8 or FX 9–16
Graphic EQ
To adjust graphic EQ using the
Main faders
1. Select an output that has a GEQ
assigned
2. Press a GEQ switch to control
that bank of frequencies
Keyboard Shortcuts
To select a particular channel or
snapshot using its number or name
• T pe the number or first few
characters of the channel name
(Inputs or Outputs screen) or
snapshot name (Snapshots screen)
PUG-INS
Bus ID
Determines la out
of input channels
on Main &Sidecars
Flip to Faders
Control encoder
function using
channel faders
Source
Press to displa
channel names
or I/O assignments
Multi Assign
—Row 1
—Row 2
Press to assign
Row 2 encoders
Press to assign
Row 1 encoders
A
Select
Press to bring
an channel to
the ACS (C)
Adjusting a lug-in Inserted on
a Channel
1. Select a channel, then press an
Insert switch (1–4) in the ACS
2. Press Insert Mode to adjust
parameters using the Assignable
Output Encoders
3. Press Prev Page or Next Page to
access additional plug-in parameters
EQ and Dynamics plug-ins can also be
adjusted using the EQ and Dynamics
controls on the ACS.
INPUTS
On Sidecars & Main
C
ASSIGNAB E CHANNE SECTION (ACS)
Bus Assigns
Input Controls
Aux Sends EQ
Insert Processing
Dynamics
Direct Out
Press encoder
to activate
Selected
Channel Controls
Use - and + to scroll
through channels
Insert Mode
Press to adjust
selected plug-in
using the
Assignable Output
Encoders (D)
Gain Guess
Press and hold to
automaticall set
input gain
Console Mode
Certain operations are only
available in Config Mode
Input Direct
B passes all channel
processing and inserts
Channel Config
Options & Snapshots
Easil store and recall snapshots
View Mode
Quickl jump to an software screen
Using a lug-in as a Bus rocessor
(Figure 1)
1. Press Plug-ins (View Mode)
to displa the Plug-ins screen
2. Click the Input selector for
an available plug-in and choose
an Aux or other Bus Out
3. Click the Output selector and
assign a return channel
Inserting a lug-in on a Channel
(Figure 2)
1. Select a channel to displa it
on screen
2. Click an Insert selector and
choose an available plug-in
— Click to assign
Current routing assignment
Assigned plug-in
ower —
In/Out —
— Input (source)
— Channel Insert or Output
— lug-in Selector
— Snapshots
Installing lug-ins
1. Enable Config mode
2. Insert the plug-in CD into the
FOH Rack CD ROM drive
3. Navigate to the Options screen and
choose the Plug-ins tab
4. Select the CD ROM drive from the
Device selector
5. Choose one or more plug-ins from
the Plug-ins to Install list
6. Click the Install button
iLok USB Smart Key authorization
may be required
Assigning a lug-in to a Rack Slot
(Figure 1)
1. Enable Config mode
2. Navigate to the Plug-ins screen
3. Click the Plug-in Selector on an
empt rack slot
4. Choose an available plug-in from
the list of installed plug-ins
D
OUTPUTS
On Main
Select an Output,
(Aux, Groups,
Matrix and Q)
to control with the
output encoders
Assignable
Output Encoders
Figure 2Figure 1
Assigning Inputs to Bus Outputs
From the ACS
1. Select one or more input channels
(see Multi-Select on other side)
2. In the ACS (C), use the Bus
Assigns and Aux Sends controls
to assign routing to Mains, Groups
and Auxes
ower Up/Down Sequence
To Power Up
1. Connect the s stem (see overview)
2. Press Power on the FOH Rack
To Power Down
1. Enable Config mode
2. Choose Shutdown from the
Options>S stem Config tab
From the Outputs section
1. Press Multi Assign on the Output
(E) to which ou want to assign
channels
2. Press Select on each input channel
(A) ou want to include
3. Press Multi Assign again to confirm
Inserts section of Inputs screen
Double-click any Plug-in
to view it in Zoom mode
Rack slot on Plug-ins screen
—
—
MainSidecar
OVERVIEW
A. Input Channels
B. Input Faders
C. Assignable Channel Section (ACS)
D. Assignable Output Encoders
E. Assignable Output Faders
F. Master/Global Section
G. Meter Bridge and System Status
H. Trackball and Button Controls
Console ink
Use 110 ohm (Digital) cable
Outboard
Pro Tools Recording Option
Digital Snake
FOH ink
VGA
Stage Rack
FOH Rack
Headphones
Weight Dimensions (W x D x H)
Main & Sidecar (joined) 194 lbs (88 kg) 78.3" x 35.5" x 13.7" (1988 x 895 x 347 mm)
Main onl 121 lbs (54.9 kg) 51.7" x 35.5" x 13.7" (1313 x 895 x 347 mm)
Sidecar onl 73 lbs (33.1 kg) 28.7" x 34.8" x 13.7" (729 x 884 x 347 mm)
B
AA
B
H
C
G
D
F
E

Other DigiDesign Music Mixer manuals

DigiDesign C24 User manual

DigiDesign

DigiDesign C24 User manual

DigiDesign Command|8 User manual

DigiDesign

DigiDesign Command|8 User manual

DigiDesign Drawmer Dynamics User manual

DigiDesign

DigiDesign Drawmer Dynamics User manual

DigiDesign C24 User manual

DigiDesign

DigiDesign C24 User manual

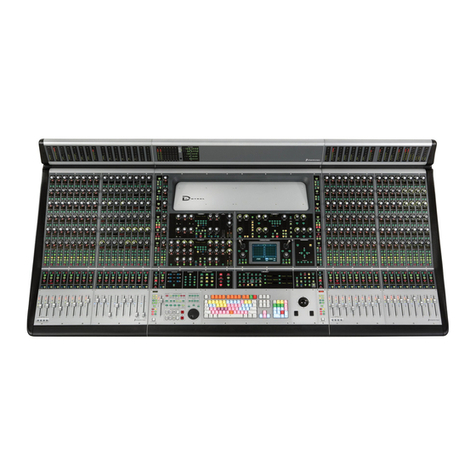
DigiDesign VENUE Profile User manual

DigiDesign

DigiDesign VENUE Profile User manual

DigiDesign Control 24 User manual

DigiDesign

DigiDesign Control 24 User manual

DigiDesign D-Control User manual

DigiDesign

DigiDesign D-Control User manual

DigiDesign Command 8 User manual

DigiDesign

DigiDesign Command 8 User manual

DigiDesign Control 24 User manual

DigiDesign

DigiDesign Control 24 User manual

DigiDesign D-Control User manual

DigiDesign

DigiDesign D-Control User manual

DigiDesign D-Show Profile User manual

DigiDesign

DigiDesign D-Show Profile User manual

DigiDesign D-Show Profile User manual

DigiDesign

DigiDesign D-Show Profile User manual

Popular Music Mixer manuals by other brands

Panasonic SHMX1200 - MIXER operating manual

Panasonic

Panasonic SHMX1200 - MIXER operating manual

Omnitronic LMC Series user manual

Omnitronic

Omnitronic LMC Series user manual

Stanton SMX.501 owner's manual

Stanton

Stanton SMX.501 owner's manual

Solid State Logic ORIGIN installation guide

Solid State Logic

Solid State Logic ORIGIN installation guide

Spirit UltraMic Plus user guide

Spirit

Spirit UltraMic Plus user guide

Sony SRP-V110 instruction manual

Sony

Sony SRP-V110 instruction manual

Kawai 4 Channel 8 Input Mixer MX-4S product manual

Kawai

Kawai 4 Channel 8 Input Mixer MX-4S product manual

Alesis iMultiMix 16 USB quick start guide

Alesis

Alesis iMultiMix 16 USB quick start guide

FONESTAR CB-119 quick start guide

FONESTAR

FONESTAR CB-119 quick start guide

Audioplex HP18AB installation manual

Audioplex

Audioplex HP18AB installation manual

YORKVILLE PowerMAX PM16 Service manual

YORKVILLE

YORKVILLE PowerMAX PM16 Service manual

Ramsey Electronics MX10 Assembly and instruction manual

Ramsey Electronics

Ramsey Electronics MX10 Assembly and instruction manual

FONESTAR FS-3000RGUB quick start guide

FONESTAR

FONESTAR FS-3000RGUB quick start guide

Gemini PS-01 Operation manual

Gemini

Gemini PS-01 Operation manual

D&R Discom 5 manual

D&R

D&R Discom 5 manual

Midas M32C quick start guide

Midas

Midas M32C quick start guide

Dynacord Discover MP7 owner's manual

Dynacord

Dynacord Discover MP7 owner's manual

Supersonic FSM-600 manual

Supersonic

Supersonic FSM-600 manual

manuals.online logo
manuals.online logoBrands
  • About & Mission
  • Contact us
  • Privacy Policy
  • Terms and Conditions

Copyright 2025 Manuals.Online. All Rights Reserved.