Digihertz Audio DK5 Vocal Effect PRO User manual

Vocal Effect PRO
DK5
Owner's Manual
DK5
MIC
User program MUS VOL/ EDIT MIC VOL EFF VOL
FBX MIC Effect Music Cen ter S ubw oof er
Main
SettingSettingSetting
STO/
STO/STO/
RCL(Hold)RCL(Hold)RCL(Hold)
Exi t(Pre ss)Exi t(Pre ss)Exi t(Pre ss)
Lock(Hol d)
Lock(Hol d)Lock(H old)
MIC
User program
FBX MIC Effect Music Cen ter S ubw oof er
Main
MUS VOL/ EDIT MIC VOL EFF VOL
Setting
STO/
RCL(Hold)
Exi t(Pre ss)
Loc k(Hol d)
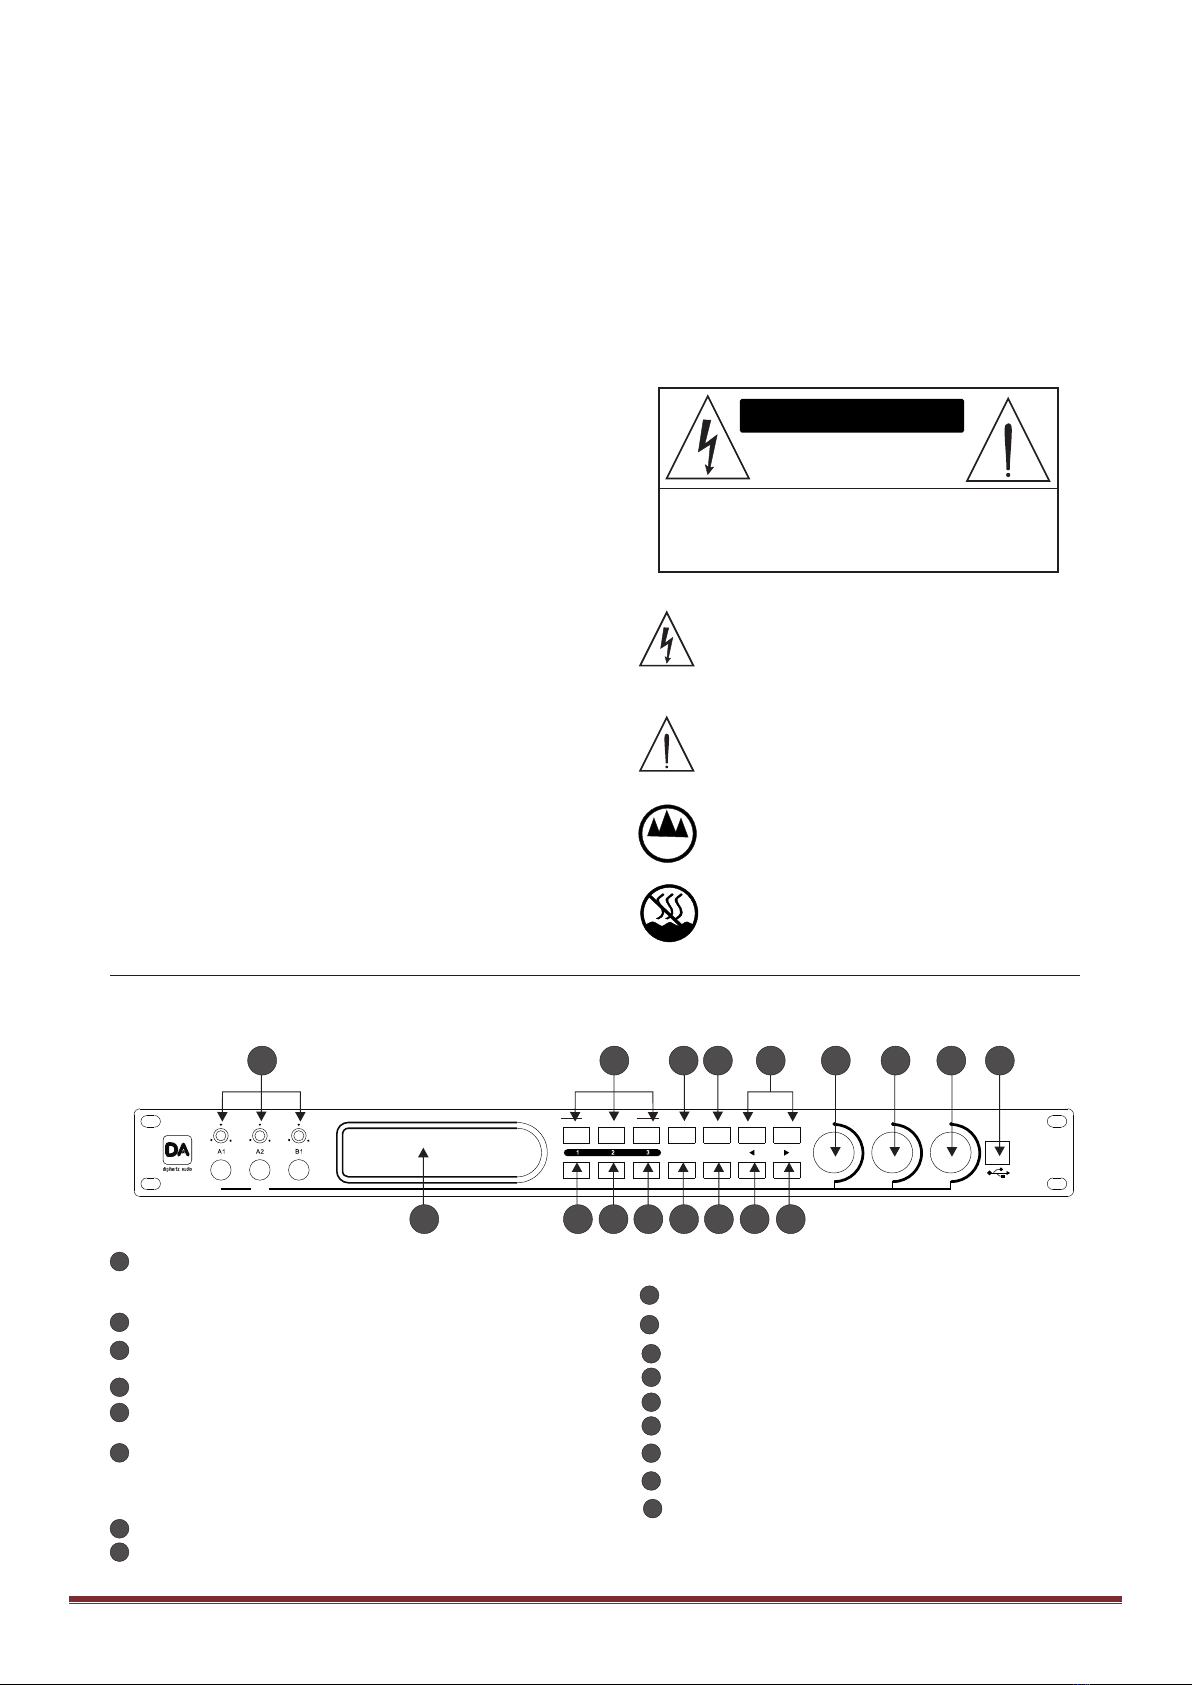
Front Panel Profile
1
12498
35 76
17 10 11 12 13 15 16
14
Direct key of user program
Microphone volume knob
Effect volume knob
1
2
3
4
5
6
7
8
9
10
11
12
13
14
15
16
17
3 microphone input jacks were divided into two groups.
(MIC 1 and 2 in the group A, MIC 3 in the group B) ,each
input has a corresponding adjustment potentiometer.
Store/ recall program key (store by press, recall by press
and hold).
Device settings key.
Arrow key of menu pages and parameters (pitch-shift
up and down of music just in the root menu).
Music volume knob/ EDIT / Exit &Lock with multiple
functions (twist the knob to adjust the volume of music
just in the root menu,otherwiseit adjusts the value of
parameter.EXIT by press, LOCK by press and hold).
USB interface(Type B).
Feedback inhibition enable or disable key.
Microphone menu key.
Effect menu key.
Music menu key.
Main outputs menu key.
Center output menu key.
Subwoofer output menu key.
Dot-Matrix LCD display, used to display a variety of
parameters adjustment information and infrared
remote receiving window.
CAUTION
RISK OF ELECTRIC SHOCK
DO NOT OPEN
CAUTION: TO REDUCE THE RISK OF ELECTRIC
SHOCK DO NOT REMOVE COVER ( OR BACK)
NO USER-SERVICEABLE PARTS INSIDE
REFER SERVICING TO QUALIFIED PERSONNEL
≤2000m
The lightning flash with arrowhead synbol within an
equilateral triangle is intended to alert the user to the
presence of uninsulated dangerous voltage within the
product's enclosure, that may be of s ufficient m agnitude
to constitute a risk of electric shock to persons.
The exclamation point within an equilateral triangle is
intended to alert the user to the presence of important
operation and maintenace (servicing) instruction in the
literature accompanying the appliance.
Onl y use it be l ow th e atti t u de of 2000m s for safty
application.
Only use it in nontropical climate condition for safty
application.
Please read the basic protective measure as below before using:
1. Please read all the safety instruction before using the product.
2. This product must be earthed. If it should be malfunction or break
down, grounding provides a path of least resistance for electric
current to reduce risk of electric shock.
3. This product is equipped with a cord having an equipment-grounding
conductor and a grounding plug. The plug must be plugged into an
appropriate outlet that is properly installed and earthed in accordance
with all local codes and ordinance.
Danger: Improper connection of the equipment-grounding
conductor can result in a risk of electric shock. Check with a
qualified electrician or serviceman if you are in doubt as to
whether the product is properly grounded. Do not modify the
plug provided with the product - if it will not fit the outlet, have
a proper outlet installed by a qualified electrician.
4. To reduce the risk of injury, close supervision is necessary when
the product is used near children.
5. Do not use this product near water-for example, near a bathtub,
washbowl, kitchen sink, in wet basement or near a swimming pool
or the lake.
6. This product may be capable of producing sound levels that cloud
cause permanent hearing loss. Do not operate for a long period of
time at high volume level or at a level that is uncomfortable. If you
experience any hearing loss or ringing in the ears, you should consult
an audiologist.
7. This product should be located so that its location or position does
not interfere with its proper ventilation.
8. This product should be located away from heat sources such as
radiators, heat registers or other products that produce heat.
9. The product should be connected to a power supply only of the type
described on the operation instructions or as marked on the product.
10. This product may be equipped with a polarized line plug (one blade
wider than the other). This is a safety feature. If you are unable to
insert the plug into the outlet, contact an electrician to replace your
obsolete outlet. Do not defeat the safety purpose of the plug.
11. The power-supply cord of the product should be unplugged from
the outlet when left unused for a long period of time.
When unplugging the power-supply cord, do not pull on the cord,
but grasp it by the plug.
12. Care should be taken so that object do not fall and liquid are not
spilled into the enclosure through opening.
13. The product should be serviced by qualified service personnel when:
A. The power-supply cord or the plug has been damaged;
B. Objects have been fallen, or liquid has been spilled into the
product;
IMPORTANT SAFETY INS TRUCTIO N C. The product has been exposed to rain;
D. The product does not appear to operate normally or exhibits a
marked change in performance;
E. The product has been dropped or the enclosure damaged;
14. Do not attempt to service the product beyond that described in the
user-maintenance instructions.
All other servicing should be
referred to qualified service personnel.
15. WARNING: Do not place objects on the product's power cord
or place it in a position where anyone could trip over, walk on
or roll anything over it. Do not allow the product to rest on or
to b e inst all ed over power cor ds of any typ e. Improper
installations of this type create the possibility of fire hazard
and/or personal injury.
16. The power-supply cord should be unplugged from the outlet when
the products is completely power off from the electric power sources
and electric networks .
DK5

HD Televison
DVD/VOD
48
6
11 12 13 15 16
14
129
35710
1
2
3
4
5
6
7
8
9
10
11
12
13
14
15
16
SUBWOO FER
CENTER
MAIN LMAIN R
MIC
RECORD
BGV
CONSOL E
COAXIA L
INPUT
OPTICA L BGM
OUT
VIDEO IN /OUT
IN 2IN 1 IN 1IN 2
L L
R R
AUDIO IN PUT
RS232C
A3A3
B2B2
SUBWOOFER
CENTER
MAIN LMAIN R
MIC
RECORD
BGV
COAXIAL
OPTICAL BGM
OUT
VIDEO IN/OUT
IN 2IN 1 IN 1IN 2
L L
R R
AUDIO INPUT
A3A3
B2B2
CONSOLE
INPUT
RS232C
Rear Panel Profile
MAINS IN,
Fuse Rating: T1AL/250VAC
~110V-240V 50/60Hz 30W,
RS232C real-time PC control interface
Digital coaxial input interface(S/PDIF)
Synchronous video output interface
3-way (background / input 1/ input 2) video input interface
Audio input(stereo background) interface
Audio input (stereo input 1) interface
Audio input (stereo input 2) interface
Stereo recording output interface
2 microphone input (A3 and B2) Jacks
Console port
Digital optical input interface(S/PDIF)
Right channel of main output
Left channel of main output
Center output
Subwoofer output
System Connection Diagram
Audio source device
Optical
Coaxial
Video output
Input 1
Input 2
Background music
Main right output
Main left output
Center output
Professional power amplifier
Microphone
On-line control
Console port
USB interface PC
Central control equipment
Infrared receiver
DVD(Input connection)
VCR(Input connection)
LD/CD(Input connection)
Recording equipment Active Subwoofer
Recording output
Background music
output 1
output 2
Subwoofer output
Microphone
MIC
Front panel
Front panel
MAINS IN
~110 V-24 0V 50/ 60H z 30W
MAINS IN
~110 V-24 0V 50/ 60H z 30W
2

B G M F B X 0 0
B G M F B X 0 0
Product Features
uThis p r o d u c t de p l o y s of 32 - b it h i g h pe r f o r m a n c e DS P a n d
AD /DA, 48k Hz sampling rat e of professional digit al multi -
Channel Voice processor.
uHigh quality professional vocal effects (Reverb, Echo, Reverb
+ Echo).
uAutomatic digital feedback inhibition, 5 optional.
u15 level stereo music pitch-shifter.
uParametric equalizer (can be set to l o w - s h e l f / h i g h - s h e l f
filter):
uMusic (left / right) 10 bands, Microphone (A/B) 15 bands, Echo
10 bands, Reverb 10 bands,
uThe m a i n ou t p u t (l e f t / r i g h t ) 7 bands, Center 7 ba n d s ,
Subwoofer 5 bands.
uInputs, Outputs, Echo and Reverb have high-cut and low-cut
filters with 12dB / 18dB / 24dB / 48dB of Bessel / Butterworth /
Linkwitz-Riley
uEach input and output c hannel is equipped with high quality
compressor.
uThe music and the ou tput channel s are equipp e d wit h del a y
function
uEach output channel with matrix volume function
uAdju stmen t of Music (left / r ight) , Microphone (A/B), Mai n
output (left / right),and Surround (left / right) can be Linked
u3 groups of audio and video input (background / input 1/ input
2),2 groups of digital audio input (coaxial, optical).
uVOD computer in t erface, in f r ared re m o t e contr o l , console
interface, connect to various equipment conveniently.
Computer real-time control by RS232C and USB, all parame-
ters can be adjusted
uExtremely low noise floor.
uInitialize mode optional (Auto save or user programs 1-3).
uAutomatic switching two modes between sing and disco.
u132*32 dotmatrix LCD display.
uMass storage: 15 user program.
1. Connect the power cable, turn on the power switch, Logo and
Model will be showed on screen as follows:
2. Then display version and status, the device starts to load the
data. Initialize mode optional (Auto save or user program 1-3), as
follows:
3. Enter the boot screen after the completion of the loading.The
boot screen shows the current volume of microphone, music and
effe ct , t he thir d ro w is hi gh lighted char acte rs and the signifi-
cance are as follows: the current music i n p u t p o r t , t h e o u t p u t
mode, th e p a n e l lock, function lock , musi c pitch, feedback
inhibition, as shown in the following figure:
Music Menu:
1. To switch the various pages of music menu by continue press
Key [Music]. Tips, press Key [ ] for back to last page, easy to
adjust the parameters in front and back pages, if needed.
Normal Boot Process
TOP Voice
Version * .**
Loading user 1
MIC: -25.0dB MUS: -22.0dB
EFF: -9.0 dB
B G M F B X 0
0
0
Type: PEQ/ Low-shelf / High-shelf
Frequency: 19.7Hz - 20200Hz
Gain: -15dB to +12dB, step 0.1dB
Bandwidth: 0.011~3.595
(5) Low-cut and High-cut filters of music (left and fight
channels can be adjusted separately):
Frequency of Low-cut filter: 19.7Hz – 202Hz
Frequency of High-cut filter: 12100Hz - 20200Hz
Roll-off of filters: 12dB, 18dB, 24dB, 36dB
Type of filters: Bessel, Butterworth, Linkwitz-Riley
(6) Delay of Music (left and fight channels can be adjusted
separately):
On / off
0.0mS to 50mS, step 0.1mS
(7) Compressor of music (left and right channels can be
adjusted separately):
Off / Hard-knee / Soft-knee typeⅠ / Soft-knee type Ⅱ /
Soft-knee type Ⅲ / Soft-knee type Ⅳ / Soft-knee typeⅤ
Threshold: -20dBu to 14.3dBu, step 0.5dB
Ratio: 1:1 to 16:1, step 2:1
(8) Noise gate of music (left and right channels can be adjusted
separately):
Off, or -90dB to 42dB, step 1dB
(9) Pitch-shifter of music (in the boot menu, press keys [ ]
and [ ] to adjust the pitch):
15 grads, b7 to #7, step 100 cent
(10) Gain trim of music inputs:
Analog inputs (BGM/IN1/IN2) : 0dB, +3dB or +6dB
Digital inputs (S/PDIF, coaxial or optical): -12dB to 0dB,
step 0.5dB
(11) Linking left and right channels of music
Yes / No
1. To switch the various pages of microphone menu by continue
press Key [MIC]. Tips, press Key [ ] for back to last page, easy
to adjust the parameters in front and back pages, if needed.
2. Twist the knob [EDIT] to adjust parameters.
3. Press key [ ] and [ ] to change the cursor's position of
same page, to adjust various parameters.
4. Microphone parameters are as follows:
(1) Microphone volume:
Mute, or -30dB to +12dB,step 0.5dB
(2) The left and right microphone volume:
Mute, or -30dB to 0dB,step 0.5dB
(3) The volume of direct sound:
Volume: 0% to 100%, step 1%
Phase inverter: 0°/ 180°
(4) Microphone equalizer (15 bands,group A and B can be
adjusted separately):
Type: PEQ/ Low-shelf / High-shelf
Frequency: 19.7Hz to 20200Hz
Gain: -15dB to +12dB, step 0.1dB
Bandwidth: 0.011 to 3.595
(5) Low-cut and High-cut filters of music (group A and B can
be adjusted separately):
Frequency of Low-cut filter: 19.7Hz – 202Hz
Frequency of High-cut filter: 12100Hz - 20200Hz
Roll-off of filters: 12dB, 18dB, 24dB, 36dB
Type of filters: Bessel, Butterworth, Linkwitz-Riley
(6) Compressor of microphone (left and fight channels can be
adjusted separately):
Ratio: 1:1 to 16:1, step 2:1
(7) Noise gate of microphone (group A and B can be adjust
2. Twist the knob [EDIT] to adjust parameters.
3. Press key [ ] and [ ] to change the cursor's position of same
page, to adjust various parameters.
4. The related parameters of the music are adjusted as follows:
(1)Music input selection:
Background music, input 1, input 2, coaxial (S/PDIF),
optical (S/PDIF)
(2) The volume of music:
Mute, or -30dB to +12dB, step 0.5dB
(3) The volume of the left and right channels of music
Mute, or -30dB to +12dB, step 0.5dB
(4) Music equalizer (10 bands, left and right channels can be
adjusted separately):
Microphone Menu
3

Threshold: -20dBu to 14.3dBu, step 0.5dBu
Ratio: 1:1 to 16:1, step 2:1
(8) Linking channel L and R of main output:
Yes / No
Frequency of Low-cut filter: 19.7Hz – 202Hz
Frequency of High-cut filter: 12100Hz - 20200Hz
Roll-off of filters: 12dB, 18dB, 24dB, 36dB
Type of filters: Bessel, Butterworth, Linkwitz-Riley
(4) Volume of main output matrixes (channel L and R can be
adjusted separately):
Volume of music: Mute, or -30dB to 0dB, step 0.5dB
Volume of direct sound: Mute, or -30dB to 0dB, step 0.5dB
Volume of echo: Mute, or -30dB to 0dB, step 0.5dB
Volume of reverb: Mute, or -30dB to 0dB, step 0.5dB
(5) Phase inverter of main output (channel L and R can be
adjusted separately):
0°/ 180°
(6) Delay of main output (channel L and R can be adjusted
separately):
On / Off,
0.0mS to 7mS, step 0.1mS
(7) Compressor of main output (channel L and R can be
adjusted separately):
Off / Hard-knee / Soft-knee typeⅠ / Soft-knee type Ⅱ / Soft-
knee type Ⅲ / Soft-knee type Ⅳ / Soft-knee type Ⅴ
1. To switch the various pages of Center output menu by continue
press Key [Center]. Tips, press Key [ ] for back to last page,
easy to adjust the parameters in front and back pages, if needed.
2. Twist the knob [EDIT] to adjust parameters.
3. Press key [ ] and [ ] to change the cursor's position of
same page, to adjust various parameters.
4. Center output parameters as follows:
(1) Center output volume:
Mute, or -30dB to +6dB, step 0.5dB
(2) Center output equalizer (7 bands):
Type: PEQ/ Low-shelf / High-shelf
Frequency: 19.7Hz to 20200Hz
Gain: -15dB to +12dB, step 0.1dB
Bandwidth: 0.011 to 3.595
(3) Low-cut and High-cut filters of center output:
Frequency of Low-cut filter: 19.7Hz – 303Hz
Frequency of High-cut filter: 2520Hz – 20200Hz
Roll-off of filters: 12dB, 18dB, 24dB, 36dB
Type of filters: Bessel, Butterworth, Linkwitz-Riley
(4) Volume of center output matrixes:
Volume of music: Mute, or -30dB to 0dB, step 0.5dB
Volume of direct sound: Mute, or -30dB to 0dB, step 0.5dB
Volume of echo: Mute, or -30dB to 0dB, step 0.5dB
Volume of reverb: Mute, or -30dB to 0dB, step 0.5dB
(5) Phase inverter of center output: 0°/ 180°
(6) Delay of center output:
On / Off,
0.0mS to 21mS, step 0.1mS
(7) Compressor of center output:
Off / Hard-knee / Soft-knee typeⅠ / Soft-knee type Ⅱ /
Soft-knee type Ⅲ / Soft-knee type Ⅳ / Soft-knee type Ⅴ
Threshold: -20dBu to 14.3dBu, step 0.5dBu
Ratio: 1:1 to 16:1, step 2:1
Center Output Menu
Subwoofer Output Menu
separately):
Off, or -90dB to 42dB, step 1dB
(8) Linking group A and B microphone
Yes / No
(9) Feedback inhibition of microphone:
5 grads, level 1 to 5
1. To switch the various pages of effect menu by continue press
Key [Effect]. Tips, press Key [ ] for back to last page, easy to
adjust the parameters in front and back pages, if needed.
2. Twist the knob [EDIT] to adjust parameters.
3. Press key [ ] and [ ] to change the cursor's position of same
page, to adjust various parameters.
4. Echo parameters as follows:
(1) Echo volume: Mute, or -30dB to 0dB, step 0.5dB
(2) Phase inverter: 0°/ 180°
(3) Echo mode: mono echo / stereo echo / dual echo
(4) Echo to Reverb: On / Off
(5) Delay time of ECHO 1/2 100ms to 600ms, step 5ms
(6) Depth of ECHO 1/2 0% to 99%, step 1%
(7) Pre-delay of ECHO 1/2 0ms to 200ms, step 1ms
(8) Delay time of ECHO 1/2 100ms to 600ms, step 5ms
(9) Depth of ECHO 1/2 0% to 99%, step 1%
(10) Pre-delay of ECHO 1/2 0ms to 200ms, step 1ms
(11) Echo equalizer (10 bands):
Type: PEQ/ Low-shelf / High-shelf
Frequency: 19.7Hz to 20200Hz
Gain: -15dB to +12dB, step 0.1dB
Bandwidth: 0.011 to 3.595
(12) Low-cut and High-cut filters of Echo:
Frequency of Low-cut filter: 19.7Hz – 1000Hz
Frequency of High-cut filter: 8000Hz - 20200Hz
Roll-off of filters: 12dB, 18dB, 24dB, 36dB
Type of filters: Bessel, Butterworth, Linkwitz-Riley
5. Reverb parameters as follows:
(1) Reverb volume: Mute, or -30dB to 0dB, step 0.5dB
(2) Phase inverter: 0°/ 180°
(3) Type of reverb: Off/ Room / Small Hall / Hall / church /
Cathedral/Vocal
(4) Pre-delay of Reverb: 0ms to 250ms, step 10ms
(5) Reverb time: 0.5s to 6s, step 0.1s
(6) Reverb equalizer (10 bands):
Type: PEQ/ Low-shelf / High-shelf
Frequency: 19.7Hz to 20200Hz
Gain: -15dB to +12dB, step 0.1dB
Bandwidth: 0.011 to 3.595
(7) Low-cut and High-cut filters of Reverb:
Frequency of Low-cut filter: 19.7Hz – 1000Hz
Frequency of High-cut filter: 8000Hz - 20200Hz
Roll-off of filters: 12dB, 18dB, 24dB, 36dB
Type of filters: Bessel, Butterworth, Linkwitz-Riley
6. Effect parameters as follows:
Effect volume: Mute, or -30dB to +6dB, step 0.5dB
1. To switch the various pages of Main output menu by continue
press Key [Main]. Tips, press Key [ ] for back to last page, easy
to adjust the parameters in front and back pages, if needed.
2. Twist the knob [EDIT] to adjust parameters.
3. Press key [ ] and [ ] to change the cursor's position of same
page, to adjust various parameters.
4. Main output parameters as follows:
(1) The left and right channel of main output volume:
Mute, or -30dB to +6dB, step 0.5dB
(2) Main output equalizer (7 bands, channel L and R can be
adjusted separately):
Type: PEQ/ Low-shelf / High-shelf
Frequency: 19.7Hz to 20200Hz
Gain: -15dB to +12dB, step 0.1dB
Bandwidth: 0.011 to 3.595
(3) Low-cut and High-cut filters of main output (channel L and
R can be adjusted separately):
1. To switch the various pages of Subwoofer output menu by
continue press Key [Subwoofer]. Tips, press Key [ ] for back to
last page, easy to adjust the parameters in front and back pages, if
needed.
2. Twist the knob [EDIT] to adjust parameters.
3. Press key [ ] and [ ] to change the cursor's position of same
page, to adjust various parameters.
4. Subwoofer output parameters as follows:
(1) Subwoofer output volume:
Mute, -30dB to +10dB, step 0.5dB
(2) Subwoofer output equalizer (5 bands):
Type: PEQ/ Low-shelf / High-shelf
Frequency: 19.7Hz to 20200Hz
Effect Menu
Main Output Menu
4

Initialized mode
Function description
Auto save
User program
1-3
The function of this option is to automatically
save all settings of user, shut down the device
or suddenly power drop, then automatically
reload to the last status. Especially suitable
for situation that is tuning or often need to
change the device settings.
Regardless of the status of the shutdown, the
corresponding user program (1 to 3) will be
automatically recalled on reboot. This function
suitable for situation of the KARAOK, in
order to reduce the workload of tuner.
Options [Initial] of the menu [Setup], to configure the initialized
mode, there are four options, Auto save and user program 1-3.
Initialized Mode Selection
Gain: -15dB to +12dB, step 0.1dB
Bandwidth: 0.011 to 3.595
(3) Low-cut and High-cut filters of subwoofer output:
Frequency of Low-cut filter: 19.7Hz – 1000Hz
Frequency of High-cut filter: 35.1Hz – 2000Hz
Roll-off of filters: 12dB, 18dB, 24dB, 36dB
Type of filters: Bessel, Butterworth, Linkwitz-Riley
(4) Volume of subwoofer output matrixes:
Volume of music: Mute, or -30dB to 0dB, step 0.5dB
Volume of direct sound: Mute, or -30dB to 0dB, step 0.5dB
(5) Phase inverter of subwoofer output: 0°/ 180°
(6) Delay of center output:
On / Off,
0.0mS to 21mS, step 0.1mS
(7) Compressor of subwoofer output:
Off / Hard-knee / Soft-knee typeⅠ / Soft-knee type Ⅱ /
Soft-knee type Ⅲ / Soft-knee type Ⅳ / Soft-knee type Ⅴ
Threshold: -20dBu to 14.3dBu, step 0.5dBu
Ratio: 1:1 to 16:1, step 2:1
Setting Menu
1. To switch the various pages of setup menu by continue press
Key [setting]. Tips, press Key [ ] for back to last page, easy to
adjust the parameters in front and back pages, if needed.
2. Twist the knob [EDIT] to adjust parameters.
3. Press key [ ] and [ ] to change the cursor's position of same
page, to adjust various parameters.
4. Setting parameters as follows:
(1) Initialized mode:
Auto save or User programs 1-3
(2) Limits of maximum volume:
Music: Mute, or -30dB to +12dB, step 0.5dB
Microphone: Mute, or -30dB to +12dB, step 0.5dB
Effect: Mute, or -30dB to +6dB, step 0.5dB
Main output: Mute, or -30dB to +6dB, step 0.5dB
Center output: Mute, or -30dB to +6dB, step 0.5dB
Subwoofer output: Mute, or -30dB to +10dB, step 0.5dB
(3) Limits of Gain of equalizer:
Music: +6.0dB to +12.0dB, step 0.1dB
Microphone: +6.0dB to +12.0dB, step 0.1dB
Effect: +6.0dB to +12.0dB, step 0.1dB
Main output: +6.0dB to +12.0dB, step 0.1dB
Center output: +6.0dB to +12.0dB, step 0.1dB
Subwoofer output: +6.0dB to +12.0dB, step 0.1dB
(4) Automatic recovery of music pitch:
On / Off
Threshold: -30dB to 0dB, step 0.5dB
Time: 0 to 60S
(5) Sing mode switch to disco:
Auto / Sing / Disco
Threshold: -30dB to 0dB, step 0.5dB
Time: 0 to 60S
Program Storage / Recall
1. Program storage
(1) Press Key [STO/RCL] to store program, then a
confirmation dialog appears, as shown below:
(2) Twist the knob [EDIT] to select the sequence number of
stack to be stored, the follow character indicates the status
of stack,“Used” or “Empty”.
(3) Press key [STO/RCL] to confirm, there will be two
situations:
If the status of stack is “Empty”, then will store directly to
finish the steps, Else if the status of stack is “Used”, a
confirmation dialog will appears again, as shown below:
Save to
User program 1? “Empty”
1
(4) Press key [ ] to cancel, key [ ] to confirm.
2. Program recall
There are two ways to recall the user program,
Ways1: Press keys [1],[2],[3] to recall the program 1-3 quickly
and directly.
Ways2:To recall more other user programs, the seteps as follows:
(1) Press and hold the Key [STO/RCL], to enter the program
recalling process, a dialog as follows,
(2) Twist knob [EDIT] to select the sequence number of stack
to be recalled, the follow character indicates the status of
stack, “Used” or “Empty”.
(3) Press key [SOT/RCL] again to confirm the sequence
number, tip recalling failed and exit the recalling process if
the stack is “Empty”. Otherwise forward to the final
confirmation if the stack is “Used”, dialog as shown below.
(4) Press key [ ] to cancel, key [ ] to confirm.
Cover user programs 1 ?
“ ” : No “ ”: Yes
1
Recall
user program 1 ? “used”
Output Mode (Sing / Disco)
1. Function description:
(1) Each output port (Main left, Main right, Center,
Subwoofer) has two sets of equalizer and volume setting,
refer to sing mode and disco mode respectively;
(2) These two modes can be switched manually or
automatically, its working principle is that when all the
MIC input has no signal and reach the setted time, the
output will be switched to the disco mode. When any one of
the mic inputs is activated, working mode switched back to
the sing.
(3) The range of threshold that a signal from microphone
inputs can be considered effectively is: -30dB to 0dB, range
of time is: 0s to 60s.
2. Setting process:
(1) Select for sing mode manually, and set the parameters for
the equalizer and volume,
(2) Select for disco mode manually, and set the parameters for
the equalizer and volume,
(3) Set an appropriate threshold and time for the microphone,
and choose the auto mode, and then device will work well.
Recall user Memory 1 ?
“ ” : No “ ”: Yes
Limits of Maximum Volume and Gain:
1. Function description:
To make the volume output in a certain range, the effective
5

protection of the amplifier and speaker. Avoid destroy the sound
field because setting the volume is too large.
For example:
When the microphone parameter is set to -10dB, then the upper
limit value of the microphone volume is -10dB, when using the
microphone volume knob or remote control to adjust the
microphone volume, the maximum output volume is -10dB.
Automatic Recovery of Music Pitch:
1.When users indue to their own physiological can not reach the
original song's pitch, to adjust the pitch of musical
accompaniment manually;
2.When detect the existing song ended, the next song will
automatically return to the original pitch.
3.When you do not need to automatically recover, this function
can be disable in device settings.
4.By setting the "threshold" and "time", making the functionmore
practical use.
Panel Lock, Function Lock
1. Panel lock: Press and Hold the Key [Lock]which it combined
with the knob [MUS VOL / EDIT] to enable the panel lock, Do it
again to unlock.
2. Function lock: Just set up in the GUI (Graphical User
Interface). By Menu ->System -> Lock.
Warning: This operation will lose all the data on the device.
Press and hold the keys [Music]+ [Main] , Turn on the AC power
switch, until the LCD monitor shows "RESET...", wait a moment
so that the monitor shows “Succeed”, then device will recovery to
factory settings.
Press the Key [Exit] return the root of menu, or automatically
return to the root menu when no operation of button or knob after
180 seconds approximately.
Simple and easy to use remote control functions, the use of
manual operation. Simple parameter adjustment, make you easy
and fast adjust the frequent parameter settings. As the following
table.
Infrared Remote Keys Description
The code is hexadecimal, user code is 82H.
Buttons Codes
(Hex) Buttons Codes
(Hex)
FBE
BGM
IN 1
COAXIAL
OPTICAL
PRESET/ USER
1
00
Null
04
03
02
05
06
0A
2
3
4
5
6
7
8
9
Mic+
09
08
0B
0C
0D
10
0F
0E
11
Mic-
Music+
Effect+
Effect-
b
#
SUB+
17
12
18
13
19
16
15
14
1B
CENT+
SUR+
1D
1E
1F
CINEMA/KTV
Null
Null
Null
IN 2 Music-
SUB-
CENT -
SUR-
FBE
1
4
7
3
6
9
2
5
8
CINEMA/KTV
Mic+
IN 1 IN 2
BGM
COAXIAL
Music+
Music-
Effect+
Effect-
PRESET/ USER
OPTICAL
b#
SUB+
Mic-
SUB-
CENT+ SUR+
CENT - SUR-
Remote control
Console Description
As shown in the following schematic, the console port has 5 pins,
which have 2 input signal lines and 2 ground lines. In practical
applications, only one of the two signal lines is required.
Ground
Two signal inputs
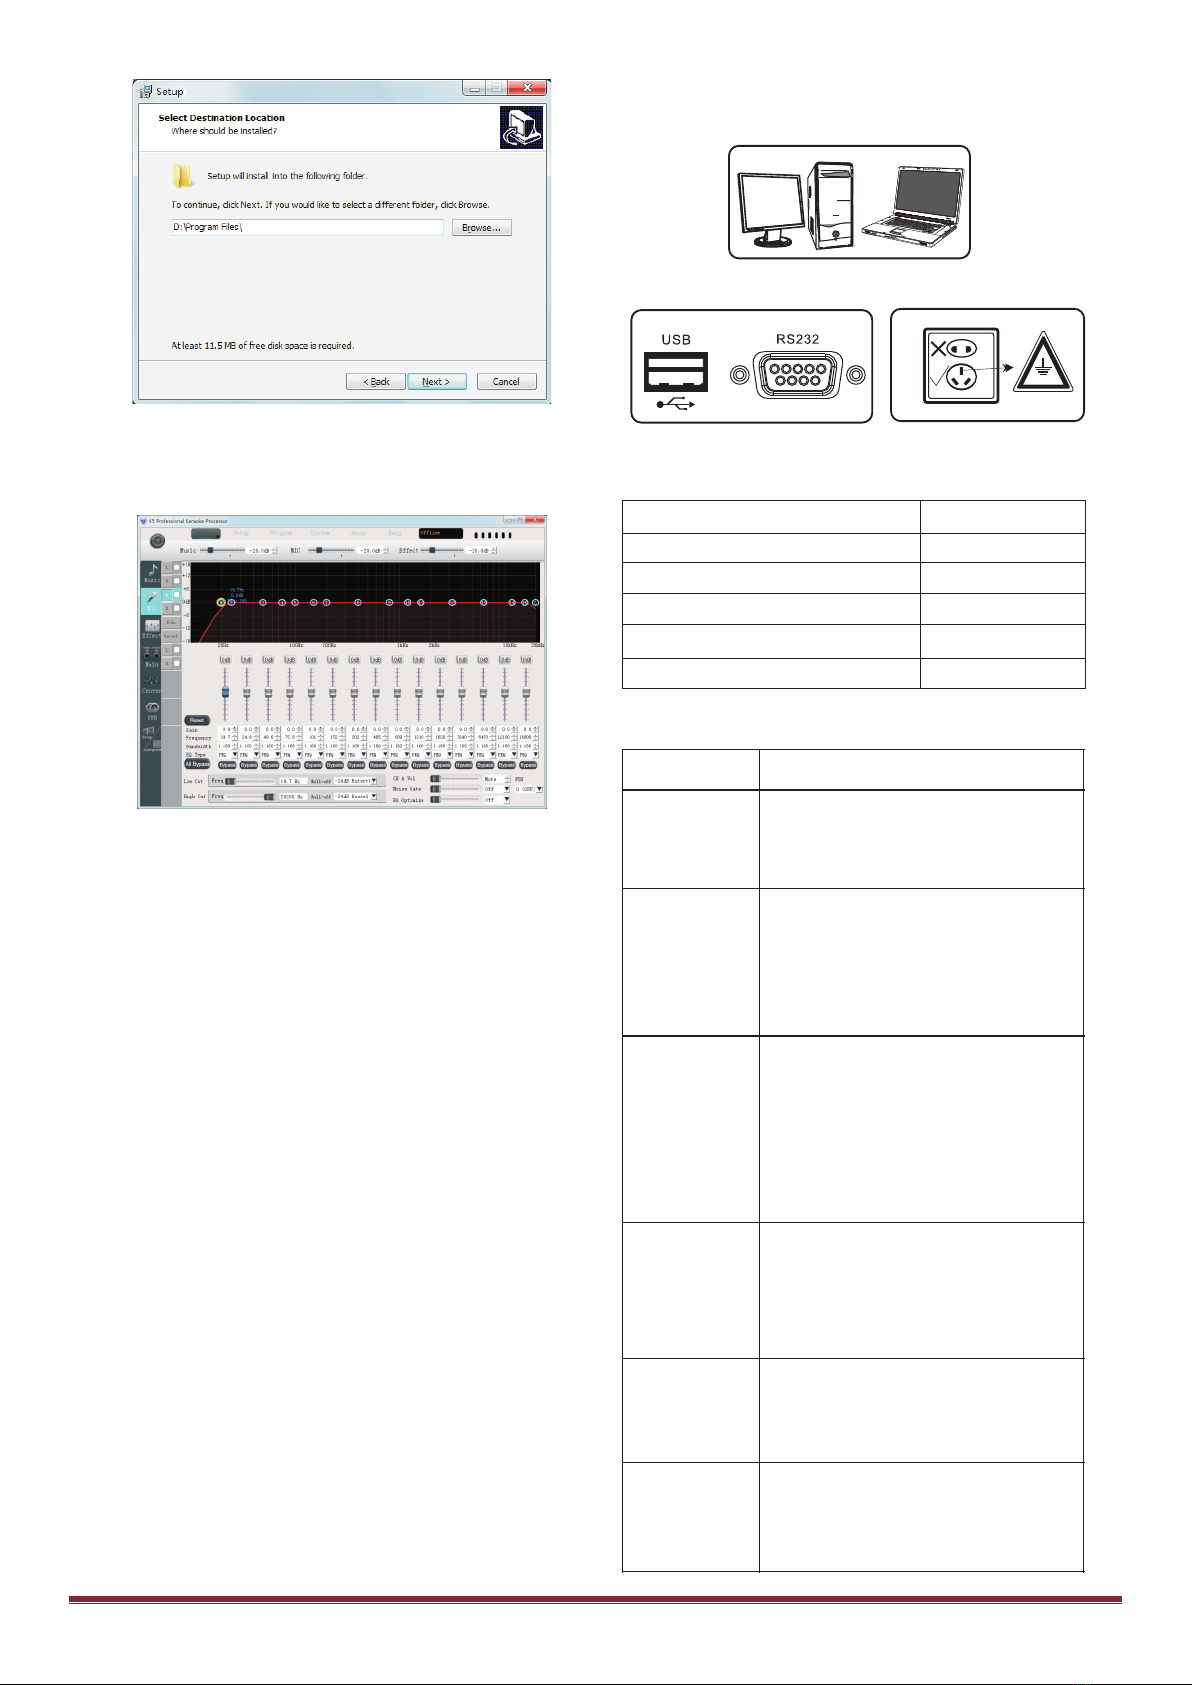
GUI Software Installation Guide
1. Put into the disk of accessories, open the CD-ROM and launch
the application“Setup.exe” for installation.
2. The installation window appears, click the Next to continue.
3. Software will ask you to choose the installation path, and then
click next to continue.
4. Follow the wizard until the installation is complete.
BGM, IN 1, IN 2
Select analog input interface for music,
Background/Input 1/input 2
COAXIAL, OPTICAL
Select digital input interface (S/PDIF) for
music
1-9
Press these keys to recall the user program
1-9 directly
CINEMA / KTV
Function of the key is not defined. Device will
ignore it
MIC+, MIC-
Increase or decrease the volume of Microphone
MUSIC+, MUSIC-
Increase or decrease the volume of Music
EFFECT+, EFFECT-
Increase or decrease the volume of Effect
b, ㄆ, #
Adjust the pitchof music,eg: Falling / Original
/ Raising
SUB+, SUB-
Increase or decrease the volume of Subwoofer
CENT+, CENT-
Increase or decrease the volume of Center
SUR+, SUR-
Function of the key is not defined. Device will
ignore it
Keys name Functions
FBE
Enable or disable feedback inhibition function
PRESET / USER
Function of the key is not defined. Device will
ignore it
Restore to Factory Settings
Return to the Root Menu
Infrared Remote
Remote Code Table
6
5. Please confirm that computer and device have been properly
connected.Launch the GUI application, click Button “Online” in
the menu,and select“USB” or “COM” to connect the device,
which depends on how you actually connected the interface.
GUI Software Notes
All the panel buttons and the knobs cannot be controlled when the
device is connected to the GUI.
No need to select which one serial port, software can
automatically search.
USB driver free.
GUI software can set all the parameters of the device.
Please refer to the help documentation for the GUI software
operation instructions.
Before the user is online control operation, be sure to read the
following notes in detail:
Otherwise it will increase the risk of abnormal conditions such as
offline, computer damage, and so on when you are online:
1.In order to ensure the normal operation of the device, please
firstly check AC power if in the range of the device.
2.If conditions permit, AC power outlet needs to have the
grounding connection settings. And use a grounding power
connected to the computer and the device.
3.The same model and the same version of GUI software don't
repeatedly install.
4. All of the GUI software don't install in the same directory.
5. To avoid the use in strong interference and strong magnetic
field environment.
6.The following acts may lead to the failure of online control, and
even damage the device or your computer:
1) Before the implementation of online, Please do not plug in or
pull out the line connected the device after it is turned on.
2) After the success of online, please do not move the computer,
device and control line.
3) After the success of online, please do not operate by panel;
including touching any keys on the device.
4) After the success of online, please do not go to plug the device
or personal computer online connector.
5) After the success of online, please do not open the same type
of online control software in the computer.
6) After the success of online, please do not use a computer to
control many different device.
Necessary Online Control Tips:
7. Please refer the important security matters content from the
manual.
Available online computer
Available online interface ACPower Grounding
Ground
Accessories
Frequent Troubleshooting Guidelines
Troubleshooting method
1.Check the power cable is
connected correctly.
2. Check the fuse is burned.
3. Check the power switch is closed.
GUI cannot be
online with
device
1. Check the communication cable is
connected correctly
2. If you use the RS232C port in the back of
the device, make sure that USB cable is not
connected.
3.Reopen the GUI software and reconnect the
communication cable.
1. Check all the input signals are normal.
2. Check all the output connection is correct,
include power amplifier and loudspeakers.
3. Restart the device.
4. Restore to factory status, Please refers to
the relevant chapter above.
5. Try to restart the device many times is still
unable to solve the fault, please contact the
distributor to resolve
No sounds output
Issues
LCD monitor no
display, light-
emitting diodes
(LED)are dark
LCD displays
fault tips,“error
xx”
LCD displays
fault tips:
“Storage error”
LCD display
fault tips:
“DSP1 error”
1.Restart the device.
2. Restore to factory status, Please
refers to the relevant chapter above.
3. Try to restart the device many times is
still unable to solve the fault, please
contact the distributor to resolve
1. Restart the device
2. Try to restart the device many times is
still unable to solve the fault, please
contact the distributor to resolve
1. Restart the device
2. Try to restart the device many times is
still unable to solve the fault, please
contact the distributor to resolve
Quantity
Description
1
RS232C Cable
1
USB Cable
1
Product software CD
1
Remote Control
1
Product user guide (This document)
7

Above Technical Changes without Notice
Te ch ni ca l s p eci fica tion
M us ic P a rt
S N R Fl at, O rigi n al pit ch 1 0 7 d B (an al o g ), 1 1 4 d B (d igit al)
T H D + N Ou t p u t 1 Vrm s @ 1 k H z 0 .0 0 2 % (an alo g ), 0 .0 0 1 % (d i g ita l)
F req u e n cy R es p o n se M a in / C e n ter o u tpu t 2 0 H z -2 0 k Hz ±0 .5 d B
Su b w o o fer o u tpu t 2 0 H z -2 0 0 0 Hz ±0 .5 d B
M ax i m u m In p u t Lev el An a lo g in p u t: B G M / IN 1 / IN 2 4 V rm s
Di g ita l in p u t : O ptica l / C o a x ial 0 d B FS = 2V rm s
M ax i m u m O u tpu t L ev el 4 V rm s
G ai n A n a log inp u t: B GM / IN 1 / IN 2 -3 0 d B to + 1 8 d B
Di g ita l in p u t : O ptica l / C o a x ial -3 0 d B to + 1 2 d B
P i tch -S h ifte r b 7 to # 7 , S tep 1 0 0 c en t (h al f-ton e)
M icro p h o ne P a rt
S N R E ffect b y p as s 9 9 d B
T H D + N E ffect b y p as s,
Ou t p u t 1 Vrm s @ 1 k H z
0 .0 0 6 %
F req u e n cy R es p o n se M a in / C e n ter o u tpu t 2 0 H z -2 0 k Hz ±0 .5 d B
Su b w o o fer o u tpu t 2 0 H z -2 0 0 0 Hz ±0 .5 d B
S en s it ivit y / Im p ed a n ce Fro n t In p u ts (3 C H s ) 3 1 m V rm s /3 .3 k Ω
B ack In p u t s(2 C H s) 4 4 m Vrm s /1 0 k Ω
G ai n Fro n t In p u ts (3 C H s ) 30 d B to 4 2 d B
B ack In p u t s (2 C H s) 3 9 d B
V id eo Pa rt
In p u t / O utpu t 3 in p u ts an d 1 o u t pu t, s yn c h ro n o us l y s w itc h ing w ith m usi c
S en s it ivit y / Im p ed a n ce 1 V p p / 7 5 Ω
P a ra m etr ic E Q & H P F / L PF
P ara m et ric E Q M u s ic : 1 0 b an d s , M ic: 15
b an d s , M a in: 7 b an d s , C e nt er: 7
b an d s , Su b w oo fer: 5 b a n d s,
E ffect : 10 b an d s
Fre q .:1 9 .7 Hz -2 0 .2 k H z ,
1 9 .7 H z -2 0 00 H z (S u b w oo fer)
B an d w idth (O ct ):0.0 1 1 -3 .5 9 5 G ain :-1 5 d B to + 1 2 d B
Gro u p A & B o r ch an n e l L & R , ca n b e ad j ust ed ind ep e n d en tl y
H P F/ LP F HP F Fre q .:1 9 .7 H z -20 2 Hz L P F F req .:1 2 .1 k H z-2 0 .2 k H z
Type: Flat/ Bessel/Butterw orth
/Linkwitz-Riley
Roll-off:12dB,18dB,24dB,36dB,48dB
Other d escription
Remote 1 infrare d receiver, 1 console port (5 pi ns, type S soc ket)
Onl ine c ontrol port 1 RS232C port (9 pins, type D-SUB, fem ale), 1 USB port (type B, driver
free)
Mains In AC 176 to 264/50H z
Pow er Consumption =13.5W
Fuse Siz e T1AL/250VAC
Ne t w eight 3.0kg
Dimensions (L×W×H ) 482×158×45(mm )
8

Signal Flow Graph
MIC-A IN
MUSIC-L IN
MIC-B IN
MI C VOL
15 PEQS
EQ O PT IM IZ E
COMPRESSOR
FB I NHIBITION
HPF/LPF
MIC VOL
15 PEQS
EQ OPTIMIZE
COMPRESSOR
FB I NHIBITION
HPF/LPF
NOISE GATE
MUSIC VOL
STEREO PITCH
-SHIFTER
HPF/LPF
NOISE GATE
MUSIC VOL
STEREO PITCH
-SHIFTER
HPF/LPF
NOISE GATE
NOISE GATE
MUSIC-R IN
DIRECT SOUND
VOLUME/PHASE
EFFECT VOL
HPF/LPF
10 PEQS
ECHO
EFFECT VOL
HPF/LPF
10 PEQS
REVERB
10 PEQS
COMPRESSOR
10 PEQS
COMPRESSOR
MATRIX
VOLUME
PHASE INVERT
VOLUME
HPF/LPF
7 PE QS
DELAY
COMPRESSOR
PHASE INVERT
VOLUME
HPF/LPF
7 PE QS
DELAY
COMPRESSOR
7 PE QS
DELAY
COMPRESSOR
PHASE INVERT
VO LUME
HPF/LPF
7 PE QS
DELAY
COMPRESSOR
MAIN-L
OU T
MAIN-R
OU T
CENTER
OU T
SUBWOOFER
OU T
PHASE INVERT
VOLUME
HPF/LPF
9
Table of contents
Popular Recording Equipment manuals by other brands


Velleman
Velleman USB INTERFACE KIT FOR ROBOTIC ARM Assembly and instruction manual

Mackie
Mackie SDR24/96 Operation guide

Comelit
Comelit 1468 Programming manual

Changzhou Xionghua Tongtai Atuomation Equipment
Changzhou Xionghua Tongtai Atuomation Equipment XHYK-10 manual

DuTCH audio
DuTCH audio IM1.3 manual

Hamilton Air
Hamilton Air 5501 Series Operator instructions


