Digital Life RP49-C User manual

SPECIAL MESSAGE SECTION
PLEASE READ CAREFULLY BEFORE PROCEEDING
This product utilizes batteries or an external power supply (adapter). DO NOT connect
this product to any power supply or adapter other than one described in the manual, on
the name plate, or specifically recommended by Digitallife.
WARNING: Do not place this product in a position where anyone could walk on, trip over,
or roll anything over power or connecting cords of any kind. The use of an extension cord
is not recommended! If you must use an extension cord, the minimum wire size for a 25’
cord (or less) is 18 AWG.
This product should be used only with the components supplied or; a cart, rack, or stand
that is recommended by Digitallife. If a cart, etc., is used, please observe all safety
markings and instructions that accompany the accessory product.
SPECIFICATIONS SUBJECT TO CHANGE:
The information contained in this manual is believed to be correct at the time of printing.
However, Digitallife reserves the right to change or modify any of the specifications
without notice or obligation to update existing units.
This product, either alone or in combination with an amplifier and headphones or
speaker/s, may be capable of producing sound levels that could cause permanent
hearing loss. DO NOT operate for long periods of time at a high volume level or at a level
that is uncomfortable. If you experience any hearing loss or ringing in the ears, you
should consult an audiologist.
IMPORTANT: The louder the sound, the shorter the time period before damage occurs.
NOTICE:
Service charges incurred due to a lack of knowledge relating to how a function or effect
works (when the unit is operating as designed) are not covered by the manufacturer’s
warranty, and are therefore the owners responsibility. Please study this manual carefully
and consult your dealer before requesting service.
ENVIRONMENTAL ISSUES:
Digitallife strives to produce products that are both user safe and environmentally
friendly. We sincerely believe that our products and the production methods used to
produce them, meet these goals. In keeping with both the letter and the spirit of the law,
we want you to be aware of the following:
Battery Notice:
This product MAY contain a small non-rechargeable battery which (if applicable) is
soldered in place. The average life span of this type of battery is approximately five years.
When replacement becomes necessary, contact a qualified service representative to
perform the replacement.
This product may also use “household” type batteries. Some of these may be recharge-
able. Make sure that the battery being charged is a rechargeable type and that the
charger is intended for the battery being charged.
When installing batteries, never mix old batteries with new ones, and never mix different
types of batteries. Batteries MUST be installed correctly. Mismatches or incorrect
installation may result in overheating and battery case rupture.
Warning:
Do not attempt to disassemble, or incinerate any battery. Keep all batteries away from
children. Dispose of used batteries promptly and as regulated by the laws in your area.
Note: Check with any retailer of household type batteries in your area for battery disposal
information.
Disposal Notice:
Should this product become damaged beyond repair, or for some reason its useful life is
considered to be at an end, please observe all local, state, and federal regulations that
relate to the disposal of products that contain lead, batteries, plastics, etc. If your dealer
is unable to assist you, please contact Digitallife directly.
NAME PLATE LOCATION:
The name plate is located on the bottom of the product. The model number, serial
number, power requirements, etc., are located on this plate. You should record the model
number, serial number, and the date of purchase in the spaces provided below and
retain this manual as a permanent record of your purchase. Thank you for choosing this
product. To ensure that you are completely satisfied with this product, please read and
understand this manual carefully.
Please keep this manual in a safe and handy place for future reference.
Always follow the basic precautions listed below to avoid the possibility of serious injury
or even death from electrical shock, short-circuiting, damages, fire or other hazards.
These precautions include, but are not limited to, the following:
Power supply
• The piano is powered by batteries. (
Batteries are not included in the package
for safe shipment.)
Do not open
• This instrument contains no user-service-
able parts. Do not open the instrument or
attempt to disassemble or modify the
internal components in any way. If it should
appear to be malfunctioning, discontinue
use immediately and have it inspected by
qualified Yamaha service personnel.
Water warning
• Do not expose the instrument to rain, use
it near water or in damp or wet conditions,
or place on it any containers (such as
vases, bottles or glasses) containing liquids
which might spill into any openings. If any
liquid such as water seeps into the
instrument, turn off the power immediately
and unplug the power cord from the AC
outlet. Then have the instrument inspected
by qualified Yamaha service personnel.
• Never insert or remove an electric plug
with wet hands.
Location
• Do not place the instrument in an unstable position where it might accidentally fall
over.
• Before moving the instrument, remove all connected cables, to prevent damage to
the cables or injury to anyone who might trip over them.
• When setting up the product, make sure that the AC outlet you are using is easily
accessible. If some trouble or malfunction occurs, immediately turn off the power
switch and disconnect the plug from the outlet. Even when the power switch is turned
off, electricity is still flowing to the product at the minimum level. When you are not
using the product for a long time, make sure to unplug the power cord from the wall
AC outlet.
Connections
• Before connecting the instrument to other electronic components, turn off the power
for all components. Before turning the power on or off for all components, set all
volume levels to minimum.
• Be sure to set the volumes of all components at their minimum levels and gradually
raise the volume controls while playing the instrument to set the desired listening level.
• Do not insert a finger or hand in any gaps on the instrument.
• Never insert or drop paper, metallic, or other objects into the gaps on the panel or
keyboard. This could cause physical injury to you or others, damage to the instrument
or other property, or operational failure.
• Do not rest your weight on, or place heavy objects on the instrument, and do not use
excessive force on the buttons, switches or connectors.
• Do not use the instrument/device or headphones for a long period of time at a high
or uncomfortable volume level, since this can cause permanent hearing loss. If you
experience any hearing loss or ringing in the ears, consult a physician.
For the Instrument
• Do not use the instrument in the vicinity of a TV, radio, stereo equipment, mobile phone, or
other electric devices. Otherwise, the instrument, TV, or radio may generate noise.
When you use the instrument along with an application on your smart device such as a
smartphone or tablet, we recommend that you set Wi-Fi or Bluetooth to on after setting “Airplane
Mode” to on on that device in order to avoid noise caused by communication.
• Do not expose the instrument to excessive dust or vibrations, or extreme cold or heat (such as
in direct sunlight, near a heater, or in a car during the day) to prevent the possibility of panel
disfiguration, damage to the internal components or unstable operation. (Verified operating
temperature range: 5° – 40°C, or 41° – 104°F.)
• Do not place vinyl, plastic or rubber objects on the instrument, since this might discolor the
panel or keyboard.
Always follow the basic precautions listed below to avoid the possibility of physical
injury to you or others, or damage to the instrument or other property. These precau-
tions include, but are not limited to, the following:
CAUTION
Operation Manual
Roll up Piano with MIDI
Model No.: RP49-C
Version:1.0
Responsible Party : ShenzhenShi
QiHeng DianZi ShangWu YouXian
GongSi
Address :
Telephone :
Type of Equipment : Roll up piano
Model Name :
* This applies only to products distributed by Digitallife. (FCC SDoC)
COMPLIANCE INFORMATION STATEMENT
1. IMPORTANT NOTICE: DO NOT MODIFY THIS UNIT!
This product, when installed as indicated in the instructions contained in this
manual, meets FCC requirements. Modifications not expressly approved by
Yamaha may void your authority, granted by the FCC, to use the product.
2. IMPORTANT: When connecting this product to accessories and/or another
product use only high quality shielded cables. Cable/s supplied with this product
MUST be used. Follow all installation instructions. Failure to follow instructions could
void your FCC authorization to use this product in the USA.
3. NOTE: This product has been tested and found to comply with the requirements
listed in FCC Regulations, Part 15 for Class “B” digital devices. Compliance with
these requirements provides a reasonable level of assurance that your use of this
product in a residential environment will not result in harmful interference with
other electronic devices. This equipment generates/
uses radio frequencies and, if not installed and used according to the instructions
found in the users’ manual, may cause interference harmful to the operation of
other electronic devices. Compliance with FCC regulations does not guarantee
that interference will not occur in all installations. If this product is found to be the
source of interference, which can be determined by turning the unit “OFF” and
“ON”, please try to eliminate the problem by using one of the following measures:
Relocate either this product or the device that is being affected by the interference.
Utilize power outlets that are on different branch (circuit breaker or fuse) circuits or
install AC line filter/s.
In the case of radio or TV interference, relocate/reorient the antenna. If the antenna
lead-in is 300 ohm ribbon lead, change the lead-in to co-axial type cable.
If these corrective measures do not produce satisfactory results, please contact the
local retailer authorized to distribute this type of product.
If you can not locate the appropriate retailer, please contact support@digit-
allife.shop.
The above statements apply ONLY to those products distributed by Digitallife or its
subsidiaries.
* This applies only to products distributed by Digitallife.
FCC INFORMATION (U.S.A.)
This device complies with Part 15 of the
FCC Rules.
Operation is subject to the following
two conditions:
1) this device may not cause harmful
interference, and
2) this device must accept any
interference received including
interference that may cause
Fire warning
• Do not put burning items, such as candles,
on the unit. A burning item may fall over
and cause a fire.
Influences on electro-medical devices
• Radio waves may affect electro-medical
devices.
- Do not use this product near medical
devices or inside areas in which the use of
radio waves is restricted.
- Do not use this product within 15cm (6 in.)
of persons with a heart pacemaker or
defibrillator implant.
If you notice any abnormality
• When one of the following problems
occur, immediately turn off the power
switch and disconnect the electric plug
from the outlet. Then have the device
inspected by Yamaha service personnel.
- The power cord or plug becomes frayed
or damaged.
- It emits unusual smells or smoke.
- Some object has been dropped into the
instrument.
- There is a sudden loss of sound during
use of the instrument.
- If any cracks or breakages exist on the
instrument.
Handling
• When cleaning the instrument, use a soft cloth. Do not use paint
thinners, solvents, alcohol, cleaning fluids, or chemical-impregnat-
ed wiping cloths.
Maintenance
To avoid the possibility of malfunction/ damage to the product, damage
to data, or damage to other property, follow the notices below.
NOTICE

General operation
Features
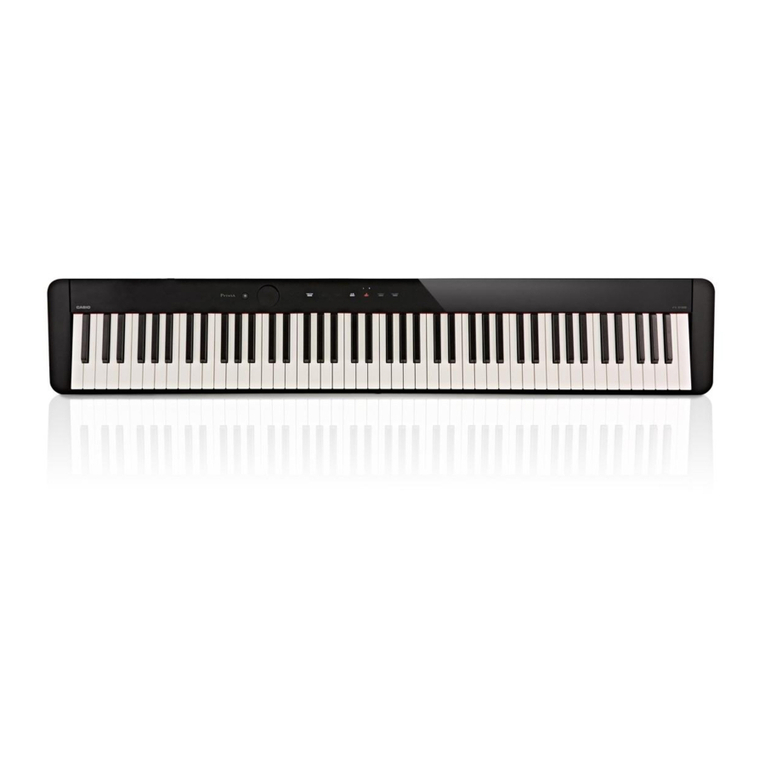
■49-Key roll up piano (Standard Piano Key 5 Octave + 1 key) .
■Tone: 100 / Rhythm: 100 / Demonstration Songs: 10
■Include Drum Kit music mode
■Audio output – via Built-in speaker or through 3.5mm audio jack
■Audio input – 1 x 3.5mm MIC (3-position) or 1 x MIDI Interface (micro USB Port)
■Rated Voltage: DC 5V (Battery AA 1.5V × 4pcs)
■Size: main-body: (L) 15.10cm × (W) 86.00cm × (D) 3.10cm
■Keyboard: (L) 71.30cm × (W) 12.20cm × (D) 0.90cm
Thank you for choosing this product. To ensure that you are completely satisfied with this product, please read and
understand this manual carefully.
INSTRUCTION
DEMO (Please refer to Appendix 3.)
After pressing one song after the other will be played back.
The selected song is automatically played back repeatedly.
Press the button again to stop the demo playback.
During playback of a demo song, press the Tone Select button to temporarily switch
to the tone select mode. You will automatically return to the demo song selection
mode after 3 seconds.
Sound selection (Please refer to the Appendix 1.)
Press first to enter the sound selection mode, then press to select sound
0 ~ 127.
Rhythms (Please refer to the Appendix 2.)
Press first and then to select rhythm 0 ~ 127. You start the rhythm with ..
Tempo control
·Press to enter into tempo setting.
·Press " means increase speed, and " " means decrease speed.
·The default value is 120 when the piano is turned on.
·Each demo song will be played back at the tempo of the song, regardless of the
tempo setting selected. Each rhythm is also stored in the instrument with a typically
associated tempo.
·However, the tempo of the song or rhythm can be changed after the song or
rhythm starts by using the and keys.
Master volume control
·Press , then Press " " increases the overall volume and " "
decreases the overall volume.
·There are 16 levels (1 ~ 16) for the master volume control and the default value is 12
when the unit is turned on.
Drum Kit
·Press this Key, the Piano will be a Drum Kit.
BEATS
Power Indicator
a. Blue LED - working status
b. Red LED - Powered by Batteries
Speaker
Suggest to lower the speaker volume to a acceptable level.
Earphone / Line output
Connect with earphone (Amplifier, earphone and speaker). Please adjust the
volume at a lower level when using earphone or speaker.
3.5mm MIC - Connect with microphone. Suggest to use branded microphone.
micro USB Port for MIDI & Power Supply
The micro USB port of the external power supply. Please take out the batteries (to
avoid damaing the piano because of leaking current of the batteries) before
connectiong the micro USB Power adapter (5v,1A).
Power ON / OFF
DEMO Demo songs
TONE Tone button
RHYTHM Rhythm button
TEMPO Tempo
VOL Volume control button
>>
Drum KIT Drum kit button
Beats
LED Indicator
Speaker
Earphone / Line output
3.5mm MIC
micro-USB Port MIDI & Power supply
Power ON / OFF
Control panel and connections
2
1
9
3
4
5
7
6
8
10
14131211
1
2
3
4
5
6
7
8
9
11
10
12
13
14
Appendix 1 – Tone List
Appendix 2 – Rhythm List
Appendix 3: Demo Songs
1
2
3
4
5
7
8
9
10
11
12
13
14
Thank you for choosing this product. To ensure that you are completely satisfied with
this product, please read and understand this manual carefully.
No.
Name of Tone
Group
No.
Name of Tone
Group
T00
Acoustic Grand piano
Piano
T39
Violin
Strings /
Ensembl
e
T01
Bright Acoustic Piano
T40
Viola
T02
Electric Grand Piano
T41
Cello
T03
Honky-tonk Piano
T42
Contrabass
T04
Chorused Piano
T43
Tremolo
Strings
T05
Hapsichord
T44
Pizzicato
Strings
T06
Rock Organ
T45
Orchestral
Harp
T07
Clavichord
T46
Timpani
T08
Celesta
T47
String
Ensemble 1
T09
Glockenspiel
T48
String
Ensemble 2
T10
Music Box
Percus
sion
T49
Synth String 1
T11
Vibraphone
T50
Synth Sting 2
T12
Marimba
T51
Choir Aahs
T13
Xylophone
T52
Voice Oohs
T14
Tubular Bells
T53
Synth Voice
T15
Dulcimer
T54
Orchestra hit
T16
Drawbar Organ
Organ
T55
Trumpet
Brass
T17
Percussive Organ
T56
Trombone
T18
Rock Organ
T57
Tuba
T19
Church Organ
T58
Muted
Trumpet
T20
Reed Organ
T59
French Horn
T21
Accordion
T60
Brass Section
T22
Harmonica
T61
Synth Brass 1
T23
Tango Accordion
T62
Synth Brass 2
T24
Acoustic Guitar (nylon)
Guitar
T63
Soprano Sax
T25
Acoustic Guitar (Steel)
T64
Alto Sax
T26
Electronic Guitar (Jazz)
T65
Tenor Sax
T27
Electronic Guitar
(Clean)
T66
Baritone Sax
T28
Electronic Guitar
(Muted)
T67
Oboe
Reed /
PIP
T29
Overdriven Guitar
T68
English Horn
T30
Distortion Guitar
T69
Bassoon
T31
Acoustic Bass
Bass
T70
Clarinet
T32
Electronic Bass (Finger)
T71
Piccolo
T33
Electronic Bass (Pick)
T72
Flute
T34
Fretless Bass
T73
Recorder
T35
Slap Bass 1
T74
Pan Flute
T36
Slap Bass 2
T75
Blown Bottle
T37
Synth Bass 1
T76
Shakuhach
T38
Synth Bass 2
T77
Whistle
T78
Ocarina
No.
Rhythm
Name
No.
Rhythm Name
No.
Rhythm Name
R00
Disco
R42
Love song
R84
Jazz Club
R01
Electro Pop
R43
Pop Ballad
R85
Cat Groove
R02
Slow Soul
R44
Slow & Easy
R86
Funky Disco
R03
Slow Rock 1
R45
Classic Piano
Ballad
R87
Disco Fox
R04
HardRock
R46
Piano Ballad
R88
Disco Party
R05
Latin Rock
R47
Acoustic Ballad
R89
Disco Samba
R06
Rock’N Roll
R48
Analog Ballad
R90
Club Latin
R07
Waltz
R49
R & B Ballad
R91
Club Dance
R08
Jazz Waltz
R50
Modern Country
Pop
R92
Disco Funk
R09
Country 1
R51
Country Ballad
R93
Disco Hands
R10
Bluegrass
R52
Unpluqqed
R94
Disco Chocolate
R11
Boogie
R53
Blue Grass 1
R95
Saturday Night
R12
Fusion
R54
Blue Grass 2
R96
Hip Shuffle
R13
Reggae
R55
Bolero
R97
Modern R & B
R14
Bossanova
R56
Cha Cha
R98
Garaqe
R15
Mambo 1
R57
Cumbia
R99
Ukpop
R16
Samba
R58
Latin Disco
R17
Tango
R59
Hully Gully
R18
Jazz Big
Band
R60
Jive
R19
Hip Hop
R61
Limbo Rock
R20
Clup Pop
R62
Ober Polka
R21
Rap Pop
R63
Pasodoble
R22
16 Beat
Shuffle
R64
Polka Pop
R23
16 Beat Pop
R65
Pop New Age
R24
8 Beat Pop
R66
Pop Waltz
R25
8 Beat Soul
R67
Pub Piano
R26
Slow Rock 2
R68
Rumba
R27
Pop Rock
R69
Salsa
R28
60’s Soul
R70
Schlager
R29
8 Beat Rock
R71
Schlager Rock
R30
Straight Rock
R72
Show Tune
R31
Techno
R73
Swing Waltz
R32
Trance
R74
Tarantella
R33
Funk
R75
Tijuana
R34
Mambo 2
R76
USA March
R35
Country 2
R77
Big Band Fast 1
R36
Jazz Rock
R78
Big Band Fast 2
R37
Twist
R79
Big Band middle 1
R38
British Pop
R80
Big Band middle 2
R39
8 Beat
Modern
R81
Dixie Jazz
R40
8 Beat Adria
R82
Big Band Shuffle
R41
Rock Ballad
R83
Medium Jazz
No.
Name of Demo Song
No.
Name of Demo Song
D00
Für Elise
D05
Twinkle Twinkle Little Star
D01
Music Box Dancer
D06
Mozart Piano Sonata
D02
The Farmer In The Dell
D07
Chopin Nocturnes
D03
Little White Boat
D08
The Maiden’s Prayer
D04
Happy Birthday
D09
Spring
1
2
3
4
5
Place the Roll-up Piano on a flat surface. Unfold the keyboard carefully.
Slide out the control panel which is a build-in speaker and place it on the other end
of the roll-up piano. Do not force it while placing.
Use only compatible adapter when playing roll-up Piano. Remove the batteries when
plugging in with an adapter.
Insert the batteries correctly if you choose to use them (instead of an adapter).
Exhausted batteries should be removed from the case and if there’s any leaking,
clean the case with soft and dry cloth immediately before insert new batteries. Do
not mix old and new batteries.
Please roll-up the keyboard properly (printed side up) and place it into the box after
use.
Operation Steps
Other Digital Life Musical Instrument manuals
