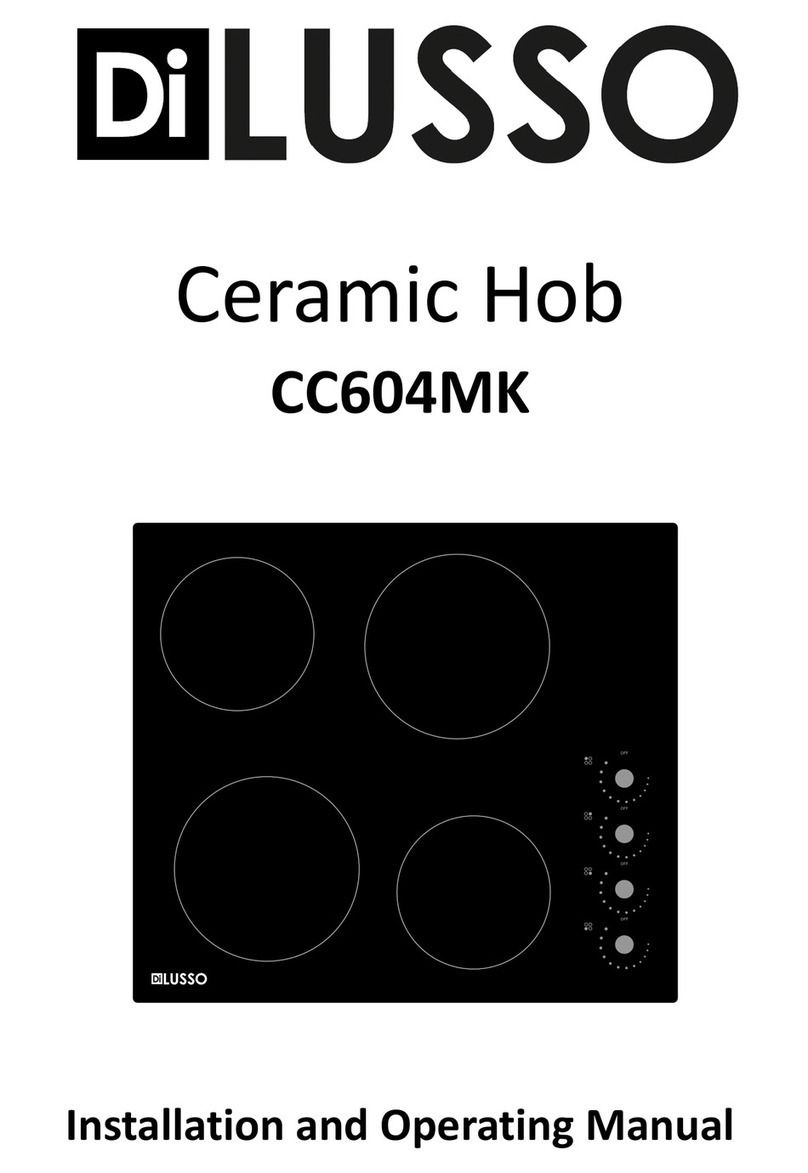
diLUSSO CC604MBT User manual

Ceramic Hob
CC604MBT
Installation and Operating Manual

Contents
1. Important Notes
Safety Warnings……………………………………………………………………………………………………………….. 3
2. About the Ceramic Hob
Product Overall Look………………………………………………………………………………………………………… 6
Control Panel……………………………………………………………………………………………………………………… 6
Technical Specification…………………………………………………………………………………………..…………… 7
3. Operating Instructions
Touch Control……………………………………………………………………………………………………………………… 8
Child Lock………………………………………………………………………………………………………………………..…. 9
Timer Control……………………………………………………………………………………………………………………… 9
Over Temperature Protection……………………………………………………………………………………………10
Residual Heat Warning……………………………………………………………………………………………………10
Default Shutdown………………………………….…………………………………………………………………………10
4. Cooking Tips……………………..……………………………………………………………..…………………………..………11
5. Cleaning & Maintenance…………………………………………..……..……………………………………………….…11
6. Troubleshooting…………………………………………………………….…….……………………………………………… 12
7. Installation Instructions……………………………………….……….…………………………………………………..…13
Dear User : This booklet contains advices for user, description, and commands as well as the
correct procedures for cleaning and maintaining the appliance.
Dear Installer : This booklet is for qualified technicians who must install the appliance and set
it functioning. Please keep this booklet for the user.
Version 01

1. Important Notes
Dear Customer
Thank you for choosing our product. This appliance is easy to use; however please read this handbook
carefully before installing and operating it. Herein, you will find the correct method of installation and
tips for best use and maintenance of the product.
Do save this Installation and Operating Manual for future reference.
Safety Warnings
Your safety is important to us. Please read this information before installing and using your cooktop.
Installation
Electrical Shock Hazard
-Before carrying out repairs or maintenance on it, disconnect the appliance from the mains electricity
supply.
-This appliance wiring system must be earthed – it is essential and mandatory.
-All electrical wiring system must be carried out by a qualified electrician.
-Failure in carrying this out is dangerous and may result in electrical shock and lead to serious
consequences.
Cut Hazard
-Panel edges are sharp, be careful
-Failure to use caution could result in injury or cuts.
Important safety instructions
-Read these instructions carefully before installing or using this appliance.
-Do not place combustible material or products on this appliance at any time.
-In order to avoid a hazard, this appliance must be installed according to these instructions for
installation.
-This appliance is to be properly installed and earthed only by a suitably qualified person.
-Please ensure this manual is available for the person carrying out the installation, to avoid any
potential hazards to the installer, the user and also damage to the appliance or the home electrical
system.
-This appliance should be connected to a circuit which incorporates an isolating switch providing full
disconnection from the power supply.
-Failure to install the appliance correctly could invalidate any warranty or liability claims.
3
Version 01

Operation and Maintenance
Electrical Shock Hazard
-Do not use if the ceramic glass cooktop is broken or cracked. If the cooktop breaks or forms a crack,
immediately switch off the electrical power supply (isolation switch) and contact the service centre.
-Switch off the electrical power supply (isolation switch) before cleaning or maintenance.
-Failure in carrying this out is dangerous and may result in electrical shock and lead to serious
consequences.
Hot Surface Hazard
-During use, accessible parts of this appliance will become hot enough to cause burns be careful not
to touch them until the surface cools down.
-Do not place any items other than suitable cookware contact the ceramic glass until the surface is
cool.
-Careful not to place metallic objects such as knives, forks, spoons and lids on the hob surface as they
can get hot.
-Keep children away.
-Handles of saucepans may be hot to touch. Check saucepan handles do not overhang over other
cooking zones.
-Failure to follow this advice may result in burns and scalds.
Important safety instructions
-Never leave the appliance unattended when in use. Boil over causes smoking and greasy spillovers
that may ignite.
-Never use your appliance as a work or storage surface.
-Never leave any objects or utensils on the appliance.
-Never use your appliance for warming or heating the room.
-After use, always turn off the cooking zones and the cooktop as described in this manual Do not
allow children to play with the appliance or sit, stand, or climb on it.
-Do not store items of interest to children in cabinets above the appliance. Children climbing on the
cooktop could be seriously injured.
-Do not leave children alone or unattended in the area where the appliance is in use.
-Children or persons with a disability which limits their ability to use the appliance should have a
responsible and competent person to instruct them in its use. The instructor should be satisfied that
they can use the appliance without danger to themselves or their surroundings.
-Do not modify or replace any part of the appliance.
-All servicing should be done by a qualified technician.
-Do not use a steam cleaner to clean your cooktop.
-Do not place or drop heavy objects on your cooktop.
-Do not stand on your cooktop.
4
Version 01

-Do not use pans with jagged edges or drag pans across the ceramic glass surface as this can scratch
the glass.
-Do not use scourers or any other harsh abrasive cleaning agents to clean your cooktop, as these can
scratch the ceramic glass.
-If the supply cord is damaged, it must be replaced by the manufacturer, its service agent or similarly
qualified persons in order to avoid a hazard.
-This appliance is intended to be used for domestic or similar applications such as: -staff kitchen areas
in shops, offices and other working environments; -farm houses; -by clients in hotels, motels and
other residential type environments; -bed and breakfast type environments.
-WARNING: The appliance and its accessible parts become hot during use.
-Children less than 8 years of age shall be kept away unless continuously supervised.
-This appliance can be used by children aged from 8 years and above and persons with reduced
physical, sensory or mental capabilities or lack of experience and knowledge if they have been given
supervision or instruction concerning use of the appliance in a safe way and understand the hazards
involved.
-Children shall not play with the appliance. Cleaning and user maintenance shall not be made by
children without supervision.
-WARNING: Unattended cooking on a hob with fat or oil can be dangerous and may result in fire.
NEVER try to extinguish a fire with water, but switch off the appliance and then cover flame e.g. with
a lid or a wet towel or wet blanket.
-WARNING: Danger of fire: do not store items on the cooking surfaces.
-WARNING: If the ceramic glass surface is cracked or any part of the electrical insulation is torn or
damaged, immediately switch off the appliance to avoid the possibility of electric shock.
-The appliance is not intended to be operated by means of an external timer or separate
remote-control system.
Choosing the correct Cookware
Do not use cookware with a jagged or curved base.
Make sure that the base of your pan is smooth, sits flat on the glass and is the same size as the cooking
zone. Always centre your pan on the cooking zone.
5
Version 01

Always lift pans off the ceramic hob – do not slide, or they may scratch the glass.
2. About the Ceramic Hob
Control Panel
Product Information
The ceramic cooker hob centers on meeting customers different cooking demands. The hob has safe and
reliable performances, making your life comfortable and enabling to fully enjoy the pleasure from life.
A – Single cooking zone 1200W
B – Single cooking zone 1800W
C – Single cooking zone 1200W
D – Single cooking zone 1800W
E – Ceramic glass cooktop
F – Touch sensor control
1 – Heating zone selection control
2 – Power / Timer regulating control
3 – Keylock
4 – ON / OFF
5 – Timer control
6
Version 01
E
F
AB
C
D

Working Principle
This ceramic cooker hob employs the use of resistance wire heating elements and adjusts the output
power by the power regulation with touch controls.
Before using your New Ceramic Hob
-Read this guide, taking special note of the ‘Safety Warnings’ section.
-Remove any protective film that may still be on your ceramic hob.
Technical Specification
Product
CC604MBT
Cooking Zones 4 Single Zones
Supply Voltage 220-240V~ 50Hz or 60Hz
Installed Electric Power
5500W-6600W
Product Size W×D×H (mm)
590 X 520 X 55 mm
Cutout Dimensions W×D (mm)
56 X 49 mm00
7
Version 01
Ceramic Cooker Hob
Model CC604MBT
Total power 5500-6600W
Rated Voltage 220-240V~
Rated Frequency 50 60Hz
Approval SGS-150250-EA
Serial # :
HZz or

3. Operating Instructions
Touch Controls
•The controls respond to touch, so user does not need to apply any excessive force while using the
touch control.
•Use the ball of the finger, not its tip.
•A beep will be heard each time a touch is
registered.
•Make sure the controls are always clean, dry,
and that there is no object (e.g. a utensil or a
cloth) covering them. Even a thin film of water
may make the controls difficult to operate.
Start cooking
After power on, the buzzer beeps once, all the indicators light up for 1 second then go off, indicating that
the ceramic hob has entered the stat of standby mode.
•Touch the ON/OFF button once. All the indicators show “-“
•A suitable pan is placed on the desired cooking zone. Make sure that the bottom of the pan and
the surface of the cooking zone are clean and dry.
•Touch the heating zone selection to select the zone that the pan is put on.
•Adjust the power level setting by using the “-” or “+” buttons on the control panel. If power level
is not set after 1 minute, the ceramic hob will automatically back to standby mode.
•Power level setting can be adjusted any time during cooking by first touching the zone selection
and then adjust the setting by using the “-” or “+” buttons on the control panel.
Finish cooking
•After cooking is done, select the cooking zone that is needed to be switched off.
•Cooking zone is turned off by using “-” button to 0 power level OR press both “+” and “-“ at the
same time.
•Turned the complete unit off by pressing the ON/OFF button.
Beware of hot surfaces
When the ceramic cooktop is hot, the hot hob warning indicator “H” will light up next to the respective
zone section control. Don’t touch the glass plate until the indicator goes out. It can also be used as an
energy saving function if you want to heat further pans, use the hotplate that is still hot.
8
Version 01

Child Lock
Controls can be locked to prevent unintended use, for example children accidentally turn the cooking
zones on.
When the controls are locked, all the controls except the ON/OFF control are disabled.
•To lock the controls
oTouch the child lock button
oTimer display will show “Lo” to indicate the unit controls are now locked
•To unlock the controls
oTurn the ceramic hob on by pressing ON/OFF button.
oPress and hold the child lock button to unlock.
When the hob is in the lock mode, all the controls are disabled except the ON/OFF - , user
can always turn the ceramic hob off with the ON/OFF control - . . However, to perform
cooking function user must unlock the hob first.
Timer control
Timer can be used in two different ways:
1. It can act as a minute minder.
a. In this case, the timer will not turn any cooking zone off when the set time is up.
2. It can be set to turn one or more cooking zones off after the set time is finished.
Timer maximum setting is 99 minutes.
Timer as a Minute Minder (When no cooking zone is selected)
•Turn the ceramic hob ON.
•Press the timer control, timer display will show “—“.
•Adjust the timer setting by using “-” or “+” buttons. Timer display will start flashing and show the
figures.
•To cancel the time, press both “-”and“+” at the same time, timer display will show “—“.
•When the timer is set, it will start counting down immediately. Timer display will show the
remaining time and flash for 5 seconds.
•Buzzer will ring for 30 seconds when time elapsed. Timer display will show “—“.
Remarks:
1. Press the“-”or“+” control of the timer once to decrease or increase by 1 minute.
2. Press and hold the “-“or“+” control of the timer to decrease or increase by 10 minutes.
3. If the setting time exceeds 99 minutes, the timer will automatically return to 0 minute.
9
Version 01

Timer set to switch cooking zone off
Setting ONE cooking zone timer
•Turn the ceramic hob ON.
•Press the cooking zone selection key to select the desired cooking zone.
•Press the timer control, timer display will show “10” by default.
•Adjust the timer setting by pressing “-” or “+” buttons. The timer display will start flashing and
show the figures.
•To cancel the time, press both “-”and“+” at the same time, timer display will show “—“.
•When the timer is set, it will start counting down immediately. Timer display will show the
remaining time and flash for 5 seconds.
•When time elapsed, the cooking zone selected will be switched off.
Setting MULTIPLE cooking zones timer
When there are multiple timers set, timer display will show the least duration. For example, if 3rd cooking
zone is set for 15minutes timer and 4th cooking zone is set for 5minutes timer, timer display will show 5.
A red dot beside the power display will flash for the cooking zone selected.
(Set to 15 minutes)
(Set to 5 minutes)
When time elapsed, the corresponding cooking zone will be switched off automatically. If there is any
changes after timer is set, user has to start the steps again.
Over-Temperature Protection
A built-in temperature sensor is used to monitor the temperature inside the ceramic hob. When an
excessive temperature is sensed, the ceramic hob will stop operation automatically.
Residual Heat Warning
The ceramic hob is equipped with residual heat warning device. After a cooking zone is switched off, the
letter “ H ” appears to indicate that the zone is still hot. Cooking can be restarted while “H” is flashing.
Default Shutdown Time
Another safety feature of the hob is automatic shutdown. If users forget to switch off a cooking zone, the
safety device will shutdown the zone after the default working duration depending on power level :
Power level
1
2
3
4
5
6
7
8
9
Default working duration (hour)
8
8
8
4
4
4
2
2
2
The timer indicator will
show the least time.
The red dot next to power level
indicator will illuminate indicating
that zone is selected.
10
Version 01

4. Cooking Tips
Take care when frying as the oil and fat heat up very quickly. At extremely high temperatures oil
and fat will ignite spontaneously and this presents a serious fire risk.
-The bottom of the pan must be thick and perfectly flat
-To avoid scratching of the cooking hob, never use cast-iron pans or pans with a rough bottom
-When food comes to the boil, reduce the temperature setting.
-Using a lid will reduce cooking times and save energy by retaining the heat.
-Minimize the amount of liquid or fat to reduce cooking times.
-Start cooking on a high setting and reduce the setting when the food has heated through.
The table below indicates the heat level and the cooking operation. Setting may vary depending on the
amount of food and personal taste.
Power Level Operation
1
To melt butter, chocolate etc
2
To warm small amount of food, gentle simmering, slow warming, and whip up
sauces with egg yolk or butter
3 - 4
To heat solid or liquid food, keep small amount of water boiling, thaw deep-frozen
food, cook omelet of 2 or 3 eggs, rapid simmering, cooking rice
5 - 6
To stew meat, fish and vegetables, simmer food, make jams, etc; pancakes
7 - 8
To roast meat, fish, steaks, and liver; to sauté meat, fish, eggs, etc; cooking pasta
9
To deep fry potatoes, etc and to boil water quickly
5. Cleaning & Maintenance
Before any cleaning or maintenance done, switch off the power supply.
The hob should be cleaned regularly, preferably after use every time, when the residual heat indicator has
gone off.
For everyday soiling on glass such as fingerprints, marks, stains left by food or non-sugary spillovers, smudges
from aluminium-bottom pans, clean the hob with a cloth damped in vinegar or cooktop cleaner. Rinse and dry
the glass with a clean cloth or paper towel.
For boil over’s, melts, and hot sugary spills or any burnt residues on the glass, remove them with a scraper
suitable for ceramic glass, rinse with water and wipe it dry with a clean cloth. Regular use of scraper could
reduce the need for chemical detergents during daily hob cleaning.
Never use abrasive or corrosive detergents, e.g. cleaning powders, oven sprays, spot-removers, wire sponges.
Never leave cleaning residue on the cooktop.
NEVER USE A STEAM JET TO CLEAN THE APPLIANCE
11
Version 01

6. Troubleshooting
Problem Possible causes What to do
The hob does not work
The hob is not wired in or mains is
not switched on.
There is a power failure.
Make sure the ceramic hob is
connected to the power supply and
the mains is switched on.
Check on the power supply.
If everything is checked and the
problem persists, contact the
customer service hotline.
The touch controls are
unresponsive.
The controls are locked.
Unlock the controls. Refer to the
Operating Instructions section.
The touch controls are
difficult to operate. There touch controls may be wet
with water over the controls
Finger tip is used to touch the
controls.
Make sure the touch control area is
dry.
Use the ball of the finger when
touching the controls.
The glass is scratched.
Used of rough-edged cookware.
Unsuitable, abrasive scourer or
cleaning products being used.
Use cookware with flat and smooth
bases. Refer to the Choosing the
correct cookware section.
Never use abrasive or corrosive
detergents, e.g. cleaning powders,
oven sprays, spot-removers, wire
sponges
Some pans make crackling
or clicking noises.
This may be caused by the
construction of the cookware
(layers of different metals
expanding differently).
This is normal for cookware and
does not indicate a fault.
Smokes coming out from
the hob The hob is dirty
Food has spilled over
Clean the hob after cooking is
finished and hob is cool down.
User a larger pan
The cooking zones do not
follow the timer set cooking
time
Timer programming error
Refer to Timer Control section for
setting the timer
12
Version 01

7. Installation Instructions
Worktop cutout
The worktop has to be of heat-resistant material.
Ensure there is a minimum of 50mm worktop space on all sides of the hole.
Cut out the worktop according to the sizes shown in the diagram below.
W(mm) D(mm) H(mm) A(mm) B(mm) X(mm) F(mm)
590
520
55
564
494
50 min.
2
Ensure a safety gap of 2mm between the sides of the hob and the cutout of the worktop.
Ventilation
To be able to function optimally and last a long time, the ceramic
cooker hob is to be installed in good a working environment.
Provide for adequate ventilation as shown in the diagram beside.
The minimum safe distance between the hotplate and
the cupboard or hood above the hotplate is 700mm.
Ensure the ceramic cooker hob is well ventilated and the
air inlet and outlet are not blocked.
Ensure the furniture materials, rear wall and adjacent
walls are able to resist temperatures of up to 150℃.
A(mm)
B(mm)
C(mm)
D
E
760
50 min.
20 min.
Air intake
Air outlet –
5mm
13
Version 01

Installing the fixing brackets
The unit should be placed on a stable, smooth surface (use the packaging).Ensure the control knobs line
up over the edge of the table to prevent damaging it. Place the screw into the bracket and screw in only
partially into the screw holes on the hob base. Tighten fully once after the hob has been placed and
aligned on the worktop properly.
Adjust the bracket orientation to cater for different worktop thickness.
Ensure the brackets do not touch or come to rest on the cutout face of the worktop after
installation.
Electrical Connection
The manufacture shall not liable for any direct or indirect damage caused by faulty installation. The
installer must ensure that the product installation and connection complies with the local and general
regulation in force.
IMPORTANT! THE APPLIANCE MUST BE CONNECTED IN ACCORDANCE WITH CURRENT ELECTRICAL RULES
AND REGULATIONS. INSTALLATION IS TO BE DONE ONLY BY AN AUTHORISED ELECTRICIAN.
WARNING! THIS APPLIANCE MUST BE EARTHED.
IMPORTANT! AN ISOLATION CUIRCIUT BREAKER SWITCH WITH SUITABLE AMPERAGE MUST BE
INCORPORATED IN THE FIXED WIRING.
A
Screw
B
Fixing Bracket
C
Screw Hole
D
Hob Base
14
Version 01

Warnings
1. The ceramic cooker hob must be installed by qualified personnel or technicians.
2. The ceramic cooker hob cannot be installed over cooling equipments, dishwashers and dryers.
3. The ceramic cooker hob shall be installed such as to facilitate good heat dissipation to ensure
optimal performance and enhance its reliability.
4. The wall and induced heating zone above the work surface shall withstand heat.
5. Adhesive joining of the cabinets such as laminates and its edgings has to be able to withstand
temperatures up to 120°C to avoid deformations or peeling.
6. Do not clean using steam cleaners.
7. All fixed wirings should be correctly done, well insulated and protected or concealed.
8. The cable must be checked regularly. If the cable is damaged or needs replacing, this should be
done by a qualified technician.
9. Ensure a minimum gap of 3mm between the connection contacts.
10. The cable must not be bent or compressed.
11. The installer must ensure that the correct electrical connection has been made and that it complies
with safety regulations.
Environment Care
Recycle the packaging materials that have the recycling symbol. Put them in the relevant recycling
containers according to the material.
This appliance is classified according to European directive 2002/96/EC on Waste Electrical and
Electronic Equipment (WEEE). When disposing of old appliances, dispose them at a proper recycling
facility. They will handle the disposal in a proper and safe manner in compliance with environmental and
local authority regulations.
Help preserve the environment.
15
Version 01
Yellow / Green
Black
Brown
Blue
220-240V~ 380-415V~
220-240V~
1
2
3
4
1
2
3
4
L1
L2
N
Yellow / Green
Black
Brown
Blue
220-240V~
2
3
4
N
L2
L1
1
1
2
3
4

Table of contents
Other diLUSSO Hob manuals
Popular Hob manuals by other brands

AEG
AEG IAE64843FB user manual
Gorenje
Gorenje Glass-ceramic built-in coking hob Instructions for use, installation, and connection
Thetford
Thetford 900 Series user manual
Whirlpool
Whirlpool AKT 108 instructions
Miele
Miele KM 7629 FX Operating and installation instructions

Aspes
Aspes AV2300 instruction manual


