Discovery Kids Tech Tab User manual

instruction
manual
PLEASE READ BEFORE OPERATING THIS EQUIPMENT
AGES
3-9
1
Safety Precautions..................... 2
Location of Controls................... 6
Charging the Unit....................... 8
Using the Bumpers .................... 9
Basic Operation ....................... 11
Using a Micro SD Card............. 12
Operation................................. 13
Account Management........... 13
Menu Options....................... 16
About Me.............................. 20
Adding Applications.............. 20
Sharing Applications............. 26
Children’s Management........ 27
Child Protection Mode .......... 28
Utilities................................. 31
Artist .................................... 36
Games.................................. 42
Music ................................... 44
Box Folder ............................ 44
Other Category Folders......... 44
Using techTAB Assistant
Software.................................. 45
Online Software Update ........... 48
FAQs........................................ 50
Specifications .......................... 52
Contents
Quick Start Note:
Turn to page 13 for initial
login instructions.

2
Safety Precautions
DANGEROUS VOLTAGE: The lightning flash with arrowhead symbol within
an equilateral triangle is intended to alert the user to the presence of
uninsulated dangerous voltage within the product’s enclosure that may be of
sufficient magnitude to constitute a risk of electric shock to persons.
ATTENTION: The exclamation point within an equilateral triangle is intended
to alert the user to the presence of important operating and maintenance
(servicing) instructions in the literature accompanying the appliance.
FCC WARNING: This equipment may generate or use radio frequency energy. Changes or
modifications to this equipment may cause harmful interference unless the modifications are
expressly approved in the instruction manual. The user could lose the authority to operate
this equipment if an unauthorized change or modification is made.
IMPORTANT SAFETY INSTRUCTIONS

3
Warning: Changes or modifications to this unit not expressly approved by the party responsible for
compliance could void the user’s authority to operate the equipment.
NOTE: This equipment has been tested and found to comply with the limits for a Class B digital device,
pursuant to part 15 of the FCC Rules. These limits are designed to provide reasonable protection against
harmful interference in a residential installation. This equipment generates, uses and can radiate radio
frequency energy and, if not installed and used in accordance with the instructions, may cause harmful
interference to radio communications. However, there is no guarantee that interference will not occur in
a particular installation. If this equipment does cause harmful interference to radio or television reception,
which can be determined by turning the equipment off and on, the user is encouraged to try to correct the
interference by one or more of the following measures:
• Reorientorrelocatethereceivingantenna.
• Increasetheseparationbetweentheequipmentandreceiver.
• Connecttheequipmentintoanoutletonacircuitdifferentfromthattowhichthereceiverisconnected.
• Consultthedealeroranexperiencedradio/TVtechnicianforhelp.
This device complies with part 15 of the FCC rules. Operation is subject to the following two conditions: (1) this
device may not cause harmful interference, and (2) this device must accept any interference that may cause
undesired operation.
This device complies with Industry Canada licence-exempt RSS standard(s). Operation is subject to the
following two conditions: (1) this device may not cause interference, and (2) this device must accept any
interference, including interference that may cause undesired operation of the device.
Under Industry Canada regulations, this radio transmitter may only operate using an antenna of a type
and maximum (or lesser) gain approved for the transmitter by Industry Canada. To reduce potential
radio interference to other users, the antenna type and its gain should be so chosen that the equivalent
isotropically radiated power (e.i.r.p.) is not more than that necessary for successful communication.
4
1. Read these instructions.
2. Keep these instructions.
3. Heed all Warnings.
4. Follow all instructions.
5. Do not use this apparatus near water.
6. Clean only with a dry cloth.
7. Do not block any of the ventilation openings. Install in accordance with the manufacturer’s
instructions.
8. Do not install near any heat sources such as radiators, heat registers, stoves, or other apparatus
(including amplifiers) that produce heat.
9. Do not defeat the safety purpose of the polarized or grounding-type plug. A polarized plug has two
blades with one wider than the other. A grounding-type plug has two blades and a third grounding
prong. The wide blade or the third prong are provided for your safety. When the provided plug
does not fit into your outlet, consult an electrician for replacement of the obsolete outlet.
10. Protect the power cord from being walked on or pinched particularly at plugs,
convenience receptacles, and the point where they exit from the apparatus.
11. Onlyuseattachments/accessoriesspecifiedbythemanufacturer.
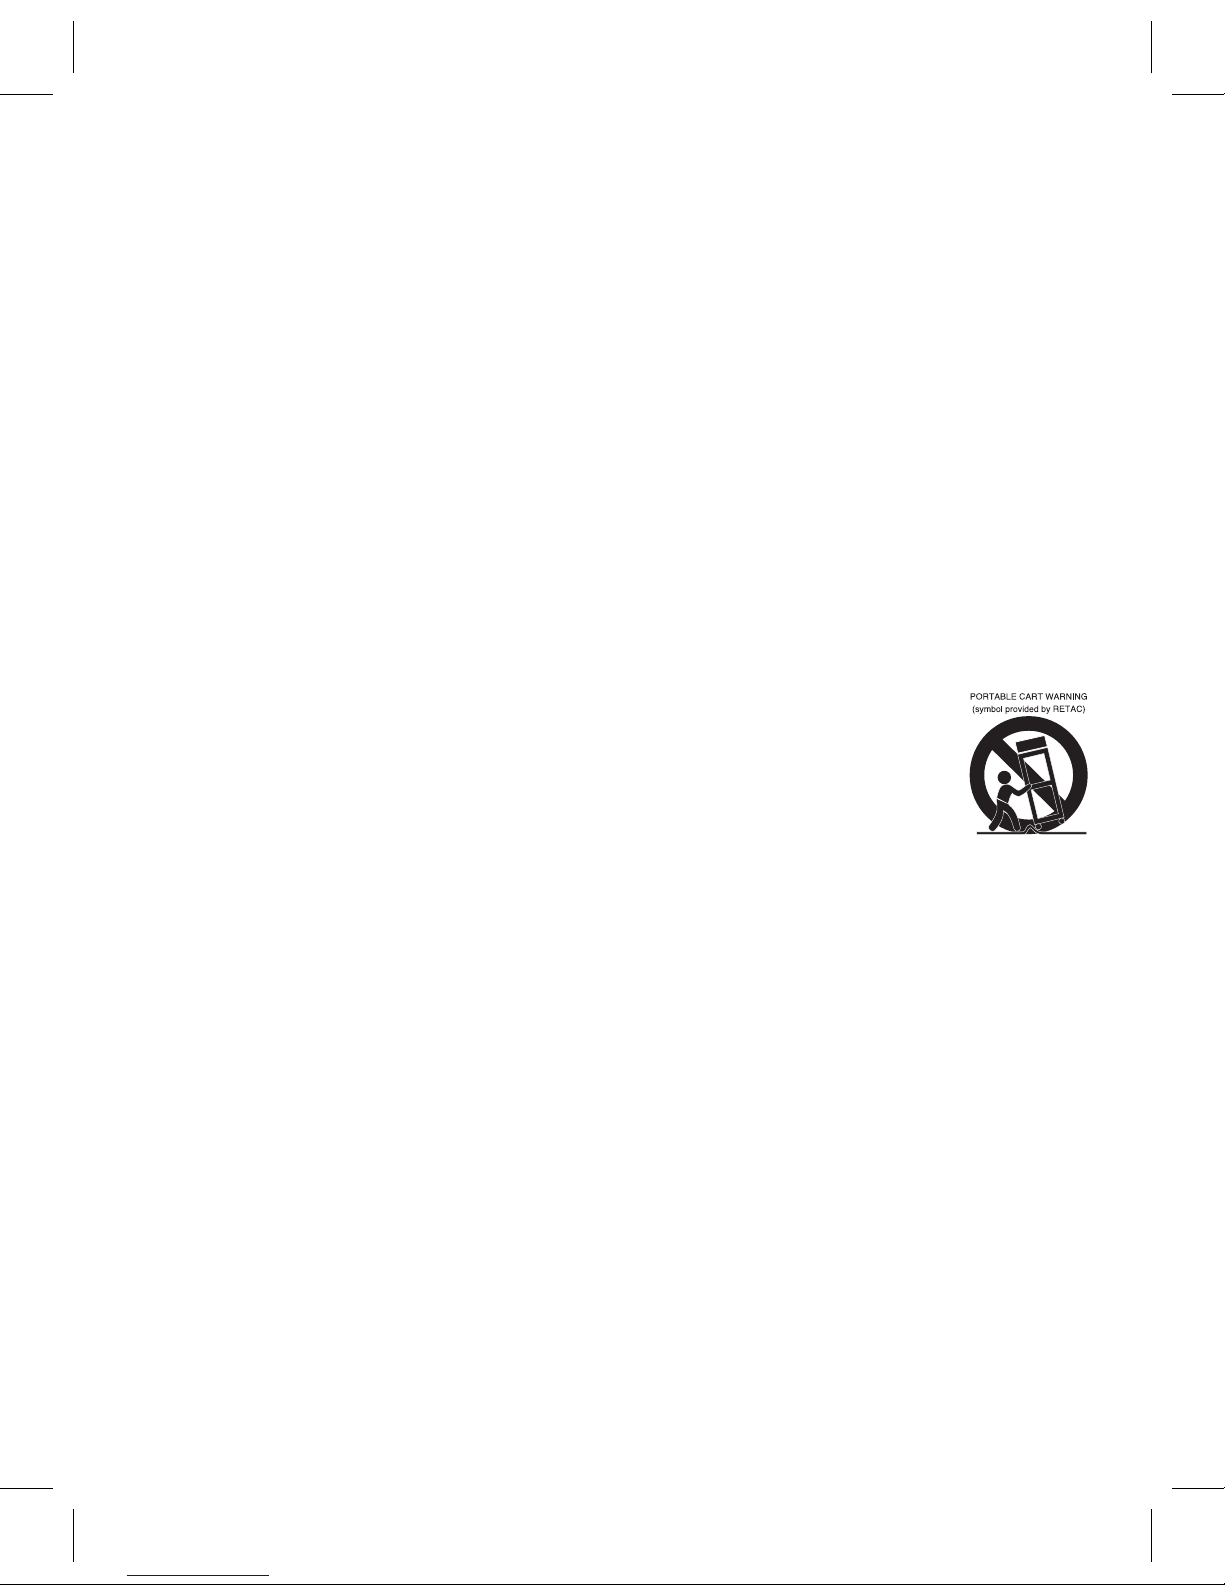
12. Use only with a cart, stand, tripod, bracket, or table specified by the
manufacturer, or sold with the apparatus. When a cart is used, use caution
whenmovingthecart/apparatuscombinationtoavoidinjuryfromtip-over.
13. Unplug this apparatus during lightning storms or when unused for long periods of time.
14. Refer all servicing to qualified service personnel. Servicing is required when the apparatus has
been damaged in any way, such as power-supply cord or plug is damaged, liquid has been spilled
or objects have fallen into the apparatus, the apparatus has been exposed to rain or moisture,
does not operate normally, or has been dropped.
15. WARNING: To reduce the risk of fire or electric shock, do not expose this apparatus to rain or
moisture. Do not place objects filled with water, such as a vase, on the apparatus.
16. The AC mains plug is used as the power disconnect device and it should remain readily accessible
and operable during intended use. In order to completely disconnect the apparatus from power,
the mains plug should be completely removed from the AC outlet socket.
17. CAUTION: To reduce the risk of fire or explosion, do not expose batteries to excessive heat such
as sunshine, fire or other heat sources.

5
This manual contains important safety precautions and information for correct
usage. Please be sure to read this manual carefully before use to avoid any
damage to the device.
User Safety
• Nevertouchthepoweradapterwhenhandsarewet.
• Deviceshouldonlybepluggedintoproperlygroundedoutlets.
• Makesuretheplugtstightlyintotheoutlet.
• Ifthedeviceoritsaccessoriesbecomedamagedinanyway,pleasedonotuse.
• Ifthereislightning,removeplugfromtheoutletimmediately.
• Ifdeviceisfullycharged,removeplugfromtheoutlet.
• Thereisabuilt-inbatteryinthisdevice,whichisnotreplaceable.
Device Safety
• Donotleavedeviceindirectsunlightorinacarforprolongedperiods.
• Donotusethedeviceindustyplaces.
• Donotusethedeviceinwetplaces,suchastherestroom.
• Keepawayfromallmagnetsandmagneticdevices,suchascreditcards.
• Neveruseanythird-partyaccessories.
• NeveruseanysharpobjectstotouchtheLCDscreen.
• PresstheLCDscreengently.Neverhitthescreen.
• Keepthedeviceawayfromwater.
• Becarefultoneverdropthedevice.
• Donotattempttorepair,disassembleorinanywaymodifythedevice.

6
Location of Controls
Front
1. Camera
2. Shutter Button
3. Power Button
4. Volume +/– Buttons
5. Speaker
6. Return Button
7. Home Button
8. Menu Button
9. ChargeIndicator
10. Micro SD Card Slot
11. Micro USB Port
12. HeadphoneJack
13. Microphone

7
Rear
1. Camera
2. Reset Button
21

8
Charging the Unit
TochargetheunitusingtheAC/DCAdapter,plugthesmallendof
theUSBcabletotheMicroUSBjackandtheotherendtotheAC/DC
Adapter. Then plug the AC/DC Adapter to an AC outlet having
100-240V~50/60Hz.
Tochargetheunitusingacomputer’sUSBport,plugthesmallendof
theUSBcabletotheMicroUSBjackandtheotherendtothepowered
USB port on the computer.
Charging with the AC/DC adapter is the fastest method.
Whencharging,theChargeindicatorwilllightupred.Whenfully
charged,itwilllightupblue.
9
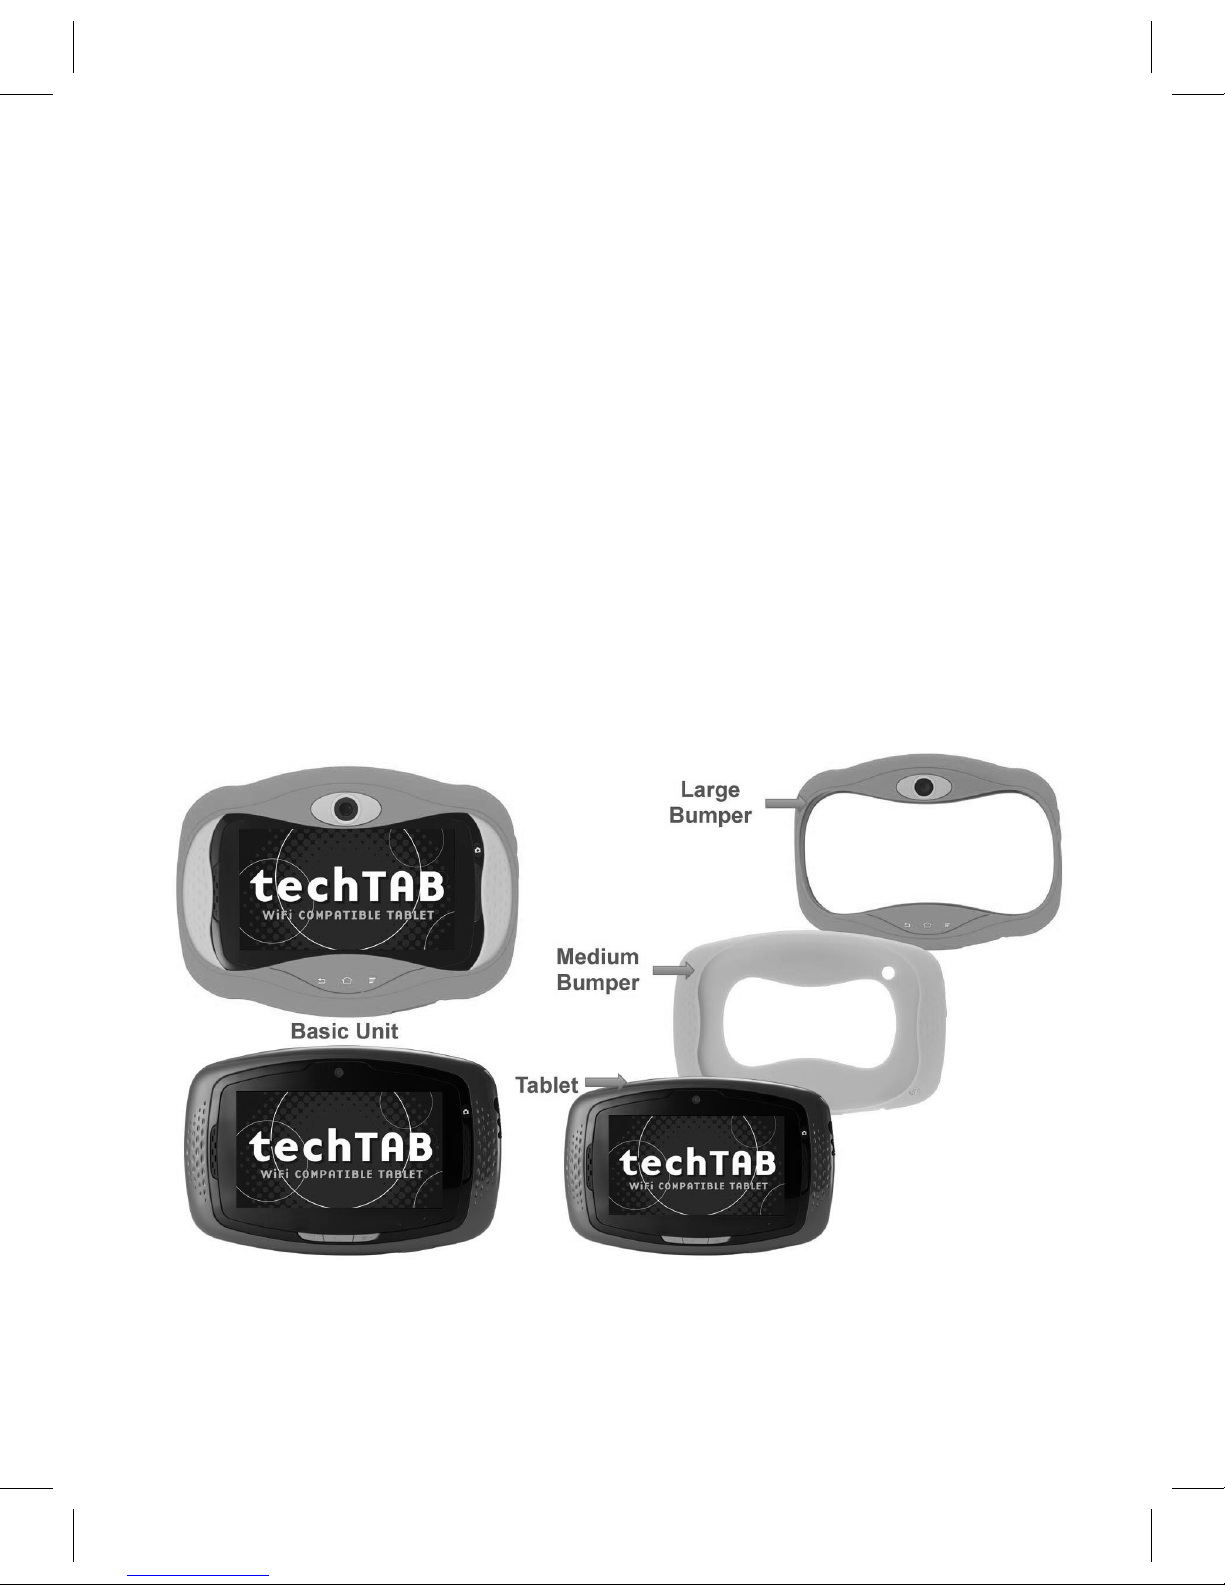
Using the Bumpers
The “Grow with Me” system of bumpers provides protection for your
tablet as your child grows. Use both bumpers for the highest level of
protection. You decide how much protection you need.
Recommended for Ages 3-4 (Large bumper available in
Blue or Pink)
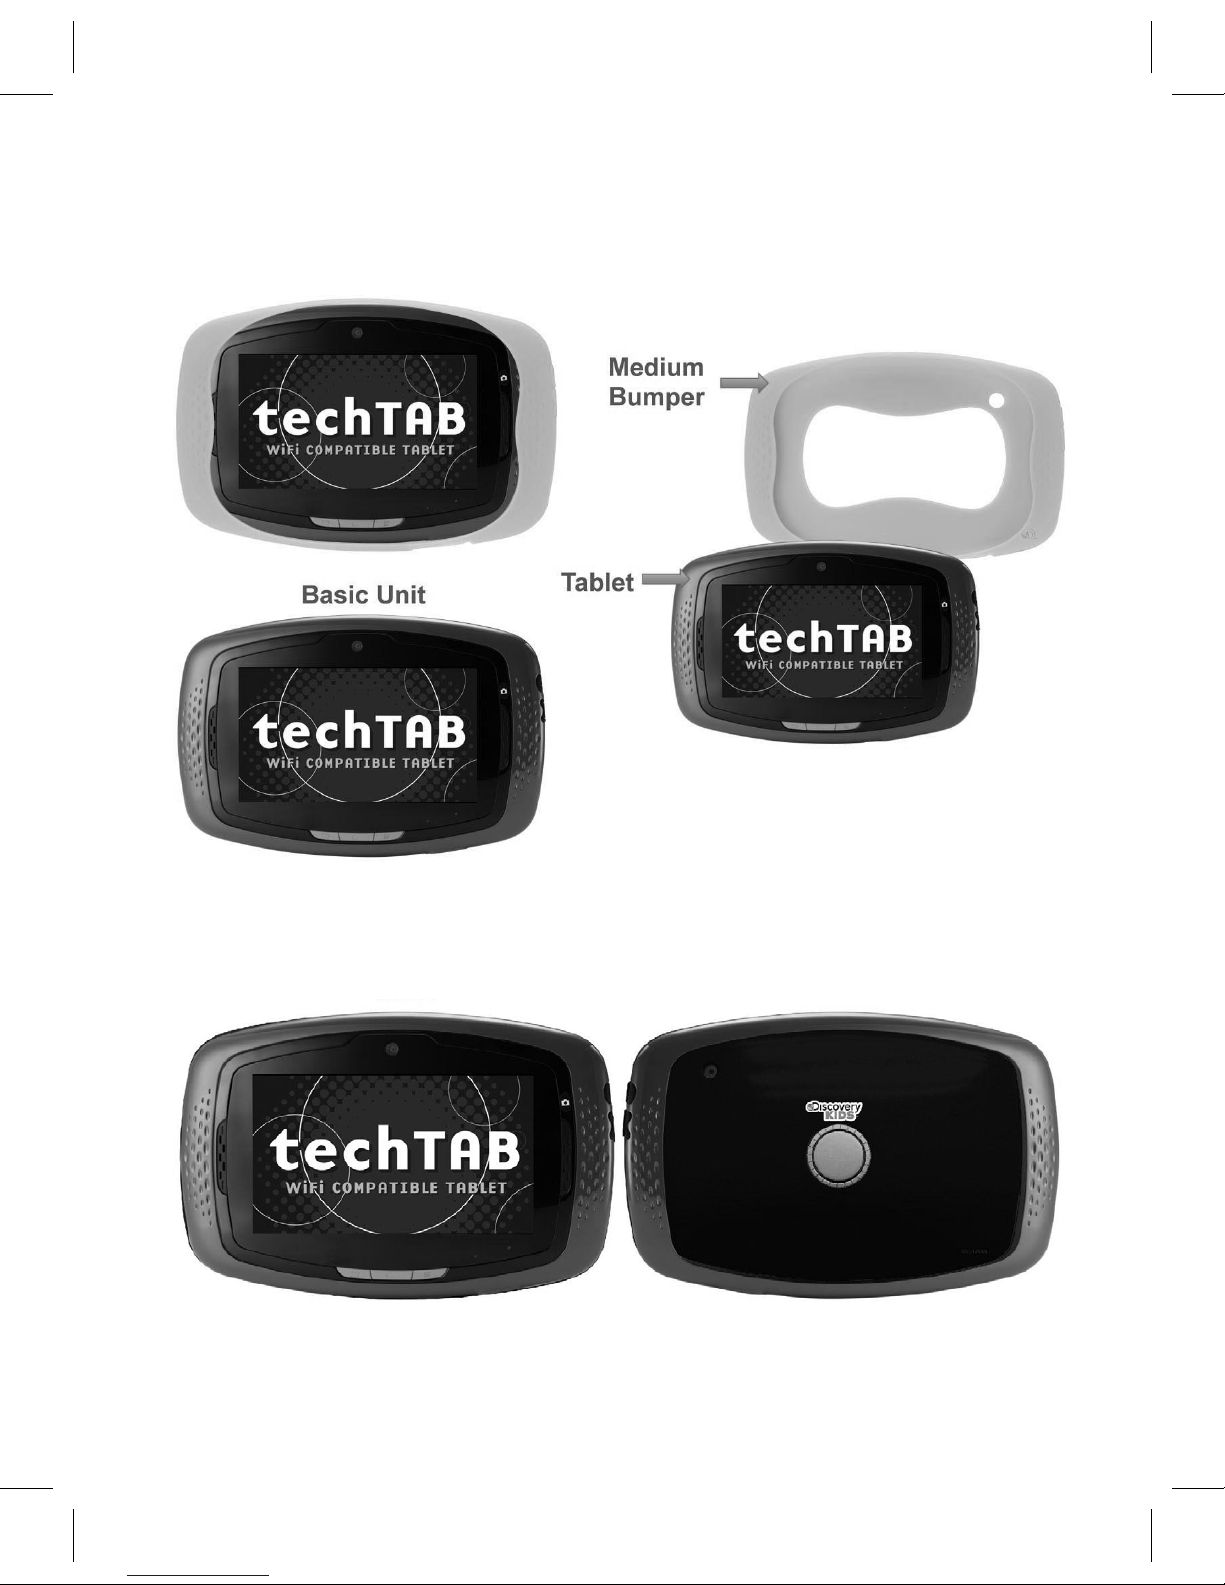
10
Recommended for Ages 5-6
Recommended for Ages 7-9
11
Basic Operation
To Turn ON:WhileintheOffmode,pressandholdthePowerbuttonfor
threeseconds.IfintheSleepmode,simplypressthePowerbuttonand
the unit will turn on.
To Turn OFF:WhileintheOnmode,pressandholdthePowerbuttonfor
threeseconds,thentapOK from the pop up box.
To Force Shutdown:WhileintheOnmode,pressandholdthe
Powerbuttonforsevenseconds;theunitwillturnoff.ThisisNOT
recommended unless the device is unresponsive.
To Sleep:WhileintheOnmode,pressthePowerbuttononceorifthe
unitisidleforoneminute,itwillentertheSleepmode.Thiswillsave
batterylife,butnotcompletelyturntheunitoff.
To Wake Up:WhileintheSleepmode,pressthePowerbuttononceto
waketheunit.
Headphone Jack:Forprivatelistening,plugstandardheadphonesor
earphonesintothisjack.
Volume: Press the + button to raise or – button to lower the volume.
: Press to return to the previous screen. Press at the Home screen to
Log off and return to the Home screen.
: Press to return to the Home screen.
: Press to enter the Menu screen.
12
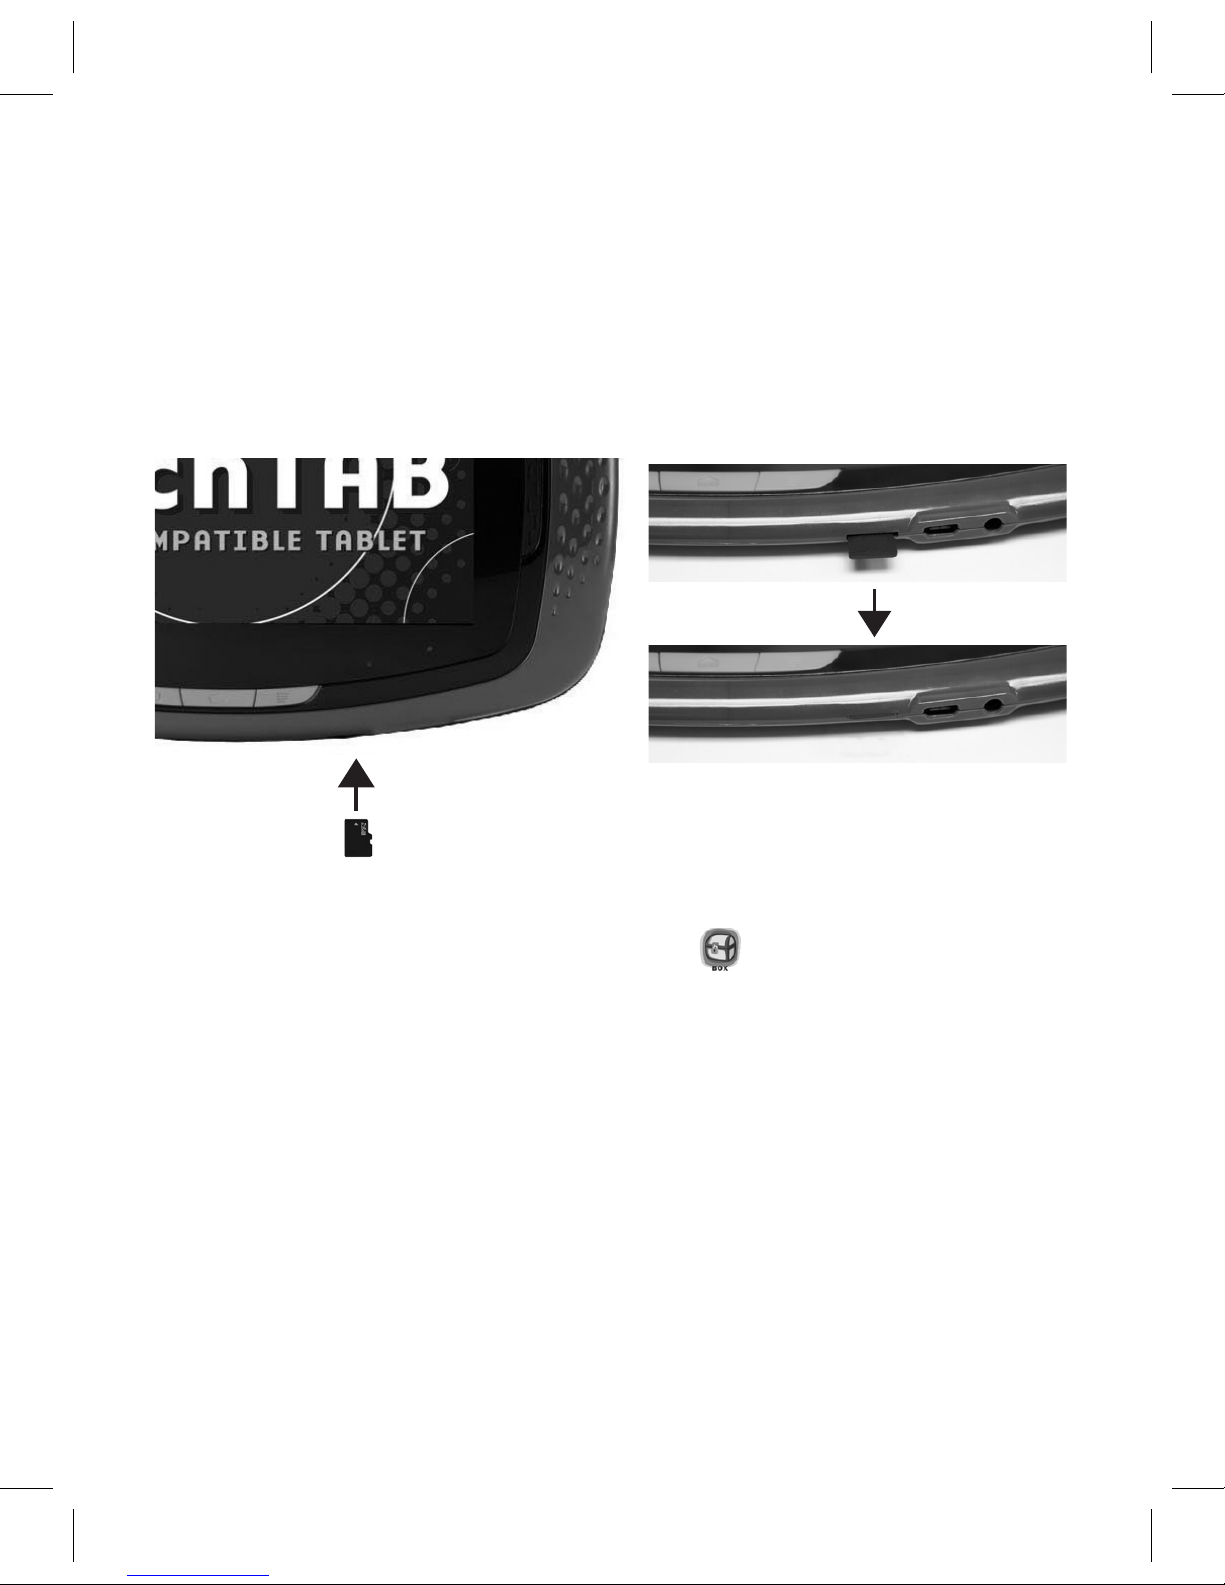
Using a Micro SD Card
InsertamicroSDcard(upto32GB)withthecontactsfacingtowardsthe
front of the unit into the Micro SD Card slot.
Afterinserted,taptheParent’sicon,loginusingthesecuritycode(see
nextpagefordetails)andthentaptheBox icon on the Home screen.
Tap the Explorer icon and then SD Card to view the contents of the SD
card,whereyoucanviewandmodifythecontents,aswellasmove
items from the SD card to this device.

13
Operation
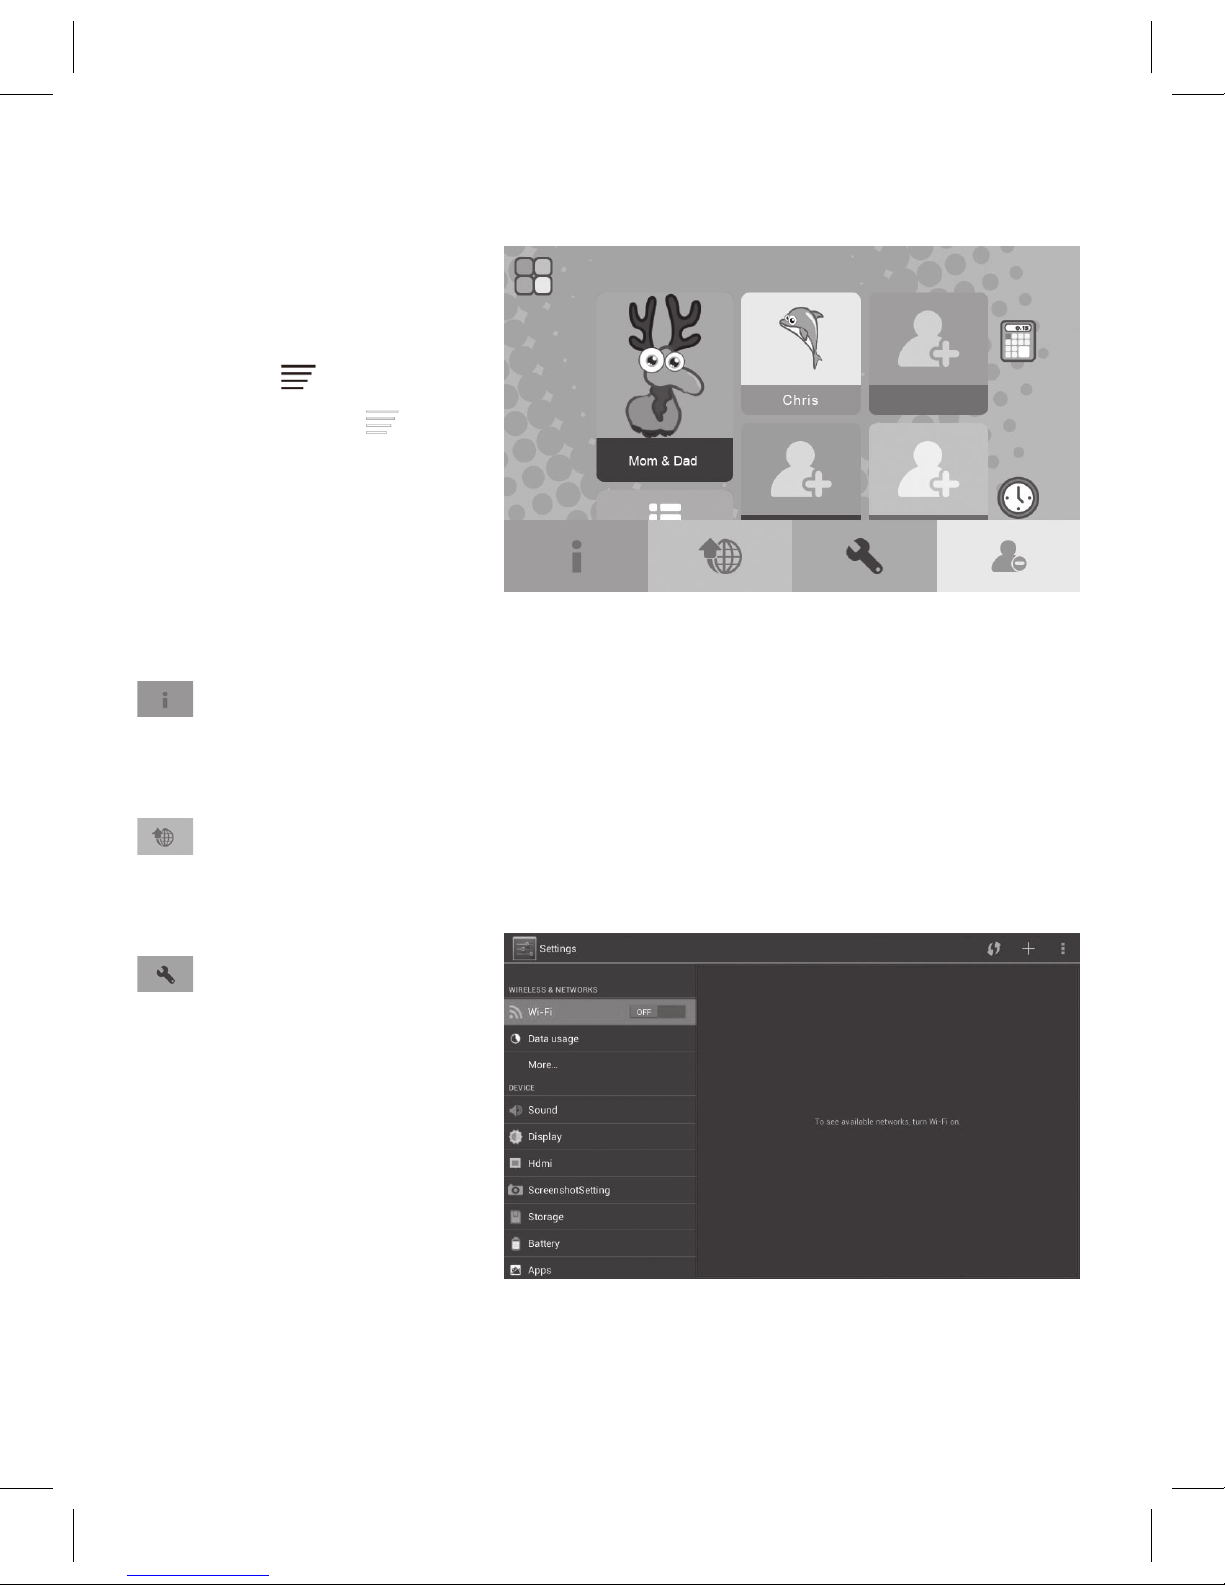
Account Management
The Account Management screen
will appear when you first turn
the unit on or when you log a
user off. This screen shows the
mainuser(theParent)andupto
four additional users and other
controls as explained in the next
column.
Thesystemdefaultstotheparentalaccount(highestauthority).The
initialpasswordis“9876”.Itisrecommendedtochangethepassword
on the Parental controls so that the default password is no longer active.
Writedownyournewpasswordandkeepitinasafeplace.Eachtablet
allows for up to four additional accounts plus the Parent account. Each
useraccountcanhavetheirownuniquepassword.However,theParent
account can access all of the accounts using their password.
AttheAccountManagementscreen,tapontheiconstoperformthe
following:
: TaptoentertheClockscreen(seepage34).
: TaptoentertheCalculator(seepage34).
: TaptochangetheBackground.

14
: Tap(orpresstheMenubutton)tobringuptheMenu(seepage16).
: Taptoaddanewuser(seepage15).
Home screen
Afterstartingupandloggingintoyourindividualaccount,youwillsee
the main home screen. There are nine folders on the home screen used
to store the many different application programs for each child. The
homescreenisshown,butmayvarybymodel.PresstheHome
button to return to the Home screen.
Below are the parent’s home screen and the child’s home screen.
Child’s Home Screen
Parent’s Home Screen

15
To Add a New User
After tapping new user ,
the parental login will appear.
Enter the default password of
“9876” or your set password
hereandtheNewUserscreen
will appear.
Enter the new user’s
informationthentapthecheck
marktoconrm.Ifyoudonot
wantapassword,leavethese
areasblank.Tapthecheck
markwhendoneandthe
Sharing Screen will appear.
On the Sharing screen you
select the category and
apps you wish to share with
individual users. Tap the
category on the left and then
the individual apps you want
to share with this user. Tap the
leftcheckmarkwhenyouare
done.
16
Menu Options
At the Account
Maintenancepage,tap
the Menu icon(or
press the Menu
button)tobringupthe
menu as shown and tap
on the icons to perform
the following:
: Information
Tap to view information about the manufacturer.
:Upgrading
Tap to upgrade the system software. Follow instructions on screen.
:System Settings
Tap to bring
up the System
Setting screen.
After entering the
Parent’spassword,
the System Setting
screen will appear.
See next page for System Setting details.

17
AtthisscreenyoucanchangetheWi-Fisettings,DateandTime,and
much more as follows.
Note: Use finger to slide screen up or down to view entire screen contents.
Wi-Fi:TaptoturnWi-Fion;alistofavailableWi-Finetworkswillappear.
Selectyournetwork,andenterpassword(ifoneisset).“Connected”will
appear if successful.
Data Usage: Tap to view the data usage for open apps.
More:TaptosettheVPN,PortablehotspotorEthernet.
Sound: TaptochangetheDefaultNoticationSoundortoturnthe
Touch Sounds On or Off.
Display: TaptochangetheBrightness,SleepTimeorFontSize.
Storage: Tap to view the used and available storage.
Battery: Tap to view the remaining charge on the battery.
Apps: Tap to view the installed apps. Tap on an App to move to the SD
Card,Uninstall,ForceStop,seemoreinfo,etc.
How to Manage the Apps
Inthesystemsettings,youcanndtheapplicationmanager.
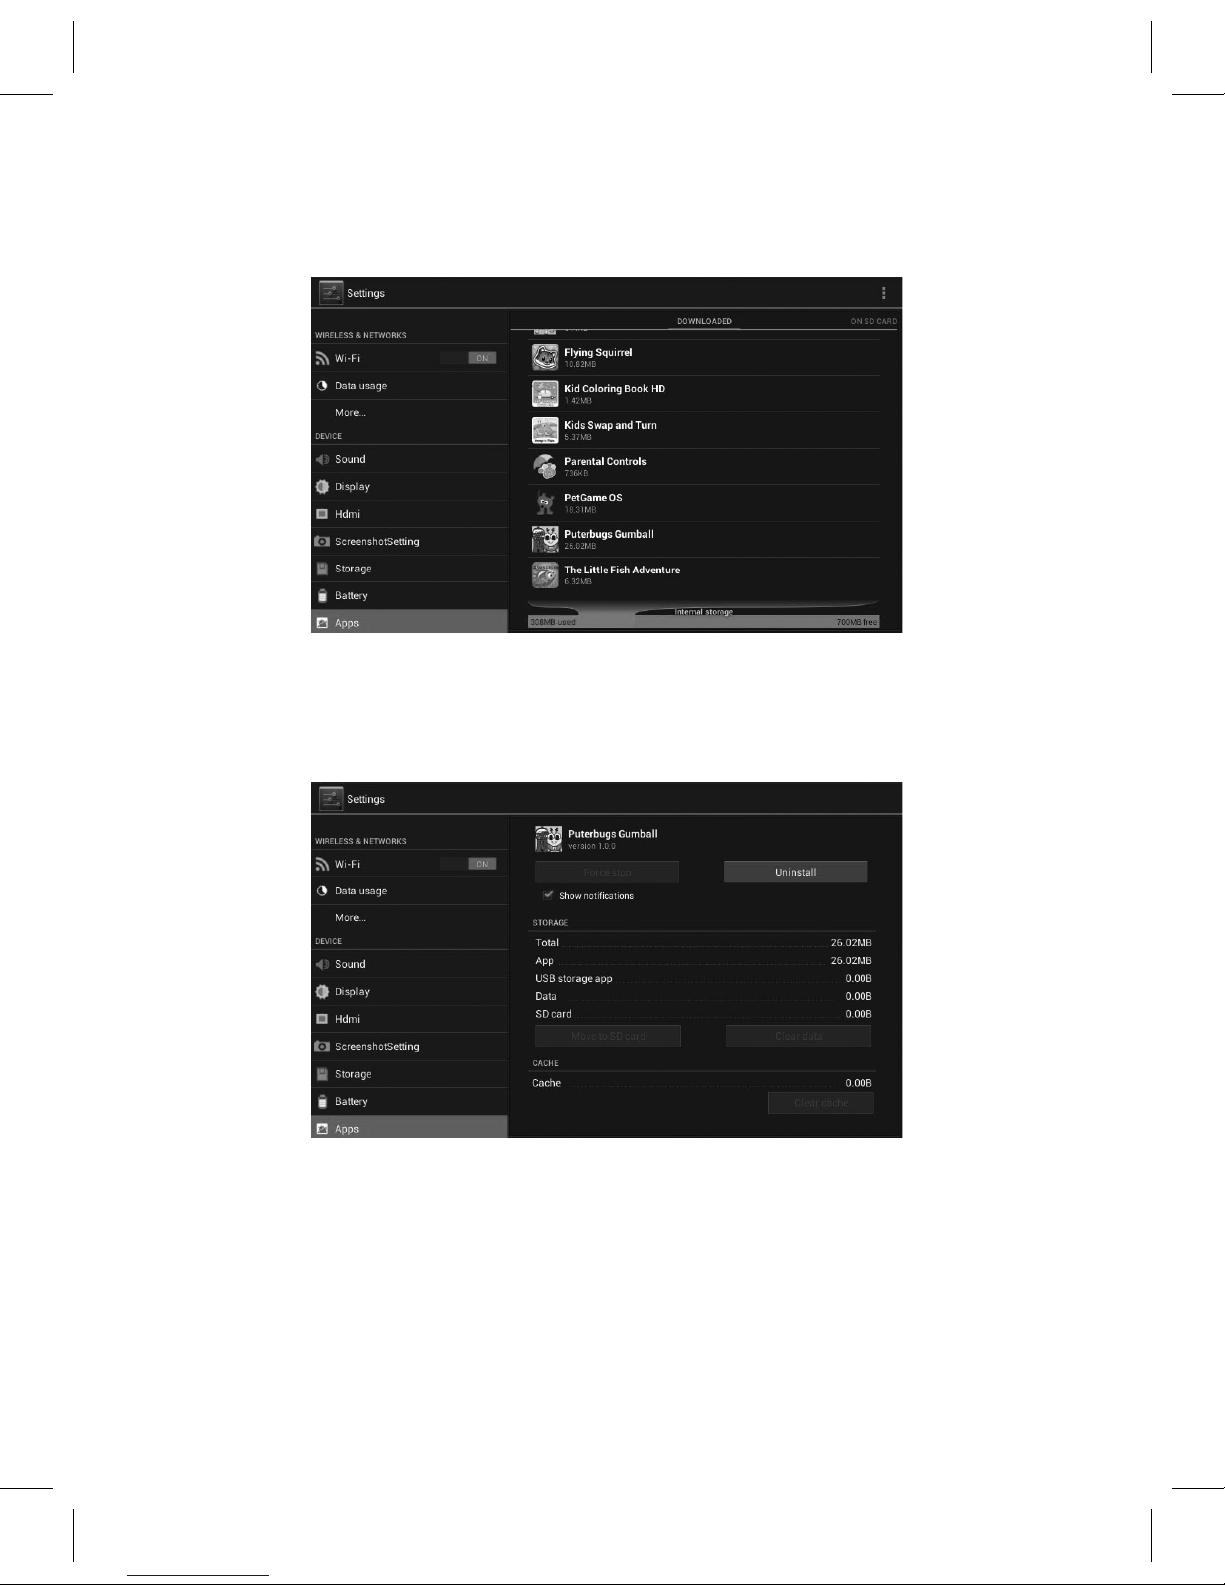
18
There are 4 categories: Downloaded / On SD Card / Running / All.
Ifyouwanttoshutdownanyoftheapps,lookunderthe“Running”tab
and tap on each app icon you wish to shut down.
Security:Taptochangeifinstallationofappsfromunknownsources
is allowed.

19
Language & Input: Tap to select your desired language and input settings.
NOTE:ChangingtheAndroidsystemlanguagewillnotchangethe
language of the user software.
Backup & Reset: Tap to reset the unit to its factory default settings.
Note:Thetabletspendsabout10minutesforthewholeresetprocess.
Email: Tap to access your email accounts and Account Settings.
Add Account: Tap to add a new email account.
Date & Time:Selecttosetthecurrentdateandtime,aswellastime
format.
:Deleting a User
Tap to delete a user. After
tappingtheicon,tapona
child’s account to delete.
Thentapthecheckmark
todelete.(TheParent’s
accountcannotbedeleted).
Table of contents


