diybook KG Garden Gate Closer GTS 120 User manual
gartentorschliesser.com
a diybook KG brand
page 1
diybook KG
Korneuburger Straße 68-70/2 Telefon: +43 2262 712 51
AT-2102 Bisamberg Telefax: +43 2262 712 51-77
UID-Nr: ATU67654415, DE313733795 E-Mail: office@gartentorschliesser.com
FB-Nr: FN 387443 w Internet: https://gartentorschliesser.com
Garden door-closer GTS 120 / 170
Assembly instructions
Step 1: Check material list and tool list
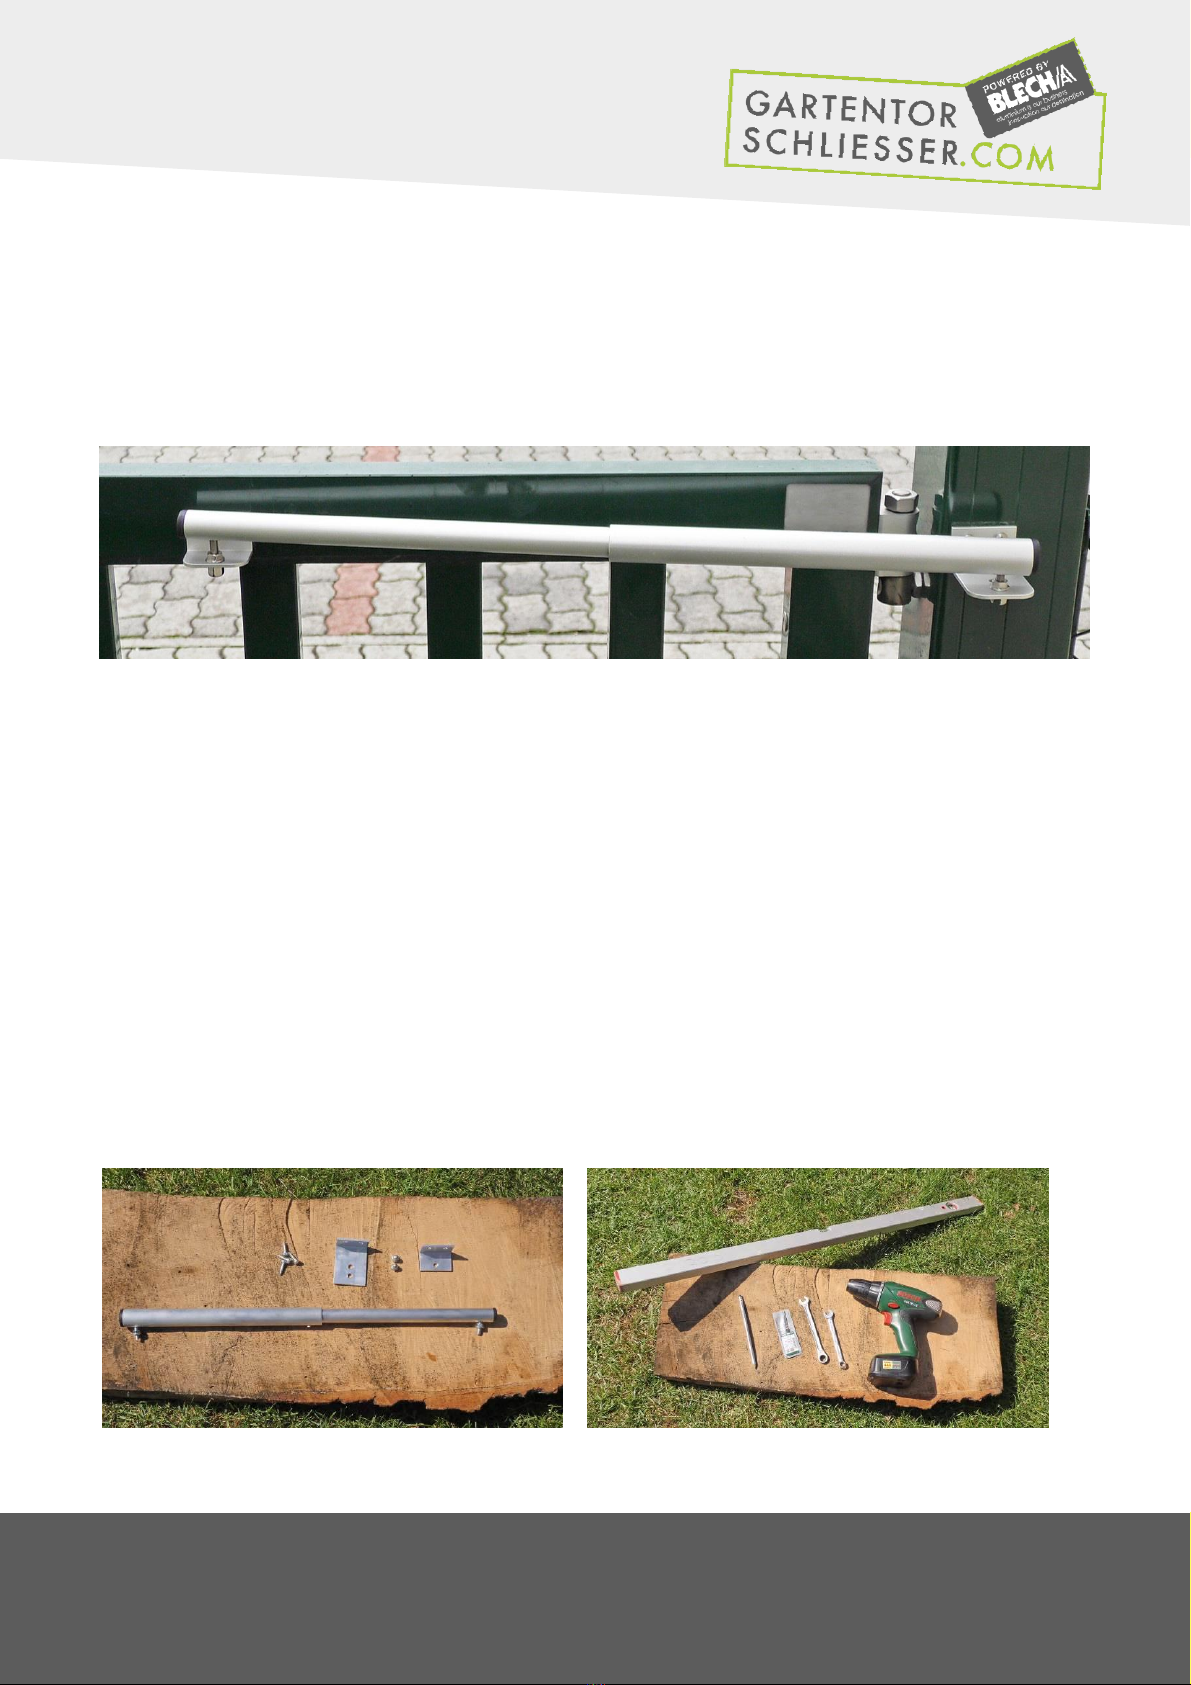
Your garden door-closer is delivered already assembled. Your product also includes two
aluminum brackets with different side lengths, 4 tapping screws and 2 cap nuts.
WARNING: The garden door-closer is preloaded! The preloading safety should be
disabled after installation! Due to preloading the threaded rods of the garden door-
closer are skewed. They will adjust during assembly.
1 garden door-closer GTS 120/170
1 aluminum bracket 30mm/30mm/4mm x approx. 45mm wide
1 aluminum bracket 30mm/60mm/4mm x approx. 45mm wide
2 cap nuts M6
4 tapping screws 4,8 x 19 mm
gartentorschliesser.com
a diybook KG brand
page 2
diybook KG
Korneuburger Straße 68-70/2 Telefon: +43 2262 712 51
AT-2102 Bisamberg Telefax: +43 2262 712 51-77
UID-Nr: ATU67654415, DE313733795 E-Mail: office@gartentorschliesser.com
FB-Nr: FN 387443 w Internet: https://gartentorschliesser.com
You will need a cordless screwdriver with a 4,2 mm metal drill and a cross slot
(Phillips) screwdriver (PH2) for installation.
You will also need a spirit level, measuring tape, pen and two no.10 fork
wrenches.
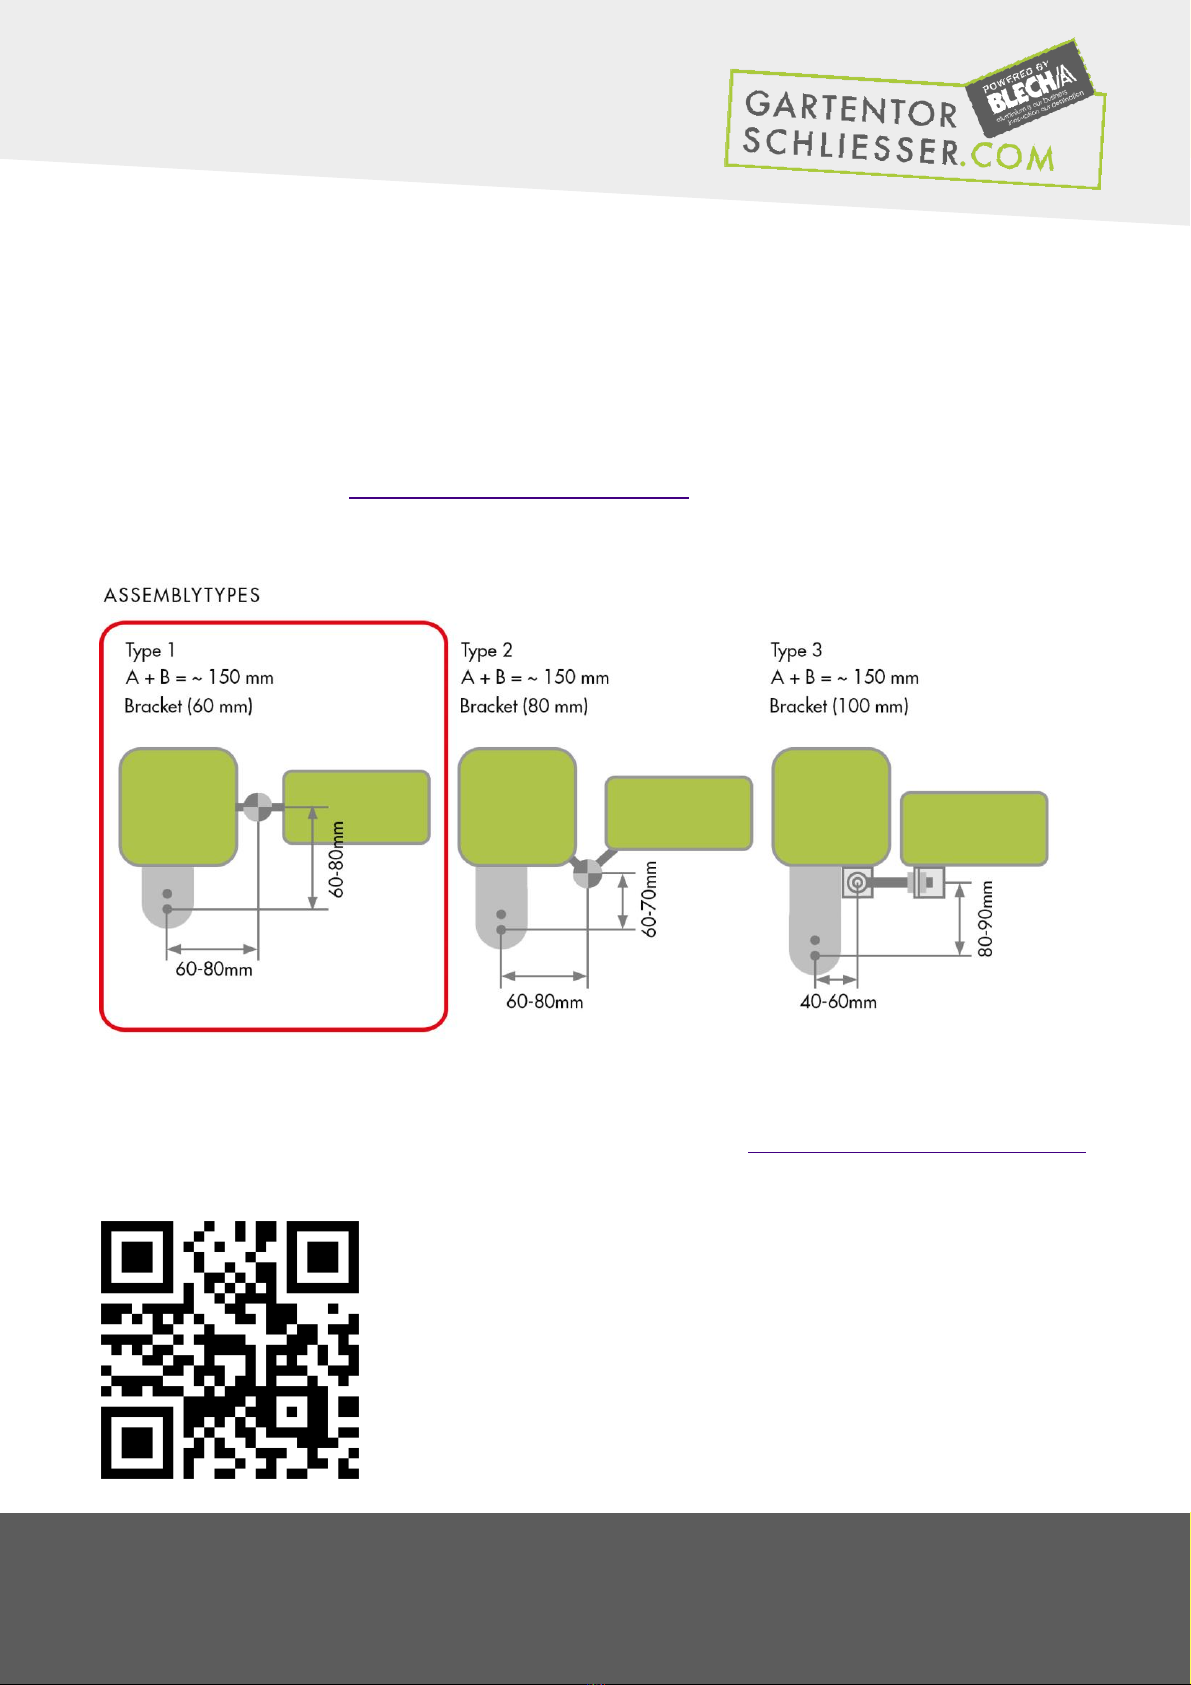
The following installation instructions show the most common mounting situation (type
1) for garden doors. For different situations, you may need a longer bracket or other
things. You can check http://gartentorschliesser.com for instructions on other mounting
types.
Using the following QR-Code, you can also watch a video https://youtu.be/9qt9OIPX2HI
on this type of mounting. (german video with english subtitles)
gartentorschliesser.com
a diybook KG brand
page 3
diybook KG
Korneuburger Straße 68-70/2 Telefon: +43 2262 712 51
AT-2102 Bisamberg Telefax: +43 2262 712 51-77
UID-Nr: ATU67654415, DE313733795 E-Mail: office@gartentorschliesser.com
FB-Nr: FN 387443 w Internet: https://gartentorschliesser.com
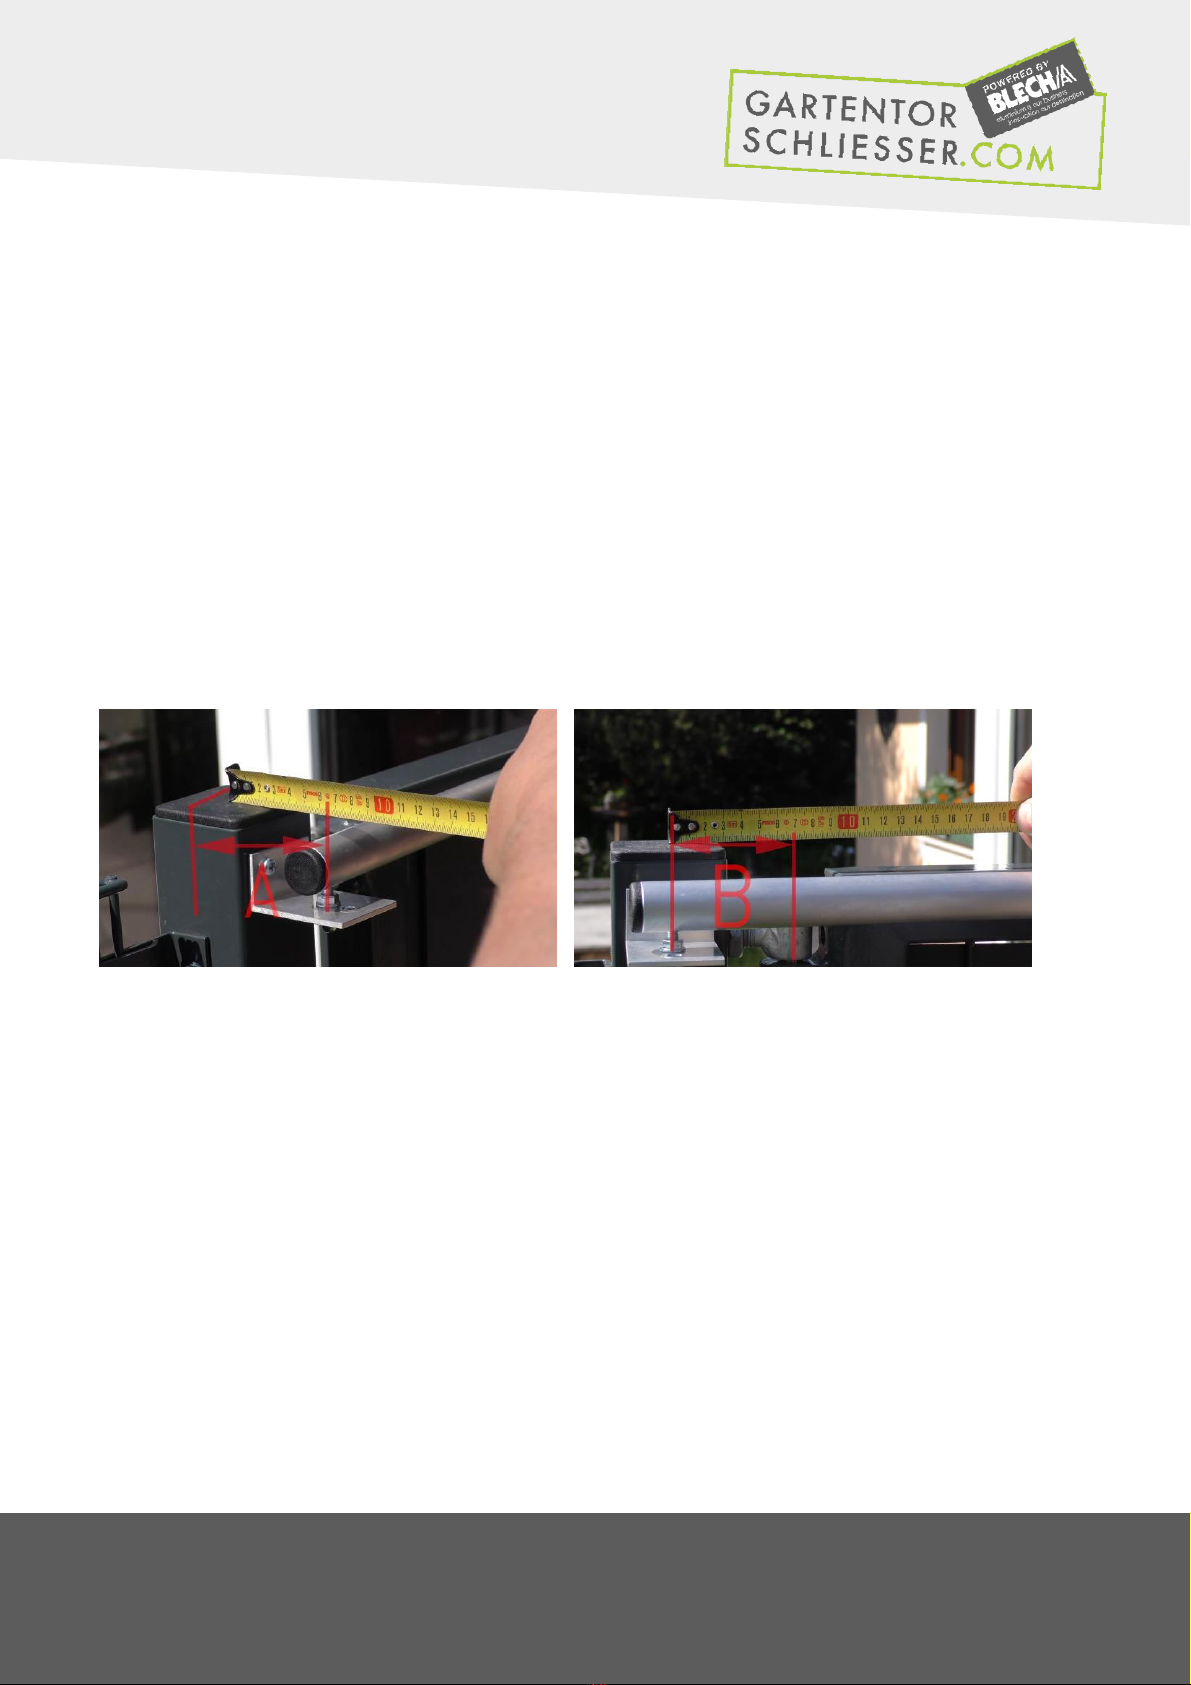
Step 2: Check your distances and determine the position of the first bracket
First, you need to determine the distance between the garden door’s pivot point and the
pivot point of the garden door-closer and then the horizontale position. For that, you
already need the first (longer) bracket of the GTS 120/170.
Distance A and Distance B taken together should not exceed 155 mm, but should
not be much less. If the sum is >= 155 mm, the door can only be opened less than
90° at worst.
TIP: We therefore recommend positioning the long bracket, which is mounted at the
garden door’s pivot point, in such a fashion that the sum oft the two distances (A+B)
does not exceed 155mm to the outer hole of the bracket.
Step 3: Calibrating the bracket on it’s abutment face
Now the height of the bracket mounted on the garden door’s pivot point is determined.
To this end, position the spirit level in such a way that the second bracket can be
installed on the garden door without any problems while still being horizontal.
Mark the drill holes using a pen.

gartentorschliesser.com
a diybook KG brand
page 4
diybook KG
Korneuburger Straße 68-70/2 Telefon: +43 2262 712 51
AT-2102 Bisamberg Telefax: +43 2262 712 51-77
UID-Nr: ATU67654415, DE313733795 E-Mail: office@gartentorschliesser.com
FB-Nr: FN 387443 w Internet: https://gartentorschliesser.com
Step 4: Drill holes for the first bracket
Drill the holes using a cordless screwdriver with a 4,2 mm drill. The drill’s dimensions
are essential here! After drilling the holes, mount the bracket using the tapping screws.
gartentorschliesser.com
a diybook KG brand
page 5
diybook KG
Korneuburger Straße 68-70/2 Telefon: +43 2262 712 51
AT-2102 Bisamberg Telefax: +43 2262 712 51-77
UID-Nr: ATU67654415, DE313733795 E-Mail: office@gartentorschliesser.com
FB-Nr: FN 387443 w Internet: https://gartentorschliesser.com
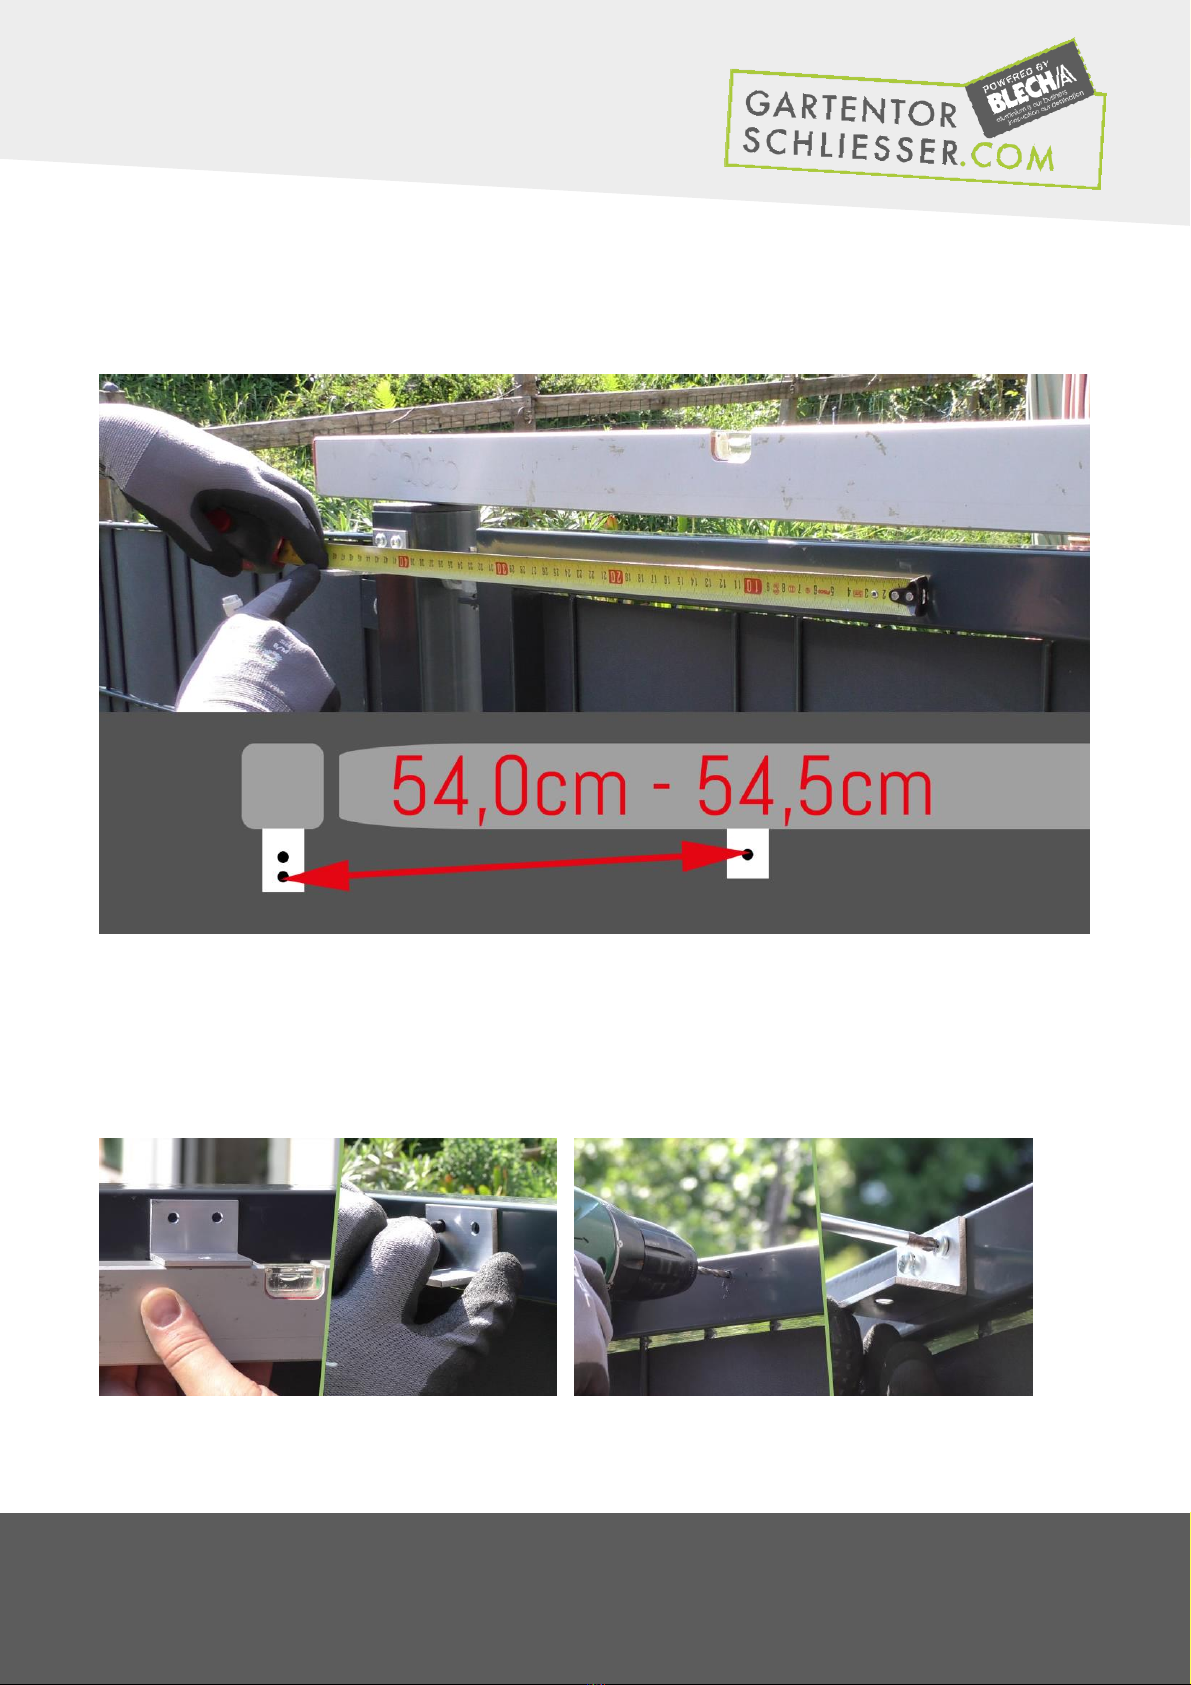
Step 5: Calibrate distance between bracket holes
The second bracket has to be installed in such a way that the distance between the two
holes lies between 540 mm and 545 mm.Exact measurement is essential here!
Step 6: Mount the second bracket
After calibrating the distance as accurately as possible the second bracket’s two
mounting holes are marked, drilled using the 4,2 mm drill and fixed using the tapping
screws.
Other manuals for Garden Gate Closer GTS 120
2
This manual suits for next models
1
Table of contents
Popular Lawn And Garden Equipment manuals by other brands

Sunforce
Sunforce SOLAR user manual

GARDEN OF EDEN
GARDEN OF EDEN 55627 user manual

Goizper Group
Goizper Group MATABI POLMINOR instruction manual

Rain Bird
Rain Bird 11000 Series Operation & maintenance manual

Cub Cadet
Cub Cadet BB 230 brochure

EXTOL PREMIUM
EXTOL PREMIUM 8891590 Translation of the original user manual


Vertex
Vertex 1/3 HP Maintenance instructions

GHE
GHE AeroFlo 80 manual

Land Pride
Land Pride Post Hole Diggers HD25 Operator's manual

Yazoo/Kees
Yazoo/Kees Z9 Commercial Collection System Z9A Operator's & parts manual

Premier designs
Premier designs WindGarden 26829 Assembly instructions

Snapper
Snapper 1691351 installation instructions