DOD GSE580 User manual


GSE580 USER MANUAL

2
Content
Instructions before use ................................................................................................... 4
Preface ................................................................................................................ 4
Product Guarantee.............................................................................................. 4
Copyright infringement Warning......................................................................... 4
Check Product Accessories.................................................................................. 4
Product Structure ........................................................................................................... 5
Front View .......................................................................................................... 5
Rear View............................................................................................................ 6
Lateral view......................................................................................................... 7
Installation ...................................................................................................................... 8
Holder Installation .............................................................................................. 8
Memory Card Installation (Optional Purchase) ................................................... 8
Installation on Your Vehicles ............................................................................... 9
Transmit the video to the vehicle monitor (AV cable is optional purchase) .......11
Transmit the video to LCD TV...................................................................... 12
Component Descriptions .............................................................................................. 13
Recharging .................................................................................................................... 15
Menu Operation ........................................................................................................... 16
Video settings ................................................................................................... 16
System Setting .................................................................................................. 33
Video Playback.................................................................................................. 52
Additional functions.......................................................................................... 58
Connecting to PC .......................................................................................................... 61
Q&A .............................................................................................................................. 62
Related Parameters....................................................................................................... 64
Video Recording Time (For Reference) ............................................................. 64
Requirement of playing Full HD 1080P and 720P.............................................. 64
Product Specifications....................................................................................... 65

3
目錄
使用前須知············································································································ 66
前言 ············································································································· 66
產品保證 ····································································································· 66
侵犯版權警告······························································································ 66
檢查產品附件······························································································ 66
產品結構················································································································ 67
前視圖 ········································································································· 67
後視圖 ········································································································· 68
側視圖 ········································································································· 69
安裝方法················································································································ 70
安裝支架 ····································································································· 70
安裝記憶卡(記憶卡選購)············································································ 70
安裝於您的車上·························································································· 71
將畫面輸出於車用螢幕(AV 線選購)··························································· 73
將畫面輸出於液晶電視·············································································· 74
各部件介紹············································································································ 75
開始充電················································································································ 77
選單操作················································································································ 78
錄影設定 ····································································································· 78
系統設定 ······································································································95
影片回放 ····································································································114
附加功能 ····································································································120
與PC 連接·············································································································123
常見問題 Q&A ······································································································124
相關參數···············································································································126
影片錄影時間(供參考)···············································································126
FULL HD 1080P AND 720P 播放的系統需求···············································126
產品規格 ····································································································127

4
Instructions before use
Preface
This user manual will describe the usage of this product in details and
at the same time provide comprehensive information including usage,
operation, installation instructions and specification, etc. Please read
the manual carefully and keep it properly. We hope our product will
satisfy your need and provide you with long-term services.
Product Guarantee
This product is approved by ISO 9001:2008 International Quality
Standard and certified with FCC and CE. Our customers can use this
product free of apprehension.
Copyright infringement Warning
Please note this product is for personal use only. The forms of usage
should not offend or infringe international or domestic copyright laws
and regulations. All recorded videos should only use for personal use..
Please note that using this product for recording of occasions like
shows, exhibitions or commercial activities will infringe others’
copyrights or legislation rights.
Check Product Accessories
Please check whether the following accessories are present before
use
1. Vehicle Power Cable (4M) x1
2. Holder x1
3. HDMI Video Cable x1
4. USB Cable x1
5. User Manual x1

5
Product Structure
Front View
1. Infrared light switch
2.Mic-in
3. Infrared light
4. Lens
5. Holder’s hole
6. Tripod fixed terminal

6
Rear View
1. Screen
2. Speaker hole
3. Tripod fixed terminal
4. Recording Button
5. Mode Button
6. Power Button
7. Menu Button
8. 5-keys Rotary Button
9. Power Indicator Light
10. Reset Button

7
Lateral View
1. DC power-in
2. HDMI output
3. AV output/USB port
4. SD memory card slot

8
Installation
Holder Installation
Integrate the holder and recorder together and press the device
downward till it completely clenched with the holder.
Memory Card Installation (Optional Purchase)
Install the SD card into the drive recorder in the specific direction.

9
Installation on Your Vehicles
.Step 1
Adhere the suction cup holder to the inside windshield and adjust the
lens facing forward. Set “ON” on the “IMAGE FLIP” function. (Page17)
.Step 2
Plug the vehicle power cable in the cig lighter, and plug the other end
to the DC port of the drive recorder.

10
.Step 3
After installation, you can tuck the surplus part of power cable inside
Column A.
.Step 4
Switch ON the power, three options will appear on the screen, wait
for 2~3 seconds till the options disappear, red light on the drive
recorder will start blinking to indicate that now is recording mode;
and you could use the menu screen to adjust the direction of the
camera to complete the installation. Please refer to page 21 for
reference, [USB IN],

11
Transmit the video to the vehicle monitor (AV
cable is optional purchase)
Video can be transmitted through AV IN interface if there are video
equipments (vehicle monitor, GPS, and Satellite TV, etc.). The
following is an example on transmitting the video to the monitor by
using GPS with build-in AV IN function
Please skip the steps if you do not have these equipments.
.Step 5
Insert the AV composite video connector to the video equipment,
plug the other end to USB port of the drive recorder, adjust the video
equipment to AV channel, and insert the vehicle power cable to
complete the installation.
When the AV Composite video connector is plugged in, the screen on
the main system will be temporarily shut off.

12
Transmit the video to LCD TV
You can also transmit the video from the drive recorder to your LCD
TV at home to playback the data or adjust the setting. The steps are
as follows:
1. Your video equipment should have AV IN or HDMI ports.
2. Connect AV cable (optional purchase) or HDMI cable to the video
equipment and the drive recorder.
3. Connect the home use transformer (optional purchase) to the drive
recorder and the house power socket.
4. Adjust the channel of the video equipment to AV or HDMI.
5. Installation completed.
When outputting the video files from the drive recorder, the screen
of the recorder will be temporarily shut off.

13
Component Descriptions
1. Infrared light switch button
Manually adjust the switch button to ON/OFF infrared light.
Turning ON the infrared light will enhance night vision effect and
turn the screen to black and white.
Infrared light ON
Infrared light OFF
2. MODE Button
When in standby status, button can be switched in circulation for
recording, photo and playback mode.
3. Power Button
Press for 2~3 sec. to switch ON or OFF the main power.
4. MENU Button
Press the button during standby status, functions of current mode
will appear.

14
5. Recording/Photo Button
Press the button when under recording mode to start/stop
recording.
Press the button when under photo mode to take picture.
6. Reset Button
When the system crashed owing to improper usage, press “reset”
button for shutdown action of drive recorder.
7. Direction Button/OK Button
Use this button to adjust UP/DOWN/LEFT/RIGHT to operate the
functions of recorder or select the menu.
Press the center of the button to operate any function of recorder.

15
Recharging
Step 1:
Please set “SCREEN SAVE” function to “5 seconds” (please refer to
page 33). sleep mode is set to avoid battery consumption during
recharging.
Step 2:
Vehicle use power cable or USB cable can be used for recharging.
Please connect the vehicle use power cable or USB cable provided
and connect to the cig lighter hole or computer.
Step 3:
The following screen will appear automatically when the connection
is made properly, please select “CHARGE” and press OK.
Step 4:
”Charging…” appeared on the screen indicates it is under recharging.
The screen will indicate “Battery Full” after completing recharging
and automatically turn off.

16
Menu Operation
Press “MENU” during recording mode.
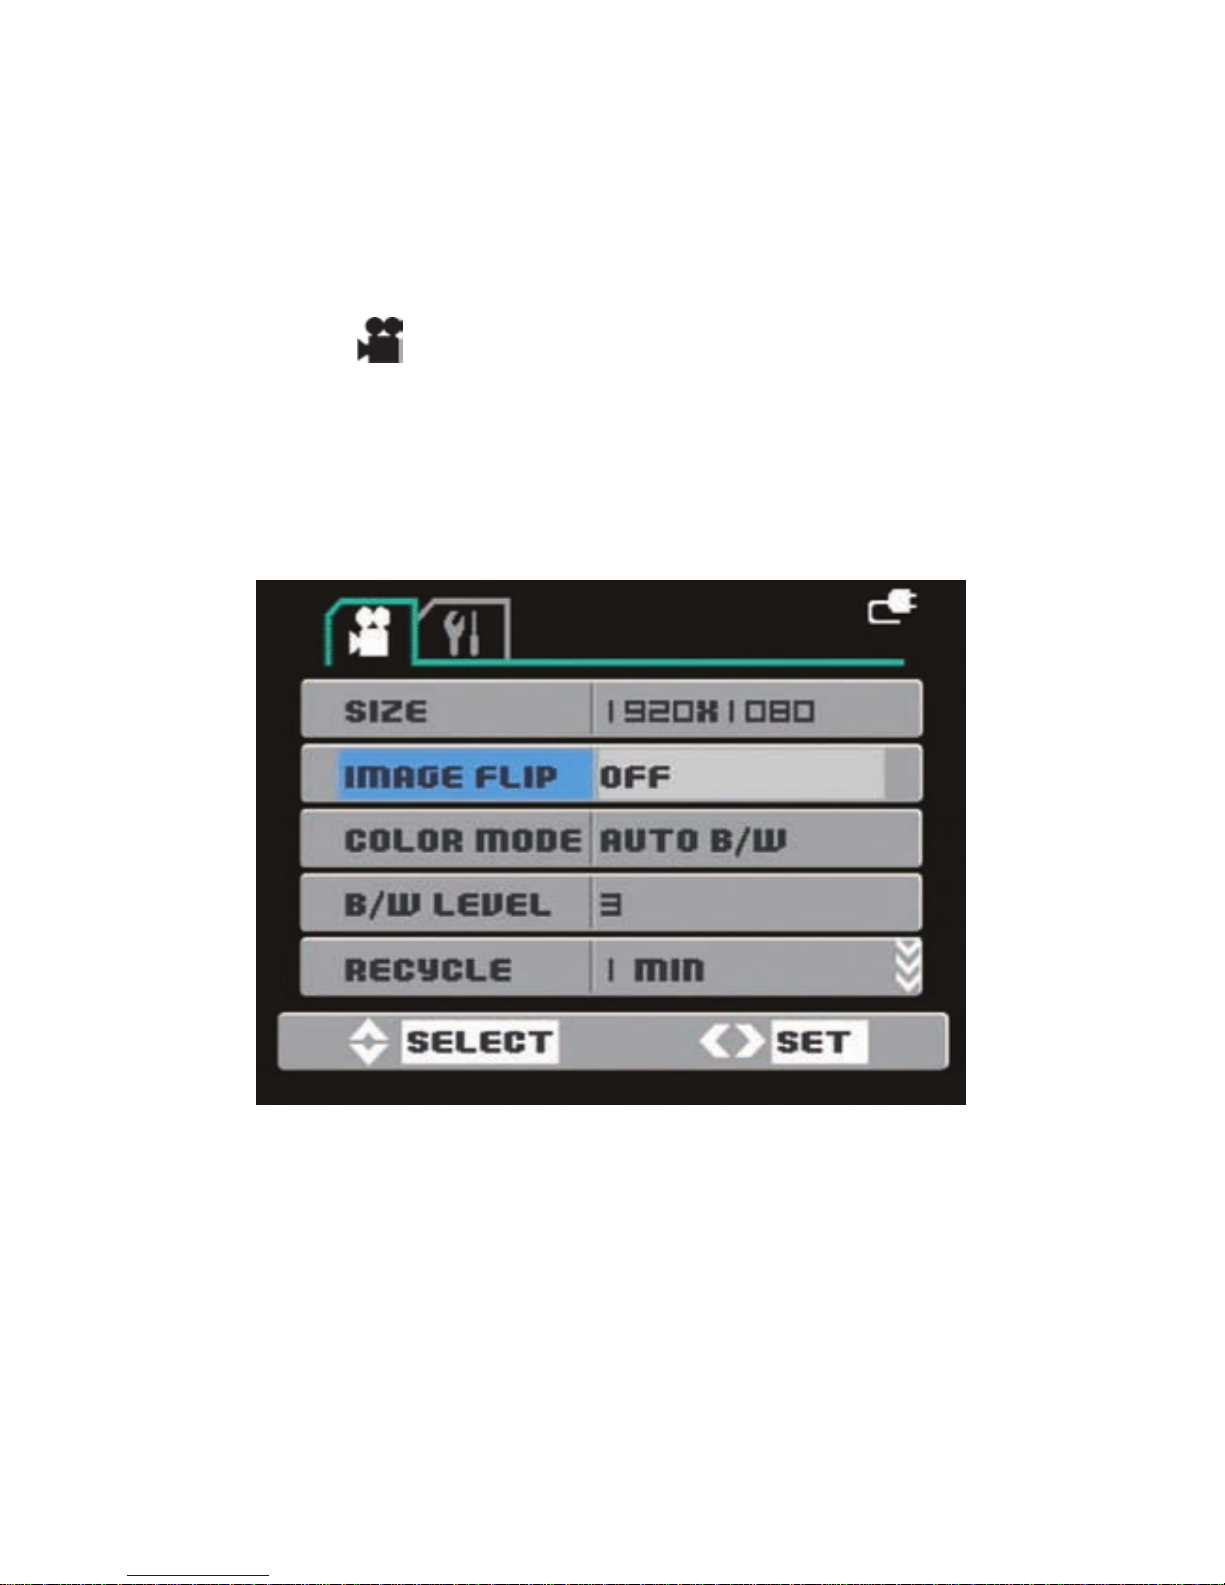
Video Settings
◆SIZE
Video resolution can be configured during recording. Higher value
means higher resolution and better picture quality, but higher
capacity consumption at the same time.
FPS is Frame Per Second during recording. Higher FPS means
smoother video.
MENU Button→【 】MENU→【SIZE】→【1920x1080 】*/
【1440x1080】/【1280x720】/【848x480】
* Default
17
◆IMAGE FLIP
Turn the menu and image vertically to 180 degree. You can also install
the drive recorder upside down 180 degree to fit your requirement.
MENU Button→【 】MENU→【IMAGE FLIP】→【OFF】*/【ON】
* Default

18
◆COLOR MODE
The system will shift to set value under insufficient light condition to
enhance the night vision effect; “AUTO B/W” and “AUTO COLOR” will
shift to black and white or color mode automatically during
insufficient light condition; “B/W” mean black and white video
irrespective of any condition.
MENU Button→【 】MENU→【COLOR MODE】→【NORMAL】/
【AUTO B/W】*/【AUTO COLOR】/【B/W】
* Default
Table of contents


