Paqes
Accessories
.........
...............•..•·· ....
..
22
How to Use ····:.···············
···
•··
··
·
23
Hemmers •···········
···
··················
24
Seam
Gauge
or
Cloth
Guide
···
···
25
Quilting
Guide
25
Adjusting
and
Chanqinq "V" Belt
28
Attachments.....•...............•..............
33
Adjustable
Cord
and
Zipper Foot
40
Attachment Foot···
···················
··
34
Binder·
••••
••··••••·····•··•·••·····
···
••
·•·•
36
·Edgestitcher •········•••··••··•···········
34
Hemmers ···········
··
····
··
··
···
·········
'57
Ruffler •··············
•·
····•
··
•········ 41-42
Blind Hem.........••••••••
..
..
.......
....
•...•••
16
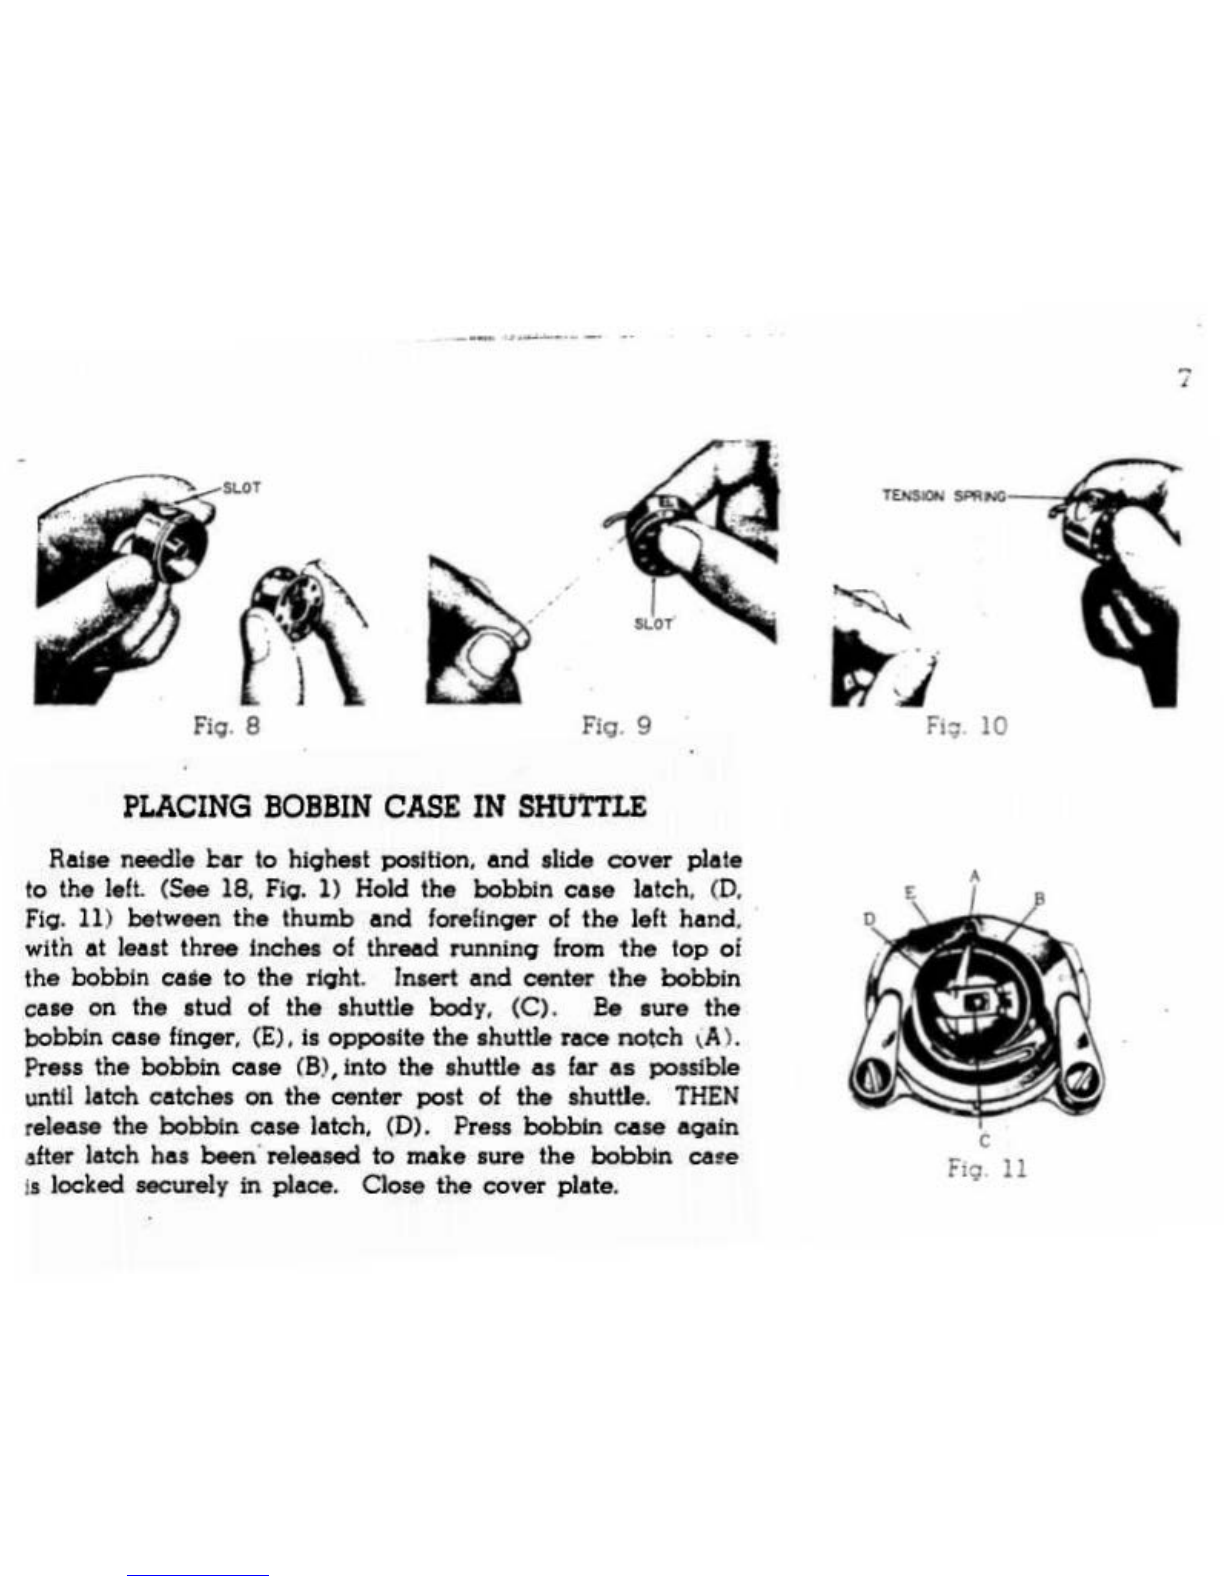
Bobbin
Placing in Shuttl
e·
·····•················· 7
Threading ··········••········· ············ 6
Winding ········· ···············
·········
·
··
5
Buttonholes •
•·
··•·········•················ 19-20
Bound ···
··
··································
46
Buttons Sew
-On·
·····························
21
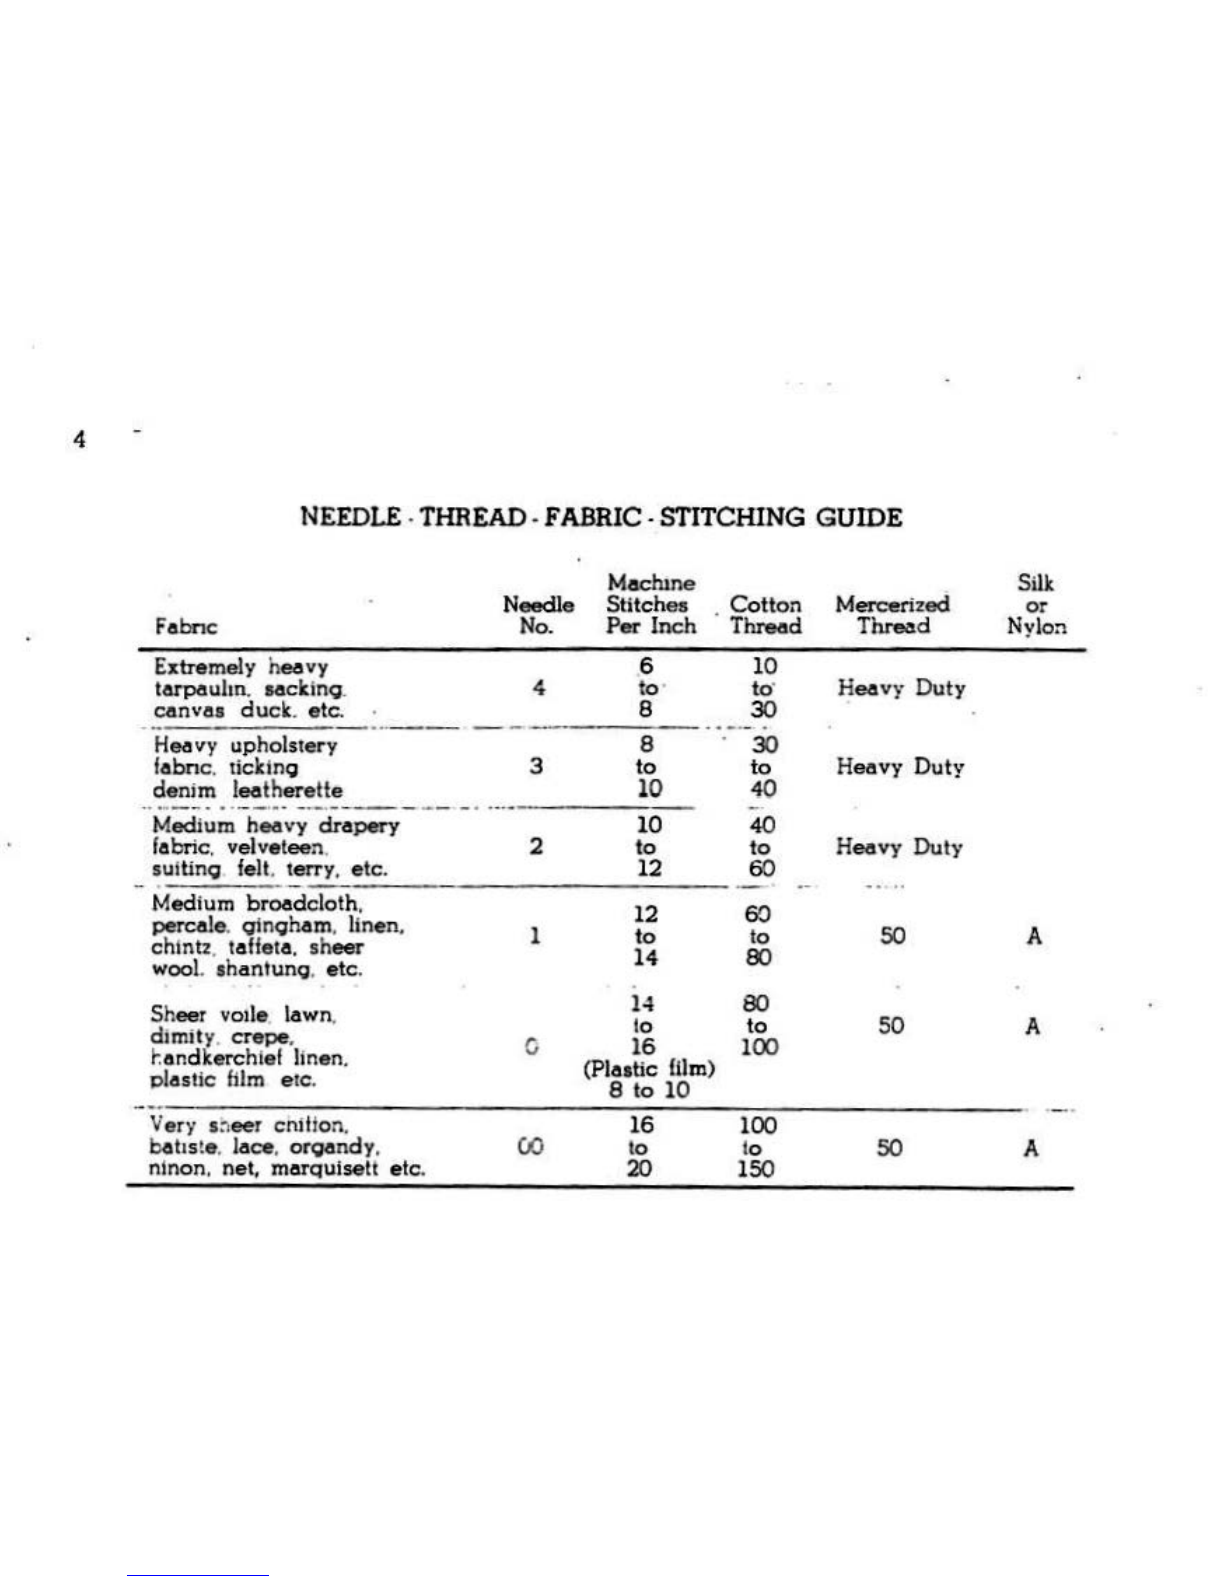
Charts
Needle•Thread.Fabric-Stitching••···· 4
Stitch Length···········
······
············· 9
Trouble •······
··
···
···
············
29
.30.31
INDEX
Pages
Darning
and
Mending--···
··
·
·····
···
·····
11
· Embroidery
Creati
ve •····· ·················· •··
···
···
17
Hoop
···
········•··•················•·......
18
Features
and
Parts (Front View) ..:... 2
(Back View)········· 3
Installation• Head
in
Cabinet•···········
49
He
ad
in
Portable
case
··•
48
Maintenance
and
Care
······ ······ ······
26
Cleaning
and
Oiling
the
Shuttle
27
Needle Setting ········
..
·················..···· 6
Pressure
and
Feeding of Fabric ······ 11
Thin
and
Light weight
Fabr
ics•·· 11
Reverse Sewing································· 9
Sewing Preparation ··•
•·
•··················
12
Sewing Tips ························ ··· ·
...
,•
43
Straight Stitching ·······················•···
13
Tension Adjustment ·······••
00
•···
·
·····
···
10
Thread
ing-Upper ......•··......
......
•......•• 8
1