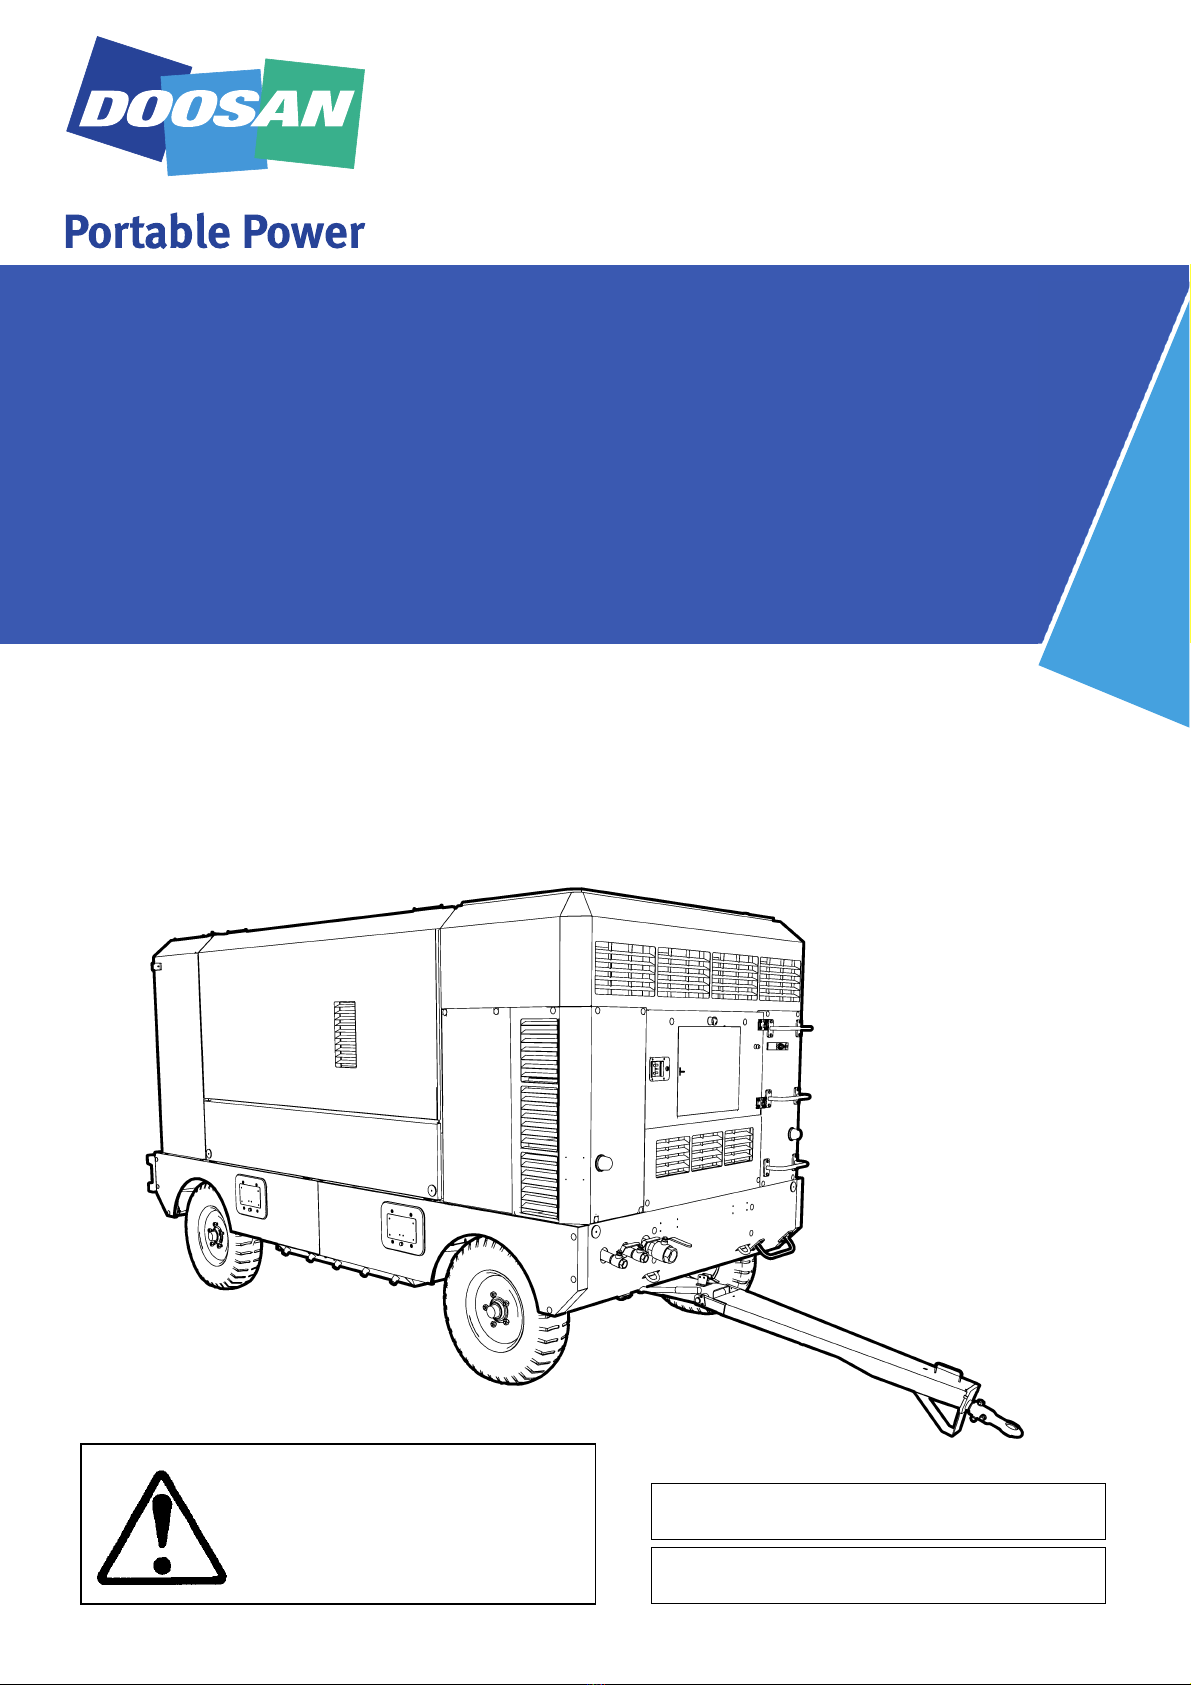
Doosan 9/274 Manual

This manual contains
important safety information
and must be made available to
personnel who operate and
maintain this machine.
46678291_en_C_05/18
9/274, 9/304, 12/254, 17/244, 21/224
OPERATION & MAINTENANCE MANUAL
Original Instruction
9/274, 9/304, SERIAL No: 895200 – 899999
12/254
17/244, SERIAL No: 883100 - 883999
21/224


Machine models represented in this manual may be used in various locations world-wide. Machines sold and
shipped into European Union Territories require that the machine display the CE Mark and conform to various
directives. In such cases, the design specification of this machine has been certified as complying with EC
directives. Any modification to any part is absolutely prohibited and would result in the CE Certification and marking
being rendered invalid. A declaration of that conformity follows:
1)
EC Declaration of Conformity 2)
3) We: 4) Represented in EC by:
Doosan International USA, Inc Doosan Trading Limited
1293 Glenway Drive Block B, Swords Business Campus
Statesville Swords
North Carolina 28625-9218 Co. Dublin
USA Ireland
5) Hereby declare that, under our sole responsibility the product(s)
6) Machine description: Portable Screw Compressor
7) Machine Model: 7/20; 7/26E; 7/31E; 7/41; 7/53 ; 7/73-10/53; 7/124-10/104; 10/124-14/114; 14/84;
7/204; 10/174; 12/154; 14/144; 9/274; 9/304; 12/254; 17/244; 21/224
8) Commercial name: 7/20; 7/26E; 7/31E; 7/41; 7/53 ; 7/73-10/53; 7/124-10/104; 10/124-14/114; 14/84;
7/204; 10/174; 12/154; 14/144; 9/274; 9/304; 12/254; 17/244; 21/224
9) VIN / Serial number:
10) is (are) in conformity with the relevant provisions of the following EC Directive(s)
11) 2006/42/EC The Machinery Directive
12) 2014/30/EU The Electromagnetic Compatibility Directive
13) 2000/14/EC The Noise Emission Directive
14) 2014/68/EU The Pressure Equipment Directive
15) 2014/29/EU The Simple Pressure Vessels Directive
16) 97/68/EC The emission of engines for no-road mobile machinery
31) 2014/35/EU The Low Voltage Equipment Directive
17) and their amendments
18) Conformity with the Noise Emission Directive 2000/14/EC
19)
20)
22)Type kW 22)Type kW
7/20 17,5 96LWA 97LWA 7/124-10/104 97
7/26E 21,3
97LWA 98LWA 10/124-14/114 122
7/31E
25,9 97LWA 98LWA 14/84 97
7/41 35
98LWA 98LWA
7/53 36
97LWA 98LWA
7/73-10/53 55 96LWA 98LWA 9/274 226 99LWA 100LWA
25) Conformity with the Pressure Equipment directive 2014/68/EU
26)
Jan Moravec
27) Engineering Director
28) Issued at Dobris, Czech Republic 29) Date
30) The technical documentation for the machinery is available from:
Doosan Bobcat EMEA s.r.o. (DBEM), U Kodetky 1810, 263 12 Dobris, Czech Republic
168 98LWA 99LWA
98LWA 99LWA
24)Guaranteed sound
power level
7/204; 10/174;
12/154; 14/144
21)Machine
We declare that this product has been assessed according to the Pressure Equipment Directive 2014/68/EU and, in accordance with the terms of
this Directive, has been excluded from the scope of this Directive. It may carry "CE" marking in compliance with other applicable EC directives.
9/304; 12/254;
17/244; 21/224
247 99LWA 100LWA
Notified body: AV Technology, Warrington, UK. Nr 1067
Directive 2000/14/EC, Annex VI, Part I
Original declaration
23)Measured sound
power level
24)Guaranteed
sound power level
U N 5
21)Machine
23)Measured sound
power level
CPN 46552199 rev N
SAMPLE


CONTENTS & ABBREVIATIONS 1
9/274, 9/304, 12/254, 17/244, 21/224
1 CONTENTS
2 FOREWORD
3 ISO SYMBOLS
7 SAFETY
9 GENERAL INFORMATION
11 OPERATING INSTRUCTIONS
26 MAINTENANCE
40 MACHINE SYSTEMS
55
FAULT FINDING
76 OPTIONS
87 PARTS ORDERING
ABBREVIATIONS & SYMBOLS
#### Contact the company for serial number
->#### Up to Serial No.
####-> From Serial No.
*Not illustrated
†Option
WDG Generator option
AR As required
HA High ambient machine
S.R.G. Site running gear
H.R.G. High speed running gear
bg Bulgarian
cs Czech
da Danish
de German
el Greek
en English
es Spanish
et Estonian
fi Finnish
fr French
hu Hungarian
it Italian
lt Lithuanian
lv Latvian, Lettish
mt Maltese
nl Dutch
no Norwegian
pl Polish
pt Portuguese
ro Romanian
ru Russian
sk Slovak
sl Slovenian
sv Swedish
zh Chinese

2 FOREWORD
9/274, 9/304, 12/254, 17/244, 21/224
The contents of this manual are considered to be proprietary and
confidential to and should not be reproduced without the prior written
permission of the company.
Nothing contained in this document is intended to extend any promise,
warranty or representation, expressed or implied, regarding the
products described herein. Any such warranties or other terms and
conditions of sale of products shall be in accordance with the standard
terms and conditions of sale for such products, which are available
upon request.
This manual contains instructions and technical data to cover all
routine operation and scheduled maintenance tasks by operation and
maintenance staff. Major overhauls are outside the scope of this
manual and should be referred to an authorised service department.
The design specification of this machine has been certified as
complying with EC directives. As a result:
a) Any machine modifications are strictly prohibited, and will invalidate
EC certification.
b) A unique specification for USA/Canada is adopted and tailored to
the territory.
All components, accessories, pipes and connectors added to the
compressed air system should be:
• of good quality, procured from a reputable manufacturer and,
wherever possible, be of a type approved by the company.
• clearly rated for a pressure at least equal to the machine maximum
allowable working pressure.
• compatible with the compressor lubricant/coolant.
• accompanied with instructions for safe installation, operation and
maintenance.
Details of approved equipment are available from the company
Service departments.
The use of repair parts / lubricants / fluids other than those included
within the approved parts list may create hazardous conditions over
which the company has no control. Therefore the company cannot be
held responsible for equipment in which non-approved repair parts are
installed.
The company reserves the right to make changes and improvements
to products without notice and without incurring any obligation to make
such changes or add such improvements to products sold previously.
The intended uses of this machine are outlined below and examples of
unapproved usage are also given, however the company cannot
anticipate every application or work situation that may arise.
IF IN DOUBT CONSULT SUPERVISION.
This machine has been designed and supplied for use only in the
following specified conditions and applications:
• Compression of normal ambient air containing no known or
detectable additional gases, vapours. or particles
• Operation within the ambient temperature range specified in the
GENERAL INFORMATION section of this manual.
The use of the machine in any of the situation types listed in table
1:
a) Is not approved,
b) May impair the safety of users and other persons, and
c) May prejudice any claims made against the company.
The company accepts no responsibility for errors in translation of this
manual from the original English version.
©COPYRIGHT 2018
DOOSAN COMPANY
TABLE 1
Use of the machine to produce compressed air for:
a) direct human consumption
b) indirect human consumption, without suitable filtration and purity
checks.
Use of the machine outside the ambient temperature range
specified in the GENERAL INFORMATION SECTION of this
manual.
This machine is not intended and must not be used in potentially
explosive atmospheres, including situations where flammable
gases or vapours may be present.
Use of the machine fitted with non approved components /
lubricants / fluids.
Use of the machine with safety or control components missing or
disabled.

DECALS 3
9/274, 9/304, 12/254, 17/244, 21/224
GRAPHIC FORM AND MEANING OF ISO SYMBOLS
Prohibition / Mandatory Information / Instructions Warning
WARNING: Electrical shock risk WARNING - Pressurised component or
system.
WARNING - Hot surface.
WARNING - Pressure control. WARNING - Corrosion risk. WARNING - Air/gas flow or Air discharge.
WARNING - Pressurised vessel. WARNING - Hot and harmful exhaust gas. WARNING - Flammable liquid.
WARNING - Maintain correct tyre pressure.
(Refer to the GENERAL INFORMATION
section of this manual).
WARNING - Before connecting the tow bar
or commencing to tow consult the
operation and maintenance manual.
WARNING - For operating temperature
below 0°C, consult the operation and
maintenance manual.

4 DECALS
9/274, 9/304, 12/254, 17/244, 21/224
WARNING - Maintenance work in progress. WARNING - Do not undertake any
maintenance on this machine until the
electrical supply is disconnected and the air
pressure is totally relieved.
WARNING - Consult the operation and
maintenance manual before commencing
any maintenance.
Do not breathe the compressed air from this
machine.
Do not remove the Operating and Maintenance
manual and manual holder from this machine.
Do not stack.
Do not operate the machine without the guard
being fitted.
Do not stand on any service valve or other parts
of the pressure system.
Do not operate with the doors or enclosure
open.
Do not use fork lift truck from this side. Do not exceed the trailer speed limit. No naked lights.
Do not open the service valve before the
airhose is attached.
Use fork lift truck from this side only. Emergency stop.

DECALS 5
9/274, 9/304, 12/254, 17/244, 21/224
Lashing point (Tie down). Lifting point. On (power).
Off (power). Read the Operation and Maintenance manual
before operation or maintenance of this
machine is undertaken.
When parking use prop stand, handbrake and
wheel chocks.
Compressor oil filling. Diesel fuel.
No open flame.
Parking brake.
Rough Service Designation.
Wet Location Operation.
Replace any cracked protective shield. Coolant fill.
Prohibition: Do not start. Start and stop device. Mandatory action:
Hearing protection must be worn.
Diesel fuel drain. Engine coolant drain. Compressor oil drain.

6 DECALS
9/274, 9/304, 12/254, 17/244, 21/224
Engine oil drain. Operational status of the engine emission filter. Engine emissions system temperature may be
high.
Disable active regeneration of the engine
emission filter.
Diesel exhaust fluid (DEF) level is low.

SAFETY 7
9/274, 9/304, 12/254, 17/244, 21/224
General Information
Ensure that the operator reads and understands the decals and
consults the manuals before maintenance or operation.
Ensure that the Operation & Maintenance manual, and the manual
holder, are not removed permanently from the machine.
Ensure that maintenance personnel are adequately trained, competent
and have read the Maintenance Manuals.
Ensure that ice and snow do not block the cooling air inlets.
Use hearing protectors when machine is running.
Make sure that all protective covers are in place and that the canopy/
doors are closed during operation.
The specification of this machine is such that the machine is not
suitable for use in flammable gas risk areas. If such an application is
required then all local regulations, codes of practice and site rules must
be observed. To ensure that the machine can operate in a safe and
reliable manner, additional equipment such as gas detection, exhaust
spark arresters, and intake (shut-off) valves may be required,
dependant on local regulations or the degree of risk involved.
A weekly visual check must be made on all fasteners/fixing screws
securing mechanical parts. In particular, safety-related parts such as
coupling hitch, drawbar components, road-wheels, and lifting bail
should be checked for total security.
All components which are loose, damaged or unserviceable, must be
rectified without delay.
Compressed air
Compressed air can be dangerous if incorrectly handled. Before doing
any work on the machine, ensure that all pressure is vented from the
system and that the machine cannot be started accidentally.
Ensure that the machine is operating at the rated pressure and that the
rated pressure is known to all relevant personnel.
All air pressure equipment installed in or connected to the machine
must have safe working pressure ratings of at least the machine rated
pressure.
If more than one compressor is connected to one common
downstream plant, effective check valves and isolation valves must be
fitted and controlled by work procedures, so that one machine cannot
accidentally be pressurised / over pressurised by another.
Compressed air must not be used for a direct feed to any form of
breathing apparatus or mask.
The discharged air contains a very small percentage of compressor
lubricating oil and care should be taken to ensure that downstream
equipment is compatible.
If the discharged air is to be ultimately released into a confined space,
adequate ventilation must be provided.
When using compressed air, always use appropriate personal
protective equipment.
All pressure containing parts, especially flexible hoses and their
couplings, must be regularly inspected, be free from defects and be
replaced according to the Manual instructions.
Avoid bodily contact with compressed air.
The safety valve, located in the separator tank, must be checked
periodically for correct operation.
Materials
The following substances may be produced during the operation of this
machine:
• brake lining dust
• engine exhaust fumes
AVOID INHALATION
Ensure that adequate ventilation of the cooling system and exhaust
gases is maintained at all times.
The following substances are used in the manufacture of this machine
and may be hazardous to health if used incorrectly:
• anti-freeze
• compressor lubricant
• engine lubricant
• preservative grease
• rust preventative
• diesel fuel
• battery electrolyte
AVOID INGESTION, SKIN CONTACT AND INHALATION OF
FUMES.
Should compressor lubricant come into contact with the eyes, then
irrigate with water for at least 5 minutes.
Should compressor lubricant come into contact with the skin, then
wash off immediately.
Consult a doctor if large amounts of compressor lubricant are ingested.
Consult a doctor if compressor lubricant is inhaled.
Never give fluids or induce vomiting if the patient is unconscious or
having convulsions.
Safety data sheets for compressor and engine lubricants should be
obtained from the lubricant supplier.
Battery
Batteries contain corrosive liquid and produce explosive gas. Do not
expose to naked flames or sparks. Always wear personal protective
clothing when handling. When starting the machine from a slave
battery ensure that the correct polarity is observed and that
connections are secure.
DO NOT ATTEMPT TO SLAVE START A FROZEN BATTERY
SINCE THIS MAY CAUSE IT TO EXPLODE.
Radiator
Hot engine coolant and steam can cause injury. Ensure that the
radiator filler cap is removed with due care and attention.
WARNINGS
Warnings call attention to instructions which must be followed
precisely to avoid injury or death.
CAUTIONS
Cautions call attention to instructions which must be followed
precisely to avoid damaging the product, process or its surroundings.
NOTES
Notes are used for supplementary information.

8 SAFETY
9/274, 9/304, 12/254, 17/244, 21/224
Transport
When loading or transporting machines ensure that the specified lifting
and tie down points are used and cables or chains are in safe limits.
When loading or transporting machines, ensure that the towing vehicle,
its size, weight, towing hitch and electrical supply are all suitable to
provide safe and stable towing at speeds either, up to the legal
maximum for the country in which it is being towed or, as specified for
the machine model if lower than the legal maximum.
Before towing the machine, ensure that:
• the tyres and towing hitch are in a serviceable condition.
• the canopy is secure.
• all ancillary equipment is stored in a safe and secure manner.
When parking always use the handbrake and, if necessary, suitable
wheel chocks.

GENERAL INFORMATION 9
9/274, 9/304, 12/254, 17/244, 21/224
MODEL 9/274 9/304 12/254 17/244 21/224
COMPRESSOR
Actual free air delivery m
3
/min/
cfm
27,0/
950
29,9/
1060
25,0/
883
23,3/
825
21,2/
750
Normal operating discharge pressure psi/bar/
kPa
125/8,6/
860
125/8,6/
860
175/12/
1200
250/17,2/
1724
300/21/
2100
Maximum allowable pressure psi/bar/
kPa
150/10,3/
1030
150/10,3/
1030
200/13,8/
1380
275/19/
1900
331/22,8/
2280
Safety valve setting psi/bar/
kPa
217/15/
1500
217/15/
1500
217/15/
1500
414/28,5/
2850
414/28,5/
2850
Maximum pressure ratio (absolute) 8:1 8:1 8:1 18:9:1 18:9:1
Operating ambient temperature
range
°C/
°F
-10 to +46/
14 to 115
-10 to +46/
14 to 115
-10 to +46/
14 to 115
-10 to +46/
14 to 115
-10 to +46/
14 to 115
Maximum discharge temperature °C/
°F
120/
248
120/
248
120/
248
120/
248
120/
248
COMPRESSOR
Cooling system Oil Injection
Oil capacity Litre 85 85 85 85 85
Maximum oil system temperature °C/
°F
120/
248
120/
248
120/
248
120/
248
120/
248
Maximum oil system pressure psi/bar/
kPa
217/15/
1500
217/15/
1500
217/15/
1500
414/28.5/
2850
414/28.5
2850
LUBRICATING OIL
SPECIFICATION
(for the specified ambient
temperatures)
SEE ‘COMPRESSOR LUBRICATION’ IN THE MAINTENANCE SECTION

10 GENERAL INFORMATION
9/274, 9/304, 12/254, 17/244, 21/224
MODEL 9/274 9/304 12/254 17/244 21/224
ENGINE QSL (285hp) QSL (333hp) QSL (333hp) QSL (333hp) QSL (333hp)
Number of cylinders / Displacement /Litre 6/8,9 6/8,9 6/8,9 6/8,9 6/8,9
Oil capacity Litre 20 20 20 20 20
Speed at full load Rev min
-1
1800 1800 1800 1800 1800
Speed at idle Rev min
-1
1200 1200 1200 1350 1350
Electrical system V DC 24 24 24 24 24
Power available at rated speed KW 226 247 247 247 247
Fuel tank capacity Litre 485 485 485 485 485
Coolant capacity Litre 58 58 58 58 58
DEF tank capacity Litre 31 31 31 31 31
Max. gross weight kg 5400 5400 5400 5700 5700
Shipping weight
(without fuel and DEF)
kg 4940 4940 4940 5260 5260
INFORMATION ON AIRBORNE NOISE (CE regions)
- The A-weighted emission sound pressure level
• 83 dB (A), uncertainty 1 dB (A)
- The A-weighted emission sound power level
• 100 dB (A), uncertainty 1 dB (A)
The operating conditions of the machinery are in compliance with
ISO 3744:1995 and EN ISO 2151:2004
WEIGHT
Shipping weight 4940 / 5260 kg
Maximum weight 5400 / 5700 kg
WHEELS AND TYRES - SITE RUNNING GEAR
Number of wheels 4
Tyre size 750 x 16 x 6PR
Tyre pressure 4,5 bar (65 lbf in
-2
)
TOWING SPEED
Maximum towing speed 30 km h
-1
(20 mile h
-1
)
Further information may be obtained by request through the
customer services department.

OPERATING INSTRUCTIONS 11
9/274, 9/304, 12/254, 17/244, 21/224
COMMISSIONING
Upon receipt of the machine, and prior to putting it into service, it is
important to adhere strictly to the instructions given below in PRIOR
TO STARTING.
Ensure that the operator reads and understands the decals and
consults the manuals before maintenance or operation.
Ensure that the position of the emergency stop device is known and
recognised by its markings. Ensure that it is functioning correctly and
that the method of operation is known.
Before towing the machine, ensure that the tire pressures are correct
(refer to the GENERAL INFORMATION section of this manual) and
that the handbrake is functioning correctly (refer to the
MAINTENANCE section of this manual). Before towing the machine
during the hours of darkness, ensure that the lights are functioning
correctly (where fitted).
Ensure that all transport and packing materials are discarded.
Ensure that the correct fork lift truck slots or marked lifting / tie down
points are used whenever the machine is lifted or transported.
When selecting the working position of the machine ensure that there
is sufficient clearance for ventilation and exhaust requirements,
observing any specified minimum dimensions (to walls, floors etc.).
Adequate clearance needs to be allowed around and above the
machine to permit safe access for specified maintenance tasks.
Ensure that the machine is positioned securely and on a stable
foundation. Any risk of movement should be removed by suitable
means, especially to avoid strain on any rigid discharge piping.
Attach the battery cables to the battery(s) ensuring that they are
tightened securely. Attach the negative cable before attaching the
positive cable.
WARNING: All air pressure equipment installed in or connected
to the machine must have safe working pressure ratings of at
least the machine rated pressure, and materials compatible with
the compressor lubricant (refer to the GENERAL INFORMATION
section).
WARNING: If more than one compressor is connected to one
common downstream plant, effective check valves and isolation
valves must be fitted and controlled by work procedures, so that
one machine cannot accidentally be pressurised / over
pressurised by another.
WARNING: If flexible discharge hoses are to carry more than
7 bar pressure then it is recommended that safety retaining
wires are used on the hoses.

12 OPERATING INSTRUCTIONS
9/274, 9/304, 12/254, 17/244, 21/224
PRIOR TO STARTING
1. Place the machine in a position that is as level as possible. The
design of the machine permits a 10 degree lengthways and
sideways limit on out of level operation. It is the engine, not the
compressor, that is the limiting factor.
When the machine has to be operated out of level, it is important to
keep the engine oil level near the high level mark (with the machine
level).
2. Check the engine lubrication oil in accordance with the operating
instructions in the Engine Operator’s Manual.
3. Check the compressor oil level in the sight glass located on the
separator tank.
4. Check the diesel fuel level. A good rule is to top up at the end of
each working day. This prevents condensation from occurring in the
tank.
5. Drain the fuel filter water separator of water, ensuring that any
released fuel is safely contained.
6. Check the radiator coolant level (with the machine level).
7. Open the service valve(s) to ensure that all pressure is relieved
from the system. Close the service valve(s).
9. Check the emergency stop. Pull knob to release.
10.Close the manual relief valve inside the machine, on the top of the
separator tank.
When starting or operating the machine in temperatures below or
approaching 0°C (32°F), ensure that the operation of the regulation
system, the unloader valve, the safety valve, and the engine are not
impaired by ice or snow, and that all inlet and outlet pipes and ducts
are clear of ice and snow.
CAUTION: Do not overfill either the engine or the compressor
with oil.
CAUTION: When refuelling:
• switch off the engine.
• do not smoke.
• extinguish all naked lights.
• do not allow the fuel to come into contact with hot surfaces.
• wear personal protective equipment.
8. CAUTION: Do not operate the machine with the canopy/doors
in the open position as this may cause overheating and
operators to be exposed to high noise levels.

OPERATING INSTRUCTIONS 13
9/274, 9/304, 12/254, 17/244, 21/224
OPERATING CONTROLS AND INSTRUMENTS
The operating controls and instruments are arranged on the control
panel as shown above. A description of each panel device is as
follows:
1. ViewPort: Graphic display showing information about
performance parameters, warnings, faults, Maintenance Manual
and Parts Catalogue.
1A. High exhaust system temperature (HEST) lamp: Illuminates
when exhaust temperatures are elevated due to automatic or
manual cleaning of the DOC-SCR aftertreatment.
1B. Exhaust system cleaning lamp: Illuminates when the DOC-
SCR system requires elevated temperatures to clean.
1C. Exhaust system cleaning disabled lamp: Illuminates when
cleaning is disabled by the Exhaust System Cleaning switch.
1D. Wait to start lamp: Illuminates when the operator should wait
before starting the engine because the intake air heater is
heating.
1E. Diesel exhaust fluid lamp: Illuminates when the DEF level is
low.
2. Joystick: Device to move in graphic menu.
3. Main control switch: Used for starting and stopping the
compressor.
3A. OFF: Stops the compressor.
3B. ON: Turns on compressor control system and ViewPort.
3C. RUN: Turns on engine control system.
4. Service air switch: Momentary contact switch. Allows engine to
warm up at low compressor pressure.
5. Discharge air pressure gauge: Indicates pressure in receiver
tank, normally from 0 psi (kPa) to the rated pressure of the
machine.
6. Engine tachometer: Indicates engine speed in RPM from 0
when stopped to full speed.
7. Hourmeter: Indicates machine operating hours.
8. Compressor oil temp gauge: Indicates compressor oil
temperature.
9. Fuel level gauge: Indicates fuel level in tank.
10. Battery voltage gauge: Indicates battery voltage.
11. Engine water temp gauge: Indicates engine water temperature.
12. E-STOP: Emergency Stop Push Button. Push to stop, turn to
release.
13. Panel light: Illuminates the instrument control panel.
14. Position for optional switches.
15. Exhaust system cleaning switch: Provides operator control of
the Exhaust Cleaning System.
Normal position: Allows automatic exhaust system cleaning to
take place as needed.
Disable position: Inhibits automatic and manual cleaning of the
exhaust system.
Initiate position: Requests manual (non-mission) cleaning of
the exhaust system if entry conditions are within proper range.
Momentary position.
16. DEF level gauge: Indicates DEF level in DEF Tank.
17. Start switch: Initiates engine cranking. Momentary position.

14 OPERATING INSTRUCTIONS
9/274, 9/304, 12/254, 17/244, 21/224
VIEWPORT
Navigation Button
Figure 1
The Navigation Button is located directly below the Viewport LCD
display. The button allows the user to navigate between and within
screens, make selections, scroll gauges, manuals, and information.
The available functions of the button are shown in Figure 1.
Throughout this description of the Viewport Screens and operation we
will refer to TILT LEFT, TILT RIGHT, TILT UP, TILT DOWN, and
ENTER. (Refer to Figure 1).
Default Screen
If at anytime you would need to return the Viewport to its Default
settings, navigate to the Set Up screen and select Default in the
Gauges Configuration panel. All previous changes to the Viewport will
be reset with the exception of Machine ID and Date and Time.
Screen Definitions
Figure 2
The available display screens are displayed along the bottom of the
Viewport LCD display. Also, the Hourmeter which counts cumulative
hours of machine operation and the Fuel Gauge which approximates
the level of fuel remaining are displayed above the gauges. Along the
lower right of the Viewport is a series of indicators of additional
machine operation functions/parameters.
During machine operation Figure 2 represents the Viewport screen
required to monitor machine performance.
* Note: All of the following navigation instructions are based on starting
from the Gauge Screen (Figure 2).
Press
TILT
UP
Press
TILT
LEFT
Press
TILT
RIGHT
Press
TILT
DOWN
Press
ENTER

OPERATING INSTRUCTIONS 15
9/274, 9/304, 12/254, 17/244, 21/224
Setup Screen
TILT LEFT to highlight the Set Up Screen and press ENTER. The
screen represented by Figure 3 will appear.
Figure 3
The Set Up Screen is comprised of 4 sections: Units, Language and
Machine ID, System Configuration, and Gauges Configuration.
When the window opens, PRESSURE will be highlighted.
To navigate between available fields, TILT LEFT or TILT RIGHT. To
change information to be displayed in highlighted field, TILT UP or TILT
DOWN.
To exit screen, navigate to Quit button,TILT LEFT or RIGHT until Quit
button is highlighted. Press ENTER.
Note: Changes to parameters in first 3 sections take effect
immediately.
Units
Pressure - Allows user to select units of pressure measurement to be
displayed on pressure gauge.
Temperature - Allows user to select units of temperature
measurement to be displayed on temperature gauge.
Language and Machine ID
Language - Allows user to select language to display on available
screens and Operation and Maintenance Manual. (Note: English is the
default language).
Machine ID - Allows user to select Machine ID. Machine ID must match
Unit Model Number as shown on the machine’s Data Plate.
System Configuration
Alert Duration - Allows user to select the desired duration of ALERT
notification. During machine operation, if an ALERT condition occurs,
the EVENTS Screen will display (over-riding currently viewed screen)
for a predetermined set time.
Save Data - Allows user to select length of time (in days) data will be
stored internally and be available to copy.
Date and Time - Allows user to set correct date and time. Date and
time will be displayed on the Gauges Screen and will be used to time/
date stamp ALERTS, FAULTS, and saved information. (Note: Date
and Time Settings are saved automatically).
Time Zone - Allows user to select appropriate time zone of machine
operation. (Note: UTC-05 US/Eastern is the default setting).
Gauges Configuration - This panel shows the available gauges for
the machine. The Scrolling Gauges are displayed in 2 columns, the
Main Gauge is in the upper right corner. The order of the Scrolling
Gauges and selection of the Main Gauge are set in this panel.
To arrange the order the Scrolling Gauges are displayed on the Gauge
Screen do the following:
• Navigate to the desired gauge by TILTING LEFT and press
ENTER. The gauge and its numeric display will be highlighted
Green.
Figure 4
• If gauge in left column, TILT RIGHT or TILT UP/DOWN to
reposition gauge to new location. Press ENTER to deselect.
• If gauge in right column, TILT LEFT or TILT UP/DOWN to
reposition gauge to new location. Press ENTER to deselect.
• Repeat until desired layout is set.
• TILT right until Main Gauge Button is highlighted. Continue to TILT
RIGHT until the Save Button is highlighted. Press ENTER to save
set up.
• To exit, TILT RIGHT to highlight Quit Button and press ENTER.
The Main Gauge is the largest, most prominent gauge displayed on the
Gauge Screen. Any of the available machine gauges can be set as the
Main Gauge.
To set the Main Gauge, do the following:
• Navigate the Gauges Configuration area in the Set Up Screen.
• Navigate to the desired gauge and press ENTER. The selected
gauge and its numeric display will be highlighted Green.
• If the highlighted gauge is in the left column, TILT LEFT to
highlight the Main Gauge Button.
• If the highlighted gauge is in the right column, TILT RIGHT to
highlight the Main Gauge Button.
• Press ENTER.
Figure 5
• TILT RIGHT to highlight Save Button and press ENTER.
• To exit, TILT RIGHT to highlight Quit Button and press ENTER.
Note: Gauge Configuration changes are immediate. However, to
ensure settings are saved after a power cycle the Save Button must be
pressed.

16 OPERATING INSTRUCTIONS
9/274, 9/304, 12/254, 17/244, 21/224
Gauge Screen
Figure 6
The Gauge Screen consists of the Main Gauge and Scrolling Gauges.
These gauges allow the user to monitor machine operating and
performance parameters.
The Main Gauge and the order of the Scrolling Gauges is defined in the
Set Up Screen procedure.
To view gauges, Gauge Screen must be selected. To scroll gauges,
TILT UP or TILT DOWN.
Information Screen
TILT RIGHT to navigate to the Information Screen. The Information
Screen will open.
Figure 7
The Information Screen is comprised of 3 areas: Manuals, System Info,
and Gauge Data.
Manuals
Press ENTER. The Engine Manual Button will be highlighted. Note: At
this time the Engine Manual is not loaded.
TILT RIGHT. The Operation Button will be highlighted. Select
Operation and the Operation and Maintenance Manual will open in a
new screen. 4 buttons are located at the bottom of the screen. TOC
(Table of Contents) button will be highlighted. Pressing ENTER will
open the manual at the Table of Contents.
Figure 8
There are two methods of viewing displayed manuals. Use the PgUp
and Pg Dn button on either side of the TOC Button. TILT LEFT or
RIGHT from the TOC Button. Using the PgUp or PgDn will step through
the manual page by page (approximately).
To scroll the chosen manual, TILT UP or TILT DOWN. Any button can
be highlighted.
To exit, TILT RIGHT to highlight the Quit Button. Press ENTER. You
will be returned to the Information Screen.
The procedure to view the Parts Manual and the Service Manual is the
same as noted before.
System Info
Navigate by TILTING RIGHT until CAN Devices Button is highlighted.
Press ENTER. A new screen will open displaying information for all
devices attached to the machine’s CAN Bus.
Figure 9
There are 4 buttons at the bottom of the screen. CAN Device Info will
be highlighted.
TILT LEFT to highlight Save List Button. Press ENTER to save a
snapshot of the displayed information. The snapshot will be stored
internally for a predetermined length of time (see Set Up Screen) and
available for retrieval.
To retrieve saved information, TILT RIGHT to highlight the Copy to
USB Button. Press ENTER. A new smaller screen will open. The
smaller screen consists of 2 buttons - Cancel and Save, and a status
bar.
Other manuals for 9/274
1
This manual suits for next models
4