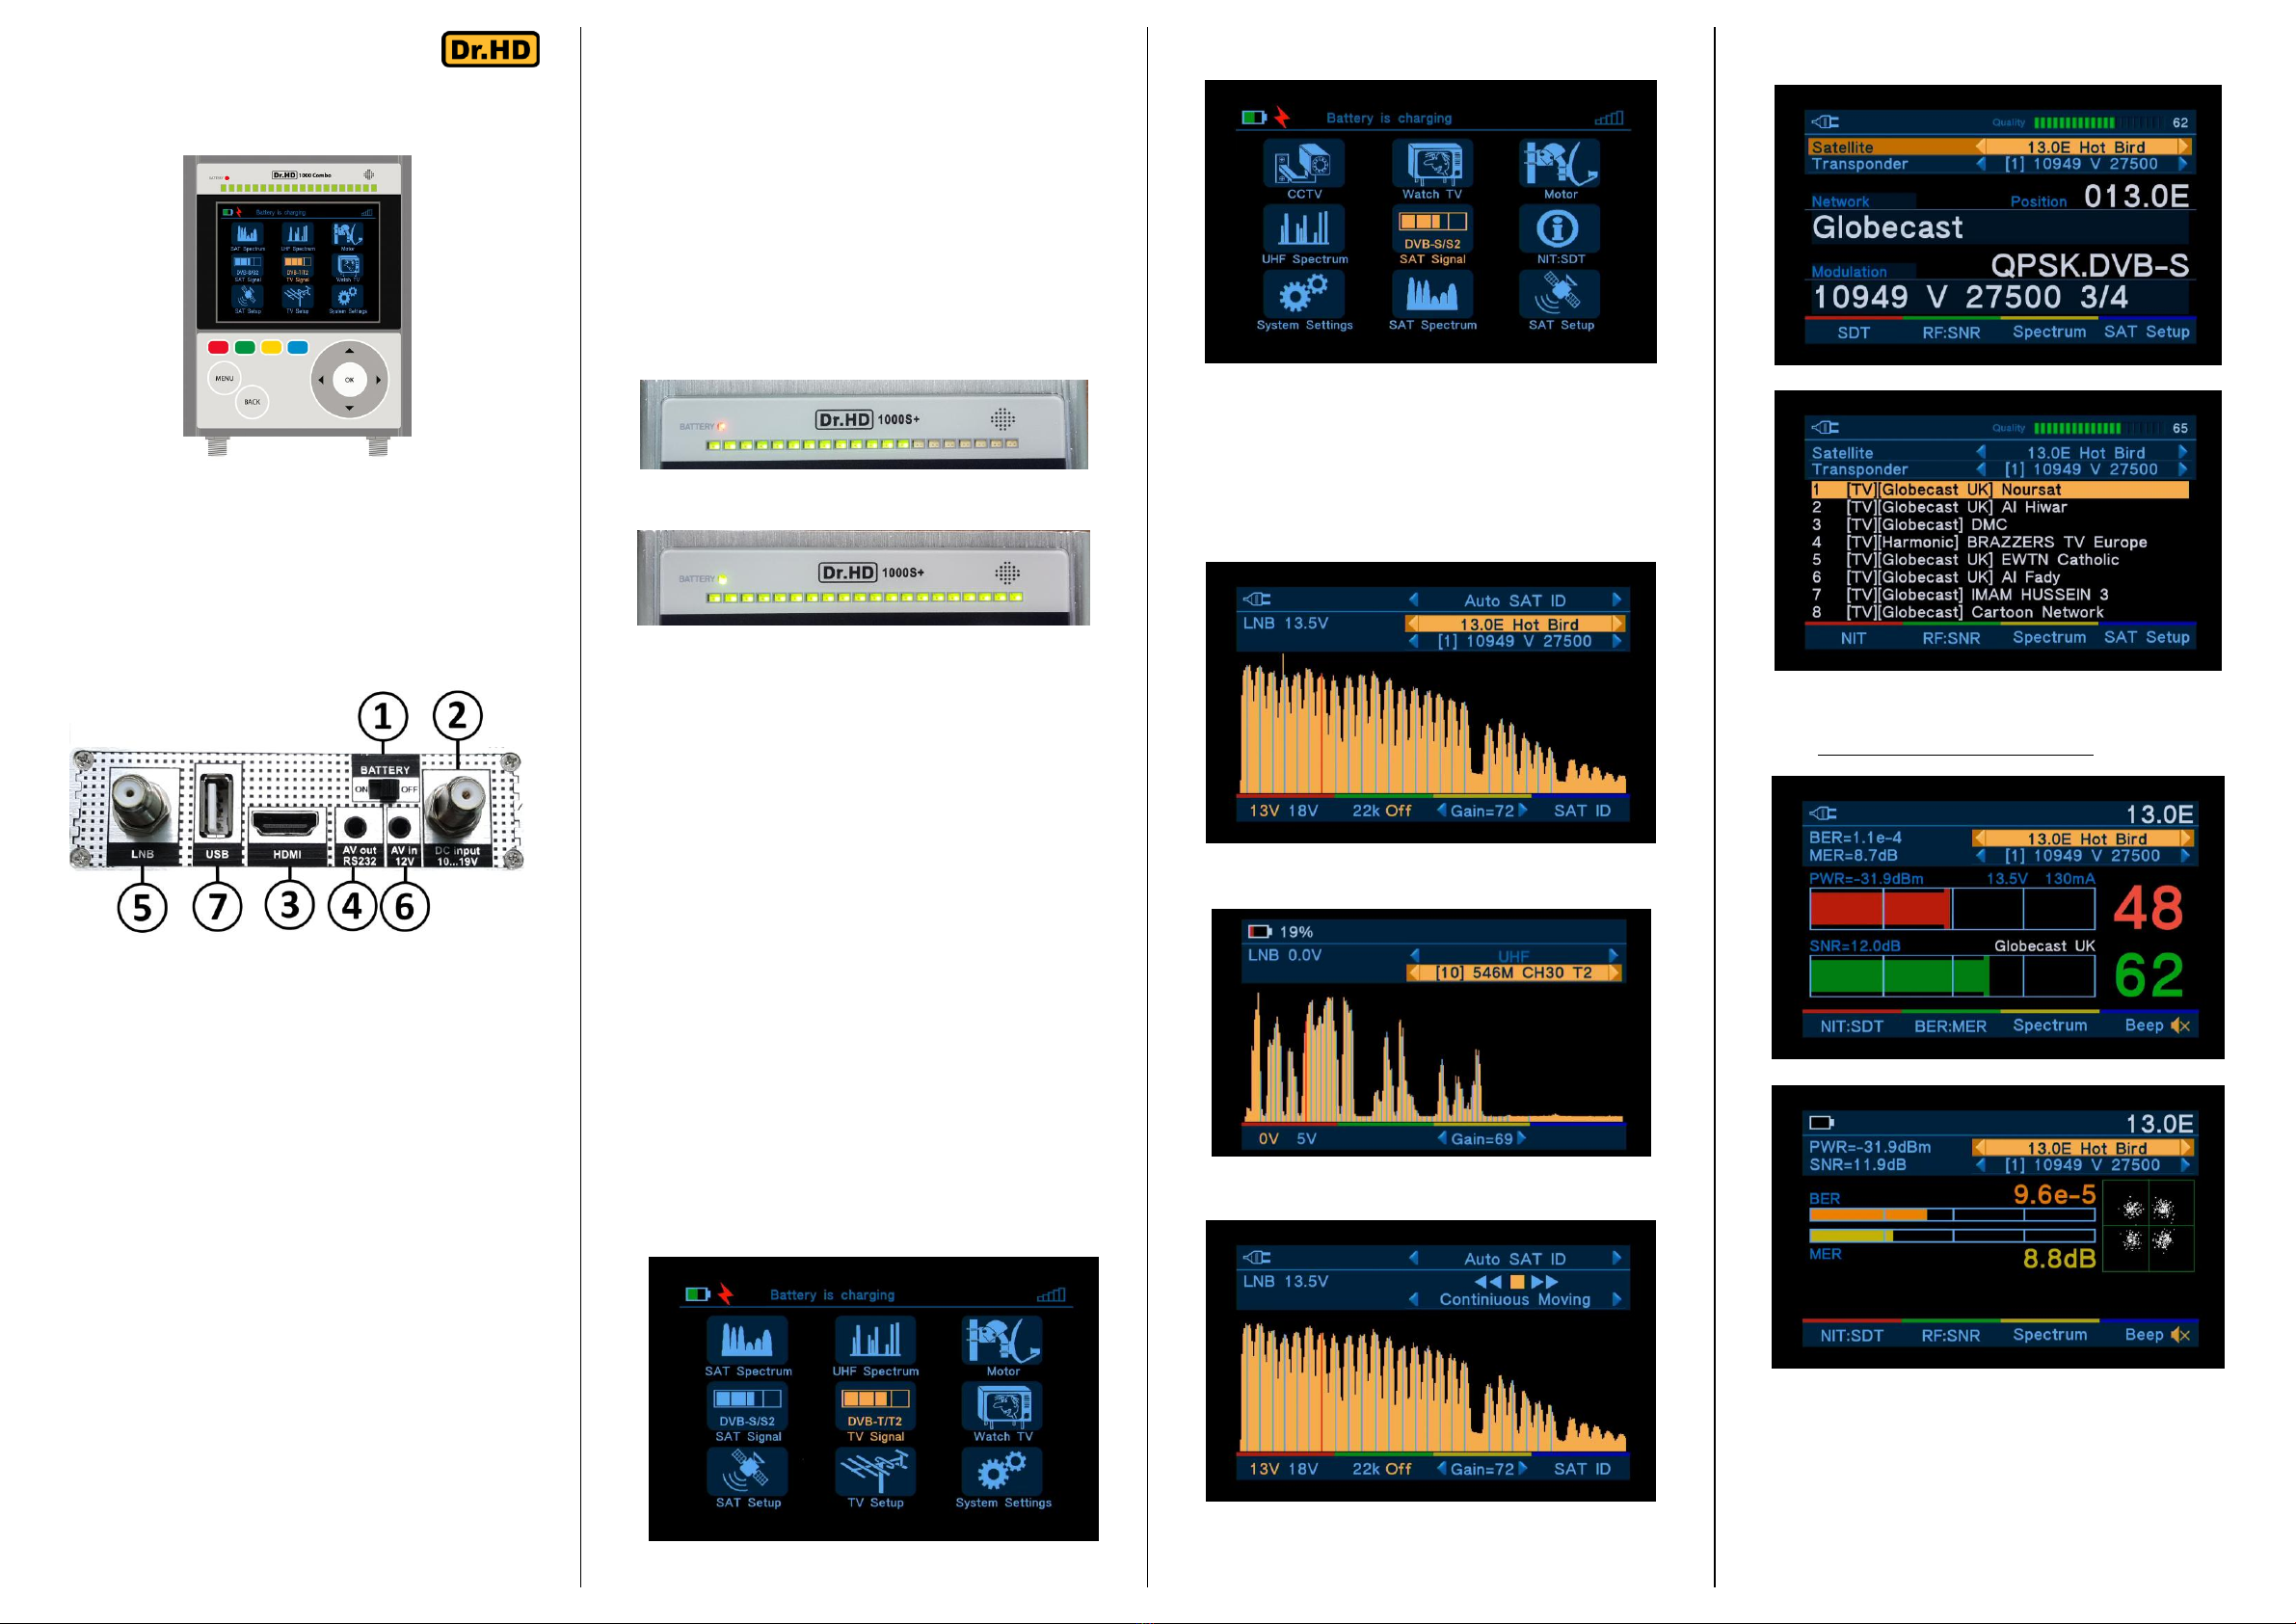
Watching TV
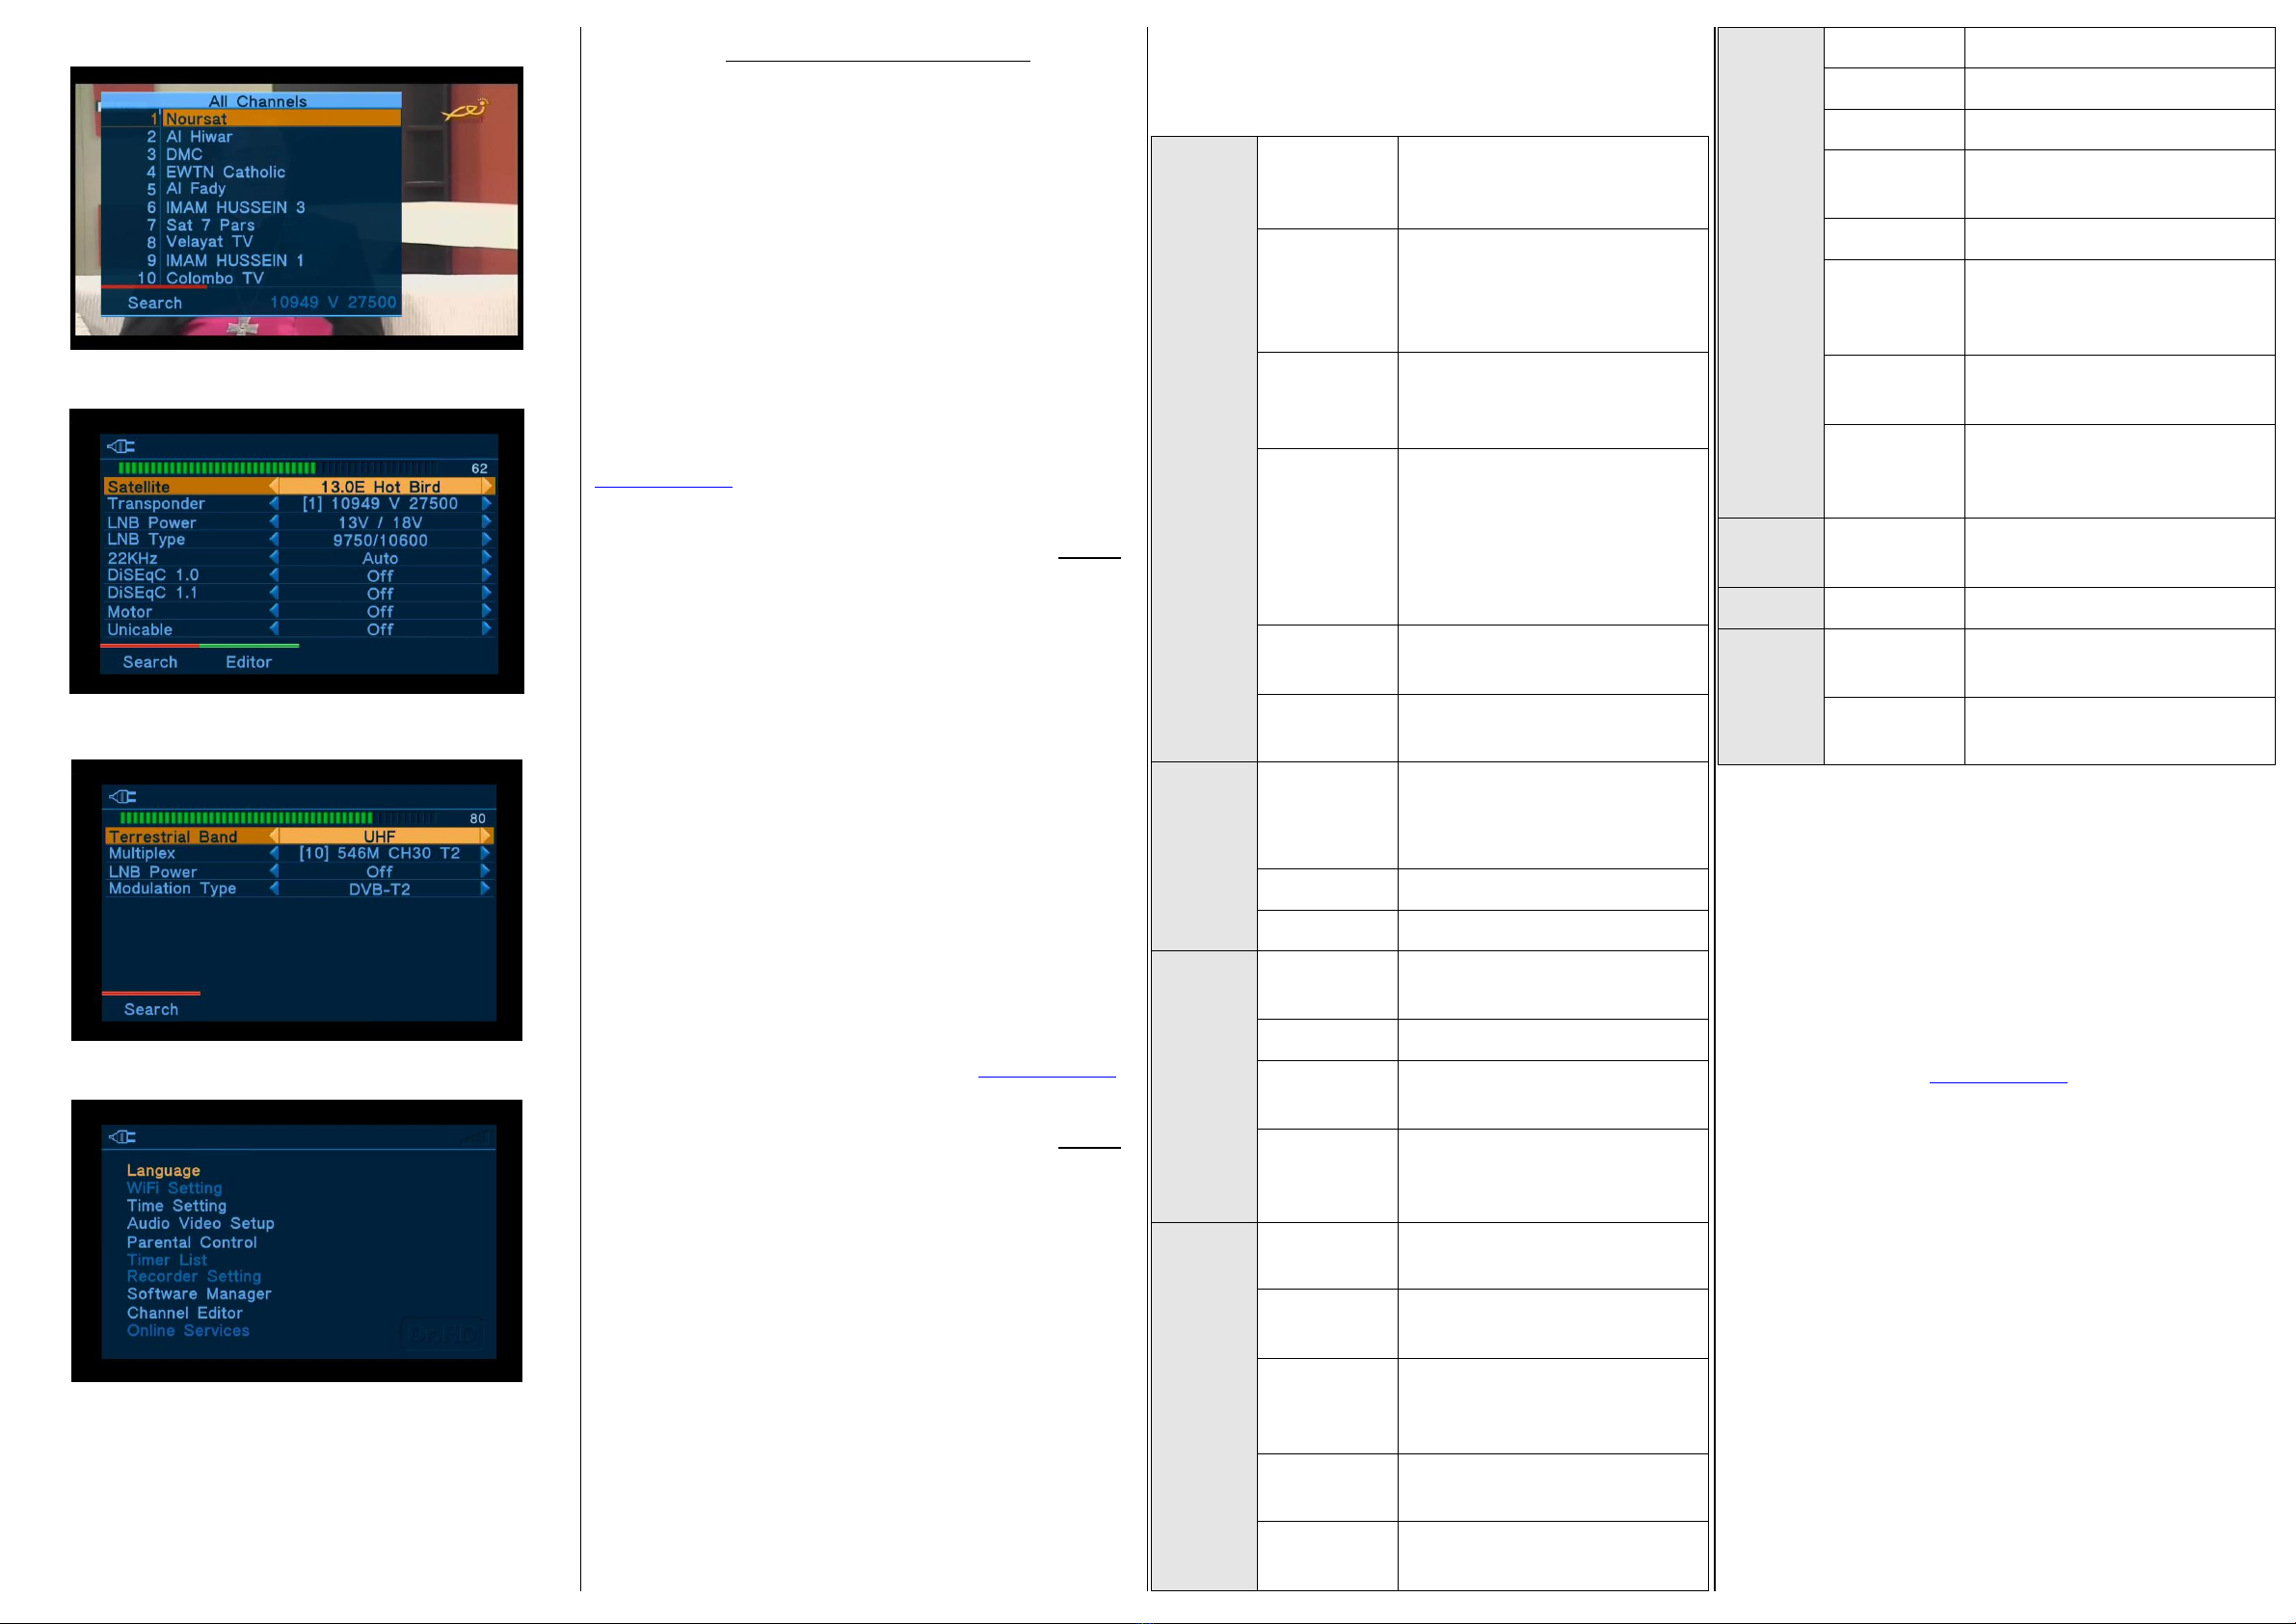
SAT Setup
TV Setup (available for 1000Combo model only)
System Settings
CCTV mode
NOTE! The CCTV mode will be enabled automatically, when you insert the
special CCTV-cable into the AV IN connector. After this, CCTV camera will get
6…11V power supply from the main battery (voltage depends on mode of
work, and normally it is enough to test-power the CCTV cameras), and the
display will show the video picture from Camera, and audio will play on the
built-in speaker. The CCTV power output has shortcut protection. This mode
supports the analogue CCTV with CVBS PAL/NTSC color system and mono
audio.
IMPORTANT! The CCTV mode is a power-saving mode! Therefore, to
return back from CCTV mode, you must reboot the Meter! Unplug PSU
from Meter (if was connected) turn the main switch to "OFF" then "ON".
Remote control unit (RCU)
Using RCU is one more way to control the Meter, especially in the Set-Top
Box mode. We did our best to make RC as easy as possible and user-friendly
for all potential customers.
Firmware USB update
We are continuously improving the Dr.HD™ 1000S+ / 1000Combo
software, adding new functions, in order to provide the best functional and
convenient product for our customers.
User can find information about firmware of Meter. To do this, go to Menu -
>System Settings –> Software Manager .
How to update firmware:
1. Download the latest version of firmware at official Website:
WWW.DR-HD.COM .
2. Unzip files to the root folder of the USB stick. Firmware files have
“ssu” extension.
3. Connect the USB stick to Meter.
4. Be sure that Meter’s battery has 20% charge or more ,
otherwise connect PSU, to prevent update failures with power off reason.
5. Select Menu ->System Settings –> Software Manager- >Upgrade,
press OK.
6. Select ssu or xml file for updating, and press Ok to start update.
You will see pop up warning messages and running progress bar. The
update requires not too much time, within 2-3 minutes. Do not do anything
during that time. After successful update finder will reboot by itself and will
enter the main menu.
NOTE: NEVER touch the main switch or disconnect PSU when doing
software update or downloading the XML files.
Follow us for new SW updates for more functions and other upgrades! You
can check our official site, but better idea is to follow us on FaceBook, also
there are YouTube videos that may help you.
Database editor and settings USB update
The Meter has simple embedded satellite+transponder database editor. It
helps to insert some changes in settings in any moment of installation. For
example, you can change polarization of transponder, you can add new
transponders, etc.
For bigger changes it is wiser to use your PC. In this case, you can record
the satellites.xml and terrestrial.xml database files to the USB stick and
downloaded to Meter from USB.
How to update settings:
1. Download database files at the official site: WWW.DR-HD.COM .
2. Unzip files to the USB stick’s root folder. The setting database
files always have “xml” extension.
3. Connect the USB stick to the Meter.
4. Be sure that Meter’s battery has 20% charge or more ,
otherwise connect PSU, to prevent update failures with power off reason.
5. NOTE! The sequence of downloading is critical. Satellites.xml
must be downloaded before terrestrial.xml and they should be download
together (one right after another) always. Call Menu ->System Settings –>
Software Manager- >Upgrade, press OK.
6. In simple file manager select xml file and press Ok to start update.
You will see pop up warning messages and running progress bar.
Attention! Embedded database has memory limitations:
Maximal satellite items count is 61.
Maximal transponder items count is 2000.
Maximal terrestrial band count is 3 for 1000Combo (VHF I/II, VHF III
иUHF) and 1 for 1000S+ (UHF only).
Maximal satellite name length is 15 Latin symbols
Editing the Database on PC.
Some customers may like editing the Database on PC. In this case, you
can edit the XML file with some editor able to work with XML files.
Then, the edited file can be recorded to USB drive and downloaded to
Meter. But
REMEMBER TO RESPECT the maximal satellite and transponder counts,
as above.
Specifications
Connector for the
cable from LNB
450MHz ~ 2150MHz (1000S+)
(maximal BW in Spectrum mode)
45MHz ~ 2150MHz (1000Combo)
Input IF signal
level range
-70dBm ~ -25dBm (satellite mode)
-100dBm ~ -25dBm (terrestrial mode)
DC 13/18V 500мА*
4.3/13V 200mA (1000Combo)
Ver 1.0/1.1/1.2/USALS/Unicable
Compatible
Upgradeable to DiSEqC 2.0
DVB-S QPSK, DVB-S2
QPSK/8PSK/16APSK/32APSK (all
models)
DVB-T QPSK 16QAM/64QAM, DVB-T2
QPSK 16QAM/64QAM/256QAM (only on
Combo)
MPEG-2, MPEG-4, H.264 AVC and Less
FULL HD 4:3/16:9
1920x1080p/i, 1280x720p, 720x576p/i,
640x480p/i
Built-in Li-ion, replaceable (8.4V)
~ 2 ....7 hours, depends on mode and
(LNB) load, typical 3+ hours
Digital HD-Video/Audio output
Audio(MONO)/
Video (CVBS)
output
With using cable-adapter 3 RCA
With using cable-adapter DB9
Audio
(Mono)/Video
(CVBS) input,
DC12V output
With using cable-adapter 2 RCA and
DCOUT
From DC adapter 12V 2А(other options,
read more above)
Size (W x H x D)
(without
connectors)
Attention! We are continuously improving the Dr.HD™ 1000S+ /
1000Combo software and hardware, adding new functions, in order to
make it the MOST EFFective, functional and convenient product for our
customers. Therefore, we reserve the right to make changes for the
benefit of our customers. That is why some functions described in this
manual might be somewhat different from what you see in your Dr.HD™
1000S+ / 1000Combo. That means that we have improved
software/hardware for your convenience!
We hope you enjoy using our Dr.HD™ 1000S+ / 1000Combo!
–From creators of Dr.HD™ 1000S.
© 2016 Dr.HD
WWW.DR-HD.COM