DRESSER Wayne 700 Series Guide

Dresser Wayne
700 Series
Small Fleet Pumps

READ THIS MANUAL BEFORE YOU BEGIN
Fuel pumps have both electricity and a hazardous, flammable, and potentially explosive liquid.
Failure to follow the below precautions and the Warning and Caution instructions in this manual may
result in serious injury or death. Read every tag attached to the pump before commencing installation.
Follow all rules, codes, and laws that apply to your area and installation.
SAFETY PRECAUTIONS - INSTALLATION AND MAINTENANCE
Always make sure ALL power to the pump is turned OFF before you open the pump junction box for
maintenance. Physically lock, restrict access to, or tag the circuit breakers you turn off when servicing
the pump. If applicable, be sure to trip (close) the emergency or safety valve(s) in the pump piping
BEFORE beginning maintenance.
Make sure that you know how to turn OFF power to the pump in an emergency. Have all leaks or
defects repaired immediately.
USE ONLY GENUINE PARTS
For product liability to be valid, no changes may be made to the equipment without the written
consent of Dresser Wayne.
HOW TO CONTACT DRESSER WAYNE
Trouble with the installation and operation of the pump should be referred to your authorized Wayne®
service personnel or Wayne Technical Support (1-800-926-3737).
INDICATORS AND NOTATIONS
Danger indicates a hazard or unsafe practice which, if not avoided, will result in severe injury or
possibly death.
Warning indicates a hazard or unsafe practice which, if not avoided, may result in severe
injury or possibly death.
Caution indicates a hazard or unsafe practice which, if not avoided, may result in minor injury.
Important information to consider, otherwise, improper installation and/or damage to
components may occur.
NOTE:
DANGER
WARNING
CAUTION
DANGER

i
February 2007 Part No. 891817 Rev A
Table of Contents
Title Page
1 INTRODUCTION ………………………………………………………………………………………. 1
1.1 Equipment Covered …………………….……………………………………………………. 1
1.2 Technical Information ………………..……………………………………………………… 1
1.3 Local, State, and Federal Codes ..……..……….………………………………………….. 3
1.4 Safety Precautions ……………..………….………………………………………………… 4
2 INSTALLATION ……………………………………………………..………………………………… 5
2.1 Equipment Inspection …………………..…………………………………………………… 5
2.2 Pump Installation ……………..……………………………………………………………… 5
2.2.1 Direct Installation on Aboveground Storage Tank ……………..……..………… 5
2.2.2 Shelf Installation on Aboveground Storage Tank …………..…………………… 6
2.3 Electrical Wiring ………….…………………………………..………………………………. 6
2.3.1 General ………………………………………………..…………………………….. 6
2.3.2 Circuit Breakers & Cutoff Switch ………………..………………………………… 6
2.3.3 Conduit………..……………………………………………………………………… 6
2.3.4 Wiring …………..…………………………………………………………………….. 7
2.3.5 Grounding ………………………………..………………………………………….. 7
2.3.6 Wiring Diagram …………………….……………………………………………… 8
2.4 Hose and Accessories Installation ……………..………………………………………….. 9
3 START-UP ……………………………………………………….…………………………………….. 11
3.1 Initial Checkout …………………………..…………………………………………………… 11
3.2 Start-up ……………………………..………………………………………………………… 11
3.2.1 Operation Test ………………………………………………………………………. 11
3.2.2 Voltage Test …………………….…………………………………………………… 11
3.2.3 Leak Test ………………………….………………………………………………… 11
3.2.4 Meter Check (Calibration) – For Units Equipped with a Meter/Register …..…. 12
3.2.5 Complete Installation …………….………………………………………………… 12
4 OPERATION …………………………………………………………………………………………… 13
4.1 Safety Items You Should Know …………………..………………………………………… 13
4.1.1 Portable Tanks and Containers ………….……………………………………….. 14
4.1.2 Health Note ………..……………..…………………………………………………. 14
4.2 Pump Operation ………………………….………………………………………………….. 14
5 MAINTENANCE ……………………………………………………………………………………….. 15
5.1 Preventive Maintenance ………………..…………………………………………………… 15
5.2 Strainer …………………………..……………………………………………………………. 15
5.3 How to Get Service on Your Pump ……………..…………………………………………. 16
6 TROUBLESHOOTING ……………………………………………………………………………….. 17
6.1 Troubleshooting Tips …………………….....……………………………………………….. 17

ii
Part No. 891817 Rev A February 2007

1
February 2007 Part No. 891817 Rev A
1. INTRODUCTION
1.1. Equipment Covered
This manual describes the installation and operation of the Wayne 700 Series Small Fleet
Pump & Meter.
Any questions concerning the installation and operation of the pump that are not covered in
this manual should be referred to your authorized Wayne service personnel or Wayne
Technical Support (1-800-926-3737).
1.2. Technical Information
Models 720: Pump and meter/register combination
730: Pump only
700R: Meter/register only
Application: For dispensing low viscosity petroleum fuels - diesel,
including biodiesel blends up to 20%; kerosene; and
gasoline with up to 15% ethanol - from aboveground storage
tanks. Not for refueling aircraft.
Performance: Up to 20 GPM (75 LPM) – 60 Hz motor. Up to 62 LPM –
50 Hz motor. Minimum dry vacuum – 15” of mercury.
Note: Actual flow rates received will depend upon the installation conditions
and the pump accessories such as the meter, hose size and length, nozzle
type, etc.
Register: Model 700R meter/register. Included with model 720.
4-wheel register with manual reset knob. Displays up to
999.9 gallons. 7-digit (with tenths) non-resettable
accumulative totalizer. Optional liter measure.
Meter: Model 700R meter/register. Included with model 720.
Phenolic nutating disc measuring chamber in aluminum
housing. Accuracy +/- .5% at full flow. Adjustable
calibration. Die-cast aluminum housing.
Pumping Unit: Self-priming, direct-drive rotary vane pumping unit. Cast
iron housing. Sintered iron rotor with eight carbon graphite
vanes.
Motor & Electrical: 1/3 HP, 1725 RPM, intermittent duty motor with thermal
overload protection. 115VAC, 60 Hz.
Junction Box: Meets UL 87 requirements. Weatherproof o-ring seal. AC
auxiliary line for optional solenoid valve control. External
motor switch in separate internal compartment. Die-cast
aluminum construction.
Strainer Assembly: Combination strainer and spring-loaded check valve with
pressure relief assembly. Cast iron housing.
Anti-Siphon Valve: Integral vacuum breaker in meter discharge. Duckbill
design. Copper tubing returns any drips back to tank through
fitting in the strainer base.

2
Part No. 891817 Rev A February 2007
Nozzle Holder Assembly: Zinc-plated steel. Accommodates standard automatic and
manual nozzles. Nozzle can be padlocked to prevent
unauthorized use.
Mounting Connection: 2” (5 cm) NPT male at base of strainer for tank mounting.
Suction Connection: 1” (2.5 cm) NPT female suction tube inlet.
Discharge Connection: 1” (2.5 cm) NPT female at pump. With meter/register,
choice of (2) 1” NPT female outlets – top or back. Plug for
unused position.
Finish: Pump, motor, and strainer assembly painted blue.
Meter/register has a black UV-resistant lexan dial face
graphic.
Hose, Nozzle, Suction
Tube: Not included.
Pressure: Working pressure up to 50 psi.
Approvals: Pending: Underwriter’s Laboratories (UL)

3
February 2007 Part No. 891817 Rev A
1.3. Local, State, and Federal Codes
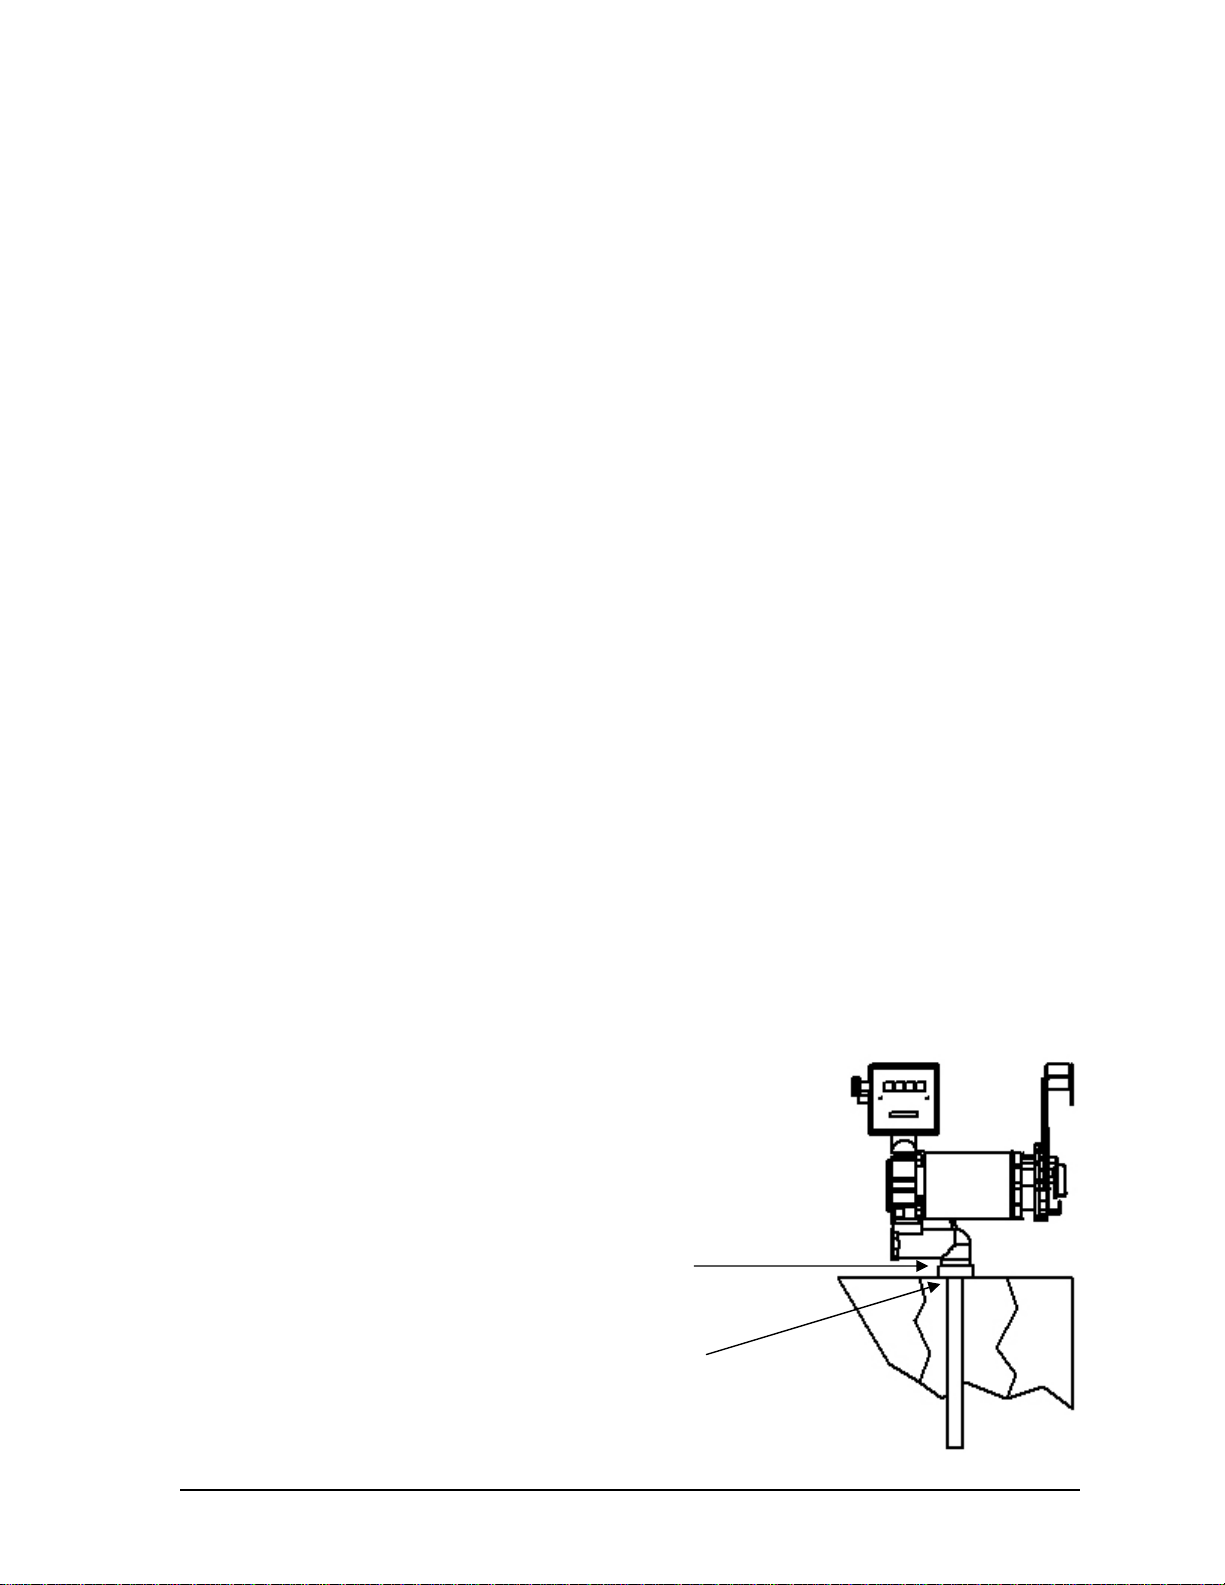
The Wayne 700 Series models are only part of a fuel dispensing system. A fuel dispensing
system typically comprises equipment and safety devices from a variety of manufacturers. It
is the responsibility of the pump owner to have a qualified installer ensure that all of the
necessary equipment and accessories are included to meet the requirements of the application
and all tanks (both underground and aboveground), piping and fittings, check valves, leak
detection and corrosion protection devices, wiring, venting systems, safety valves, filtration
devices, etc. are installed in accordance with the manufacturer’s instructions and in
compliance with local and regional building codes and requirements pertaining to private
fueling facilities (or other locations where the pump may be installed).
These requirements may include references to the National Electrical Code (NFPA 70);
Automotive and Marine Service Station Code (NFPA 30A); Flammable and Combustible
Liquids Code (NFPA 30); Standard for the Storage of Flammable and Combustible Liquids at
Farms and Isolated Sites (NFPA 395); Code of Federal Regulations, Title 40, Section 280 (40
CFR 280); United States Environmental Protection Agency (U.S. EPA) Technical
Regulations of 9-23-88 and U.S. EPA Financial Responsibility Regulations of 10-26-1988.
Where local requirements do not specify applicable codes, Wayne recommends using the
codes listed above. These codes are comprehensive and detailed, often requiring
interpretation to cover unusual situations, and, therefore, the associated handbooks (where
applicable) should also be consulted. (The handbooks are also available from the same
sources.)
Due to the variety of locations encountered, further information on installation cannot be
dealt with in this document except as the codes relate directly to the installation of the pump.
Therefore, it is strongly recommended that a qualified engineer or contractor familiar with
local regulations and practices be consulted before starting installation.
Pertinent information and codes are available from the following sources:
Association for Composite Tanks (ACT)
North State Street
Suite 720
Chicago, IL 60602
(301) 355-1307 (for information requests)
American Petroleum Institute (API)
1220 L Street, N.W.
Washington, DC 20005
(202) 682-8000
Fiberglass Petroleum Tank and Pipe Institute
One SeaGate, Suite 1001
Toledo, OH 43604
(419) 247-5412
National Assoc. Corrosion Engineers
(NACE)
Box 218340
Houston, TX 77218
(713) 492-0535
National Fire Protection Association (NFPA)
One Batterymarch Park
Quincy, MA 02269-9101
(617) 770-3000
National Leak Prevention Association
(NLPA)
685 Fields Ertel Road
Cincinnati, OH 45241
(513) 489-9844 or 1-(800) 543-1838
Petroleum Equipment Institute (PEI)
Box 2380
Tulsa, OK 74101
(918) 494-9696
Steel Tank Institute
P. O. Box 4020
Northbrook, IL 60065
(312) 498-1980
Underwriters Laboratories Inc.
333 Pfingsten Road
Northbrook, IL 60062
(312) 272-8800

4
Part No. 891817 Rev A February 2007
Underwriters Laboratories of Canada
7 Crouse Road
Scarsborough, Ontario, Canada N1R3A9
(416) 757-3611
United States Environmental Protection
Agency
Office of Underground Storage Tanks
401 M St., SW (05-400WF)
Washington, DC 20640
(703) 308-8850 (Underground Storage Tanks)
Western Fire Chiefs Association
5360 South Workman Mill Road
Whittier, CA 90601
(213) 699-0541
U. S. Department of Labor,
Occupational Safety and Health Administration
(OSHA) Washington, DC 20402
• Call OSHA at (202) 523-8148 to determine
specific needs; OSHA rules are covered by Title
29 of the Code of Federal Regulations (29 CFR.)
• Order OSHA publications from:
Government Printing Office (GPO)
Washington, DC 22304
(202) 783-3238
NOTE: Other regulatory codes may apply. Consult your local and regional code requirements to
determine which codes are applicable for your location.
1.4. Safety Precautions
NFPA 30A states that:
“When maintenance to Class I dispensing devices becomes necessary and such maintenance
may allow the accidental release or ignition of liquid, the following precautions shall be taken
before such maintenance is begun:
•Only persons knowledgeable in performing the required maintenance shall perform the
work.
•All electrical power to the dispensing device and pump serving the dispenser shall be shut
off at the main electrical disconnect panel.
•The emergency shut-off valve at the pump, if installed, shall be closed.
•All vehicle traffic and unauthorized persons shall be prevented from coming within 20
ft.(6 m) of the dispensing device1.”
Electric shock hazard! More than one disconnect switch may be required to de-energize the
pump for maintenance and servicing. Use a voltmeter to make sure ALL circuits in the pump
are de-energized. Failure to do so may result in serious injury.
Lockout/Tagout requirements of the U. S. Dept. of Labor, Occupational Safety and Health
Administration (OSHA) may also apply. Refer to Title 29, Part 1910 of the Code of Federal
Regulations (29CFR1910), Control of Hazardous Energy Source (Lockout/Tagout).
1.Reprinted with permission from NFPA 30A-90, Automotive and Marine Service Station Codes,
Copyright ©1990, National Fire Protection Association, Quincy MA 02269. This reprinted material is
not the complete and official position of the National Fire Protection Association on the referenced
subject, which is represented only by the standard in its entirety.
WARNING

5
February 2007 Part No. 891817 Rev A
1” NPT female
connection for user-
supplied suction tube
2” NPT male
connection for
mounting pump to
tank opening
2. INSTALLATION
2.1. Equipment Inspection
•If the pump is shipped directly to the site, examine the shipment immediately upon
arrival to make certain there has been no damage or loss in transit. Make sure that all the
component parts, including any optional equipment, are accounted for.
•Check and save the Packing Slip, Bill of Lading, Invoice, and all other documents
included in the shipment.
•Damaged or lost equipment must be reported to the carrier. Any damage or loss that may
occur in transit is not covered under the Dresser Wayne Warranty.
2.2. Pump Installation
•The Wayne 700 Series is designed for use with aboveground storage tanks. The pump
may be mounted directly into a fitting on the top of the tank or on a shelf on the side of
the tank.
•The installer should make sure that the tank is equipped with the necessary safety devices
according to the federal, state, and local codes, including, but not limited to, a
pressure/vacuum vent, emergency vent, and vented fill cap.
•The suction pipe should terminate at a minimum of 3” (7.6 cm) from the bottom of the
tank.
•The pump has an integral check valve to maintain prime. In suction lines less than 15 feet
(4.6 m), no additional check valves are required. In longer installations, make sure that
any check valves or foot valves include pressure relief mechanisms.
2.2.1. Direct Installation on Aboveground Storage Tank
•Measure and cut a 1” (2.5 cm) galvanized pipe for the suction pipe. The pipe needs to be
threaded on one end, and should be a length that provides a minimum of 3” (7.6 cm)
clearance from the bottom of the tank.
•Apply a U.L. Listed gasoline-resistant pipe joint sealing compound to the threads of the
galvanized pipe, and securely screw the threads into the pump inlet.
•Lift the pump and suction pipe, and insert the suction
pipe through the standard 2” (5 cm) opening in the
aboveground tank. Thread the pump into the opening
until it is secure and facing the desired direction.

6
Part No. 891817 Rev A February 2007
½” female NPT
conduit connection
for AC wiring
2.2.2. Shelf Installation on Aboveground Storage Tank
•The Wayne 700 Series may be mounted on a shelf on the side of the tank to make the
user controls more accessible with larger tanks.
•The installer must provide the necessary mounting hardware, piping, and safety valves
according to the federal, state, and local codes.
•If the pump is mounted below the product level, it is necessary to install an emergency
gate valve in the piping immediately after it exits the tank followed by a solenoid valve
controlled by the pump’s auxiliary AC control lead (see Section 2.3.4). A pressure
regulator valve with shear section, or equivalent valve, must be installed beneath the
pump. All valves must be equipped with a pressure relief mechanism. Pressure in the
pump cannot exceed 50 psi.
2.3. Electrical Wiring
2.3.1. General
•Wayne recommends employing a qualified electrician for all wiring.
•A hazardous liquid is being handled, so it is important to ensure that all wiring and
conduit is in accordance with all federal, state and local regulations, including, but not
limited to, the National Electrical Code (NFPA 70), NFPA 30, NFPA 30A, and NFPA
395.
2.3.2. Circuit Breakers & Cutoff Switch
•Wire the pump to a dedicated 15 AMP circuit breaker.
•Two pumps may be wired to the same circuit breaker.
•In addition to the circuit breaker requirements, an emergency power cutoff should be
installed that provides a single control to simultaneously turn off all AC power to all of
the site dispensing equipment. The switch should be located within a convenient distance
of the fueling equipment.
2.3.3. Conduit:
•Use ½” threaded, rigid, metal conduit and properly
sealed connectors.
•All threaded connections must be drawn up tight and
have a minimum of five threads engaged.
•Do not use flexible conduit or knockout boxes.

7
February 2007 Part No. 891817 Rev A
2.3.4. Wiring
•All wiring should be UL-Listed, gasoline- and oil-resistant wire rated at least 90ºC,
600V, Gas & Oil Resistant.
•All AC wire terminations should be made in the motor junction box. Make sure all wire
connections are tightly spliced and secured with a wire nut. Use electrical tape to close
the open end of the wire nut. After completing the wiring terminations, securely fasten
the junction box cover using all of the supplied bolts.
•The AC wire size will depend upon the distance from the pump to the circuit breaker
panel. Reference the recommended sizes in the following chart.
RECOMMENDED WIRE GAUGE SIZES
Distance
Feet Meters Wire Gauge
25’ 7 m 14
50’ 15 m 14
100’ 30 m 12
150’ 46 m 10
200’ 61 m 8
250’ 76m 8
300’ 91m 8
•If two pumps are wired from the same circuit breaker, increase the wire size to handle the
additional load.
•Auxiliary AC Control Lead
oAn auxiliary AC Control Lead wire (brown) is provided in the motor junction box.
This line is hot when the pump is turned on and may be used to provide a switch
detect to a fuel management system, open a solenoid valve in the supply line for
positive head pressure applications, or power a signal light.
oMaximum load is one amp.
oCheck the “on” voltage of the auxiliary lead and make sure it is compatible with any
equipment being connected.
oThe wire size for the auxiliary AC Control lead should be 14-gauge.
oIf the auxiliary lead is not used, make sure the wire is capped with a wire nut and the
open end of the wire nut is covered with electrical tape.
2.3.5. Grounding
•All pumps and electrical connection boxes must be grounded per NFPA 70.
•Connect a ground wire between the motor junction box ground lug and the main
electrical service panel.
•Make sure a ground rod is properly installed and wired to the ground bus strip of the
main electrical service panel in accordance with the National Electrical Code. Unless
prohibited by local regulations, it is recommended that the neutral and ground bus strips
be tied together.

8
Part No. 891817 Rev A February 2007
Breakers
N
HOT
Pump Feed
Ground Screw Junction Box
Return
Pump
Motor
115 VAC
14 White
14 Black
18 Brown
Handle
Aux AC
2.3.6. Wiring Diagram
Notes:
1. All equipment to be installed in accordance with all applicable local, state, and federal codes, including, but
not limited to, the National Electrical Code (NFPA 70), NFPA 30, the Automotive and Marine Service
Station Code (NFPA 30A), and the Standard for Storage of Flammable and Combustible Liquids at Farms
& Isolated Sites (NFPA 395).
2. For wiring connections, use wires rated at least 90ºC, 600V, Gas & Oil Resistant.
3. See the wire size chart for proper gauge of the wires.
4. Aux AC – The Auxiliary AC Control Lead (brown) is hot when the pump is turned on and can be used to
provide a switch detect to a fuel management system, open a solenoid valve in the supply line for positive
head pressure applications, or power a signal light. Maximum load is 1 amp. Cap the wire if not used.
5. For full details on the electrical wiring, see entire Section 2.3.

9
February 2007 Part No. 891817 Rev A
2.4. Hose and Accessories Installation
•Hose assemblies should be U.L. Listed and installed in accordance with the
manufacturer’s instructions.
•Install the hose assembly after the pump is installed.
oTo ensure a proper joint, wash all cutting oil off the threads and use a U.L. Listed
gasoline-resistant pipe joint sealing compound.
oPlace the compound on male threads only; be careful not to get any excess compound
on the inside of the fittings.
oInstall the fixed end of the hose to the dispenser outlet; secure according to the
instructions of the sealing compound and hose manufacturer.
oInstall the nozzle, and other hose accessories – swivels, breakaways, etc. – on the
hose according to the manufacturer’s instructions.
NOTE: Do not use the joint sealant compound on balanced vapor recovery accessories.
Reference the manufacturer’s instructions.
•For additional safety, breakaway connectors on the hose are recommended for all
installations. Refer to your state and local codes for breakaway device requirements that
apply to your installation.
Use only UL Listed hoses and nozzles. Continuity must be present between the dispenser
outlet and nozzle spout to prevent static discharge while fueling. Continuity must be
checked for the outlet/hose assembly to insure that the nozzle is grounded. Failure to do so
may result in a hazardous condition that could cause serious injury or death.
WARNING
With the meter/register
option, there is a choice of a
1” female NPT outlet at the
top or back of the meter for
the hose connection. A plug
is provided for the unused
outlet.
If the meter/register is not
used, there is a 1” female
NPT outlet available at the
top of the pump for the hose
connection.

10
Part No. 891817 Rev A February 2007

11
February 2007 Part No. 891817 Rev A
3. START-UP
3.1. Initial Checkout
Verify the following items have been correctly completed and the installation meets the
necessary federal, state, and local regulations as specified in Section 1.3.
•The pump is securely fastened to the tank or shelf.
•All conduit is rigid metal and is securely fastened. Do not seal the conduit until the
wiring has been verified through proper operation.
•All wires are appropriately terminated and the pump is properly grounded.
•The motor junction box cover is securely fastened with all of the supplied bolts.
•The hose and hose accessories are securely connected to the pump and have been
checked for continuity.
•All water has been removed from the tank and the tank has a sufficient amount of fuel for
testing (above bottom of suction line).
NOTE: Do not use the Model 700 Series to remove water from the tank. It will harm the pump.
3.2. Start-up
3.2.1. Operation Test
After verifying the above items have been completed, operation of the pump can be checked.
1. Turn on the circuit breaker for the pump.
2. Remove the nozzle from the nozzle holder, and lift the on/off lever at the bottom of the
nozzle holder to turn on the pump.
3. If the pump is equipped with a register, turn the reset knob to zero the display.
4. Insert the nozzle into a fill tank and press the nozzle lever to dispense fuel. Visually
verify fuel is being dispensed, check the register display if applicable, and inspect all
hose and piping connections for leaks.
5. Turn the pump off by pushing the on/off lever back down.
6. Repeat steps 2 – 5 several times to verify everything is working satisfactorily.
3.2.2. Voltage Test
•While the pump is turned off, verify the incoming voltage to the pump is within + 10% of
the motor nameplate voltage. If the voltage is not within the acceptable range, take the
appropriate corrective measures before using the pump.
•Turn the pump on and record the voltage readings while the nozzle is open (dispensing)
and then closed (bypass). Any voltage drops in excess of 10% need to be corrected.
3.2.3. Leak Test
•Re-check the pump and all piping and hose connections to make sure there are not any
signs of leaks.

12
Part No. 891817 Rev A February 2007
3.2.4. Meter Check (Calibration) - For Units Equipped with a Meter/Register
All meters are tested and calibrated for gasoline at the factory before shipping. As part of the
start-up procedure, the meter accuracy should be verified based on the actual product
dispensed, added accessories, installation conditions, or any changes that could have occurred
during rough transit..
Step 1 Dispense product in a certified 5 gallon or 20 liter calibration container to wet the
container and then empty it back into the tank, allowing it to drain for 10 seconds.
Step 2 Dispense product into the container until exactly 5 gallons (20 liters) are shown on
the register display.
Note: When verifying the accuracy, dispense at a flow rate that will be typical of the
flow rate normally used. Changing the flow rate during or between
verification tests may cause your results to vary.
Step 3 Compare the reading on the container’s sight glass to the register value. If you
desire to get the measurement closer to zero on the test container, follow step 4.
Step 4 The meter is adjusted by turning the calibration screw on the left side of the
register. Turn the screw clockwise to correct a plus cubic inches reading on the test
container sight glass, and turn the screw counterclockwise to correct a minus cubic
inches reading.
Note: Track the direction of the turns and the number of full and fractional turns
made with each adjustment in case additional corrections must be made after
re-verifying the accuracy.
Step 5 Repeat Steps 1-4 until the desired level of accuracy is reached.
3.2.5. Complete Installation
•After all tests have been completed successfully, and a proper installation and operation
are verified, the conduit openings should be appropriately sealed.
•The installer should make sure all documentation and manuals are left with the pump
owner.
Calibration Screw

13
February 2007 Part No. 891817 Rev A
4. OPERATION
4.1. Safety Items You Should Know
•Know how to turn OFF power to the pump in an emergency.
•Use the pump for appropriate applications. Use only low viscosity petroleum fuels –
diesel, including biodiesel blends up to 20%; kerosene; and gasoline with up to 15%
ethanol. Do not use the pump for pumping water or water-based liquids. Do not use the
pump for dispensing fuel into aircraft.
•Make sure the dispenser is equipped with the proper accessories for the application and
the product dispensed.
•Inspect regularly, all external fuel carrying components such as, hoses, nozzles,
breakaways, etc., for damage or leaks.
•Inspect regularly, the pump housing parts for damage or leaks.
•Have all leaks or defects repaired immediately.
•If a pressure regulator valve is used, test the shear section of the valve, by opening and
closing several times, at least once per year.
•Care should be taken to prevent fuel spillage. If spillage occurs, clean-up immediately.
•Use of automatic safety nozzles prevents overfilling fuel tanks and avoids spilling fuel.
•Avoid tipping the nozzle downward spilling excess fuel.
•Sufficient lighting must be provided to allow safe use of the pump.
•Stow hoses to prevent tripping.
•Know the Hazardous Zone area around the pump.
•Do not operate the pump in the presence of any source of ignition including lighted
cigarettes, electrical equipment, and running/hot engines.
•Always keep an operating nozzle attended and do not re-enter the vehicle after beginning
the fueling sequence. Static buildup can be created from sliding in and out of the vehicle
seat. Static discharge by subsequently touching an operating nozzle can create a
hazardous situation.
•Portable tanks (containers) of 12 gallons (45 liters) or less shall not be filled while they
are in or on a motor vehicle. See Warning information about this subject on the following
pages.
•Wear safety goggles and protective clothes when dispensing any liquid that may be
potentially harmful or hazardous. Change saturated clothing and wash skin promptly with
soap and water.

14
Part No. 891817 Rev A February 2007
4.1.1. Portable Tanks and Containers
Portable containers of 12 gallons (45 liters) or less shall not be filled while they are in or on a
motor vehicle. Filling portable containers, especially when they are sitting on a non-
conductive surface such as a floor mat or a plastic bedliner in the back of a pick-up truck, can
present a possible safety hazard and should be avoided as so stated in the following
WARNING:
FIRE HAZARD!
The flow of gasoline through the pump nozzle can produce static electricity, which can cause a
fire if gasoline is pumped into an ungrounded gasoline container. To avoid static buildup and
the possible resulting serious injury:
•Place approved container on the ground. Do not fill the container in the vehicle or truck bed.
•Keep the nozzle in contact with the can or container while filling. Do not use an automatic
pump handle (latch-open) device.
4.1.2. Health Note
Be advised that petroleum fuel and fuel vapors can damage your health.
4.2. Pump Operation
To Dispense Fuel:
•Remove the nozzle from the nozzle holder.
•Lift the on/off lever at the bottom of the nozzle holder to turn the pump on.
•If the pump is equipped with the optional register, turn the reset knob to zero the register.
•Insert the nozzle into the fill tank and squeeze the nozzle handle to dispense fuel.
•After fueling is complete, push the on/off lever down to turn off the pump, and re-insert
the nozzle into the holder.
NOTE: To prevent unauthorized usage, the nozzle may be locked into the nozzle holder.
The pump motor is equipped with thermal overload protection. If the motor overheats, the motor
will automatically shutoff, and prevent pump operation until it cools. Make sure you always turn
the pump off if the thermal overload protector trips. If the power is not turned off, after the motor
cools, it will automatically reset and product could be dispensed.
WARNING
CAUTION

15
February 2007 Part No. 891817 Rev A
5. MAINTENANCE
5.1. Preventive Maintenance
The safety precautions described in Section 1.3 apply to the following preventive
maintenance procedures. A correctly installed pump, given proper preventive maintenance
attention, will seldom require emergency service. Perform the following checks on a regular
basis:
•Check the pump housing parts for leaks regularly. Check nozzles, swivels, hoses, filters,
and joints for leaks and wear. Have all defects repaired immediately.
•Do not abuse the hose by trying to stretch it to reach a vehicle. This will cause early
failure at the couplings.
•Keep the pump clean at all times. Use only mild soap and water with a soft cloth. Do not
use gasoline or other petroleum-based products to clean the pump. Do not use abrasive
cleaners on any part of the pump. If it is necessary to just wipe off the pump, use a damp
cloth. Periodic waxing (3 times per year) of the pump surfaces with an automotive wax or
polish is essential to maintain the original finish and inhibit corrosion.
NOTE: Do not spray the pump with water.
•Test the tank for water regularly. Water in petroleum is not only a source of engine
trouble, but will also cause damage to the pump.
•Check the nozzle holder switch operation. If this does not operate easily, too much force
may be applied on the switch mechanisms, causing premature failure.
5.2. Strainer
A dirty strainer screen will slow down the delivery of product. If the tank and piping
installation is new, it may be necessary clean the strainer screen two or three times during the
first few days of operation to remove installation debris and pipe sealant. After this, strainer
cleaning should be performed periodically.
Before removing the strainer, turn off the power to the pump. Failure to do so may result in a
hazardous condition that can result in serious injury. Make sure safety goggles are worn.
Loosen the strainer cover and allow the product to drain into a plastic container until pressure is
relieved. Return the product to the appropriate tank.
WARNING

16
Part No. 891817 Rev A February 2007
To remove the strainer:
•Remove the two bolts and strainer
cover. Place a container under the
opening to catch the petroleum and
sediment.
•Pull out the strainer and wash the
screen in gasoline. Use compressed
air to dislodge lint and other foreign
particles.
•Install the clean strainer. Turn the
electrical power ON and check for
leaks.
5.3. How to Get Service on Your Pump
Trouble with the operation of the dispenser should be referred to your local Wayne
authorized service personnel or call the Wayne Help Desk at 1-800-289-2963.
Any modification, repair, or service to the dispenser, not in accordance with the original design,
may invalidate compliance with the equipment certifications such as UL, CSA, CE Marking, etc.
Consult manufacturer as necessary.
CAUTION
Table of contents
Other DRESSER Wayne Water Pump manuals
Popular Water Pump manuals by other brands

WilTec
WilTec Urea/AdBlue 51353 Operation manual

Homa
Homa TP 50 Series Installation and operation instruction manual

Rosenbauer
Rosenbauer DIGIDOS24 AT Operation manual

Robot Pumps
Robot Pumps RS Series Operation & maintenance manual

WULI
WULI WS-3000DT Operation manual

T.I.P.
T.I.P. LTP 40/10 operating instructions

Wilden
Wilden Original Series operation & maintenance

Bell
Bell UPFD Use and maintenance manual

Wilo
Wilo Yonos MAXO Installation and operating instructions

Homa
Homa Chromatic C 235 Original instruction manual

Zoeller
Zoeller QWIK JON ULTIMA 203 installation instructions

Grundfos
Grundfos Magna Installation and operating instruction