DrunkLizard X7 User manual

DrunkLizard
X7
User Manual
v201912FOR THE MOST UP-TO-DATE USER MANUAL, PLEASE REFER TO WWW.DRUNKLIZARD.COM

I About the manual
D
z
X7
(
)
@
z
Warnings:
:
!
Tips:
Q
D
z
:
(
)
W
8
;
Please note that r
220
D.
V
R
(
)
!!
,
V
Z
,
,
V
;
-01-
Content
p
-02-

1 Safety Notes
1.1 About safety
1.2 Safety Precautions
-03-
F
or precaution, always wear a helmet and other safety gear,
especially riders under 18 years old. (Check with your
local/state helmet/safety laws as various states require
everyone wear a helmet.)
I I
I I
I I
Av
oid
r
iding in hea
v
y rain or puddles
;
a
lso a
v
oid mud, ice and other slick ha
z
ards.
Do NOT ride with two or more people;
your e-scooter is for a single rider.
Max Weight: 220 lbs
Excess weight will slow the motor and prohibit the e-scooter
from attaining max capabilities (speeds, mileage, etc), as
well as may irreparably damage the scooter.
Do NOT ride after drinking, taking medicine or while under the influence
of any other substance; Do NOT drink and dri
v
e!
-04-
There's risk for any vehicle, including electric scooters; for your safety, please ride safely and obey the local laws.
•Please check that tires are inflated to 50 PSI before riding.
•Do not cause injury to others while riding, and be cautious when riding the scooter around pedestrians, bikes, cars,
other vehicles, personal property and other hazards.
•Do not use phones, or other handheld devices, when operating your scooter, and ride without headphones to
ensure safety. Be sure to pay attention to your visual and audio surroundings.
•Do not attempt jumps and obstacles as you risk personal injury and scooter failure.
•Any modification of the scooter is prohibited as it could lead to unstable operation, which may cause serious injury.
•While the scooter is water resistant up to IP54, avoid leaving the electric scooter in rain for extended periods of
time. Store indoors when possible.
Av
oid
r
iding if pregnant.

DO NOT take calls or listen to music while riding the scooter;
be aware of your visual and audio surroundings.
DO NOT use near fire or other dangerous areas that
could cause the electric scooter
'
s battery to catch fire.
-05-
15°
A
void riding up inclines and hills greater than 15
° to
prevent damage to the e-scooter's motor. Be cautious of
road hazards, speed bumps, potholes, stairs, mud, wet &
slick terrain, ice & snow, and be especially vigilant when
riding at night.
&
DO NOT ride on vehicle road. Drive safely and
stick to sidewalks, and bike lanes when applicable.
(Be sure to check & comply with local traffic laws.)
2.1 Overall View
2 Product Introduction
St
e
m
f
x
Ki
-06-

v
LCD display
Instructions for
M
enu Buttons
Power switch:
press the power button for 2-3 seconds to turn the power on/off.
2
Acceleration:
press the right acceleration/throttle lever to start and accelerate.
3
Brake:
squeez
e the brake handbar to brake. Lightly step on the rear fender brake to assist with extra braking power.
4
Press the function key to directly adjust the speed.
•Eco mode / Energy-saving mode / Beginner mode: no characters in the gear position
•Drive mode / Normal mode: gear characters display white "D"
•Sports mode: gear characters display red "D"
5
Headlights:
double tap the function button to turn on/off the headlights and taillights.
Brake lights light up (whether the headlights/taillights are on or off) when the disc brake/handbrake is engaged.
6
Cruise control mode:
keep the current speed for 6 seconds to enter cruise control, release when controller beeps.
To exit the cruise control mode, press accelerator again or squeeze the handbrake (squeezing the handbrake initiates the
brake light whether the headlights are on or off).
-07-
2.2
A
ssembly instructions
m/
*
mm
q
z
m;
i
m
5. Screw on the handlebars
'
* Make sure the folding lever is against the stem when
closing and opening; to secure it, use the folding ring. (If
it isn't against the stem, the latch can catch and stop the
ability to close/open until it is tapped back up against the
stem.)

2.3 Folding instructions
-09-
:,
1.Loosen the folding/fixing ring. 2. Open the folding latch. 3 . Open the folding latch* and
lower the stem of the scooter.
4. Align the hook with the hole of
the rear fender
and
press down.
2.4 Battery
R
emo
v
al and Installation Instructions
R
em
ov
al
In
s
t
alla
t
i
on
1. Press the lock and
pull up the dash-
board cover to open.
1. Press the lock and
open the dashboard
cover to open.
2. Unscrew the battery 3. Pull the battery straight
spring cover. up to remove the battery*.
2. Align the battery
groove with the groove
in the stem, and slowly
lower battery inside; pay
attention to the groove
direction and the L
/R
guide on the battery.
3.
Tighten the battery spring
cover, and push the
dashboard cover down to
complete the installation. (If
difficulties screwing the
spring cap down, see
troubleshooting section.)
-10-
* Make sure the folding latch is against the stem
when closing and opening; to secure it, use the
folding ring. (If it isn't against the stem, the latch
can catch and lock the ability to close/open until
it is tapped back up against the stem.)
*Keep the spring cover near the removed battery, or somewhere safe as to not lose it; without the battery, it can fall into the stem tube and be difficult to remove.

3 How to ride the scooter
Wear proper safety equipment.
2. Put one foot on the baseboard. Push off the
ground with other foot.
q
1. Press the POWER button for 2-3 seconds.
3. Balance both feet on your scooter when
you have enough momentum.
4. Press the THROTTLE lever lightly with your
right thumb to accelerate.
6. Squeeze the brake lever to brake, and
gently press the rear fender with your heel
to assist the brake.
5. Keep holding the THROTTLE lever to
speed up. Do not ride too fast.
7. Do NOT get off the scooter until it comes to
a complete stop.

4 Battery Instructions
These instructions show how to charge and maintain the battery, along with safety notices and the specifications.
Please use the battery properly according to this manual to prolon
g the battery life and its performance.
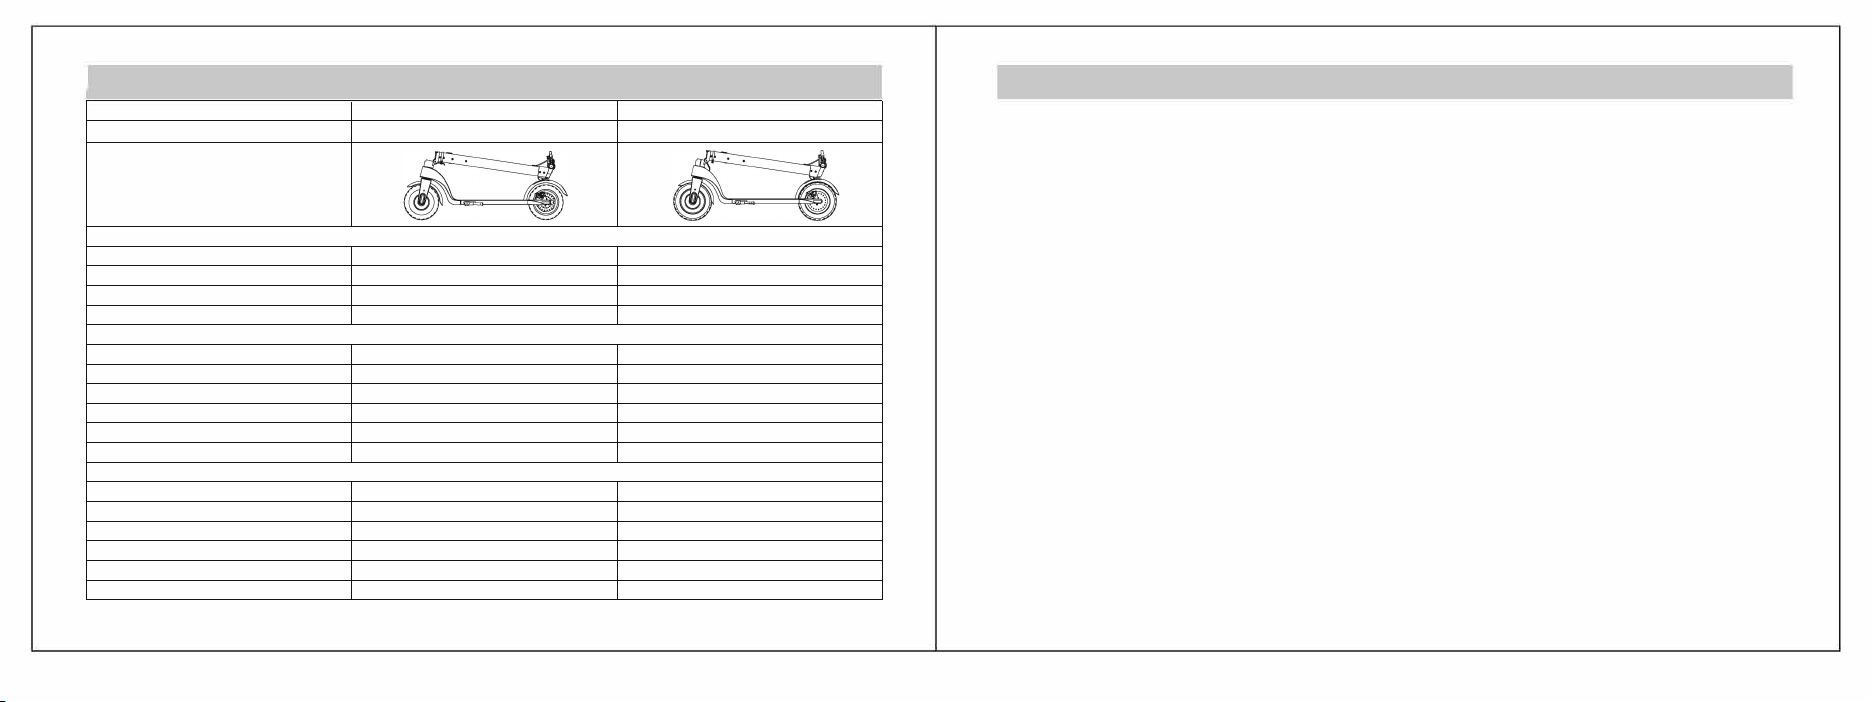
4.1 Battery Specifications
Batt
e
r
y Type
F
9
F
° 3 months (
1
00%
charge)
2
F
9
F
B
c
•
The battery of the electric scooter should be used within local laws; do NOT disassemble, tamper or attempt to open the
battery casing. Dispose of battery according to local regulations consistent with lithium-ion battery recycling/disposal.
•
Do not use if there is an odor or in excessive heat, or if there is a leak of any substance. (Do not touch anything leaking
from the battery.)
•
Do not let children and animals touch the battery. You must unplug the charger before installing the battery or riding.
•
If you want the electric scooter to run most efficiently, the battery must be fully charged and used within the temperature
range indicated in the battery specifications. Recharging should happen when almost fully used to maintain battery life.
•
Lithium batteries are considered dangerous to travel via air. Check with airlines before attempting to fly with the scooter.
•
The battery contains dangerous substances. Please do not open the battery. Do not insert anything into the battery.
Tip: When the internal temperature of the battery exceeds 45°C
/
112°
F
, the battery is protected and will not
discharge current
.
&
F
&
-13-
Open the charging port cover; make sure the charging port is clean and dry.
Connect the charger with the battery and the other end with power (1 00V-240V;50/60Hz); make sure the charging indicator is on.
When the indicator light on the charger is on, this indicates it is charging; otherwise, check if the line connection is good.
When the indicator on the charger has changed color (from red to green), it indicates that the battery has been filled to 99%. At
this time, remove the charger. (Leaving the charger plugged in after a full charge is safe, but will degrade the battery life over time.)
When using method 1: Ensure the battery is inside the scooter, with the silicone charging cover completely closed.
When using method 2: Remove the battery from the scooter and open the silicone charging port.
Both methods: Plug the charger DC plug into the battery charging port; plug the power cord into the charger. Then,
connect the other port into the socket (100V-240V; 50/60Hz), and confirm the charger indicator is on.
Cover the charging port with the anti-dust rubber cover after charging so as not to risk metal touching the
charging port and short-circuiting, causing damage and potential fires.
-14-
Please note, the battery does not come fully charged out of the box, so charge before first use.

I 5 Specification
s
Item 8.5 inch
Product
PP
PP
PP
OEVNJ
9$KRUH[WHQGHG$K
W front-wheel motor
PLOHV
PSK
OEV
NJ
)<
100-240Vac
50-60Hz
50°F-95°F/10°C-35°C
-1
5-
10inch
PP
PP
PP
OEVNJ
9$KRUH[WHQGHG$K
350W front-wheel motor
9-12 miles
PSK
OEVNJ
)<
100-240Vac
50-60Hz
50°F-
9
5°F/10°C-35°C
I 6 Maintenance
Maintenance considerations:
•
Make sure the electric scooter charger and charging line are disconnected, and ensure that the electric scooter is off, when no t in use.
•
Wipe the exterior with a soft cloth to clean the electric scooter.
•
Maintain tire pressure in accordance with the PSI listed on your tire's sidewalls. The DrunkLizard 8.5" is an air-filled tubeless tire;
keep 8.5" tire pressure at 50 PSI. The DrunkLizard 10" is an air-filled tube tire; keep the 10" tire pressure at 28 PSI.
Do not clean the scooter by using high-pressure water hoses, or by soaking in water, to prevent damage to the electronics
BE SURE TO MAINTAIN YOUR SCOOTER AND ITS COMPONENTS TO ENSURE THEY ARE IN PROPER WORKING ORDER
BEFORE RIDING, INCLUDING TIRE PRESSURE, BRAKES AND LIGHTS.
Be sure to properly care for and protect custom pinstriping art (should this be applicable for your scooter) to ensure it lasts.
Storage
Please charge your electric scooter before storage to prevent the battery cells from discharging during dormancy.
(Please be sure to charge at least once every three months while in long-term storage.)
If the storage environment temperature is lower than 32 0F, don't charge the electric scooter. Please put it in
inside where the temperature is above 50 0F, and then charge. Storage temperature should be between 50 °F
to 95 °F.
Please keep the electric scooter in a suitable place: indoor, dry, within appropriate temperatures and away from
damaging hazards.
Cover to prevent dust buildup and rust.
Scooter loads with weight in excess of 220 lbs may cause damage to the drive ability, motor wear, batt ery life and speeds.
In order to protect the user's safety, the user should not take apart the electric scooter. Tampering, disassembling, mis-use or
abuse of the scooter automatically voids the scooter's written and/or expressed warranty.
l
-16-
air-filled tubeless tire air-filled tube tire
frame made of aviation aluminum alloy
IP54 water resistant level
OEV
NJ
OEV
NJ
Note: Mileage, maxes and speeds are attainable in ideal riding conditions; battery mileage depends on rider's weight, scooter speed,
outdoor temperature and stop/go traffic. Above stats attained cruising in energy-saving mode at 77°F temp with a 165 lbs load.
yes yes

I7 Troubleshooting
PROBLEM
unable to start up
can not charge
SOLUTION
Check to see if the battery is powered
.
Check that the battery screw cap is
fully locked into place and
that the battery rubber charging
closure (on the bottom of the battery) is fully closed.
1.
Check to see whether the plug is plugged in securely to the outlet.
2.
Check the charger's connection to the AC plug (if the light is on).
3.
Check that the plug of the charger and the charging port of the scooter/
battery have been inserted correctly.
4.
Check that the battery panel cover is completely closed (when charging
inside the scooter stem).
This electric scooter does NOT come equipped with Bluetooth.
8 Packing List
E-Scooter/Battery: 1 PC
Charger/Cable: 1 Pair
Handlebar (R
/L
): 1 Pair
M6 hex wrench (to install brake lever): 1 PC
Tire Adapter (to connect to a standard air pump): 1 PC User (on X7 8.5")
Manual: 1PC
S
f
fu
-
A
h
-1
7-
jI
User Files
User Name
Address
Telephone Purchase Site
Purchase Price
Scoote
r
T
ype
and ti
r
e si
z
e
User Signature
9 Product Quality Certificate
Please complete and return the warranty card information via email ([email protected]).
10 Product Warranty Card
ZIP
Invoice Number
Dealer's Signature
-18-
can not screw down spring battery cap Ensure the battery ribbon is tucked inside the spring as ribbon can be long.
can not unfold scooter / locked into partial folded position Ensure the folding latch is positioned tightly against the stem (not in a
partially open position). If necessary, tap folding latch toward stem.
low tire pressure Use tire adapter tube and a standard air pump to air to PSI stated on tire.
flat tire Use a bicycle tire sealant (e.g. tire Slime); contact us for a replacement tire.
We shall provide warranty service due to
manufacturing
defects
&
non-artificial quality problems.
Six month warranty to the main body including handlebar stem, Motor, Charger...
Items not covered under warranty include: plastic decorative cover, pinstriping art (if any), rubber components (handlebar,
tires, etc.).
Any man-made or event damage, including, but not limited to, opening the housing, mis-use, abuse, improper storage, rust,
vehicle accidents, and inclement weather are not covered under warranty.
E-mail
City, State
Table of contents