manuals.online logo
Brands
  1. Home
  2. •
  3. Brands
  4. •
  5. Dual
  6. •
  7. Car Receiver
  8. •
  9. Dual XRM46BT Operating instructions

Dual XRM46BT Operating instructions

Other Dual Car Receiver manuals

Dual DV1014BH Operating instructions

Dual

Dual DV1014BH Operating instructions

Dual XHD7720 Operating instructions

Dual

Dual XHD7720 Operating instructions

Dual XR4110 Operating instructions

Dual

Dual XR4110 Operating instructions

Dual DC206BT Operating instructions

Dual

Dual DC206BT Operating instructions

Dual XD5250 Operating instructions

Dual

Dual XD5250 Operating instructions

Dual iplug MXDMA65 Operating instructions

Dual

Dual iplug MXDMA65 Operating instructions

Dual XDVD8182 Operating instructions

Dual

Dual XDVD8182 Operating instructions

Dual XDVD236BT Operating instructions

Dual

Dual XDVD236BT Operating instructions

Dual DV516BT Operating instructions

Dual

Dual DV516BT Operating instructions

Dual XD28BT Operating instructions

Dual

Dual XD28BT Operating instructions

Dual XHD7714 Operating instructions

Dual

Dual XHD7714 Operating instructions

Dual iplug XDM6820 Operating instructions

Dual

Dual iplug XDM6820 Operating instructions

Dual XDVD236BT User manual

Dual

Dual XDVD236BT User manual

Dual XDVD1265BT User manual

Dual

Dual XDVD1265BT User manual

Dual MXD426BT Operating instructions

Dual

Dual MXD426BT Operating instructions

Dual XDM6350 Operating instructions

Dual

Dual XDM6350 Operating instructions

Dual iPlug XDM6220 Operating instructions

Dual

Dual iPlug XDM6220 Operating instructions

Dual MXD105 Operating instructions

Dual

Dual MXD105 Operating instructions

Dual DM90MIR Operating instructions

Dual

Dual DM90MIR Operating instructions

Dual XDMA6415 Operating instructions

Dual

Dual XDMA6415 Operating instructions

Dual MXD105 Operating instructions

Dual

Dual MXD105 Operating instructions

Dual DSA2062 Operating instructions

Dual

Dual DSA2062 Operating instructions

Dual DC208BT User manual

Dual

Dual DC208BT User manual

Dual DXDM227BT Operating instructions

Dual

Dual DXDM227BT Operating instructions

Popular Car Receiver manuals by other brands

Linear Series LS5050 Operation and installation manual

Linear Series

Linear Series LS5050 Operation and installation manual

Kenwood KRC-160 instruction manual

Kenwood

Kenwood KRC-160 instruction manual

Sony XR-CA430X Service manual

Sony

Sony XR-CA430X Service manual

T+A Elektroakustik K1 CD-RECEIVER operating instructions

T+A Elektroakustik

T+A Elektroakustik K1 CD-RECEIVER operating instructions

SoundMax SM-CDM1052 instruction manual

SoundMax

SoundMax SM-CDM1052 instruction manual

Xtrons HD107HD user manual

Xtrons

Xtrons HD107HD user manual

Mopar RB3 manual

Mopar

Mopar RB3 manual

Clarion ADDZEST DMZ615 owner's manual

Clarion

Clarion ADDZEST DMZ615 owner's manual

Sony XAV-601BT Specifications

Sony

Sony XAV-601BT Specifications

PIE GM12-POD/S Operation manual

PIE

PIE GM12-POD/S Operation manual

Hyundai H-910H instruction manual

Hyundai

Hyundai H-910H instruction manual

Sony XR-C6100 Service manual

Sony

Sony XR-C6100 Service manual

Sony CDX-L600X - Fm/am Compact Disc Player Installation/connections

Sony

Sony CDX-L600X - Fm/am Compact Disc Player Installation/connections

Motorola VWA63 Service manual

Motorola

Motorola VWA63 Service manual

Sound Storm STM93R user manual

Sound Storm

Sound Storm STM93R user manual

Nextar D3201 instruction manual

Nextar

Nextar D3201 instruction manual

Alpine CDE-163BT owner's manual

Alpine

Alpine CDE-163BT owner's manual

Kenwood KDC-X303 quick start guide

Kenwood

Kenwood KDC-X303 quick start guide

manuals.online logo
manuals.online logoBrands
  • About & Mission
  • Contact us
  • Privacy Policy
  • Terms and Conditions

Copyright 2025 Manuals.Online. All Rights Reserved.

INSTALLATION/OWNER'S MANUAL
AM/FM Receiver with Bluetooth
XRM46BT
2
XRM46BT INSTALLATION
TYPICAL FRONT-LOAD 
DIN MOUNTING METHOD
KEYS
HEAD
UNIT
MOUNTING
SLEEVE
INSTALLATION
MOUNTING KIT
OR DASHBOARD
Preparation
Please read entire manual before installation.
Before You Start
• Disconnect negative battery terminal. Consult a qualified technician for instructions.
• Avoid installing the unit where it would be subject to high temperatures, such as from
direct sunlight, or where it would be subject to dust, dirt or excessive vibration.
Getting Started
• Remove trim ring from unit.
• Remove 2 transit screws located on top of the unit.
• Insert the supplied keys into the slots as shown, and slide the unit out of the mounting
sleeve.
• Install mounting sleeve into opening, bending tabs to secure.
• Connect wiring harness and antenna. Consult a qualified technician if you are unsure.
• Certain vehicles may require an installation kit and/or wiring
harness adapter (sold separately).
• Test for correct operation and slide into mounting sleeve to secure.
• Snap trim ring into place.
3
XRM46BT INSTALLATION
Wiring Diagram
FUSE
When replacing the fuse,
make sure new fuse is the
correct type and amperage.
Using an incorrect fuse could
damage the radio.
The unit uses one
10 amp AGC fuse located
in-line.
Antenna
Connector
10 AMP
AGC Fuse
4
XRM46BT OPERATION
Control Locations
Preset 3 / Intro
Preset 2 / Random
Preset 1 / Repeat
Display
Tune Up
Tune Down
Band / Go Back
Mode
Bluetooth Talk
Power / Mute
Volume Knob
Audio / Menu
USB Port
Reset
Auxiliary Input
Preset 6 / Folder Up
Preset 5 / Folder Down
Preset 4 / Play / Pause
16
2 3 4
1 10
2 11
3 12
4 13
5 14
6 15
7 16
8 17
9 18
18
5
13 12 11 10 9 8 71617 1415
5
XRM46BT OPERATION
General Operation
Press  or any other button to turn the unit on. Press
again to turn the unit off.
Press MODE to select between AM/FM, USB, Bluetooth
or auxiliary input modes. Modes of operation are
indicated in the display. USB mode will not appear
unless a USB device is connected.
The radio frequency (tuner mode) or MP3 title/track
information (USB mode) will be shown by default. Press
DISP to display the clock. The default display will return
after five seconds.
When in USB mode, the display will alternate between
track number/elapsed time and available MP3
information, including file name, song title, artist name,
album name and folder name.
Press RESET upon initial installation or if abnormal
operation occurs. Reset button is located in the top right
corner.
Press DISP to display the clock, then press and hold
DISP until the hours will flash. Rotate the volume knob
to adjust the hours. Press the volume knob, and the
minutes will flash. Rotate the volume knob to adjust the
minutes.
Insert a 3.5mm connector in the front panel AUX port.
Connect the other end of the 3.5mm connector to the
headphone output of an audio device, MP3 player, etc.
Adjust volume using the volume knob (00-40).
Press EQ to select between the following preset
equalization curves: FLAT, POP, JAZZ, ROCK and OFF.
Note: Ability to manually adjust Bass and Treble settings
is disabled when a preset equalization curve is selected.
Setting equalization curves to OFF enables manual Bass
and Treble adjustments.
Power On/Off
Mode
Display
Reset
Set the Clock
Auxiliary Input
Volume
Preset EQ Curves
6
XRM46BT OPERATION
General Operation
Press the volume knob to select between Bass, Treble,
Balance, Fader, Loudness, Distance and Stereo.
Press the volume knob until BAS appears.
Rotate the volume knob left/right to adjust.
(-7 minimum / +7 maximum)
Press the volume knob until TRE appears.
Rotate the volume knob left/right to adjust.
(-7 minimum / +7 maximum)
Press the volume knob until BAL appears.
Rotate the volume knob left/right to adjust.
10L (left) to 10R (right). "L=R" represents equal balance.
Press the volume knob until FAD appears.
Rotate the volume knob left/right to adjust.
10R (rear) to 10F (front) "F=R" represents equal balance.
Press the volume knob until LOUD ON or LOUD OFF appears,
then rotate the volume knob to select desired option.
Activating this feature will enhance the bass and treble fre-
quencies when listening to music at low volumes.
Press EQ, then turn the volume knob to cycle through the
equalization curves: FLAT (default), POP, JAZZ, CLASSIC,
BEAT, ROCK and USER. Any manual adjustment to the Bass
or Treble settings are automatically saved as USER.
From tuner mode only, press the volume knob until DX 
or LOCAL appears, then rotate the volume knob to select
desired option. Selecting LOCAL programs the unit to stop at
only strong stations when seek tuning.
From tuner mode only, press the volume knob until STEREO 
or MONO appears, then rotate the volume knob to select
desired option. Selecting MONO can improve listening in
areas with a weak FM signal.
Press and hold the volume knob until BEEP ON or BEEP
OFF appears, then rotate the volume knob to select desired
option. Activating this feature programs the unit to beep each
time certain buttons are pressed.
From tuner mode only, press and hold the volume knob 
until BEEP ON or BEEP OFF appears. Press the volume knob 
again to display AREA USA or AREA EURO, then rotate the
volume knob to select option appropriate for your location.
The clock will display 12-hour AM/PM time in USA frequency
spacing mode (PM 10.00). In European frequency spacing
mode, the clock will display 24-hour time (22.00).
Audio / Menu
Bass
Treble
Balance
Fader
Loudness
EQ
Distance Tuning
Stereo / Mono
Audible Beep
Area Selection
12/24-Hour Clock
BASS TREBLE BALANCE FADER LOUDNESS EQ DISTANCE
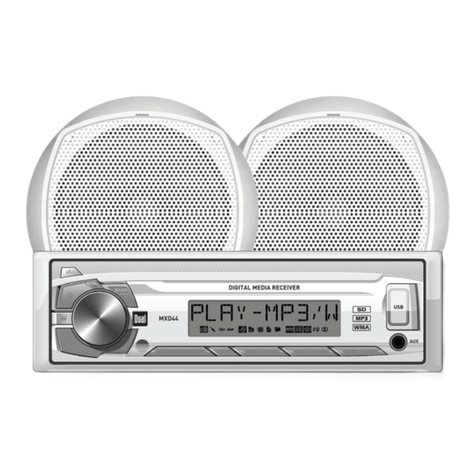
STEREO
7
XRM46BT OPERATION
Seek Tuning
Manual Tuning
Band 
Storing and Recalling 
Station Presets
Connecting a USB Device
(sold separately)
Playing Music
Track Select
Fast Forward and 
Reverse
Pause
Displaying Information
Press TUNE
nn
or TUNE 
ll
momentarily to seek to the
next strong station.
Press and hold TUNE
nn
or TUNE 
ll
until "MANUAL"
appears, then press TUNE
nn
or TUNE 
ll
momentarily
to change radio frequency up or down one step at a time.
Press and hold to advance quickly.
Press BAND to select between FM1, FM2, FM3, AM1 and
AM2 bands.
Up to 18 FM stations and 12 AM stations can be stored. To
store a station, select the desired band and station. Press
and hold the desired preset button (1-6) for more than
2 seconds. When stored, the preset number will appear in
the display. The station can be recalled anytime by pressing
the corresponding preset button.
To play MP3 files from most USB mass storage devices, line
up the USB connector and insert the USB device into the
unit's USB port.
When a USB device is first connected, “LOAD” will appear in
the display and playback will begin momentarily. Depending
on the number of files and folders, it may take several
seconds for the device to begin playing. If no valid MP3 files
are detected, “NO FILE” will be displayed and the last mode
will be resumed.
Press TRACK 
ll
to skip to the beginning of the next
track. Press TRACK
nn
to return to the beginning of the
current track. Pressing TRACK
nn
again skips to the
beginning of the previous track.
Press and hold TRACK 
ll
or TRACK
nn
on the remote
control to fast forward or reverse a track.
Press
l
/
II
to temporarily stop USB playback.
Press
l
/
II
again to resume playback.
ID3 tag and file/folder information will be automatically
changed during playback. Press DISP to view the clock.
Default display will resume after five seconds.
AM/FM Tuner Operation
USB Operation 
8
XRM46BT OPERATION
USB Operation 
Press RPT to choose between:
• Current Song - Continuously repeats selected track.
• Current Folder - Continuously repeats all files in folder.
Press RDM to choose between:
• Off - Cancels RDM function.
• All Songs - Plays all tracks in random order.
• Current Folder - Plays all tracks in folder in random
order.
Press INT to enter the Intro menu, then turn the volume
knob to select one of the following options:
• Off - Cancels the INT function.
• All Songs - Plays first 10 seconds of each track.
• Current Folder - Plays first 10 seconds of each track in
folder.
Maximum character display information
• Track name – 64 character maximum
• Directory name – 64 character maximum
• *Song title – 64 character maximum
• *Artist name – 64 character maximum
• *Album name – 64 character maximum
*Song title, artist name and album name will only be
displayed if included with the MP3 file.
The following types of files are compatible:
• MP3 data
The following types of files are not compatible:
• MP3 PRO format
• MP3 playlists
• WAV format
MP3 playback sequence is based on order the files are
copied to the USB device and begins in the root folder. Any
empty folders or folders that do not include MP3 files are
skipped. Depending on your software, the playback order
may vary.
Repeat
Random
Intro 
Character Support
Media Compatibility
Playback Order
9
XRM46BT OPERATION
USB Operation
• Maximum number of files: 1024
• Maximum number of folders: 512
• Maximum number of folder levels (sub folders): 8
Note: If the number of files/folders exceeds the maximum
outlined above, the additional files/folders will be ignored.
Note: Devices that exceed the maximum number of files or
folders may not function properly.
Due to the differences of USB devices, some devices may
not be compatible. USB devices must be ‘mass storage
class’ and formatted to the FAT or FAT32 file system in
order to ensure compatibility. USB devices must be 32GB or
smaller in capacity to be compatible.
Only MP3 files with filename extension (.mp3) can be played.
Do not attempt to play non-MP3 files with the MP3
extension.
8kHz ~ 48kHz
8kbps ~ 320kbps constant
Variable bit rates
Note: Some files may not play or be displayed correctly,
depending on sampling rates and bit rates.
ID3 tags Version 1.0 to 2.0
Note: If an invalid ID3 tag version is detected, "NO
SUPPORT" will scroll on the display.
Playback Capacity
USB Device Compatibility
Additional MP3 
Information
Sampling Frequency 
Rates
Transfer Bit rates
MP3 Tag Display
10
XRM46BT OPERATION
Bluetooth® Operation
Most Bluetooth devices support the auto-connect feature, and will connect automatically
if the device is in range when the unit is powered-on. If your device was previously paired
but does not connect, use these instructions below. Some devices require authorization to
allow the auto connect feature.
• If your most recently connected Bluetooth device becomes disconnected or does not
reconnect, press from Bluetooth mode to reconnect your mobile device.
• To connect a previously paired device that was not recently connected:
1) If applicable, press and hold to disconnect any connected mobile devices.
2) From Bluetooth mode, press SELECT. "Paired Devices" will appear on the LCD.
3) Turn the volume knob to cycle through the list of devices.
4) Press SELECT or to connect to the desired device. It must be in range to connect.
Note: If the Auto Connect setup menu setting is set to OFF, you must press to connect
you device after pairing, and each time the unit is powered-on.
Press and hold for 3 seconds to disconnect a connected device. The device will remain
paired and appear in the PAIRED DEVICES menu, but not be connected.
Before you can use a Bluetooth device, it must be paired and
connected. Make sure that Bluetooth is activated on your
device before you begin the pairing process.
The unit broadcasts the pairing signal constantly when
no devices are currently connected. Complete the pairing
sequence from your Bluetooth device. Refer to the owner's
manual for your device for more details.
The device name is "DUAL BT"  
The Bluetooth passcode "1234" 
Note: The unit can be in any mode of operation when pairing
is performed.
If a device is currently connected, press and hold to
disconnect the current device before a new device can be
paired. Then begin the pairing sequence from the new
Bluetooth device.
Preparation
Pairing a New Device
Pairing Additional Devices
Pairing a Device
(Re)Connecting a Paired Device
Disconnecting a Device