ducduc indi doublewide dresser/changer User manual

indi doublewide
dresser/changer
a how-to guide that won’t leave you in tears
ASSEMBLY INSTRUCTIONS

parenting is hard.
this is easy.
no really, it is.
MADE HERE™
MADE SAFE MADE SMART
MADE WELL™

want to watch this assembly IRL?
(acronym challenged? that means “in real life”.)
open the camera on your phone and place it over the
QR code below to see our NYC studio dream team do all
the heavy lifting (just kidding, there is none!)
or go to ducducnyc.com/pages/assembly-instructions

thank you for selecting a
studio duc product!

Please check contents against the components list in these instructions. Also, please ensure
there was no damage that may have occurred in shipping. If any components are missing or
you find any damage, please contact ducduc before continuing.
We recommend the use of a Colgate 3-Sided contour Pad (CR300-S80) if this dresser is to
be used as a changing table.
Maximum changing pad dimensions: W16” x L33” x H5”.
Pay close attention to the safety warnings in these instructions and on dresser/changer la-
bels.
The maximum weight of any child on top of the dresser/changer is 45 pounds.
Read all the instructions before use.
Do not use if dresser/changer is damaged or broken.
CARE AND CLEANING:
Do not scratch or chip the finish. Do not use abrasive chemicals for cleaning. Clean with mild
soap on a soft rag. Rinse and dry thoroughly. If you ever re-finish this furniture, be sure to
use only a non-toxic finish.
Do not attempt to move this dresser/changer alone–dragging or sliding it across a floor may
cause structural damage. A minimum of two people is required to safely lift and reposition
the dresser/changer.
KEEP INSTRUCTIONS FOR FUTURE USE
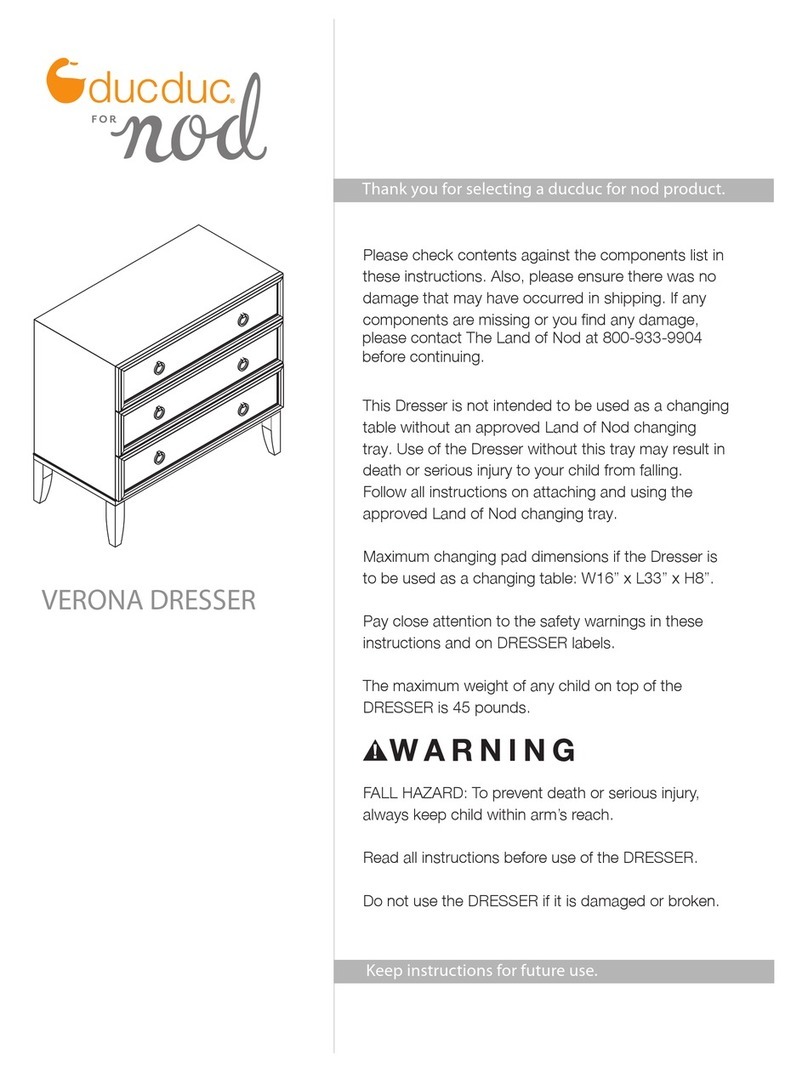
Please check contents against the components list in these
instructions. Also, please ensure there was no damage that may have occurred in
shipping. If any components are missing or you find any damage, please contact
ducduc before continuing.
To use the dresser as a changing table, insert and use the changing table tray
provided with the dresser.
We recommend the use of a Colgate 3-Sided contour Pad (CR300-S80) if this
dresser is to be used as a changing table.
Maximum changing pad dimensions: W16” x L33” x H8”.
Pay close attention to the safety warnings in these instructions and on dresser/
changer labels.
The maximum weight of any child on top of the dresser/changer is 45 pounds.
Read all the instructions before use.
Do not use if dresser/changer is damaged or broken.
CARE AND CLEANING:
Do not scratch or chip the finish. Do not use abrasive chemicals for cleaning.
Clean with mild soap on a soft rag. Rinse and dry thoroughly. If you ever
re-finish this furniture, be sure to use only a non-toxic finish.
Do not attempt to move this dresser/changer alone- dragging or sliding it across
a floor may cause structural damage. A minimum of two people is
required to safely lift and reposition the dresser/changer.
KEEP INSTRUCTIONS FOR FUTURE USE
secure this unit to support surface using the
mounting hardware provided. see instructions.

WHAT’S IN THE BOX:
A1
L side panel
H
hammer cap
F (x4)
foot
B1
back upper panel
B2
back lower panel
C
tray stretcher
D
bottom
E
top
A2
R side panel
A3
center partition
G (x4)
JCB bolt (25mm)
I
allen key (4mm)
J
block foot

DB2 (x6)
drawer box back
DB3 (x6)
L drawer box side
DB4 (x6)
R drawer box side
DB5 (x6)
drawer box bottom
DB6 (x6)
indi pull
DB7 (x12)
screw for indi pull
K
safety strap kit
(with hardware)
DB1 (x6)
drawer face
M (x2)
confirmat screw for
stretcher
L
allen key (3mm)

WHAT YOU’LL NEED:
20 minutes
(or less)
2 people
plus a dog for moral support
(unless you’re a cat person)
household hammer or
rubber mallet
a soft surface to assemble on
(like a rug or some of the corrugate
box your piece arrived in)
phillips head screwdriver

lean bottom (D) against a wall as shown.
using the provided allen key (I) and JCB bolts (G), attach feet (F) to bottom (D).
2
1
important!
be sure the JBC bolts are
attached to the side of the
bottom panel WITH the
countersink holes. duc insider tip!
be sure the edges of the
feet are square to the
edges of the bottom
panel before fully
tightening the JCB bolts.
important!
be sure the 2
small holes on the
bottom are facing
away from the
wall

important!
when attaching the
bottom and center
partition, make sure the
drawer glide hardware
extends upward as shown.
insert connectors on block foot (J) into holes on bottom (D). tap with hammer and hammer
cap (H) to lock into place.
flip the assembled base around so the feet are facing the wall. insert connectors on center
partition (A3) into slots on bottom (D) and push down to lock into place.
3
4
important!
follow stickers on center partition (A3) to
install panel in the correct orientation.

important!
follow stickers on top panel (E) to install panel
in the correct orientation.
lean L side panel (A1) against a wall as shown.
insert remaining connectors on center partition (A3) into slots on top (E) and push down at
the connection to lock into place. set assembled pieces aside for now.
6
5

7a
7b
insert connectors on back lower panel (B2) lower 2 slots on L side panel (A1). push down
at the connection to lock into place.
insert connectors on back upper panel (B1) lower 2 slots on L side panel (A1). push down
at the connection to lock into place.
important!
be sure the 3
holes on the back
panel are located
at the top interior.
important!
follow stickers on both back upper panel (B1)
and back lower panel (B2) to install panels in
the correct orientation.

insert connectors on both back panels (B1 + B2) into slots on R side panel (A2). push down
at the connection to lock into place.
gently lay the partially assembled case on its back and have a friend gently flare the side
panels (A1 + A2) outward as shown.
9a
8

9b with the side panels flared outward, insert connectors of assembled base (D, F, +J) and
top (E) into slots on R side panel (A2).
important!
follow stickers on components
A3, E, + D to install panels in the
correct orientation.
important!
when attaching these
components, make sure
the drawer glide hardware
on center partition (A3)
extends upward as shown.

9d once all connectors and slots are lined up and side panels are back to square position,
apply hammer cap (H) to the head of a household hammer and tap bottom (D) and top
(E) until there is no gap at the connection to back panels (B1 + B2).
9c insert remaining connectors insert connectors of assembled base (D, F, +J) and top (E)
into slots on L side panel (A1).

with a friend, rotate the assembled case into upright position. position tray stretcher
(C) between two side panels (A1 + A2) as shown. once the connectors on tray stretch-
er (C) are lined up with the holes on top (E), use hammer with hammer cap (G) to tap
until secure.
10a
10b
duc insider tip!
when attaching the tray
stretcher, start by loosely
screwing in each bolt.
once everything is lined up and
both bolts are in place, fully
tighten all screws until secure.
insert screws (M) into holes on side panels (A1 + A2). use allen key (L) to secure tray
stretcher (C) to side panels (A1 + A2).

11a now we build the drawers! starting with drawer face (DB1) facing down, insert
connectors of both drawer box side panels (DB3 + DB4) into slots on drawer face
(DB1). push down at the connections to lock into place.
11b rotate the partially assembled drawer box as shown. slide drawer box bottom (DB5) into
place using grooves on the drawer box side panels (DB3 + DB4) as guides. be sure glide
hardware on bottom panel (DB5) is positioned outside the drawer interior and toward
the drawer face (DB1) as shown.
11c again, rotate partially assembled drawer box as shown. insert connectors of drawer box
back (DB2) into slots on drawer box sides (DB3 + DB4). push down at the connections
to lock into place. use hammer and hammer cap (F) if needed.

12 build remaining drawers using steps 11a, 11b, 11c, and 11d.
11d using a phillips screwdriver and screws (DB7), attach the pull hardware (DB6) to the
front of each drawer face.

starting at the top, pull drawer glides out to extended position as shown.
13a

13b place one assembled drawer box onto extended glides as shown. from underside of
drawer, use hands to pull each glide forward until it locks into connection with glide
hardware attached to drawer box bottom (DB5). the drawer will be secure when you
hear a click on each connection. once secured, push drawer box in to close.
Table of contents
Other ducduc Indoor Furnishing manuals
Popular Indoor Furnishing manuals by other brands

Furniture of America
Furniture of America CM3023T Assembly instructions

LumiSource
LumiSource SMOOCH CHAIRTM CHR-SMOOCH-X Assembly instructions

Homelegance
Homelegance B2013DC Assembly instruction

DREAMS
DREAMS 413-00146 Assembly instructions

PAIDI
PAIDI SINO 2 Assembly instructions

Babystep
Babystep Classic 1230 manual