1
Region
Germany:
Azimuth
angle:
Elevaon
angle:
LNB lt
angle (skew):
North-west (Dortmund)
165° 30° -2°
North-east (Berlin) 173° 30° -2°
South-west (Stugart) 167° 33° -2°
South-east (Munich) 170° 34° -0°
Determine the angle for the satellites
It is necessary to know the approximate posion on the
horizon in order to quickly align to the correct satellites.
You can either use the simple online calculator
which you can nd at
www.durline.de/tools/satcalc.html
or you can scan the adjacent QR code.
Or:
Roughly align your satellite dish
You now need to align the antenna towards the direcon in the sky where you expect
to nd the satellite.
Elevaon angle: Use the antenna dial (back part).
Azimuth angle: align using a compass as your guide (e.g. smartphone/satellite nder).
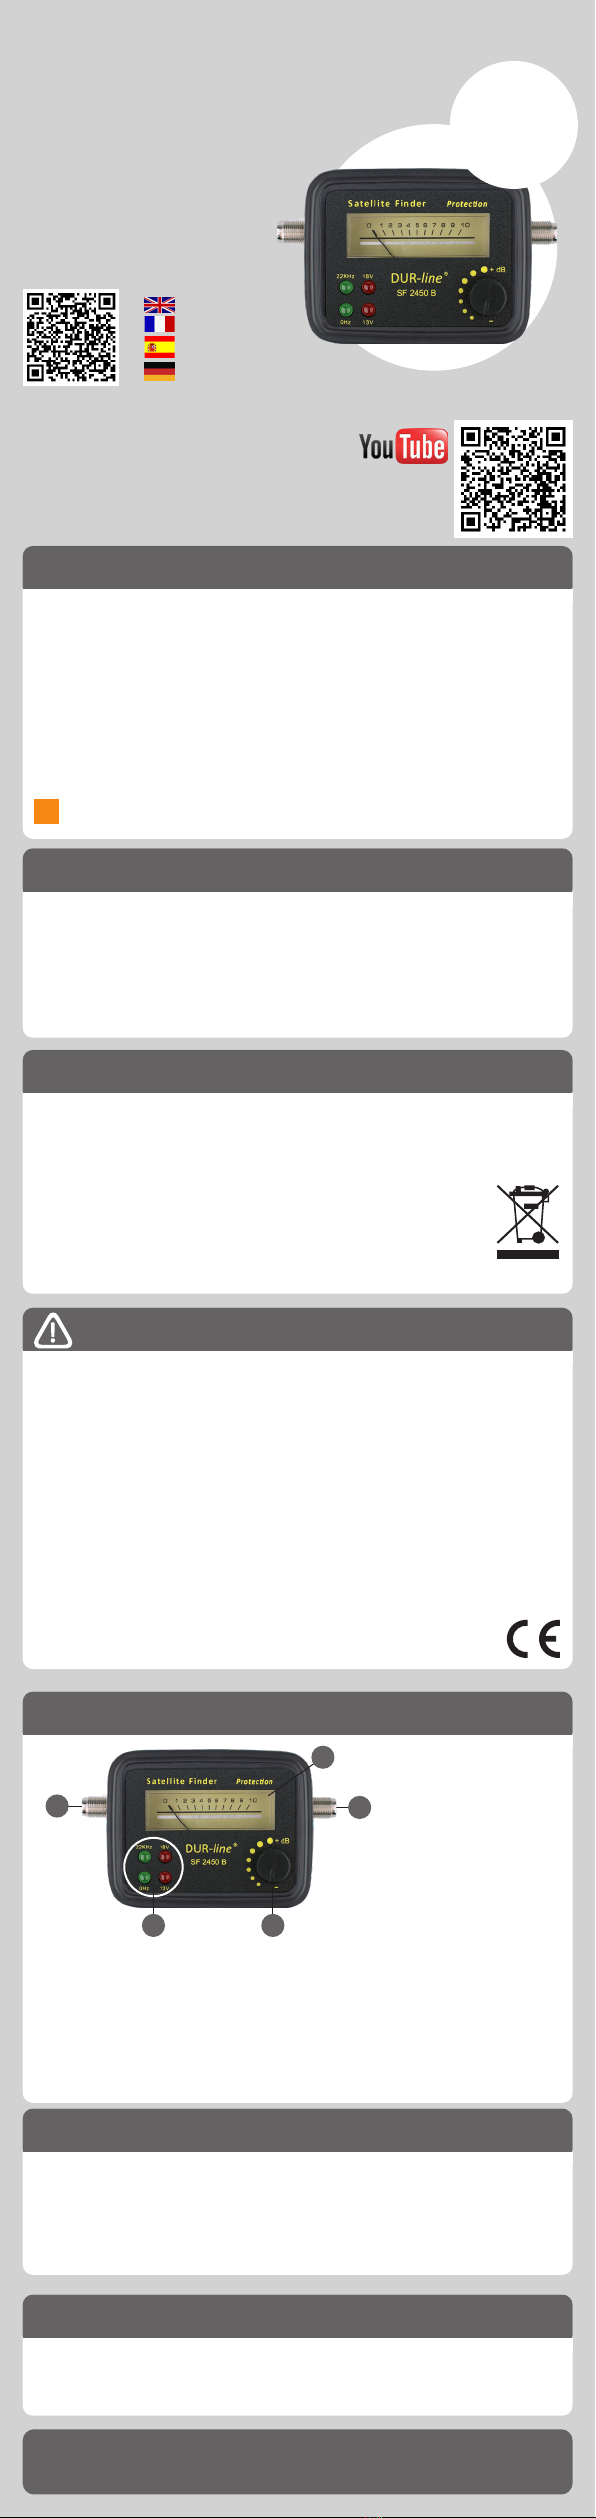
2 Start operang the Sainder
TV / receiver
LNB
2.1 Connect the satellite nder with the LNB
Use the coaxial cable that was included with the product – connect the
“LNB” connector to the LNB output.
2.2 Connect the receiver/power supply (receiver is o)
Connect the (receiver) supply cable to the connector that is labelled “receiver”.
2.3 Switch on the receiver/power supply
The receiver now takes over the satellite nder’s power supply –
the satellite nder is acvated and the display is illuminated.
Depending on the LNB type or if the antenna is lted too far in a
downwards direcon, it can be the case that due to reecons, the
satellite nder will display a reading even though a satellite is not being
received. It is therefore inially important to always approximately set
the angle on the antenna (elevaon, azimuth) and to ensure that there
is a clear view of the sky.
3
Adjusng the satellite dish more precisely
3.1 CAREFULLY turn the satellite dish le and right –
take into account the level display and buzzer volume
Turn SLOWLY.
When the antenna is roughly aligned, the level display moves to the
right and the buzzer goes o.
3.2 Turn the controller so that the needle lies
approximately in the middle of the level display
It is then easy to see whether your adjustments are improving or
worsening the level.
If the needle moves completely to the right (or le), it is
necessary to readjust the level with the level adjuster.
3.3 Carefully turn and lt the antenna unl you have moved it
into the opmum posion
The antenna is in the opmum posion when the signal level can not
be increased anymore.
It is oen possible to slightly increase the quality if you
turn the LNB in its retaining clamp in small increments.
(It is not necessary to opmise the skew for Astra 19.2°!)
4
Checking the TV picture/removing the Sainder
4.1 Check the picture of a number of channels on your TV
(if necessary, start a channel search)
It is most likely that the satellite dish is aligned towards a different
satellite if you are unable to tune into a channel or if you are tuned into
an incorrect channel. Some satellites are located in close proximity to
each other. --> Check the Azimuth angle and adjust again.
4.2 Switch off the receiver/power supply
Firstly, separate the receiver from the mains to avoid short circuiting.
4.3 Fasten the satellite dish crosswise and
remove the satellite finder from the signal path
Finally, connect the supply cable to LNB - job completed!
i
Reference direcons for the most common private and public broadcasters,
such as Sky, can be found in the following table.
i
i
Rule of thumb:
Satellites that can be received in Europe are found on
the southern horizon. The southern point corresponds to 180°.
Turn in a easterly direcon (to the le) or a westerly direcon
(to the right) from this point. Astra 19.2°E is located a few degrees to the east,
so you therefore need to turn to the le.
It is also necessary to ensure that the antenna is adjusted to align with the
correct elevaon angle.
You can use the satellite dishes on your neighbours’ rooves to help you to
judge the correct angle.
i
Video tutorial:
1Elevaon: 2Azimuth:
approx. 30°
Astra 19.2
= approx. 170°
Astra 19.2
= approx. 30°
i
Step by Step Manual
1 Prepare the satellite dish
Angle calculator