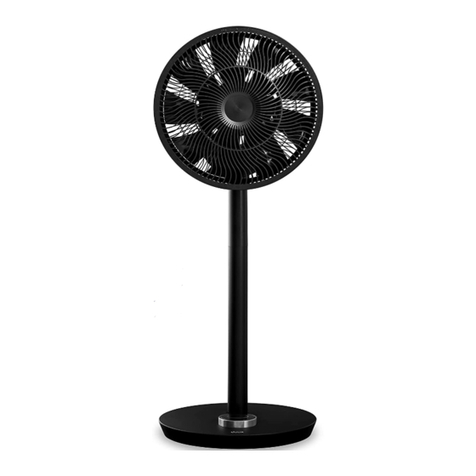
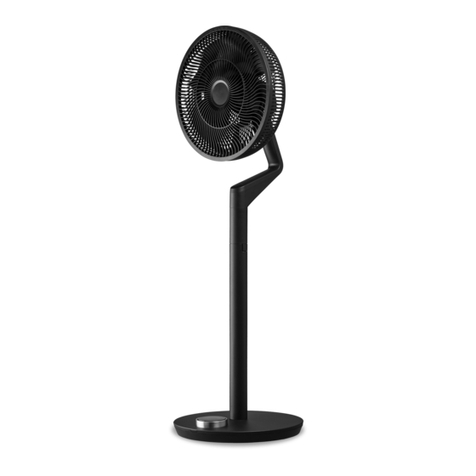
Duux Whisper DXCF03 User manual

1
Whisper
fan
User manual | Gebruikershandleiding | Mode d’emploi
Manual de instrucciones | Bedienungsanleitung

2
Thank you for
choosing Duux.
We’re so glad you decided to read the instructions to your new Duux fan! Many users casually dismiss
instructions and seek to gure it out on their own. But studies show that people who read instructions will
get up to speed more quickly and eciently than those who poke around with trial and error.
At Duux we believes in the importance of a comfortable and healthy living environment. Enhancing your well-
being by designing appealing, functional and eective products is the passion that drives us every day. With
our range of innovative air treatment products we aim to provide you the best possible indoor air quality.
Meet the cooling fan that surprises you with a gentle breeze, a vigorous gust of wind and everything in
between. The Duux Whisper has no less than 26 settings. In this way you can always nd the perfect airow
environment. Thanks to the horizontal and vertical oscillation function, the Whisper provides a pleasant
coolness throughout any room. Choose yourself, which mode you prefer: xed speed, ‘natural wind’ or
perhaps the night mode, by which you are lulLCD into sleep by the whispering breeze.
Read the manual carefully to get the most out of your Whisper fan.

3
Table of
contents
EN
1. Product overview 4
2. Installation and use 5
3. Maintenance 8
4. Functions 9
5. Technical specications 12
Set of screws
Power adapter User guide
Box
contents
Remote control
Night
Fan
Timer
Swing
Comfort
Fan base
Grill with fan
blades
Motor

4
1. Product overview
Adjustability of the mount
Remote control holder
LCD control panel
Oscillation mechanism
Handle
Night
Fan
Timer
Swing
Comfort
Remote control
Power adapter

5
Read before installation:
• When using electrical appliances, basic
precautions should always be followed to reduce
the risk of re, electric shock and injury.
• Before using the device, please carefully read the
entire instruction manual.
General cautions
• For indoor use only. Do not use in commercial,
industrial or outdoor environments.
• Do not use the device in the vicinity of ammable
or explosive substances or fuels. Never use any
paint, cleaning sprays, anti-insect sprays or similar
near the unit; this could deform the plastic or
cause electrical damage.
• Always turn o and unplug the power cord when
not in use, servicing, cleaning or moving the
device.
• Do not route the power cord or adaptor under
rugs, carpets or furniture. This may damage the
cord/adaptor or cause it to overheat creating a
re hazard.
• Do not route the power cord in or through
doorways or areas where the cord may be
damaged or create a tripping hazard.
• Only use the device in the upright position on a
at level surface (even during transport) and at
least 50cm from any objects.
• Never insert or allow ngers or objects to enter
grill openings while the device is operating to
prevent injury and/or damage to the device.
• Do not block, cover or obstruct the air inlet/outlet
while the device is operating.
• Never use a single extension cord to operate
more than one electrical device.
• Do not use the device near a window opening.
Rain may create an electrical hazard.
• Do not use this device when it is damaged or not
functioning properly.
• Do not operate the device with a damaged cord
or plug.
• Do not mount the device on walls or ceiling.
• Do not operate the device when the housing is
removed or damaged.
• Do not use the device in swimming pools,
washrooms or similar wet areas.
• Do not use the device in a potentially explosive
environment containing combustible liquids,
gases or dusts.
• Ensure that there is at least 50cm between the
sides of the device and any ammable, heating
materials.
• Do not pull the unit along by the cord.
• If the supplied power cord is damaged it must
2. Installation and use
EN

6
Installing the product
Place the mount on the base of the product,
slightly turn counterclockwise to lock into the
base and tighten with the locking ring on the
bottom side.
Attach the fan blades to the motor.
Place the rear grill over the motor and tighten
with the locking ring.
mount
base
locking ring
2
be replaced by an electrician or qualied person to
avoid any hazard.
• The mains supply must conrm to the specication
shown on the rating label on the back of the device.
• Close doors and windows for optimal eciency.
• Keep curtains or blinds closed during the sunniest
hours of the day.
•Do not turn on the device if you have discovered
damage to the appliance, cord or plug or if the
device is malfunctioning or if there are signs of any
other defect. Return the complete product to the
point of purchase or to a certied electrician for
inspection and/or repair. Always ask for original
parts. The device (incl. cord and plug) may only be
opened and/or repaired by properly authorized and
qualied persons.
• Only a licensed professional is allowed to dismantle
or modify the device.
• This device is to be used only for its prescribed
purpose. Any other use is deemed to be a cause of
misuse. The user/operator, not the manufacturer
will be liable for any damage or injuries of any kind
caused as a result of this.
• This appliance is not intended for use by persons
(including children) with reduced physical, sensory
or mental capabilities, or lack of experience and
knowLCDge, unless they have been given supervision
or instruction concerning use of the appliance by a
person responsible for their safety.
• Children should be supervised to ensure that they do
not play with the appliance.
• Ensure that the fan is switched o from the supply
mains before removing the guard.
1
3
Note: make sure that the grooves in the fan
blades are slid over the pins

7
Use the plastic screw to secure the fan blades.
Note: turn the screw anticlockwise rmly to
secure it.
Fit the front grill and rotate it a little, clockwise,
until the arrow on the grill lines up with the
left-side marker.
Fit the supplied screw to the underside of the
grill and connect the two halves rmly together.
Installing the remote control
Remove the lid
Place the battery according to the instructions
on the lid with the correct polarity
Close the lid
Note:
• Only use 1x CR2025 3V batteries
• Non-rechargeable batteries are not to be
recharged
• Exhausted batteries are to be removed from the
remote control and safely disposed of
• If the remote control is to be stored unused for a
long period, the battery should be removed
• The supply terminals are not to be short-circuited.
• Only use detachable power adapter GM42-
120300-x*A (*x stands for type of power plug).
GM42-120300-3A (UK plug) GM42-120300-2A (EU
Plug).
1
2
3
4
5
6
EN

8
3. Maintenance
Cleaning the body
Use a soft, damp cloth to wipe the body clean.
Never use aggressive chemicals, gasoline,
detergents, chemically treated cloths, or other
cleansing solutions. These all could possibly hurt
the casing material.
Cleaning the fan blades
Follow below instructions to clean the fan blades:
Remove the screw from the underside of the
grill
Rotate the outside cover to unlock the grill and
remove it
Disassemble the fan blades from the motor as
shown in the picture.
Important: Always unplug the device from the
mains before cleaning. To maximize the eciency
of the device, clean regularly
1 2 3
1
2
3

9
Night mode
4. Functions
Natural wind
Set fan
speed
Horizontal oscillation
Fan speed
Vertical oscillation
Set timer function
Timer
EN
Standby indicator

10
Fan speed: The Duux Whisper fan has 26 speed settings.
Horizontal oscillation: The fan swivels horizontally, 0 to 90 degrees, from left to right.
Vertical oscillation: The fan swivels vertically, 0-100 degrees, from top to bottom.
Timer: The timer can be set to switch the fan o automatically. This can be set
to between 0 and 12 hours from the time that the fan is rst turned on.
Natural wind: The fan rotates at dierent speeds to simulate natural wind conditions.
Night mode: In night mode, the fan speed continues to operate at the set speed.
After 10 seconds, the LCD screen will completely turn o while
remaining to operate. To reactivate the LCD screen, simply press the
control ring.
Standby mode: The fan is in standby mode, indicating it is powered but not operational.
Instructions for use
Tip: In night mode, you can adjust the ventilation speed directly
adjust by pressing the control button twice.

11
Note: When using the remote, be sure to point
it directly at the remote sensor on the device and
remove any obstacles that may be in the path
between the remote and the device.
Note: To replace or remove the battery, push
the tab lock on the bottom edge of the remote
to the left and hold it. While holding the tab to
the left, pull the tray out of the remote. Remove/
replace the battery and make sure to place the
new battery with the + symbol pointing towards
you. Place the tray back in the remote.
Fan
Timer
Swing
Comfort Night
Remove the parts from the packaging
and assemble the device according to the
instructions in this manual.
Connect the power cable to the input terminal
in the base of the product. Then insert the plug
into the wall socket. The control ring will light
up and show the standby indicator.
Press the control ring once, to turn the product
on. The fan springs into life and will thereafter
default to the most recent speed setting.
Use the stainless steel exterior of the control
ring to switch between settings.
When a display icon is ashing, you can set and
Operating instructions
adjust this setting by pressing the control ring.
When the desired position is reached, press
the control ring again to conrm the selection.
When setting the fan speed and timer function,
the LCD display will continue to ash until the
desired setting is selected. After this, press the
control ring again to conrm the selection.
Once the function is set, the icon will stop
blinking and will remain visible in the display,
for as long as this function is set to on.
Press the control ring for a few seconds to
switch o the appliance.
Power
Fan speed
down
Fan speed up
Timer down Timer up
Horizontal oscillation Vertical oscillation
Natural wind Night mode
EN
1
2
3
4
5
6
7
8

12
5. Technical specications
950 mm
340 mm 340 mm
Power consumption:
26W
220 - 240V
50/60 Hz
Fan speed:
26 speeds
Weight:
4.3 kg
Noise level:
13-50dBa
Adjustable height:
73-95 cm
Display:
Digital LCD
display
Airow:
710 CBM/hr
Main material types:
ABS, PP
Model no.
DXCF03/09
LCD

13
Power consumption:
26W
220 - 240V
50/60 Hz
Airow:
710 CBM/hr
Disposal
The European directive 2012 / 19 / CE on Waste
Electrical and Electronic Equipment (WEEE),
requires that old household electrical appliances
must not be disposed in the normal unsorted
municipal waste stream. Old appliances must
be collected separately in order to optimize the
recovery and recycling of the materials they
contain and reduce the impact on human health
and the environment. The crossed out “wheeLCD
bin” symbol on the product reminds you of your
obligation, that when you dispose of the appliance
it must be separately collected. Consumers
should contact their local authority or retailer for
information concerning the correct disposal of
their old appliance.
EN
Simplied EU
declaration of
conformity
The full text of the EU Declaration of Conformity is
available at the following internet address: www.
duux.com/doc

14
Notes

15
Notes

16
Bedankt dat
je voor Duux
hebt gekozen
We zijn blij dat je hebt besloten om de handleiding van je nieuwe Duux ventilator te lezen! Veel gebruikers
slaan de instructies over en gaan direct met het apparaat aan de slag. Echter verschillende studies tonen
aan dat mensen die eerst de gebruikershandleiding lezen, sneller en eciënter van start kunnen dan
mensen die zomaar wat proberen.
Bij Duux geloven we in een comfortabele en gezonde leefomgeving voor iedereen. Het verbeteren van
het binnenklimaat met aantrekkelijke, functionele en eectieve producten is onze dagelijkse passie. Met
onze reeks van innovatieve luchtbehandelingsproducten streven we er naar om jou van de best mogelijke
luchtkwaliteit te voorzien.
Ontmoet de ventilator die je verrast met een zacht briesje, een stevige windvlaag en alles daartussenin.
De Duux Whisper kent maar liefst 26 standen. Zo vind je altijd de perfecte luchtstroomsterkte. Dankzij de
horizontaal- en verticaal-oscillerende functie geeft de Whisper overal in de ruimte een aangename koelte.
Kies zelf welke stand jij het prettigst vindt: één snelheid, ‘natural wind’ of bijvoorbeeld de nachtmodus
waarbij je in slaap wordt gesust door het suizen van de wind.
Lees de handleiding goed door om het meeste uit je Whisper ventilator te halen.

17
Inhouds
opgave
NL
1. Productoverzicht 18
2. Installatie 19
3. Onderhoud 22
4. Functies 23
5. Technische specicaties 26
Schroevenset
Stroomadapter Gebruikershandleiding
Doosinhoud
Afstandsbediening
Night
Fan
Timer
Swing
Comfort
Ventilator voet
Rooster met
ventilatorbladen
Motor

18
1. Productoverzicht
Verstelbaarheid stang
Afstandsbediening houder
LCD bedieningspaneel
Oscillatiemechanisme
Handgreep
Night
Fan
Timer
Swing
Comfort
Afstandsbediening
Adapter

19
2. Installatie en gebruik
Lezen vóór installatie:
•Neem bij het gebruik van elektrische apparaten
altijd algemene voorzorgsmaatregelen in acht om
het risico van brand, elektrische schok en letsel te
beperken.
•Lees eerst de hele handleiding aandachtig door
voordat u het apparaat gaat gebruiken.
Algemene waarschuwingen
• Uitsluitend binnenshuis gebruiken. Niet gebruiken
in commerciële, industriële en buitenomgevingen.
•Gebruik het apparaat niet in de buurt van
ontvlambare of explosieve (brand)stoen.
Gebruik geen verf, reinigingssprays, anti-
insectsprays of soortgelijke middelen vlak bij
het apparaat; dit kan het plastic vervormen of
elektrische schade veroorzaken.
• Schakel het apparaat uit en trek de stekker uit het
stopcontact wanneer u het niet gebruikt en bij
onderhoud, reiniging of verplaatsing.
• Zorg ervoor dat het netsnoer of de adapter niet
onder vloerbedekking, tapijt of meubilair wordt
geleid. Dit kan het snoer/de adapter beschadigen
of oververhitting veroorzaken, waardoor
brandgevaar ontstaat.
• Leid het netsnoer niet in of door deuropeningen
of plekken waar het beschadigd kan worden of
struikelgevaar oplevert.
• Zet het apparaat altijd rechtop op een vlak
oppervlak (zelfs tijdens transport) en op ten
minste 50 cm afstand van eventuele voorwerpen.
• Steek nooit vingers of voorwerpen in de
roosteropeningen terwijl het apparaat in gebruik
is om letsel en/of schade aan het apparaat te
voorkomen.
• Zorg ervoor dat de luchtinlaat/-uitlaat niet wordt
geblokkeerd of afgedekt terwijl het apparaat in
gebruik is.
• Gebruik nooit één verlengkabel voor meer dan
één elektrisch apparaat.
• Gebruik het apparaat niet vlak bij een
raamopening. Regen kan resulteren in een
elektrisch gevaar.
• Gebruik dit apparaat niet als het beschadigd is of
niet correct functioneert.
• Gebruik het apparaat niet als het netsnoer of de
stekker beschadigd is.
• Monteer het apparaat niet op wanden of het
plafond.
• Gebruik het apparaat niet als de behuizing
verwijderd of beschadigd is.
• Gebruik het apparaat niet in zwemgelegenheden,
wasruimtes of soortgelijke vochtige omgevingen.
• Gebruik het apparaat niet in explosiegevaarlijke
omgevingen met ontvlambare vloeistoen,
gassen of stof.
NL

20
• Zorg ervoor dat de afstand tussen de zijkanten
van het apparaat en eventuele ontvlambare
verwarmingsbrandstoen ten minste 50 cm
bedraagt.
• Houd kinderen en huisdieren nauwlettend in de
gaten terwijl het apparaat in gebruik is.
• Zorg ervoor dat kinderen niet met het apparaat
spelen.
• Trek het apparaat niet voort via het netsnoer.
• Indien het meegeleverde netsnoer beschadigd
is, moet dit door een elektricien of gekwaliceerd
persoon worden vervangen om gevaarlijke
situaties te voorkomen.
• De voedingsspanning dient overeen te komen
met de specicatie op het typeplaatje aan de
achterzijde van het apparaat.
• Sluit deuren en ramen voor optimale eciëntie.
• Houd gordijnen of jaloezieën dicht op de
zonnigste uren van de dag.
• Schakel het apparaat niet in als u merkt dat het
apparaat, het netsnoer of de stekker beschadigd
is of als het apparaat niet correct werkt of een
ander defect vertoont. Breng het complete
apparaat naar het verkooppunt of naar een
gecerticeerde elektricien voor inspectie en/of
reparatie. Vraag altijd om originele onderdelen.
Het apparaat (incl. netsnoer en stekker) mag
uitsluitend worden geopend en/of gerepareerd
door daartoe bevoegde en gekwaliceerde
personen.
• Alleen erkende professionals mogen het apparaat
demonteren of aanpassen.
• Dit apparaat mag uitsluitend voor het bestemde
doel worden gebruikt. Enig ander gebruik wordt
gezien als oneigenlijk gebruik. De gebruiker/
bediener en niet de fabrikant is aansprakelijk
voor eventuele schade of letsel als gevolg hiervan.
• Dit apparaat is niet bedoeld voor gebruik door
personen (inclusief kinderen) met verminderde
fysieke, sensorische of mentale vermogens of
met een gebrek aan ervaring en kennis, tenzij
zij onder toezicht staan of instructies hebben
gekregen betreende het gebruik van het
apparaat van een persoon die verantwoordelijk is
voor hun veiligheid.
• Kinderen moeten onder toezicht staan om ervoor
te zorgen dat zij niet met het apparaat spelen.
• Zorg ervoor dat de ventilator is uitgeschakeld en
de stekker uit het stopcontact is voordat u de
afscherming verwijdert.
This manual suits for next models
1
Table of contents
Languages:
Other Duux Fan manuals
Popular Fan manuals by other brands

Sharper Image
Sharper Image 206635 user guide

Wolf
Wolf CRL-iD-1300 Installation and maintenance instructions

Hearth and Home Technologies
Hearth and Home Technologies 19263A installation instructions

Ebmpapst
Ebmpapst G2E120-FC80-01 operating instructions

Ebmpapst
Ebmpapst K3G630-PW04-01 operating instructions

HAMPTON BAY
HAMPTON BAY 409-952 owner's manual

Air King
Air King AK965 Specifications

Ebmpapst
Ebmpapst R2E175-AC79-22 operating instructions

Ebmpapst
Ebmpapst A4E400-AP02-14 operating instructions

Ebmpapst
Ebmpapst W2E143-AB15-01 operating instructions

Ebmpapst
Ebmpapst R2E150-AN89-14 operating instructions

Profi Care
Profi Care PC-VL 3063 M instruction manual