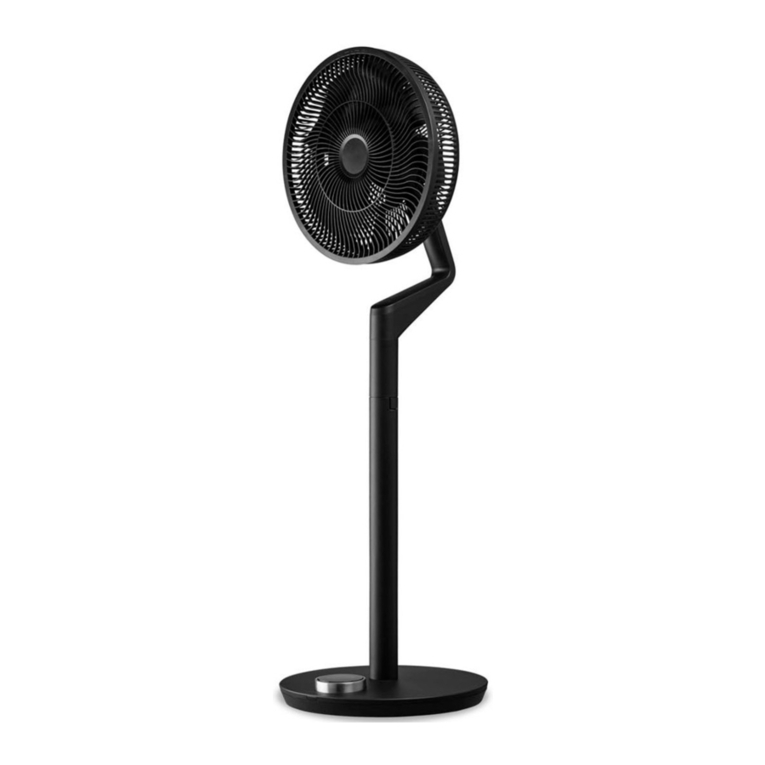
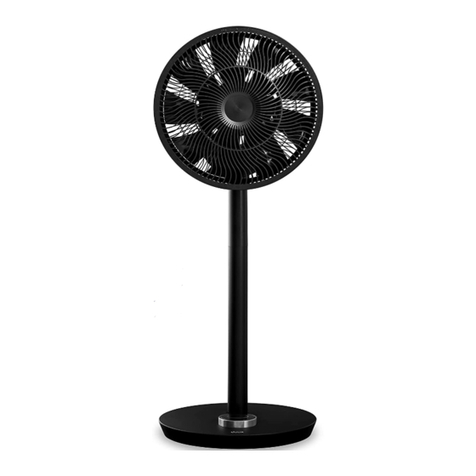
Duux Whisper Flex Ultimate User manual

1
user manual | gebruikershandleiding | Bedienungsanleitung
Mode d’emploi | manual de instrucciones
Whisper Flex
Ultimate
smart wireless fan
WATCH THE
INSTRUCTION
MOVIES

32
1. Product overview 4
2. Installation and use 5
3. Maintenance 11
4. Functions 12
5 Technicalspecications 17
Table of
contents
EN
Thank you for
choosing Duux.
We’re so glad you decided to read the instruction to your new Duux fan! Many users casually dismiss
instructionsandseektogureitoutontheirown.Butstudiesshowthatpeoplewhoreadinstructionswill
getuptospeedmorequicklyandecientlythanthosewhopokearoundwithtrialanderror.
At Duux we believe in the importance of a comfortable and healthy living environment. Enhancing your
wellbeingbydesigningappealing,functionalandeectiveproductsisthepassionthatdrivesuseveryday.
With our range of innovative air treatment products we aim to provide you the best possible indoor air
quality.
Meet the cooling fan that surprises you with a gentle breeze, a vigorous gust of wind and everything in
between.TheDuuxWhisperFlexUltimatehasnolessthan30speedsettings.Inthiswayyoucanalwaysnd
theperfectairowenvironment.Thankstothehorizontalandverticaloscillationfunction,theDuuxWhisper
Flex Ultimate provides a pleasant coolness throughout any room. Choose yourself, which mode you prefer;
xedspeed,naturalwindorperhapsthenightmode,bywhichyouarelulledinsleepbythewhispering
breeze. The separately available dock and battery pack allows you to freely move the devise without wires.
Read the manual carefully to get to most out of your Duux Whisper Flex Ultimate.
6
7
8
4
5
1
2
3
Remote control position 2
Power button
Remote control position 2
Locking mechanism
Battery lock slider
Remote control receiver
6
7
8
4
5
1
2
3
Remote control position 2
Power button
Remote control position 2
Locking mechanism
Battery lock slider
Remote control receiver
6
7
8
4
5
1
2
3
Remote control position 2
Power button
Remote control position 2
Locking mechanism
Battery lock slider
Remote control receiver
6
7
8
4
5
1
2
3
Remote control position 2
Power button
Remote control position 2
Locking mechanism
Battery lock slider
Remote control receiver
6
7
8
4
5
1
2
3
Remote control position 2
Power button
Remote control position 2
Locking mechanism
Battery lock slider
Remote control receiver
6
7
8
4
5
1
2
3
Remote control position 2
Power button
Remote control position 2
Locking mechanism
Battery lock slider
Remote control receiver
6
7
8
4
5
1
2
3
Remote control position 2
Power button
Remote control position 2
Locking mechanism
Battery lock slider
Remote control receiver
Tools
Base unit

54
1. Product overview
Parts
1Remote control receiver
2Display & Control panel
3Power button
4Remote control
Remote control position 1
6Remote control position 2
7Power adapter
5
Read before installation:
• When using electrical appliances, basic
precautions should always be followed to
reducetheriskofre,electricshockandinjury.
•Before using the device, please carefully read
the entire instruction manual.
General cautions
•For indoor use only. Do not use in commercial,
industrial or outdoor environments.
•Do not use the device in the vicinity of
ammableorexplosivesubstancesorfuels.
Never use any paint, cleaning sprays, anti-insect
sprays or similar near the unit; this could
deform the plastic or cause electrical damage.
• Alwaysturnoandunplugthepowercord
when not in use, servicing, cleaning or moving
the device.
•Do not route the power cord or adaptor under
rugs, carpets or furniture. This may damage the
cord/adaptor or cause it to overheat creating a
rehazard.
•Do not route the power cord in or through
doorways or areas where the cord may be
damaged or create a tripping hazard.
•Only use the device in the upright position on a
atlevelsurface(evenduringtransport)andat
least50cmfromanyobjects.
• Neverinsertorallowngersorobjectstoenter
grill openings while the device is operating to
preventinjuryand/ordamagetothedevice.
•Do not block, cover or obstruct the air inlet/
outlet while the device is operating.
•Never use a single extension cord to operate
more than one electrical device.
•Do not use the device near a window opening.
Rain may create an electrical hazard.
•Do not use this device when it is damaged or
not functioning properly.
•Do not operate the device with a damaged cord
or plug.
•Do not mount the device on walls or ceiling.
•Do not operate the device when the housing is
removed or damaged.
•Do not use the device in swimming pools,
washrooms or similar wet areas.
•Do not use the device in a potentially explosive
environment containing combustible liquids,
gases or dusts.
•Ensure that there is at least 50cm between the
sidesofthedeviceandanyammable,heating
materials.
•Closely supervise any children and pets when
the device is in use.
2. Installation and use
2
3
1
45
6
7
6
7
8
4
5
1
2
3
Remote control position 2
Power button
Remote control position 2
Locking mechanism
Battery lock slider
Remote control receiver
EN

76
Installing the product
Install fan blade: Place the fan blade on the
motor.
Note: Make sure the pins on the motor axis
align with the groove on the fan blade
Secure fan blade: Use the plastic nut
to secure the fan blade to the motor.
Install and secure rear grill: Place the rear grill
over the motor and tighten with the locking
ring.
Install front grill: Place the front grill on the
back grill. While doing so, make sure to align
arrow on the front grill with the right-side
marker. Rotate it counter clockwise until it
aligns with the left-side marker.
•Keep children away from playing with the
device.
•Do not pull the unit along by the cord.
•If the supplied power cord is damaged it must
bereplacedbyanelectricianorqualied
person to avoid any hazard.
• Themainssupplymustconrmtothe
specicationshownontheratinglabelonthe
back of the device.
• Closedoorsandwindowsforoptimaleciency.
•Keep curtains or blinds closed during the
sunniest hours of the day.
• Do not turn on the device if you have
discovered damage to the appliance, cord
or plug or if the device is malfunctioning or if
there are signs of any other defect. Return the
complete product to the point of purchase or
toacertiedelectricianforinspectionand/or
repair. Always ask for original parts. The device
(incl.cordandplug)mayonlybeopenedand/or
repairedbyproperlyauthorizedandqualied
persons.
•Only a licensed professional is allowed to
dismantle or modify the device.
•This device is to be used only for its prescribed
purpose. Any other use is deemed to be a
cause of misuse. The user/operator, not the
manufacturer will be liable for any damage or
injuriesofanykindcausedasaresultofthis
Assemble table fan: Attach the motor to the
basebyttingthetwometalpinsofthemotor
connector to the designated holes in the base
connector.
Note: The largest of the two pins must align
with the largest of the two holes. The pins are not
identical in size to ensure proper connection in only
one orientation.
1
2
3Fitthesuppliedscrew(part6)totheunderside
ofthegrillandconnectthetwohalvesrmly
together.
5
64
EN

98
Assemble standing fan: To extend the height of
thefan,inserttheextensiontubebyttingthe
two metal pins of the extension tube connector
to the designated holes in the base connector.
Similarly match the metal pins of motor
connector to the top of the extension tube.
8
Disassemble standing fan: Disconnect the
motor from the extension tube by squeezing
the locking mechanism at the top of the tube.
Pull the motor away from the extension tube
at the same time. Disconnect the extension
tube by lifting the fan and squeezing the
locking mechanism on the bottom of the base.
Simultaneously pull the motor from the base.
9
Disassemble table fan: Disconnect the motor
from the base by lifting the fan and squeezing
the locking mechanism on the bottom of the
base. Simultaneously pull the motor from the
base.
7
Motor
Base
EN

1110
Cleaning the fan
Use a soft, damp cloth to wipe the fan clean. Never
use aggressive chemicals, gasoline, detergents,
chemically treated cloths, or other cleaning
solutions. These all could possible damaging the
casing material.
Cleaning the fan blades
Use the screwdriver to remove the screw
located at the bottom of the grill.
Turn the front grill clockwise and remove it.
Unscrew the plastic nut and remove the fan
blade from the motor.
Use a soft, damp cloth to wipe the fan blade
clean.
Installing the dock + battery pac
Open battery compartment: Open the battery
hatch on the bottom of the base by sliding the
lock to “unlock” and remove the lid.
Place battery: Place the battery in the battery
compartment.
Close battery compartment: Place the lid back
on the compartment and push to close. You
should hear and audible click.
1
1
2
3
2
3
3. Maintenance
Important: Always unplug the device from the
mains before cleaning. To maximize the eciency
of the device, clean regularly
1 2 3
Installing the remote control
Open battery compartment:
Slide the battery tray out of the remote
Place battery: Look for the correct
orientationofthepolarity(+and-).
Close the battery compartment:
Slide the battery tray back into the
remote until it snaps in place.
1
2
3
Battery hatch
Dock insert
Lock 4
EN

1312
Timer function
Temperature
function
4. Functions
Wind mode
Horizontal oscillation
Night mode
Vertical oscillation
Battery status
Power status
WiFi Status
Natural wind mode
WiFi status
Only visible when WiFi is connected
Power status
Onlyvisiblewhenfaniso
Battery status
Shows the battery status in 3 levels.
Regular mode
Choose from 30 speed settings for a
consistentairow.
Natural wind mode
Variable wind speeds and oscillation in both
directions to simulate natural wind conditions.
Night mode
By selecting this mode, the LED display will
automaticallyturnoafter10secondsforan
undisturbed night’s sleep
Temperature function
Set a temperature goal. When this setting
is active, the fan will measure ambient
temperature and will decrease its when speed
when the goal is reached.
Timer function
Setatimertoswitchthefanoautomatically.
Choose a time between 0 and 12 hours.
Horizontal oscillation function
Set an oscillation angle to rotate the fan
horizontally from left to right. There are three
preset angles; 30, 60 and 90 degrees.
Vertical oscillation function
Set an oscillation angle to rotate the fan
vertically from top to bottom. There are two
preset angles; 90 and 105 degrees.
Instructions for use
EN

1514
Note: In battery mode the fan speed is
limited to position 15. Depending on the
settings, the battery will last max.12 hours.
Lower the ventilation speed and activate
night mode to increase battery life. See below
comparison chart for reference:
* For reference only. Test environment conditions: 21,5⁰C, 35% humidity.
Fan speed Oscillation Battery life*
1O 12:00 H
Horizontal or Vertical 07:30 H
Horizontal & Vertical 05:00 H
5O 10:00 H
Horizontal or Vertical 06:00 H
Horizontal & Vertical 04:10 H
10 O 08:00 H
Horizontal or Vertical 04:30 H
Horizontal & Vertical 03:20 H
15 O 06:00 H
Horizontal or Vertical 03:00 H
Horizontal & Vertical 02:30 H
Battery operation
Assemble the fan according to chapter
“Installing the product” of this manual.
Plug the power adapter in an available power
socket and plug the connector into the base of
the product. The display will light up and show
the power icon.
Press the power button to turn the product on.
The fan will start in default setting or resume
operation according to the most recent setting.
Operating instructions
The control panel allows for two actions by
the user:
- pressing the control ring
- rotating the aluminum ring; both clockwise
and counter clockwise.
Rotatetheringtoselectdierent
functionalities.Aashingiconindicateswhat
mode or setting is currently selected. Press the
displaytoconrmtheselectedfunctionality.
Modes: Activate a mode by selecting the
correspondingiconandpressingtoconrm.
Next, choose the desired wind speed by
rotatingtheringandpresstoconrm.
Functions: Activate a function by selecting
thecorrespondingiconandpresstoconrm.
Next,choosethedesiredvalue(hours,angle
ordegreeCelsius)byrotatingandpressingto
conrm.Deactivateasettingbyselectingitrst
and then pressing the control ring and holding
it for 3 seconds.
Flashing display: When setting a fan speed or
functionality,thedisplaywillashtoindicate
that you are making changes. The display will
stopashingonceavaluehasbeenconrmed
or when no input is received for 8 seconds.
1
2
3
1
2
3
4
5
Power button
Natural wind
mode
Temperature
function
Timer
function
Night
mode
Horizontal
Oscilation
Vertical
oscilation
Regular wind
mode
EN

1716
WiFi mode
To activate the WiFi mode make sure the fan is
o,meaningthatthebladesaren’tspinningand
the power icon is on. Press and hold the control
ring for 5 seconds. When successful the WiFi-icon
willstartashing.Thefanwillactivelysearchfor
devices to pair with while a timer counts down
from 99 to 0. Once connected, the WiFi-icon will
turn solid.
WiFi and APP operation
Scan below QR code to download the Duux APP
or search DUUX APP in the App Store or Google
Play Store to start the procedure to download the
APP. Once installed, enter your e-mail address and
complete the registration.
Connect to WiFi
Once registered, click “add duux device” on the
main screen or use the “+” button in the top
right corner to add a new device.
Search for “Whisper Flex Ultimate” and press to
continue
Connect to your preferred WiFi network and
enter the corresponding password
Follow the instructions in the app to complete
the pairing process.
APP STORE PLAY STORE
1
2
3
4
5.Technicalspecications
1030 mm
330 mm 330 mm
Power consumption:
3-32W
Fan speed:
30 speeds
Weight:
5 kg
Noise level:
13-50dBa
Adjustableheight:
58-103 cm
Display:
Digital LCD
display
Airow:
820 m3/h
Main material types:
ABS, PP
Model no.
DXCF14/15
LCD
Note: If you experience any problems with
connecting or using the app, please refer to the
FAQ in the app menu.
EN

1918
Disposal
The European directive 2012 / 19 / CE on Waste
ElectricalandElectronicEquipment(WEEE),
requires that old household electrical appliances
must not be disposed in the normal unsorted
municipal waste stream. Old appliances must
be collected separately in order to optimize the
recovery and recycling of the materials they
contain and reduce the impact on human health
and the environment. The crossed out “wheeled
bin” symbol on the product reminds you of your
obligation, that when you dispose of the appliance
it must be separately collected. Consumers
should contact their local authority or retailer for
information concerning the correct disposal of
their old appliance.
Notes
EN

2120
1. Productoverzicht 22
2. Installatie en gebruik 23
3. Onderhoud 29
4. Functies 30
5 Technischespecicaties 35
Inhouds-
opgave
Bedanktdatjevoor
Duux hebt gekozen.
WezijnblijdatjehebtbeslotendehandleidingbijjenieuweventilatorvanDuuxdoortelezen!Veel
gebruikerslatendehandleidinglinksliggenenproberenerzelfachtertekomen.Uitonderzoekblijktechter
dat mensen die de handleiding lezen sneller en beter snappen hoe een apparaat werkt dan mensen die er
met vallen en opstaan achterkomen.
BijDuuxgelovenweinhetbelangvaneencomfortabele,gezondeleefomgeving.Jouwwelzijnverhogen
dooraantrekkelijke,functioneleeneectieveproductenteontwikkelen:datisdepassiedieonsiederedag
opnieuwdrijft.Metonsaanbodaaninnovatieveluchtbehandelingsproductenwillenwejedebestdenkbare
luchtkwaliteit binnenshuis bieden.
Maakkennismetdezeverkoelendeventilatordiejeverrastmeteenzachtbriesje,eenkrachtigewindvlaag
en alles daar tussenin. De Duux Whisper Flex Ultimate heeft maar liefst 30 snelheden. Dus geniet van de
perfecteluchtcirculatievoorjouwomgeving,waarjehemookgebruikt.Dankzijdehorizontaleenverticale
swinghoudtdeDuuxWhisperFlexUltimateelkekamerheerlijkkoel.Kiesjefavorietestand:eenconstante
luchtstroom,eennatuurlijkbriesjeofdestillenachtmoduswaarbijjeheerlijkinslaapvalt.Metdelos
verkrijgbaredockenaccumaakjedeventilatorvolledigdraadloosenverplaatsjehemeenvoudigdoorhet
hele huis.
LeesdezehandleidinggoeddooromallesuitjeDuuxWhisperFlexUltimatetehalen.
6
7
8
4
5
1
2
3
Remote control position 2
Power button
Remote control position 2
Locking mechanism
Battery lock slider
Remote control receiver
6
7
8
4
5
1
2
3
Remote control position 2
Power button
Remote control position 2
Locking mechanism
Battery lock slider
Remote control receiver
6
7
8
4
5
1
2
3
Remote control position 2
Power button
Remote control position 2
Locking mechanism
Battery lock slider
Remote control receiver
6
7
8
4
5
1
2
3
Remote control position 2
Power button
Remote control position 2
Locking mechanism
Battery lock slider
Remote control receiver
6
7
8
4
5
1
2
3
Remote control position 2
Power button
Remote control position 2
Locking mechanism
Battery lock slider
Remote control receiver
6
7
8
4
5
1
2
3
Remote control position 2
Power button
Remote control position 2
Locking mechanism
Battery lock slider
Remote control receiver
6
7
8
4
5
1
2
3
Remote control position 2
Power button
Remote control position 2
Locking mechanism
Battery lock slider
Remote control receiver
Hulpmiddelen
Onderstel
Motor Rooster met
ventilatorenbladen
Verlengbuis
Voedingsadapter Handleiding
Afstandbediening
Inhoud
doos
NL

2322
1. Productoverzicht
Onderdelen
1Ontvanger afstandsbediening
2Display en bedieningspaneel
3Aan/uit-knop
4Afstandsbediening
Afstandsbediening positie 1
6Afstandsbediening positie 2
7Voedingsadapter
5
Voor installatie doorlezen:
• Bijhetgebruikvanelektrischeapparatendienen
altijddestandaardvoorzorgsmaatregelenin
acht te worden genomen om brand, elektrische
schokken en letsel te voorkomen.
•Lees voor gebruik van het apparaat de volledige
gebruiksaanwijzingaandachtigdoor.
Algemene waarschuwingen
•Alleen voor gebruik binnenshuis. Niet
gebruiken in commerciële, industriële of
buitenomgevingen.
•Gebruik het apparaat niet in de buurt
vanbrandbareofexplosievestoen
ofbrandstoen.Gebruiknooitverf,
reinigingssprays, anti-insectensprays en
dergelijkeindebuurtvanhetapparaat;ditkan
het plastic vervormen of elektrische schade
veroorzaken.
• Zethetapparaataltijduitenhaaldestekkeruit
het stopcontact als het apparaat niet in gebruik
is,tijdensonderhoudofalsjehetreinigtof
verplaatst.
•Leg het snoer en de adapter niet onder een
kleedoftapijtenzetergeenmeubelsop.Dit
kan het snoer of de adapter beschadigen of
leiden tot oververhitting en brandgevaar.
•Leg het snoer niet in of door een deuropening
of op een andere plek waar het beschadigd kan
raken of een struikelgevaar vormt.
•Gebruik het apparaat alleen rechtopstaand
opeenvlakkeondergrond(ooktijdenshet
transport)enopminimaal50cmafstandvan
objecten.
• Steeknooitjevingersofandereobjecteninde
openingen van het rooster als het apparaat in
gebruik is; dit kan leiden tot letsel of schade aan
het apparaat.
•Blokkeer nooit de luchtinlaat/-uitlaat, en dek of
sluit deze nooit af als het apparaat in gebruik is.
•Gebruik nooit een enkelvoudig verlengsnoer
om meer dan één elektrisch apparaat van
stroom te voorzien.
•Gebruik het apparaat niet in de buurt van een
open raam of deur. Regen kan kortsluiting
veroorzaken.
•Gebruik het apparaat niet als het is beschadigd
of niet goed functioneert.
•Gebruik het apparaat niet als het snoer of de
stekker is beschadigd.
•Monteer het apparaat niet op een muur of
plafond.
•Gebruik het apparaat niet als de behuizing is
verwijderdofbeschadigd.
2. Installatie en gebruik
2
3
1
45
6
7
6
7
8
4
5
1
2
3
Remote control position 2
Power button
Remote control position 2
Locking mechanism
Battery lock slider
Remote control receiver
NL

2524
De installatie van het product
Plaats het ventilatorblad: plaats het
ventilatorblad op de motor.
Let op: zorg ervoor dat de pennen op de
motoras zijn opgelijnd met de groef in het
ventilatorblad
Zet het ventilatorblad vast: zet het
ventilatorblad vast aan de motor met de
kunststof moer.
Plaats het achterste rooster en zet dit vast:
plaats het achterste rooster over de motor en
draai vast met de borgring.
Plaats het voorste rooster: plaats het voorste
roostertegenhetachtersterooster.Lijn
hetpijltjeophetvoorsteroosteropmetde
markering rechts. Draai het rooster tegen de
klokintotdathetpijltjeisopgelijndmetde
markering links.
•Laat kinderen niet met het apparaat spelen.
•Trek het apparaat niet mee aan het snoer.
• Omgevaarlijkesituatiestevoorkomen,
dient een beschadigd elektriciteitssnoer te
worden vervangen door een elektricien of
gekwaliceerdepersoon.
•De netvoeding moet overeenkomen met de
specicatieophettypeplaatjeopdeachterkant.
•Sluit deuren en ramen voor optimaal
rendement.
• Houdgordijnenofjaloezieëngeslotentijdens
de zonnigste uren van de dag.
• Zethetapparaatnietaanalsjeschadeaan
het apparaat, het snoer of de stekker hebt
ontdekt of als het apparaat defect is of als er
tekenenzijnvaneenanderdefect.Stuurhet
complete product terug naar het verkooppunt
ofnaareengecerticeerdeelektricienvoor
inspectieen/ofreparatie.Vraagaltijdnaar
origineleonderdelen.Hetapparaat(incl.
snoerenstekker)magalleenwordengeopend
en/of gerepareerd door geautoriseerde en
gekwaliceerdepersonen.
•Het apparaat mag alleen door gediplomeerde
vakmensen worden gedemonteerd of
aangepast.
•Dit apparaat mag alleen worden gebruikt
voor het voorgeschreven doel. Elk ander
gebruik wordt beschouwd als een oorzaak van
misbruik. De gebruiker en niet de fabrikant is
aansprakelijkvoorschadeofletselvanwelke
aard dan ook veroorzaakt als gevolg hiervan.
Het tafelmodel monteren: bevestig de motor
aan het onderstel door de twee metalen
pennen van de motoraansluiting in de
daarvoor bestemde gaten in de aansluiting van
het onderstel te plaatsen.
Let op: de grootste van de twee pennen moet in
het grootste gat. De pennen hebben verschillende
afmetingen om te waarborgen dat ze maar op één
manier kunnen worden aangesloten.
1
2
3Draaidemeegeleverdeschroef(onderdeel6)
in de onderkant van het rooster en zet de twee
helften stevig aan elkaar vast.
5
64
NL

2726
Het vloermodel monteren: om de ventilator te
verlengen,monteerjehetverlengstukdoorde
twee metalen pennen van de aansluiting van
het verlengstuk in de daarvoor bestemde gaten
in de aansluiting van het onderstel te plaatsen.
Plaats vervolgens op dezelfde manier de pennen
van de motoraansluiting in de bovenkant van
het verlengstuk.
8
Het vloermodel demonteren: koppel de
motor af van het verlengstuk door het
vergrendelmechanisme bovenaan de buis
inteduwen.Trektegelijkertijddemotorvan
het verlengstuk af. Koppel het verlengstuk
af door de ventilator op te tillen en het
vergrendelmechanismeaandeonderzijdevan
hetonderstelinteduwen.Trektegelijkertijdde
motor van het onderstel af.
9
Het tafelmodel demonteren: koppel de motor
af van het onderstel door de ventilator op te
tillen en het vergrendelmechanisme aan de
onderzijdevanhetonderstelinteduwen.Trek
tegelijkertijddemotorvanhetonderstelaf.
7
Motor
Onderstel
NL

2928
De ventilator reinigen
Gebruik een zachte, vochtige doek om de
ventilator schoon te vegen. Gebruik nooit
agressieve chemicaliën, benzine, wasmiddelen,
chemisch behandelde doeken of andere
reinigingsoplossingen. Deze kunnen de behuizing
beschadigen.
De ventilatorbladen reinigen
Verwijderdeschroefaandeonderzijdevanhet
rooster met een schroevendraaier.
Draai het voorste rooster met de klok mee en
verwijderdit.
Draaidekunststofmoerlosenverwijderhet
ventilatorblad van de motor.
Gebruik een zachte, vochtige doek om het
ventilatorblad schoon te vegen.
Installatie van de dock + accu
Open het accucompartiment: open het
accucompartimentaandeonderzijdevan
hetondersteldoorhetschuifjenaarde
'ontgrendel'-standteschuivenenhetklepjete
verwijderen.
Plaats de accu: plaats de accu in het
accucompartiment.
Sluithetaccucompartiment:plaatshetklepje
terug op het compartiment en druk het dicht.
Alshetgoedis,hoorjeeenduidelijkeklik.
1
1
2
3
2
3
3. Onderhoud
Belangrijk: haal altijd de stekker uit het
stopcontact voordat je het apparaat gaat
reinigen. Om de eciëntie van het apparaat te
maximaliseren, moet het regelmatig worden
gereinigd
1 2 3
Openhetbatterijcompartiment:schuifhet
batterijvakuitdeafstandsbediening
Plaatsdebatterij:kijknaardepolariteiten
(+en-)encontroleerdemanierwaaropde
batterijmoetwordengeplaatst.
Sluithetbatterijcompartiment:
schuifhetbatterijvakteruginde
afstandsbediening,totdathetopzijnplekvalt.
1
2
3
Accucompartiment
Dock-aansluiting
Vergrendeling
4
Installatie van de
afstandsbediening
NL

3130
Timerfunctie
Temperatuur
functie
4. Functies
Windmodus
Horizontale swing
Nachtstand
Verticale swing
Accustatus
Aan/uit-status
Wi-status
Natuurlijkebries-modus
Wi-status
Alleenzichtbaarindienverbondenmetwi
Aan/uit-status
Alleen zichtbaar als de ventilator uit staat
Accustatus
Geeft de accustatus weer op 3 niveaus.
Standaardmodus
Kies een van de 30 snelheden voor een
consistente luchtstroom.
Natuurlijkebries-modus
Variabele windsnelheden en horizontale en
verticaleswingrichtingenomeennatuurlijke
bries te simuleren.
Nachtmodus
Voor een goede nachtrust wordt in deze
modus het led-display na 10 seconden
automatisch uitgeschakeld.
Temperatuurfunctie
Stel de gewenste temperatuur in. Als deze
instelling actief is, meet de ventilator de
omgevingstemperatuurengaathijlangzamer
draaien als de gewenste temperatuur is
bereikt.
Timerfunctie
Stel de timer in om de ventilator automatisch
uitteschakelen.Kieseentijdsvakvan0tot12
uur.
Horizontale swingfunctie
Stel een horizontale swinghoek in om de
ventilator van links naar rechts te laten
draaien.Jehebtdekeuzeuitdriehoeken:30,
60 en 90 graden.
Verticale swingfunctie
Stel een verticale swinghoek in om de
ventilator van boven naar beneden te laten
draaien.Jehebtdekeuzeuittweehoeken:90
en 105 graden.
Gebruiksaanwijzing
NL

3332
Let op: in de accumodus is de ventilatorsnelheid
beperkt tot positie 15. De accu gaat afhankelijk
van de instellingen maximaal 12 uur mee. Door de
ventilatorsnelheid te beperken en de nachtmodus in
te schakelen, spaar je de accu. Zie onderstaande tabel
ter referentie:
*Uitsluitend ter referentie. Omstandigheden van de testomgeving: 21,5⁰C, 35% luchtvochtigheid.
Ventilatorsnelheid Swingrichting Levensduur van de
accu*
1 Uit 12 uur
Horizontaal of verticaal 7,5 uur
Horizontaal en verticaal 5 uur
5 Uit 10 uur
Horizontaal of verticaal 6 uur
Horizontaal en verticaal 4 uur en 10 minuten
10 Uit 8 uur
Horizontaal of verticaal 4,5 uur
Horizontaal en verticaal 3 uur en 20 minuten
15 Uit 6 uur
Horizontaal of verticaal 3 uur
Horizontaal en verticaal 2,5 uur
Accu
Monteerdeventilatorvolgensdeaanwijzingen
in het hoofdstuk 'De installatie van het product'
in deze handleiding.
Steek de voedingsadapter in een beschikbaar
stopcontact en plaats de aansluiting in het
onderstel. Het display licht op en toont het
aan/uit-icoontje.
Druk op de aan/uit-knop om het apparaat
aan te zetten. De ventilator start in de
standaardinstelling of keert terug naar de
laatst gekozen instelling.
Gebruiksaanwijzingen
Op het bedieningspaneel kan de gebruiker
twee acties uitvoeren:
- de bedieningsring indrukken;
- de aluminium ring draaien, met de klok mee
of tegen de klok in.
Draai de ring om verschillende functionaliteiten
teselecteren.Eenknipperendicoontjegeeftde
geselecteerde modus of instelling aan. Druk op
het display om de geselecteerde functionaliteit
te bevestigen.
Modus kiezen: activeer een modus door het
bijbehorendeicoontjeteselecteren;druk
om te bevestigen. Kies daarna de gewenste
windsnelheid door de ring te draaien; druk om
te bevestigen.
Functies: activeer een functie door het
bijbehorendeicoontjeteselecteren;drukom
te bevestigen. Kies daarna de gewenste waarde
(uren,hoekofgradenCelsius)doorderingte
draaien; druk om te bevestigen. Deactiveer
een instelling door deze te selecteren en
vervolgens de bedieningsring 3 seconden
ingedrukt te houden.
Knipperenddisplay:tijdenshetinstellenvan
de ventilatorsnelheid of een functionaliteit
knipperthetdisplay;ditbetekentdatje
instellingenaanhetwijzigenbent.Hetdisplay
stopt met knipperen zodra een instelling is
bevestigd of als er 8 seconden geen actie is
ondernomen.
1
2
3
1
2
3
4
5
Aan/uit-knop
Natuurlijke
briesmodus
Temperatuur
functie
Timer functie
Nacht-
modus
Horizontale
swing
Verticale
swing
Standaard
windmodus
NL

3534
Wi-modus
Activeerdewi-modusalleenalsdeventilator
is uitgeschakeld, dus als de bladen niet meer
draaienenhetaan/uit-icoontjebrandt.Houdde
bedieningsring 5 seconden ingedrukt. Daarna zal
hetwi-icoontjegaanknipperen.Deventilator
gaat actief op zoek naar apparaten om mee te
koppelen,terwijleentimerafteltvan99naar0.
Zodraerverbindingisgemaakt,blijfthetwi-
icoontjecontinubranden.
Bedieningvanwienapp
Scan de onderstaande QR-code om de Duux-
app te downloaden of zoek de Duux-app in de
App Store of Google Play Store om de app te
downloaden.Voernadeinstallatiejee-mailadres
in en rond de registratie af.
Metwiverbinden
Klik na de registratie op 'add duux device'
op het hoofdscherm of gebruik de knop '+'
rechtsboven om een nieuw apparaat toe te
voegen.
Zoek naar 'Whisper Flex Ultimate' en klik
om verder te gaan.
Maak verbinding met het gewenste
wi-netwerkenvoerhetbijbehorende
wachtwoord in.
Volg de instructies in de app om de
verbindingsprocedure te voltooien.
APP STORE PLAY STORE
1
2
3
4
5.Technischespecicaties
1030 mm
330 mm 330 mm
Stroomverbruik:
3-32W
Ventilatorsnelheid:
30 snelheden
Gewicht:
5 kg
Geluidsniveau:
13-50dBa
Verstelbare hoogte:
58-103 cm
Display:
Digitaal
lcd-display
Luchtcirculatie:
820 m3/u
Hoofdmaterialen:
ABS, PP
Modelnr.
DXCF14/15
LCD
Let op: mocht je problemen ondervinden bij
het verbinden of gebruiken van de app, raadpleeg
dan de FAQ in het app-menu.
NL

3736
Notes
Afvoer
VolgensdeEuropeserichtlijn2012/19/
EUbetreendeafgedankteelektrischeen
elektronischeapparatuur(AEEA)mogenoude
elektrischehuishoudelijkeapparatennietviade
gemeentelijkedienstenalsnormaalongesorteerd
huishoudelijkafvalwordenafgevoerd.Oude
apparaten moeten gescheiden worden ingezameld
om hergebruik en recycling van de materialen
indeapparatenteoptimaliserenendeeecten
op de gezondheid van mensen en het milieu te
beperken. Het symbool van een container met
eenkruiserdoorherinnertjeaanjeverplichting
om het afgedankte apparaat aan te bieden voor
gescheiden afvalinzameling. Consumenten dienen
contactoptenemenmetdeplaatselijkeoverheid
of hun detailhandelaar voor meer informatie over
de correcte afvoer van oude apparaten.
NL

3938
1. Aperçu du produit 40
2. Installation et utilisation 41
3. Maintenance 47
4. Fonctions 48
5. Caractéristiques techniques 53
Table des
matières
Merci d’avoir
choisi Duux.
NoussommesravisquevousayezdécidédelirelesinstructionsrelativesàvotrenouveauventilateurDuux!
De nombreux utilisateurs ne prêtent pas attention aux instructions et veulent trouver eux-mêmes comment
fonctionne l’appareil. Cependant, des études démontrent que les personnes qui lisent les instructions
pourrontsefamiliariseravecl’appareilplusrapidementetplusecacementquecellesquiprocèdentpar
tâtonnements.
Chez Duux, nous sommes convaincus de l’importance d’un environnement de vie confortable et sain. La
passionquinousanimejouraprèsjourestd’améliorervotrebien-êtreenconcevantdesproduitsattrayants,
fonctionnelsetecaces.Grâceànotregammed’appareilsdetraitementdel’airinnovants,nousvisonsà
vous fournir la meilleure qualité d’air intérieur possible.
Voici le ventilateur rafraîchissant qui vous surprend avec une brise douce, une forte rafale de vent et tout
ce qui se passe dans l’intervalle. Le Duux Whisper Flex Ultimate dispose de pas moins de 30 réglages de
vitesse.Vouspouvezainsitoujourstrouverlacirculationdel'airidéale.Grâceàlafonctiond'oscillation
horizontale et verticale, le Duux Whisper Flex Ultimate procure une agréable fraîcheur dans toutes les
pièces.Choisissezvous-mêmelemodequevouspréférez:vitessexe,ventnatureloupeut-êtrelemode
nocturne, qui vous berce dans votre sommeil par la brise discrète. La station d'accueil et la batterie,
disponiblesséparément,vouspermettentdedéplacerlibrementl'appareilsansl.
LisezattentivementlemanuelpourproteraumaximumdevotreDuuxWhisperFlexUltimate.
6
7
8
4
5
1
2
3
Remote control position 2
Power button
Remote control position 2
Locking mechanism
Battery lock slider
Remote control receiver
6
7
8
4
5
1
2
3
Remote control position 2
Power button
Remote control position 2
Locking mechanism
Battery lock slider
Remote control receiver
6
7
8
4
5
1
2
3
Remote control position 2
Power button
Remote control position 2
Locking mechanism
Battery lock slider
Remote control receiver
6
7
8
4
5
1
2
3
Remote control position 2
Power button
Remote control position 2
Locking mechanism
Battery lock slider
Remote control receiver
6
7
8
4
5
1
2
3
Remote control position 2
Power button
Remote control position 2
Locking mechanism
Battery lock slider
Remote control receiver
6
7
8
4
5
1
2
3
Remote control position 2
Power button
Remote control position 2
Locking mechanism
Battery lock slider
Remote control receiver
6
7
8
4
5
1
2
3
Remote control position 2
Power button
Remote control position 2
Locking mechanism
Battery lock slider
Remote control receiver
Outils
Unité de base
Motrice Grille avec
pales de ventilateur
Tube de rallonge
Adapteur secteur Manuel
d’instructions
télécommande
Contenu
de la boite
FR
Other manuals for Whisper Flex Ultimate
1
This manual suits for next models
2
Table of contents
Languages:
Other Duux Fan manuals
Popular Fan manuals by other brands

Daikin
Daikin VAM 150FAVE Service manual

Convair
Convair CoolTower CTF05 owner's manual

VES
VES Ecovent EVHR Installation, operation and maintenance manual

Rowenta
Rowenta ESSENTIAL PROTECT VU4011 Series manual

Global Industrial
Global Industrial 258321 user manual

Home Decorators Collection
Home Decorators Collection 44-WWD Use and care guide