10
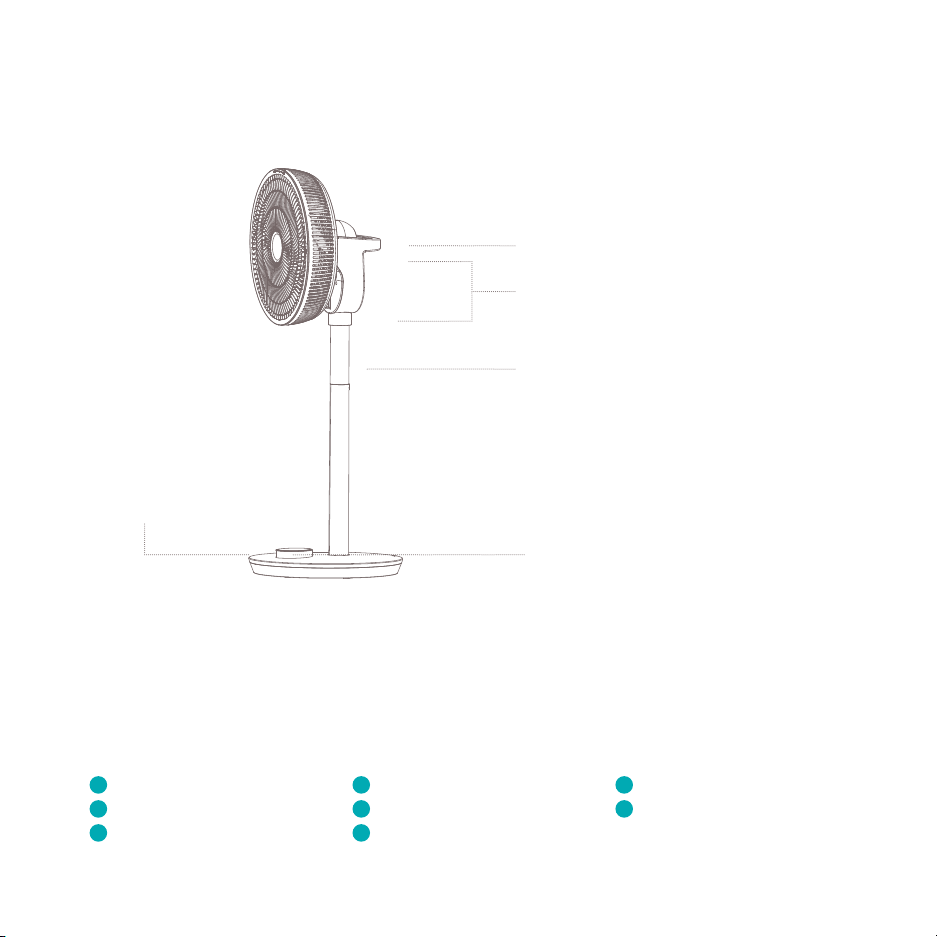
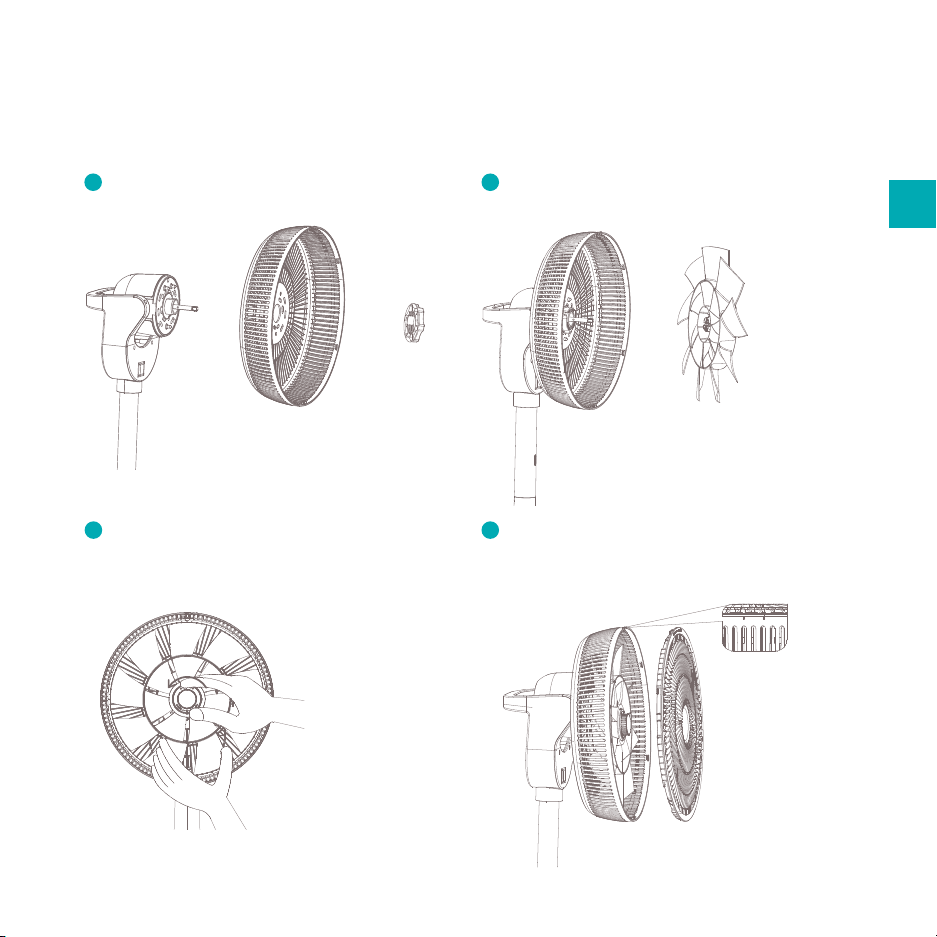
1Remove the parts from the packaging
and assemble the device according to the
instructions in this manual.
2Connect the power cable to the input terminal
in the base of the product. Then insert the
plug into the wall socket. The LED display will
light up and show ‘00’.
3Press the control ring once, to turn the
product on. The fan springs into life and will
thereafter default to the most recent speed
setting.
4Use the stainless steel exterior of the
aluminium control ring to switch between
settings.
3.2 Instructions for using the LED display
5 When a display icon is ashing, you can
set and adjust this setting by pressing the
control ring. When the desired position is
reached, press the control ring again to
conrm the selection.
6When setting the fan speed and timer
function, the LED display will continue to ash
until the desired setting is selected. After this,
press the control ring again to conrm the
selection.
7Once the function is set, the icon will stop
blinking and will remain visible in the display,
for as long as this function is set to on.
8 Press and hold the control ring to switch o
the device.
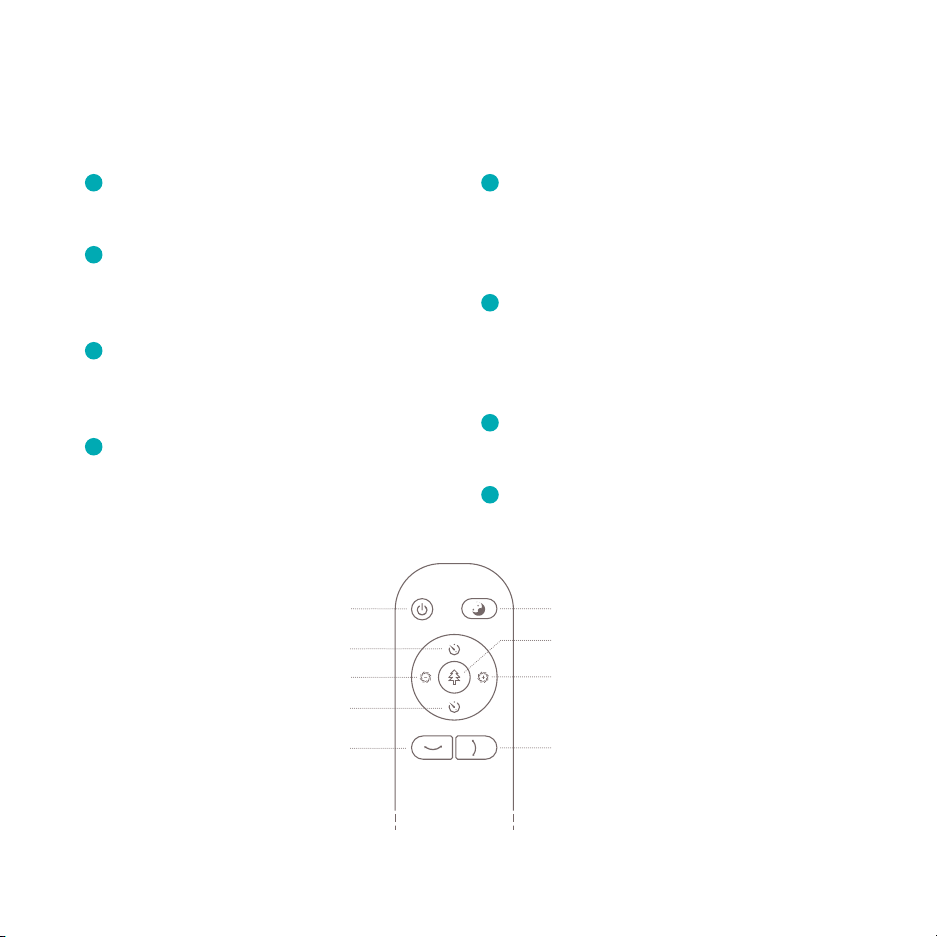
Power
Timer Up
Night mode
Natural wind
Timer down
Ventilation speed down Ventilation speed up
Horizontal oscillation Vertical oscillation