Dynatech scieneo. amplio VI User manual

User Guide
for

Regulatory Compliance Information
FCC Declaration of Conformity
This device complies with Part 15 of the FCC Rules. Operation is subject to the following two
conditions: (1) this device may not cause harmful interference, and (2) this device must accept
any interference received, including interference that may cause undesired operation.
This equipment has been tested and found to comply with the limits for a Class B digital
device, pursuant to part 15 of the FCC Rules. These limits are designed to provide reasonable
protection against harmful interference in a residential installation. This equipment genera-
tes, uses and can radiate radio frequency energy and, if not installed and used in accordance
with the instructions, may cause harmful interference to radio communications. However,
there is no guarantee that interference will not occur in a particular installation. If this equip-
ment does cause harmful interference to radio or television reception, which can be determi-
ned by turning the equipment o and on, the user is encouraged to try to correct the interfe-
rence by one or more of the following measures:
• Reorient or relocate the receiving antenna.
• Increase the separation between the equipment and receiver.
• Connect the equipment into an outlet on a circuit dierent from that to which the receiver
is connected.
• Consult the dealer or an experienced radio/TV technician for help.
For questions related to the EMC performance of this product, contact:
Elitegroup Computer Systems Co., Ltd
No.239, Sec. 2, Ti Ding Blvd., Taipei, Taiwan 11493
886-2162-1177

Canadian Department of Communications Compliance Statement
This digital apparatus does not exceed the Class B limits for radio noise emissions from di-
gital apparatus set out in the Radio Interference Regulations of the Canadian Department of
Communications. This device complies with Industry Canada licence-exempt RSS standard(s).
Operation is subject to the following two conditions: (1) this device may not cause interferen-
ce, and (2) this device must accept any interference, including interference that may cause
undesired operation of the device.
Le présent appareil numerique német pas de bruits radio électriques dépassant les limi-
tes applicables aux appareils numériques de la classe B prescrites dans le Réglement sur le
broullage radioélectrique édicté par le ministére des Communications du Canada. Le présent
appareil est conforme aux CNR d’Industrie Canada applicables aux appareils radio exempts
de licence. L’exploitation est autorisée aux deux conditions suivantes : (1) l’appareil ne doit
pas produire de brouillage, et (2) l’utilisateur de l’appareil doit accepter tout brouillage radio-
électrique subi, même si le brouillage est susceptible d’en compromettre le fonctionnement.
French SAR/DAS
Votre ordinateur a un DAS. Pour plus d‘informations, voir le portail radiofréquences-sante-en-
vironnement: www.radiofrequences.gouv.fr
Taiwan battery recycling:
Translation – please recycle batteries
CE mark. Declaring compliance to all the applicable
European Union (EU) directives. For CE mark related questions:
Elitegroup Computer Systems Co., Ltd
No.239, Sec. 2, Ti Ding Blvd., Taipei, Taiwan 11493
886-2162-1177
In the European Union, this symbol indicates that this product including
battery must not be disposed of with household waste. It is your respon-
sibility to hand it over to a designated collection point for the recycling of
waste electrical and electronic equipment. For more information, please
contact your local waste collection center or the point of purchase of this
product.

Safety Precautions
The following are lists of precautionary measures that users must understand before using
this computer:
1. Do not place near the re or other sources of heat.
2. Do not expose to magnetic elds.
3. Do not expose to direct sunlight.
4. Do not expose to rain or moisture.
5. Do not place heavy objects to add heavy pressure on the computer.
6. Do not drop the computer.
CAUTION
RISK OF EXPLOSION IF BATTERY IS REPLACED BY AN INCORRECT TYPE. DISPOSE OF USED BAT-
TERIES ACCORDING TO THE INSTRUCTIONS.
ATTENTION
RISQUE D‘EXPLOSION SI LA BATTERIE EST REMPLACÉE PAR UN TYPE INCORRECT. RECYCLEZ
LES BATTERIES USAGÉES SELON LES INSTRUCTIONS.
IT IS RECOMMENDED TO USE THIS COMPUTER IN AN ENVIRONMENT WHERE THE AMBIENT
TEMPERATURE IS NO MORE THAN 35°C.

Contents
1. Getting to know your computer .......................................................................................... 1
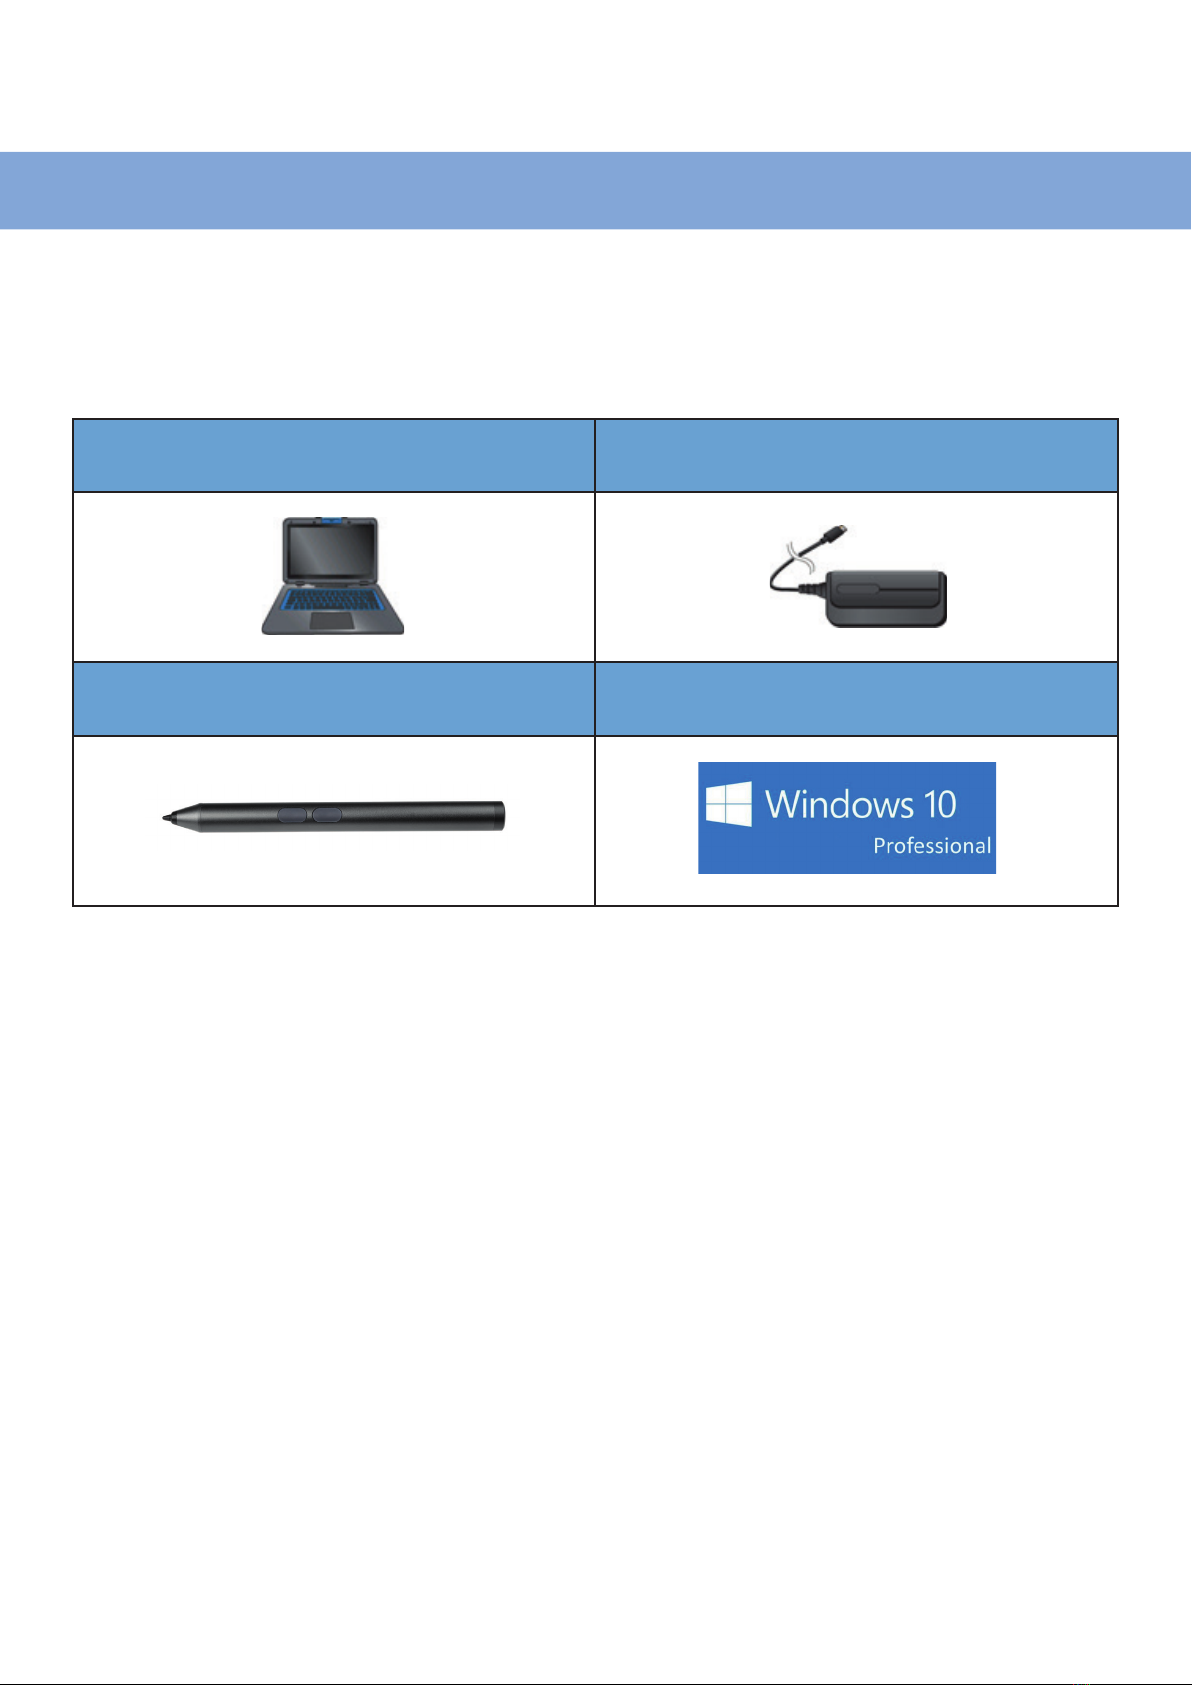
Package contents ................................................................................................................ 1
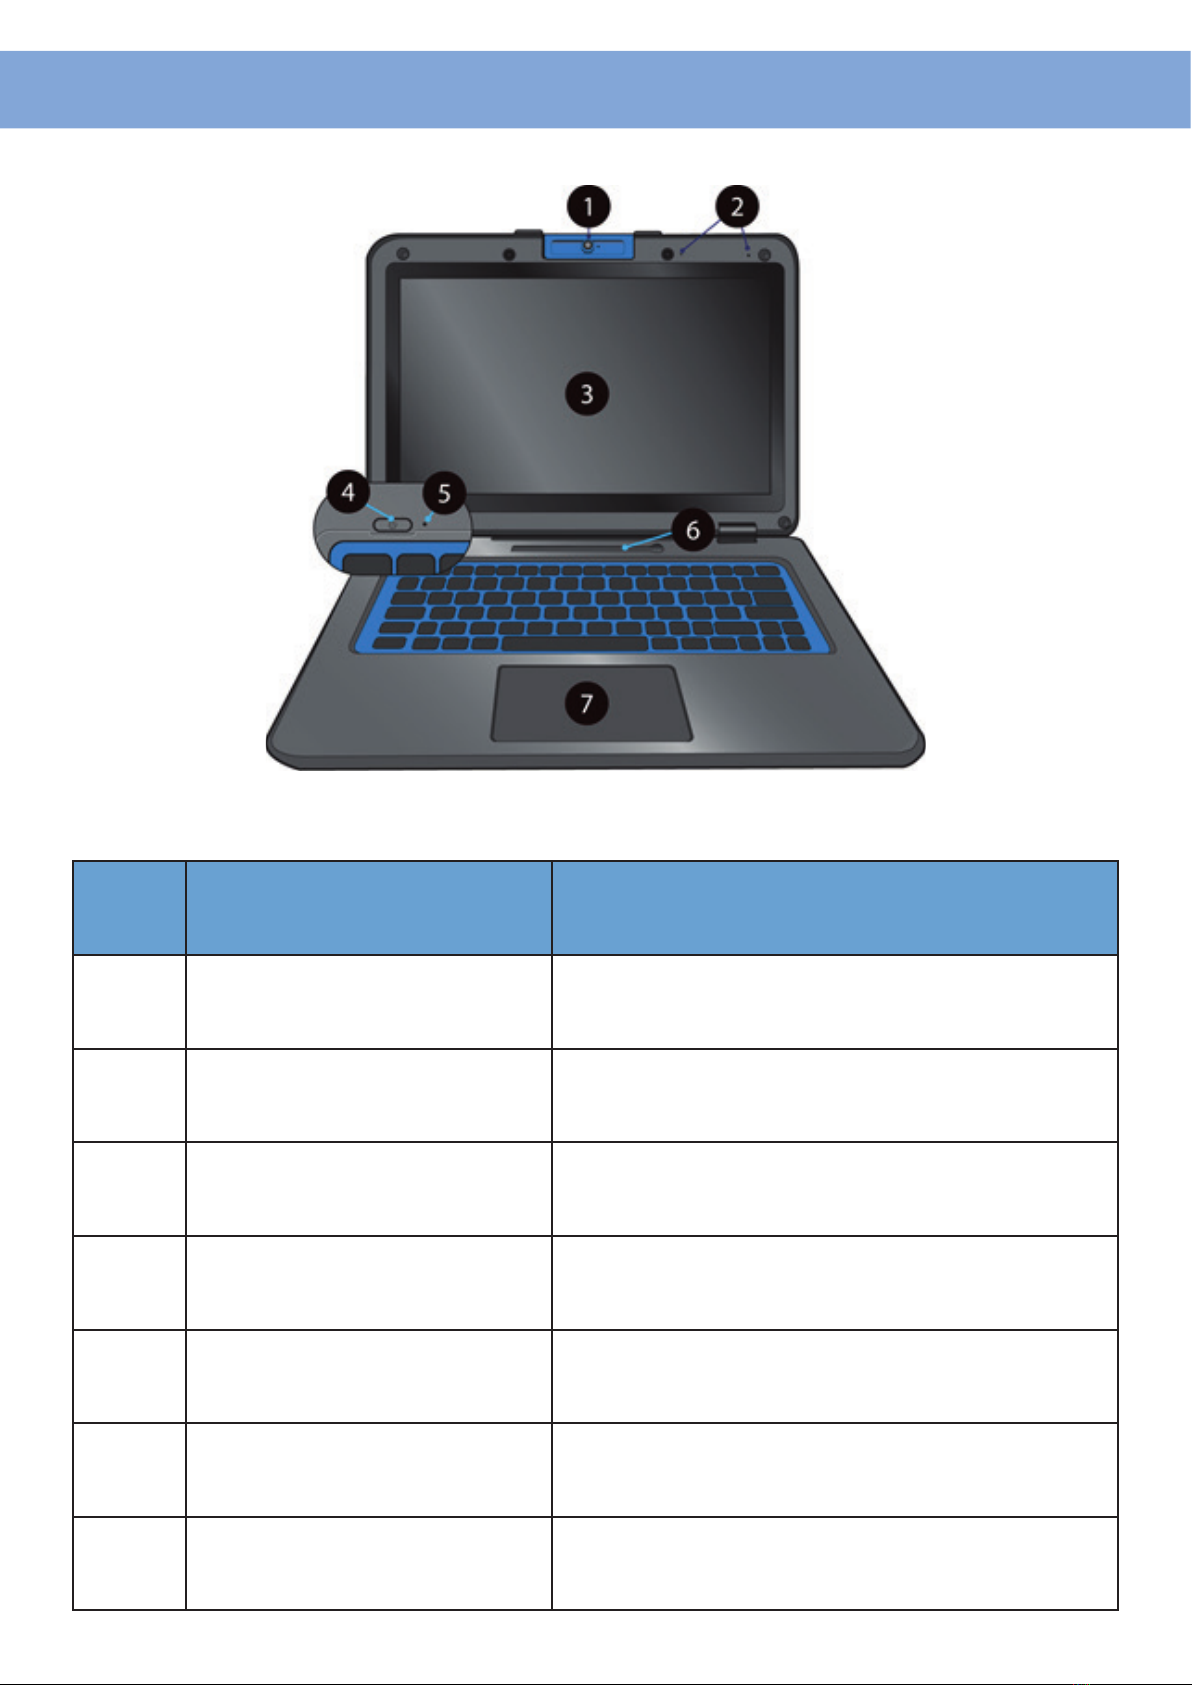
Layout................................................................................................................................... 2
Front............................................................................................................................. 2
Bottom......................................................................................................................... 3
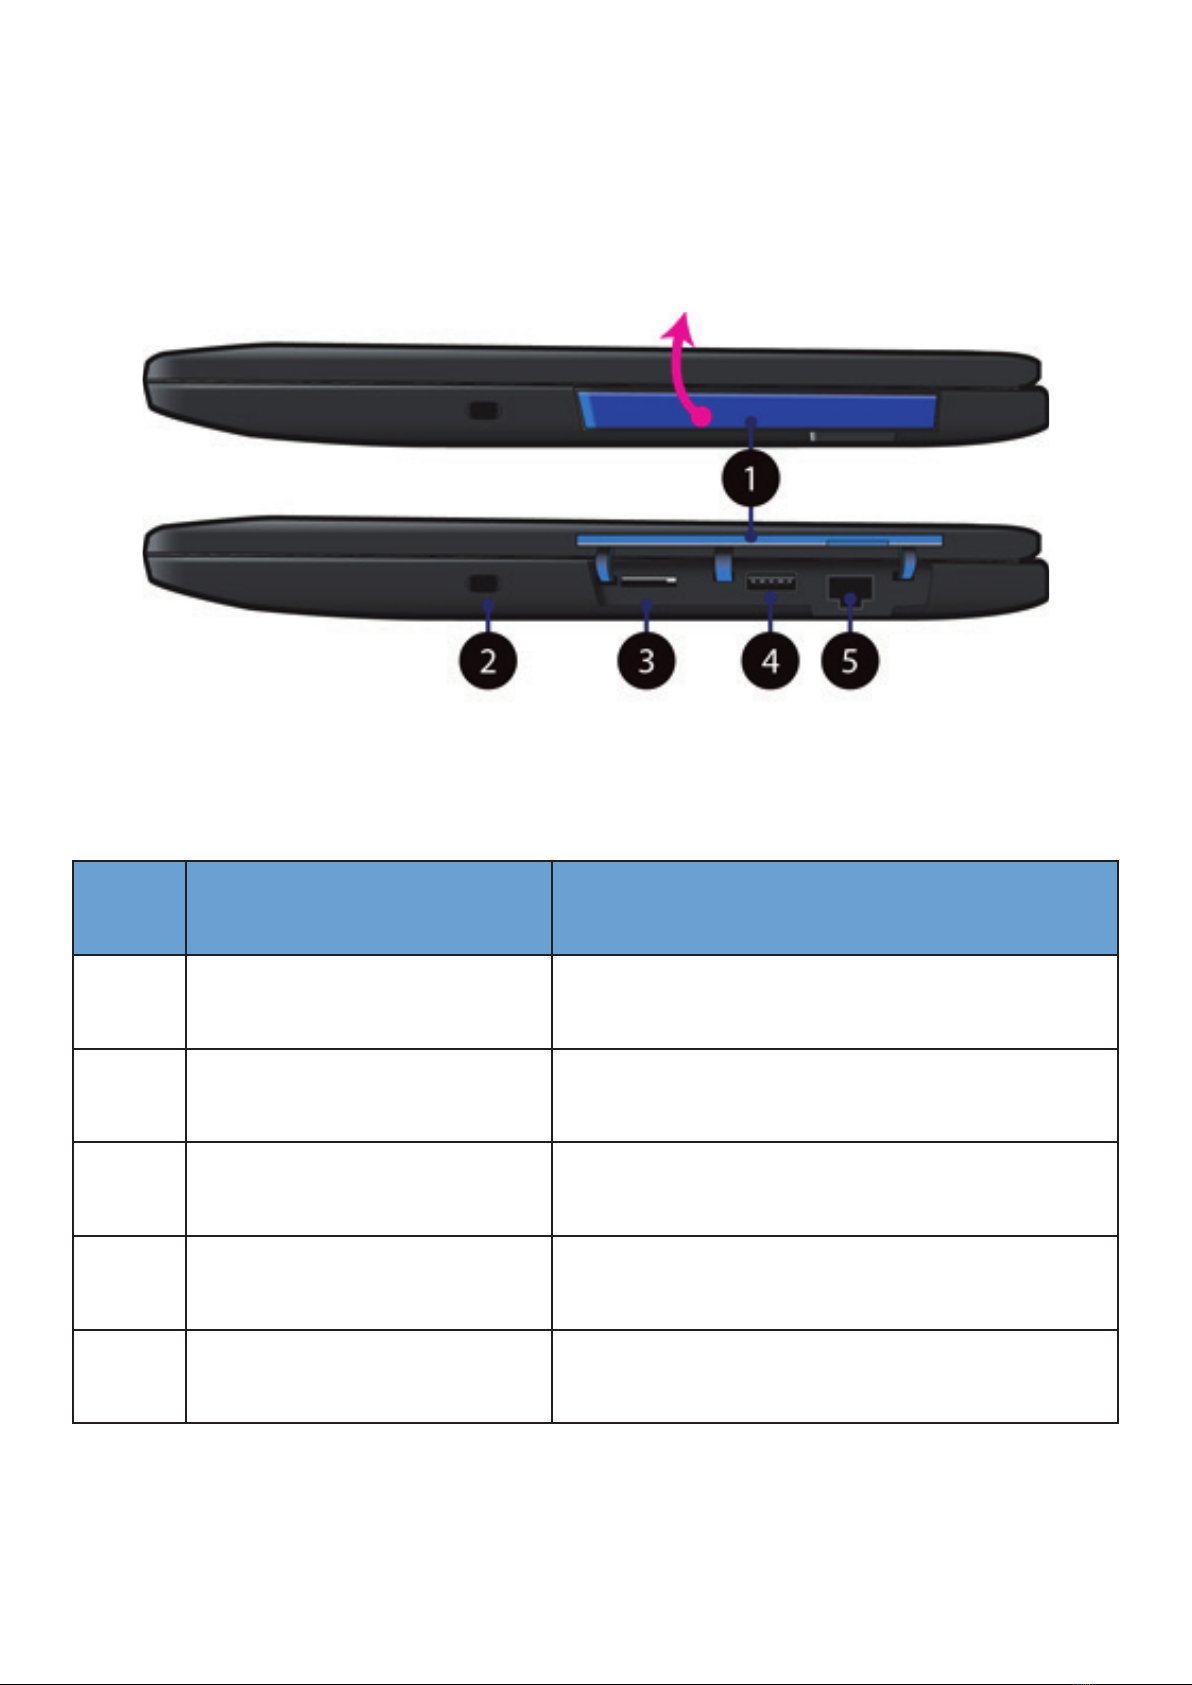
Right............................................................................................................................. 4
Left ............................................................................................................................... 5
Back of the LCD panel................................................................................................ 6
Function keys.............................................................................................................. 7
Folding the keyboard.......................................................................................................... 8
Your rotatable camera........................................................................................................ 9
Stylus pen battery replacement ...................................................................................... 10
2. Using your computer.......................................................................................................... 11
Powering ON/OFF ............................................................................................................. 11
Powering on your computer................................................................................... 11
Powering on for the rst time ................................................................................ 11
Powering o your laptop ........................................................................................ 12
Putting your laptop into sleep mode..................................................................... 13
Waking up your laptop ............................................................................................ 13
Basic touchpad operations .............................................................................................. 14
One nger ................................................................................................................. 14
Two ngers................................................................................................................ 14
Three ngers............................................................................................................. 15
Four ngers............................................................................................................... 16
Basic touchscreen operations ......................................................................................... 17
Fingerprint login (optional) .............................................................................................. 19
3. Windows Interface............................................................................................................... 22
Virtual desktops................................................................................................................. 22
Start With Virtual Desktops.............................................................................................. 22
Creating a new desktop........................................................................................... 23
Taskbar............................................................................................................................... 24
Start menu ................................................................................................................ 24
Search box - Cortana ............................................................................................... 25
App shortcuts area................................................................................................... 26
Notication area....................................................................................................... 26
4. Setup and Connection ......................................................................................................... 27
Settings screen .................................................................................................................. 27
Windows Activation........................................................................................................... 28
Setup Your Microsoft Account......................................................................................... 28
Replacing Desktop with Start screen.............................................................................. 29
Pin and unpin your app.................................................................................................... 30
Pinning an App to Start menu or taskbar ............................................................. 30
Removing an App ..................................................................................................... 30
Wireless LAN...................................................................................................................... 31
Enabling wireless connection ................................................................................. 31
Connecting to a wireless LAN ................................................................................. 31
Micro SD Card Slot ............................................................................................................ 32
To insert your micro SD card .................................................................................. 32
To remove your memory card................................................................................ 33
Connecting an External Device........................................................................................ 33
Connecting to the USB port .................................................................................... 33

Contents
5. Battery .................................................................................................................................. 34
Charging your battery....................................................................................................... 34
Inspecting your battery status......................................................................................... 36
Indicators .................................................................................................................. 36
Taskbar...................................................................................................................... 36
6. Windows Help and Troubleshooting.................................................................................. 38
Troubleshooting................................................................................................................ 38
7. Specication ......................................................................................................................... 41

1
1. Getting to know your computer
Package contents
Carefully unpack your box and take out the items listed as below. If any of the items is mis-
sing or damaged, contact your dealer immediately:
1x Laptop 1x AC adapter and
power cable
1x Stylus pen 1x Windows 10 licence (optional)

2
Layout
Front
No. Name Function
1 Rotatable camera Often for taking self-portraits as well as for
video conferencing.
2 Microphone Mainly for sound and speech recording
3 Touchscreen
The main display of your laptop and a see-
touch device. You can look at it and also
touch it with your ngers to control it.
4 Power button Press it to power on/o your laptop.
5 Power indicator Shows the power status of your laptop.
6 Stylus holder You can rest the stylus here.
7 Touchpad Allows you to control your system using gu-
re gestures

3
Bottom
No. Name Function
1 Handle This integrated rubber handle allowing you to
carry your notebook easily and handily.
2 Speaker
The sound system has two speakers for play-
ing music, notication sounds, and other
audio data.

4
Right
No. Name Function
1 Rubber cover Pull and ip it up to access the I/O interface
2 Kensington lock Allows you to secure the notebook with a
Kensington lock.
3 SIM card slot nano type Insert your SIM card slot here to acquire the
mobile connection.
4 USB 2.0 Type-A port Plug your USB Type-A devices here.
5 RJ45 Plug the RJ45 cable to connect to a wired net-
work environment.

5
Left
No. Name Function
1 Rubber cover Pull and ip it up to access the I/O interface
2 USB Type-C port
Plug your USB Type-C supported devices here.
Plug the provided adapter here to charge the
battery.
3 HDMI Plug your HDMI supported device here.
4 USB 3.0 Type-A port Plug your USB Type-A devices here.
5Combo Audio jack for micro-
phone/headphone Plug your 3.5mm headphone here
6 Micro SD card slot Plug your micro SD card here

6
Back of the LCD panel
No. Name Function
1 System indicator Shows the system status.
2 Wi-Fi indicator Shows your Wi-Fi connection status.

7
Function keys
Mute or unmute your system.
Decreases the volume level.
Increases the volume level
Switches display output between your display, external monitor (if
connected) and both.
Decreases the display brightness
Increases the display brightness.
Opens the Settings screen.
Play or Pause
Push here to talk to Cortana, if available.
The following function keys are no need to press Fn to make them work.

8
Folding the keyboard
This laptop supports a swiveling 11.6-inch touchscreen that can be used in several dierent
ways. Opening the device as a standard laptop gives you access to the keyboard and touch-
pad, while folding the keyboard behind the screen turns it into a tablet. You also can prop the
notebook‘s screen up in stand mode, which is ideal for viewing videos and presentations.

9
Your rotatable camera
Form the angle at which the camera facing forward, you can adjust the camera angle dow-
nward to make it facing d own at an angle of 35 degree.
Or, you can turn it over a full 200 degree to use it like a rear-facing camera.

10
Stylus pen battery replacement
1. Unscrew the end part of the stylus.
2. Replace the AAAA battery with the positive (+) end of the battery pointing toward the wri-
ting tip.
3. Screw the end back on.

11
2. Using your computer
Powering ON/OFF
Powering on your computer
Powering on for the rst time
1. If this is the rst time you turn this computer on, connect the AC adapter and fully charge
the battery.
2. Press the power button (normally 1 to 2 seconds). You shall see the screen turning on.
The laptop will require you to do the initial setup, which including:
• Activate your Windows 10
• Sign in to or create your Microsoft account
• Setup a wireless connection and more
Please follow the instruction to complete the initial setup.

12
Powering o your laptop
Save all your data before powering your laptop o.
To power o your system, following the steps below:
A. By Start menu
1. Click the Windows icon in the low-left corner of the Desktop.
Or, press on the Windows key in the keyboard.
2. In the Start menu, click <Power> option, as shown on the right,
3. Select <Shut down> from the power option menu, as shown on the right.

13
Putting your laptop into sleep mode
Waking up your laptop
When you will be away from your laptop for a short time, put the laptop to sleep.
Do one of the following:
• Close the display panel
• Press the power button briey one time.
• Open the Start menu and select <Power> then <Sleep>.
Just pressing the power button briey one time.

14
Basic touchpad operations
The touchpad works like a traditional mouse. With it, you can move the cursor and perform
left-click, right-click, double-click actions. However, the actual available actions are application
dependent.
One nger
Two ngers
Action Explanation
Tap once on the touchpad surface or press once on
the low-left corner of the touchpad to get the eect
just like left clicking a mouse.
Press once on the low-right corner of the touchpad to
get the eect just like right clicking a mouse.
Press and continue to hold down the left corner and
then move (drag) your nger across the touchpad sur-
face to drag an item on the desktop.
Action Explanation
Tap once on the touchpad surface to get the eect
just like right clicking a mouse
Table of contents
Other Dynatech Laptop manuals