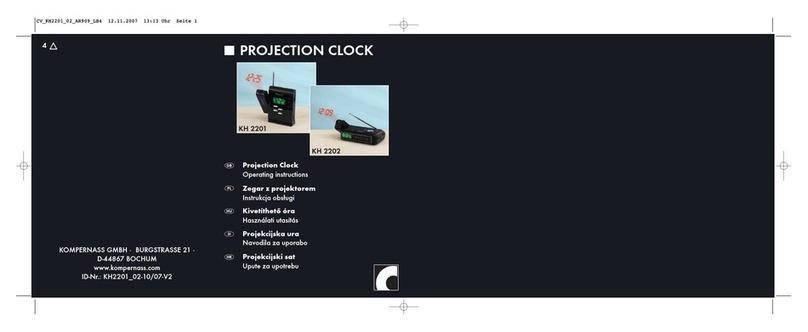
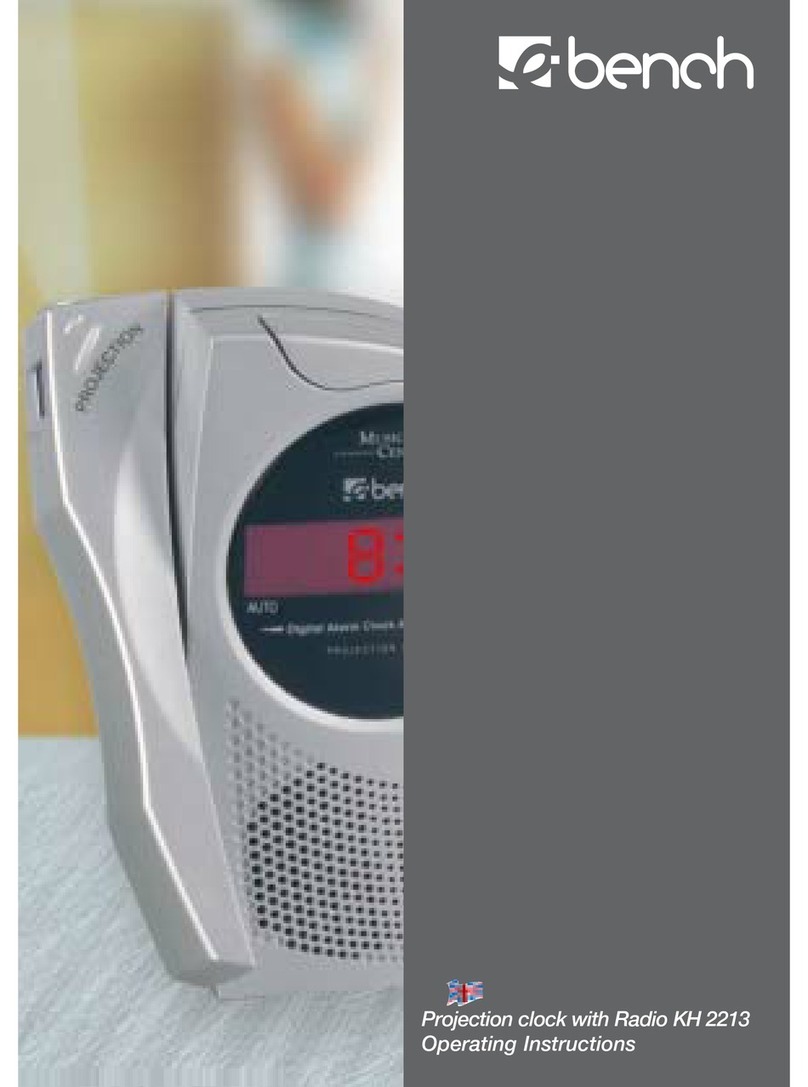
E-Bench KH 2202 User manual

KOMPERNASS GMBH · BURGSTRASSE 21 ·
D-44867 BOCHUM
www.kompernass.com
ID-Nr.: KH2201_02-10/07-V2
PROJECTION CLOCK
KH 2201
KH 2202
3
PROJECTION CLOCK
Operating instructions
PROJEKTIONSUR
Betjeningsvejledning
PROJEKSJONSKLOKKE
Bruksanvisning
ÑÏËÏÚ-ÐÑÏÂÏËEAÓ
Ïäçãßåò ÷ñÞóçò
PROJEKTIONSUHR
Bedienungsanleitung
CV_KH2201_02_AR909_LB3 12.11.2007 11:08 Uhr Seite 1

KH 2201
rewq
t
y
u
i
a
s
d
f
g
h
j
k
l
;
o
KH 2202
wui
e
r
a
2)
j
h
ytfg
;
q
olk
d
s
CV_KH2201_02_AR909_LB3 12.11.2007 11:09 Uhr Seite 5

LIST OF CONTENTS PAGE
Safety instructions 4
Intended Use 5
Items supplied 6
Operating Elements 6
Technical data 7
Placement 8
Operation 8
Radio operation 9
Setting up the telescope aerial 9
Setting the time 10
Setting the alarm time 10
Snooze Function 11
Projection 11
Background lighting for the display and projection 11
Cleaning 11
CE- Conformity 12
Disposal 12
Warranty and Service 13
Importer 14
- 3 -
Read these operating instructions carefully before using the appliance for the
first time and preserve this manual for later reference. Pass this manual on to
whoever might acquire the appliance at a future date.
IB_KH2201_02_AR909_UK_3.qxd 12.11.2007 10:52 Uhr Seite 3

PROJECTION CLOCK
Safety instructions
To avoid fatal injury through electric shock:
• Use the clock in dry environments only.
• Make sure that fluids or any other objects do not get inside the device.
• Do not place objects containing fluids, e.g. flower vases, on the appliance.
To avoid burn and other injuries:
• Place the appliance in an open and well-ventilated area so that heat
pockets cannot be created within it. Never cover the ventilation slits!
• Do not place open fire sources, e.g. candles, on the appliance.
• Avoid close proximity to heat sources, e.g. direct solar radiation, heaters
and other appliances etc.!
• This appliance is not intended for use by individuals (including children)
with restricted physical, physiological or intellectual abilities or deficiences
in experience and/or knowledge unless they are supervised by a person
responsible for their safety or receive from this person instruction in how
the appliance is to be used.
• Children should be supervised to ensure that they do not play with the
appliance..
Electro-magnetic fields
This appliance complies with the statutory limits for electro-magnetic compatibility!
If you still have any doubts regarding its use in bedrooms:
• Place the appliance about half a meter from the bed.
From this distance the electro magnetic fields are no longer effective even for
electro sensitive people itself.
- 4 -
IB_KH2201_02_AR909_UK_3.qxd 12.11.2007 10:52 Uhr Seite 4

Note:
This appliance is equipped with non-slip rubber feet. As floor and furniture
upper surfaces comprise of various materials and are cleaned with various
types of polishes and/or cleaning agents, it cannot be completely excluded
that some of these substances contain components that could attack the rubber
pads and soften them. If possible place an anti-slip material under the feet
of the appliance.
Note:
In certain countries there could be special regulations in force regarding the
allocated radio frequency ranges.
Take note that you may not exploit these radio services, pass details heard
from them on to third parties or otherwise improperly misuse them.
Intended Use
The equipment is intended for employment as an alarm clock, using a tone
signal, and for receiving radio transmissions. Any other usage of, or modification
to, the appliance is deemed to be improper usage and carries the risk of
serious personal injury.
The manufacturer accepts no liability for damages that result from improper
use of the appliance or are caused by the incorrect operation of it. Not intended
for commercial use.
- 5 -
IB_KH2201_02_AR909_UK_3.qxd 12.11.2007 10:52 Uhr Seite 5

Items supplied
After unpacking the appliance, immediately check to determine that all listed
items are present and that the appliance is in a faultless condition.
1 Projection clock with radio, 1 Operating manual
The batteries and a 3V-mains adaptor (accessories), required for operation,
are not included in the supply.
Operating Elements
qProjection lens
wTelescopic antenna
eButton Snooze
rProjection, Display illumination
tDisplay
yFrequency scale
uButton Alarm
iButton Hour
oButton Time
aButton Min (Minute)
sLoudspeakers
dProjection focus
fTuning wheel
gVolume controller VOLUME / BUZZ
hExternal 3V Direct current connection for 4.0 mm x 1.7 mm barrel connector
jBattery Compartment
kSwitch-Projection ON/OFF
lSwitch - Alarm ON/OFF
;Waveband selector FM/AM
2) Stand-up support (only Model KH 2202)
- 6 -
IB_KH2201_02_AR909_UK_3.qxd 12.11.2007 10:52 Uhr Seite 6

Technical data
Power rating: 3 V
Rated current : 300 mA
Frequency range :
FM (VHF) 87.5 - 108 MHz
AM (MW) 530 - 1600 kHz
Dimensions:
KH 2201 14.2 cm x 13.1 cm x 3.8 cm
KH 2202 17 cm x 8.8 cm x 4.2 cm
Weight :
KH 2201 and KH 2202: ca. 245 gr.
Operating temperature : 5°C - 40°C at <85% rel. humidity
Batteries:
(Batteries not supplied)
• Model KH 2201: 1.5 V Type Mignon/AA
• Model KH 2202: 1.5 V Type Micro/AAA
• 2 x 1.5 V for radio operation, display illumination and projection
• 1 x 1.5 V for the LCD clock (the compartment is described in “CLOCK USE“)
Mains adapter:
(Item not supplied)
Rated voltage: DC 3V (+/- 5%)
Rated current : min. 300 mA
Barrel connector: 4.0 mm x 1.7 mm
When using a 3 V mains adaptor, a battery must be inserted into the
compartment “CLOCK USE”. Otherwise, the clock will not function.
- 7 -
IB_KH2201_02_AR909_UK_3.qxd 12.11.2007 10:52 Uhr Seite 7

Placement
• Place the projection clock onto a level surface.
• Position the projection clock such that the projection lens qis directed
onto an empty surface.
Only Model KH 2202:
• Fold out the stand-up support 2).
Operation
Connect the external mains adaptor
This appliance can be operated with an external mains adaptor.
Please use only mains adaptors that meet these specifications:
Rated voltage: DC 3V (+/- 5%)
Rated current : min. 300 mA
Barrel connector: 4.0 mm x 1.7 mm
Attention:
Make certain that the polarity is correct – both for the batteries as well as for
the mains adaptor. Take note of the markings on the 3V direct current connection
h. False polarity will damage the appliance.
- 8 -
IB_KH2201_02_AR909_UK_3.qxd 12.11.2007 10:52 Uhr Seite 8

Radio operation
1. To switch on, turn the volume controller VOLUME / BUZZ g, until an audible
»Click« is heard.
2. Using the volume controller VOLUME / BUZZ gnow set the desired volume.
3. Set the waveband selector switch ;to the desired wavelength range
(FM/AM).
4. Adjust the tuning wheel fto select the desired radio station. The frequencies
can be read off from the frequency scale y.
5. To switch off, turn the volume controller VOLUME / BUZZ guntil an
audible »Click« is heard (KH 2201.Turn the volume controller upwards,
KH 2202: Turn the volume controller to the rear).
Setting up the telescope aerial
On Model KH 2201:
• Extend the telescope aerial wcompletely.
The telescope aerial won Model KH 2201 is not rotatable.
If you try to turn the telescope aerial w, the aerial mounting will be damaged.
On Model KH 2202:
• Remove the telescope aerial wfrom its retainer and set it up.
• Extend the telescope aerial wcompletely.
To improve reception in the FM frequency range, slowly turn the end of the
telescope aerial win various directions. As soon as you have found a position
with good reception from your desired radio station, leave the telescope aerial
win this position. For the reception of AM transmitters, an aerial is built into
the appliance. For improved reception, alter the position of the appliance in
radio mode.
- 9 -
IB_KH2201_02_AR909_UK_3.qxd 12.11.2007 10:52 Uhr Seite 9

Setting the time
Whilst holding the button TIME opressed down:
1. Press several times consecutively, or press and hold, the button HOUR i,
to set the hours.
2. Release the button HOUR i, as soon as the desired hours setting is shown
in the Display t.
3. Press several times consecutively, or press and hold, the button MIN a,
to set the minutes.
4. Release the button MIN a, as soon as the desired minutes setting is shown
in the Display t.
The set time is automatically accepted as soon as the TIME button ois released.
Setting the alarm time
If the clock is set correctly, as described above:
1. Switch the radio off: Place the volume controller VOLUME / BUZZ gto
BUZZ (a »Click« is audible).
Whilst holding the button ALARM upressed down:
2. Press several times consecutively, or press and hold, the button HOUR i,
to set the hours.
3. Release the button HOUR i, as soon as the desired hours setting is shown
in the Display t.
4. Press several times consecutively, or press and hold, the button MIN a,
to set the minutes.
5. Release the button MIN a, as soon as the desired minutes setting is shown
in the Display t.
The adjusted alarm time will be automatically accepted as soon as the button
ALARM uis released.
6. To activate the alarm time function, place the switch lALARM On/Off to
“ON”.
- 10 -
IB_KH2201_02_AR909_UK_3.qxd 12.11.2007 10:52 Uhr Seite 10

Snooze Function
Pressing the SNOOZE ebutton interrupts the alarm tone for 8 minutes.
After these 8 minutes, the alarm tone is repeated. Place the switch lALARM
On/Off to “OFF“ to completely switch off the alarm function.
Projection
Attention! When used properly, the radiation from the projection of the display is
not at all dangerous! However, avoid looking directly into the light beam
and do not aim the beam at other persons or at animals.
To display the correct time on the wall or the ceiling, the hinged projection
element must be swung forwards and the room must be appropriately darkened.
1. Place the switch Projection On/Off kto position ON.
2. Set the projection element as desired. The time is projected onto the required
position. Projection distance approx. 40cm - 3m.
3. Adjust the clarity of the projection with the projection focus d.
Background lighting for the display and projection
Pressing the button Projection/Display Illumination ractivates the display
illumination and the time projection for approx. 10 seconds.
Cleaning
• Keep the appliance and the ventilation openings clean at all times.
• Fluids may not, under any circumstances, penetrate into the interior of
the appliance.
• Use a soft cloth to clean the appliance housing.
• Never use detergents or solvents that could damage plastics.
- 11 -
IB_KH2201_02_AR909_UK_3.qxd 12.11.2007 10:52 Uhr Seite 11

CE- Conformity
This consumer electronics appliance, being in conformity with their fundamental
requirements and directions, complies with the relevant regulations of both
the EMC Guidelines 2004/108/EG and the Guidelines for Low Voltage
Appliances 2006/95/EG.
Disposal
Do not dispose of the appliance in your normal domestic waste.
This appliance is subject to the European Guidelines 2002/96/EG.
Dispose of the appliance through an approved disposal centre or at your
community waste facility.
Observe the currently applicable regulations. In case of doubt, please
contact your waste disposal centre.
Disposing of batteries!
Do not dispose of the batteries with household waste. Every consumer is obliged
by law to deposit all batteries at a collecting point of his community/his precinct or
to return them to a shop.
This obligation is intended to ensure that batteries are disposed of in an
environmentally safe fashion. Only dispose of batteries when they are fully
discharged.
Dispose of all packaging materials in an environmentally friendly
manner.
- 12 -
IB_KH2201_02_AR909_UK_3.qxd 12.11.2007 10:52 Uhr Seite 12

Warranty and Service
The warranty given for this appliance is for 3 years from the date of purchase.
The appliance has been manufactured with care and meticulously examined
before delivery.
Please retain your receipt as proof of purchase. In the case of a warranty
claim, please make contact by telephone with our service department. Only
in this way can a post-free despatch for your goods be assured.
The warranty covers only claims for material and maufacturing defects, not
for wearing parts or for damage to fragile components, e.g. buttons or batteries.
This product is for private use only and is not intended for commercial use.
The warranty is void in the case of abusive and improper handling, use of
force and internal tampering not carried out by our authorized service
branch. Your statutory rights are not restricted in any way by this warranty.
DES Ltd
Units 14-15
Bilston Industrial Estate
Oxford Street
Bilston
WV14 7EG
Tel.: 0870/787-6177
Fax: 0870/787-6168
e-mail: support.uk@kompernass.com
- 13 -
IB_KH2201_02_AR909_UK_3.qxd 12.11.2007 10:52 Uhr Seite 13

Kompernass Service Ireland
c/o Irish Connection
41 Harbour view
Howth Co. Dublin
Tel: 087-99 62 077
Fax: 18398056
e-mail: support.ie@kompernass.com
Importer
KOMPERNASS GMBH
BURGSTRASSE 21
D-44867 BOCHUM
www.kompernass.com
- 14 -
IB_KH2201_02_AR909_UK_3.qxd 12.11.2007 10:52 Uhr Seite 14

INDHOLDSFORTEGNELSE SIDE
Sikkerhedsanvisninger 16
Bestemmelsesmæssig anvendelse 17
Medfølger ved køb 18
Betjeningselementer 18
Tekniske data 19
Opstilling 20
Betjening 20
Radiofunktion 21
Indstilling af teleskopantenne 21
Indstilling af klokkeslæt 22
Indstilling af vækningstidspunkt 22
Snooze-funktion 23
Projektion 23
Baggrundsbelysning til display og projektion 23
Rengøring 23
CE-Konformitet 24
Bortskaffelse 24
Garanti og service 25
Importør 26
- 15 -
Læs betjeningsvejledningen omhyggeligt igennem, før du bruger apparatet
første gang, og gem den til senere brug. Hvis du giver apparatet videre til
andre, skal vejledningen også følge med.
IB_KH2201_02_AR909_DK.qxd 12.11.2007 13:24 Uhr Seite 15

PROJEKTIONSUR
Sikkerhedsanvisninger
Bemærk følgende for at undgå livsfarlige elektriske stød:
• Brug kun radioen i tørre rum.
• Kontrollér, at der ikke kan komme væske eller genstande ind i radioen.
• Sæt ikke nogen genstande, der er fyldt med væske, som f.eks. vaser, på
apparatet.
Sådan undgår du faren for brand og tilskadekomst:
• Stil projektionsuret, så der ikke kan opstå overophedning, dvs. frit og med
god ventilation. Dæk aldrig ventilationsåbninger til!
• Stil ikke åbne brandkilder som f.eks. lys, på uret.
• Undgå ekstra varmetilførsel, f.eks. i form af direkte sollys, varmeapparater,
andre apparater osv.!
• Denne maskine må ikke benyttes af personer (inklusive børn) med begrænsede
fysiske, sensoriske eller psykiske evner eller med manglende erfaringer
og/eller manglende viden, medmindre en ansvarlig person holder opsyn
med dem og giver dem anvisninger til, hvordan maskinen anvendes.
• Børn skal være under opsyn, så det sikres, at de ikke leger med maskinen.
Elektromagnetiske felter
Dette apparat overholder de lovmæssige grænseværdier for elektromagnetisk
kompatibilitet! Hvis du alligevel er betænkelig, hvad angår opstilling i sove-
værelset:
• Stil apparatet op i cirka en halv meters afstand fra sengen.
Senest fra denne afstand af findes der selv for elektrosensible mennesker
ingen felter mere.
- 16 -
IB_KH2201_02_AR909_DK.qxd 12.11.2007 13:24 Uhr Seite 16

Bemærk:
Dette apparat er udstyret med skridsikre gummifødder. Da gulv- og møbel-
overflader består af meget forskellige materialer og behandles med mange
forskellige plejemidler, kan det ikke udelukkes fuldstændigt, at nogen af disse
stoffer indeholder bestanddele, som angriber og opløser gummifødderne.
Læg eventuelt et skridsikkert underlag under radioens fødder.
Bemærk:
Reglerne vedrørende tildelte radiofrekvensområder kan variere fra land til
land.
Vær opmærksom på, at du ikke må udnytte informationer fra eventuelt modtagne
radiotjenester, ikke videregive dem til andre eller misbruge dem til andre formål.
Bestemmelsesmæssig anvendelse
Projektionsuret er beregnet til vækning med signal og til modtagelse af radio-
sendere. Enhver anden form for anvendelse eller ændring af apparatet anses
for ikke-bestemmelsesmæssig og indebærer betydelige farer for uheld.
Producenten er ikke ansvarlig for skader, der skyldes ikke-bestemmelsesmæssig
anvendelse eller forkert betjening. Ikke beregnet til erhvervsmæssigt brug.
- 17 -
IB_KH2201_02_AR909_DK.qxd 12.11.2007 13:24 Uhr Seite 17

Medfølger ved køb
Kontroller straks efter udpakningen, at projektionsuret er fuldstændigt og i
fejlfri stand.
1 radio med projektionsur, 1 betjeningsvejledning
Batterierne, der skal bruges til uret og en eventuel 3 V-netdel (tilbehør) med-
følger ikke ved køb.
Betjeningselementer
qProjektionslinse
wTeleskopantenne
eKnap Snooze
rProjektion, displaybelysning
tDisplay
yFrekvensskala
uKnap Alarm
iKnap Hour (time)
oKnap Time
aKnap Min (minut)
sHøjttalere
dProjektionsfokus
fTUNING-indstilling
gLydstyrkeindstilling VOLUME / BUZZ
hEkstern 3V jævnstrømstilslutning til 4,0 mm x 1,7 mm hulstik
jBatterirum
kKontakt projektion tænd/sluk (ON/OFF)
lKontakt alarm tænd/sluk (ON/OFF)
;Kontakt til frekvensvalg FM/AM
2) Opstillingsbøjle (kun model KH 2202)
- 18 -
IB_KH2201_02_AR909_DK.qxd 12.11.2007 13:24 Uhr Seite 18

Tekniske data
Mærkespænding: 3 V
Mærkestrøm: 300 mA
Frekvensområde:
FM (UKW) 87,5 - 108 MHz
AM (MB) 530 - 1600 kHz
Mål:
KH 2201: 14,2 cm x 13,1 cm x 3,8 cm
KH 2202: 17 cm x 8,8 cm x 4,2 cm
Vægt :
KH 2201 og KH 2202: ca. 245 gr.
Driftstemperatur: 5°C - 40°C ved <85% rel. luftfugtighed
Batterier:
(medfølger ikke ved køb)
• Model KH 2201: 1,5 V type Mignon/AA
• Model KH 2202: 1,5 V type Micro/AAA
• 2 x 1,5 V til radiofunktion, displaybelysning og projektion
• 1 x 1,5 V til LCD-uret (der står "CLOCK USE" på rummet)
Netdel:
(medfølger ikke ved køb)
Mærkespænding: DC 3 V (+/- 5%)
Mærkestrøm: min. 300 mA
Hulstik: 4,0 mm x 1,7 mm
Ved brug af en 3 V-netdel skal batterierne lægges ind i rummet "CLOCK
USE". Ellers fungerer uret ikke.
- 19 -
IB_KH2201_02_AR909_DK.qxd 12.11.2007 13:24 Uhr Seite 19

Opstilling
• Stil projektionsuret op på en jævn undergrund.
• Indstil projektionsuret, så projektionslinsen qpeger på en tom flade.
• Kun model KH 2202:
• Klap opstillingsbøjlen 2) ud.
Betjening
Tilslutning til ekstern netdel
Der kan tilsluttes en ekstern netdel til dette projektionsur.
Der må kun anvendes netdele med følgende specifikationer:
Mærkespænding: DC 3 V (+/- 5%)
Mærkestrøm: min. 300 mA
Hulstik: 4,0 mm x 1,7 mm
Obs:
Sørg for korrekt polaritet – både for batterierne og den eksterne strømforsyning.
Vær opmærksom på påskriften på 3V jævnstrømstilslutningen h.
Apparatet bliver beskadiget, hvis polariteten er forkert.
- 20 -
IB_KH2201_02_AR909_DK.qxd 12.11.2007 13:24 Uhr Seite 20
This manual suits for next models
1
Table of contents
Languages:
Other E-Bench Clock manuals
Popular Clock manuals by other brands

LEFF amsterdam
LEFF amsterdam one radio controlled instruction manual

Balance Meteo
Balance Meteo 955214 quick start guide

BENZING
BENZING M3 quick start guide

Emperor Clock Company
Emperor Clock Company 100 M Movement Installation & operating instructions

GlobalTime Electronic
GlobalTime Electronic GTD368 Series Installation and user manual

Amana
Amana WC-2001 instructions