E-matic E4 series User manual


Table of Contents
1.0 Introduction.............................................................................................................................1
1.1 Foreword ....................................................................................................................1
1.2 Package Contents ......................................................................................................1
1.3 Warnings..................................................................................................................... 1
1.4 Computer Requirements.............................................................................................1
1.5 Layout of the Player.................................................................................................... 2
Part I: Computer Operations
2.0 Connecting and Charging the Player......................................................................................4
2.1 Connecting and Disconnecting the Player from Your Computer.................................4
2.2 Charging the Battery...................................................................................................4
3.0 Video Conversion....................................................................................................................5
3.1 Installing Video Conversion Software .........................................................................5
3.2 Converting Video........................................................................................................5
3.3 Using Other Conversion Software ..............................................................................6
3.4 Converting Video in Linux...........................................................................................6
4.0 Copying Files..........................................................................................................................7
4.1 Copying Media Files to your Player............................................................................7
4.2 Using Windows Media Player's® Sync Function ........................................................8
5.0 Expanding the Player's Storage..............................................................................................9
5.1 Preparing MicroSD or “TF” Cards for Use ..................................................................9
Part II: Player Operations
6.0 Basic Operations................................................................................................................... 11
6.1 Turning the Player On and Off.................................................................................. 11
6.2 Understanding and Navigating Menus...................................................................... 11
6.3 Changing the Volume ...............................................................................................13
7.0 Watching Videos...................................................................................................................14
7.1 Playing a Video.........................................................................................................14
7.2 Basic Play Operations ..............................................................................................14
7.3 Video Menu Commands ...........................................................................................15
E4 Series User Manual
Page ii

7.4 File Menu Commands...............................................................................................15
8.0 Listening to Audio..................................................................................................................16
8.1 Playing an Audio File................................................................................................16
8.2 Basic Play Operations ..............................................................................................16
8.3 Audio Menu Commands ........................................................................................... 17
8.4 File Menu Commands...............................................................................................18
9.0 Viewing Pictures ...................................................................................................................19
9.1 Entering My Picture Mode ........................................................................................19
9.2 Basic Play Operations ..............................................................................................19
9.3 My Pictures Menu Commands..................................................................................20
10.0 Shooting Photographs ..........................................................................................................21
10.1 Entering Camera Mode.............................................................................................21
10.2 Basic Photo Shooting Operations.............................................................................21
10.3 Camera Menu Commands........................................................................................21
11.0 Recording Video ...................................................................................................................23
11.1 Entering DV Mode ....................................................................................................23
11.2 Basic Video Shooting Operations.............................................................................23
11.3 The DV Menu............................................................................................................24
12.0 Recording Audio....................................................................................................................24
12.1 Entering Recorder Mode...........................................................................................24
12.2 Basic Recorder Operations.......................................................................................24
13.0 E-Book Operations................................................................................................................26
13.1 Entering E-Book Mode..............................................................................................26
13.2 Basic E-Book Operations.......................................................................................... 26
13.3 E-Book Menu............................................................................................................26
14.0 Listening to the FM Radio.....................................................................................................27
14.1 Basic Radio Operations............................................................................................ 27
14.2 FM Radio Menu ......................................................................................................28
15.0 PC Camera...........................................................................................................................29
15.1 Accessing the PC Camera ......................................................................................29
16.0 Device Settings.....................................................................................................................30
17.0 Flash Games.........................................................................................................................31
17.1 Installing New Games...................................................................................................31
E4 Series User Manual
Page iii

17.2 Removing Games .........................................................................................................32
17.3 Playing Games..............................................................................................................32
Miscellaneous
18.0 Formatting the Player............................................................................................................34
18.1 Understanding File systems......................................................................................34
18.2 Reformatting Your Player in Windows.......................................................................34
19.0 Help ..................................................................................................................................35
19.1 Troubleshooting........................................................................................................35
19.2 For More Help...........................................................................................................35
20.0 Technical Specifications........................................................................................................36
E4 Series User Manual
Page iv

1.0 Introduction
1.1 Foreword
Thank you for purchasing this player. Please read this manual carefully
before using the product. Specifications and software updates are subject
to change without notice. The player pictured in this manual may differ
from yours, but the information in this manual will still apply.
Please visit our website for more information: www.Ematic.us
1.2 Package Contents
Your player comes with the following items:
zThe player
zA Stylus
zA USB cable
zA cleaning cloth
zOne pair of stereo headphones
zThis user manual
zA quick-start guide
1.3 Warnings
zDo not use the product in extreme temperatures, or dusty or wet
environments.
zDo not leave the product in direct sunlight.
zOnly insert or remove microSD/TF cards when the unit is turned off.
zDo not disconnect the player and USB from your computer without first
ensuring a “safe removal” as this may damage the player. See pg. 4.
zDo not open or disassemble the player as this will void the warranty.
zHandle the player with care to prevent its physical damage.
zProtect the player from static discharge.
1.4 Computer Requirements
Virtually any computer and operating system that is able to use USB
storage devices can be used to copy files to and from the player. These
include Windows®, Mac OS X®, and Linux®.
E4 Series User Manual Page 1 of 36

The following, however, is required in order to use the included video
conversion software:
zWindows 2000/ME/XP/Vista
zAn 800MHz or faster CPU
zUSB port
zCD-ROM drive
zAt least 50MB free hard disk space
1.5 Layout of the Player
If the
screen freezes, this
device can be
rebooted by using
a pin to press the
RESET at the back
of the player
E4 Series User Manual Page 2 of 36

Part I: Computer Operations
E4 Series User Manual Page 3 of 36

2.0 Connecting and Charging the Player
2.1 Connecting and Disconnecting the Player from Your Computer
Turn on the player and use the included USB cable to connect it to your
computer. Plug the small end of the USB cable into the player, and the
large end of the cable into the computer.
The first time you connect the player to your computer; your computer will
detect it and automatically install any necessary drivers. When it has
finished, the player will appear in My Computer as Removable Disk or
USB Disk Device.
To safely disconnect the player from your
computer, click the green arrow in the
system tray (the area by the clock on your
task bar), which will display a list of attached
USB devices. Click the player in the list.
Windows will display a message when it is
safe to remove the player.
2.2 Charging the Battery
The player has a built-in battery that must be charged before the player
can be used.
Any USB device that
stores data (e.g. flash drives,
cameras, and media players)
should always be
disconnected from your
computer using this method!
1. Turn on the player.
2. Connect your player to a turned-on
computer via the USB cable.
Charging will begin after using the
stylus to press the battery button.
3. Let the player charge for 4 hours.
E4 Series User Manual Page 4 of 36

3.0 Video Conversion
3.1 Installing Video Conversion Software
Before watching videos on your new player,
they must be first converted to a format
recognized by the player. This conversion
can be done with Windows software that
came included with your player. Follow
these steps to install the software:
This player will only
play videos that have been
converted to a compatible
video format.
1. Place the included CD into your computer's disc drive.
2. Click Start > My Computer, and then click the drive corresponding to
your disc drive.
3. Double-click Setup.exe to perform the installation.
4. Complete the installation as directed by the installation wizard. If
Windows asks you whether to allow the installation, click ALLOW.
3.2 Converting Video
To play videos on your player, you must (a) have some
videos on your computer, (b) convert them to the
format supported by your player if necessary, and then
(c) copy the video files to your player.
Follow these steps to convert video files:
Note: You cannot
convert copy-
protected DVDs.
1. Connect your player to your computer using the USB cable if you wish
to save directly to the player.
2. Run the conversion software by clicking Start > Programs >
Multimedia Player Utilities > Video Converter.
3. Choose a folder in which to save the converted files by clicking the red
icon beside the Output File field.
You can save the converted files to your computer and copy them to
the player later, or save them directly to the player itself. To save the
converted files directly to the player, save to the player's VIDEO folder.
4. Build a list of videos to convert. Click the green icon next to the Input
File field, navigate your folders, and select one or more videos to
convert. (Note that the program will not convert from any video
format.) Once a video is selected, it will be added to a file list at the
E4 Series User Manual Page 5 of 36

bottom of the window. Repeat the Add File process until you have
completed your list of videos to convert.
5. Once the list is complete, click the Begin button ( ) to start
converting and saving the list of videos. A message will appear to
indicate when the list is complete.
3.3 Using Other Conversion Software
While the included software converts numerous formats to the format
required by the player, there may be some that it cannot convert, such as
MP4 files. However, you can find other free software on the Internet that
can do the job. For software that specifically converts MP4 files, follow
these steps:
1. Using your favorite web browser, visit www.download.com.
2. Enter the following search phrase: pazera mp4 avi
3. Click Download Now on the row that reads Pazera Free MP4 to AVI
Converter.
4. Once the download is complete, unzip the file.
5. To run the program, enter the new unzipped folder and double-click
mp4toavi.exe.
6. Run the program and
make sure that when
you convert videos
that you configure a
resolution of 320x240.
3.4 Converting Video in Linux
While the player does not
come with conversion
software for Linux, there
are several free, open
source programs available
in Linux that can do the
necessary transcoding.
The three most powerful commandline encoders are mencoder, ffmpeg.
and transcode. To make things easier, you can use one of the many
available front-ends, although the simplest may be avidemux (pictured).
Regardless of the tool you use, transcode videos as follows:
AVI file container
MP3 audio encoder
Filter: Mix audio down to stereo
Xvid video encoder
Filter: reduce to 320x240
E4 Series User Manual Page 6 of 36

zUse AVI as the file container.
zEncode video using the Xvid codec.
zResize video to 320 x 240 pixels or smaller.
zEncode the audio using an MP3 codec.
zReduce the audio to 2 channels if the original was more, such as 5.1.
There may be other transcoding “formulas” that will produce videos that
are compatible with the player. Also note that there are some formats that
will work without conversion. For a full list of supported formats, see
“Technical Specifications” on pg. 36.
Note: Ematic does not provide support to Linux users; however, you can
get help from the Linux community on the Internet via information sites,
forums, and e-mail lists.
4.0 Copying Files
4.1 Copying Media Files to your Player
To listen and/or view media on your player,
you must first copy the files from your
computer to the player. Before copying files
to your player, you must make certain that
the files you wish to enjoy on your player
are, in fact, supported by the player. See the
full list of supported formats under “Technical
Specifications” on page.36. Read about
video conversion on page. 5.
Follow these steps to copy media files under Windows:
Make certain your
media files are supported by
the player. Media from
iTunes is NOT supported
1. Switch the player on.
2. Connect the player to your computer with the USB cable.
3. Open a window to the player: Double-click My Computer, and then
double-click the drive that corresponds to the player. It will probably be
labeled Removable Disk.
4. Using the same process, open a window to your music, video, or other
media files.
5. Drag-and-drop media files from your computer's window to the
player's window. Media files must be copied to the correct folders:
E4 Series User Manual Page 7 of 36

Music files are copied to the MUSIC folder. You can use subfolders.
Video files are copied to the VIDEO folder.
Image files are copied to the PICTURES folder.
E-book files are copied to the TXT folder.
6. Disconnect the player from the computer using the safe removal
method on page. 4.
4.2 Using Windows Media Player's®Sync Function
If you sync your player with Windows Media Player, follow these steps
when initially syncing the device:
1. Turn the player ON.
2. Connect the player to your computer.
3. Run Windows Media Player and then click the tiny down arrow on the
Sync tab.
4. Click USB DISK DEVICE and then Setup Sync on the submenu.
5. If you want Windows to automatically sync your player, then select
Sync this device automatically, otherwise clear the box, and click
Finish.
6. Highlight the files you want transferred to your device and drag them
into the Sync List column.
7. Click Start Sync to transfer the files. When the process is complete,
you should be able to see the song files on the player through My
Computer.
Note: See the full list of supported formats under “Technical
Specifications” on page 36 to determine which synced songs will be
supported by the player.
E4 Series User Manual Page 8 of 36
5.0 Expanding the Player's Storage
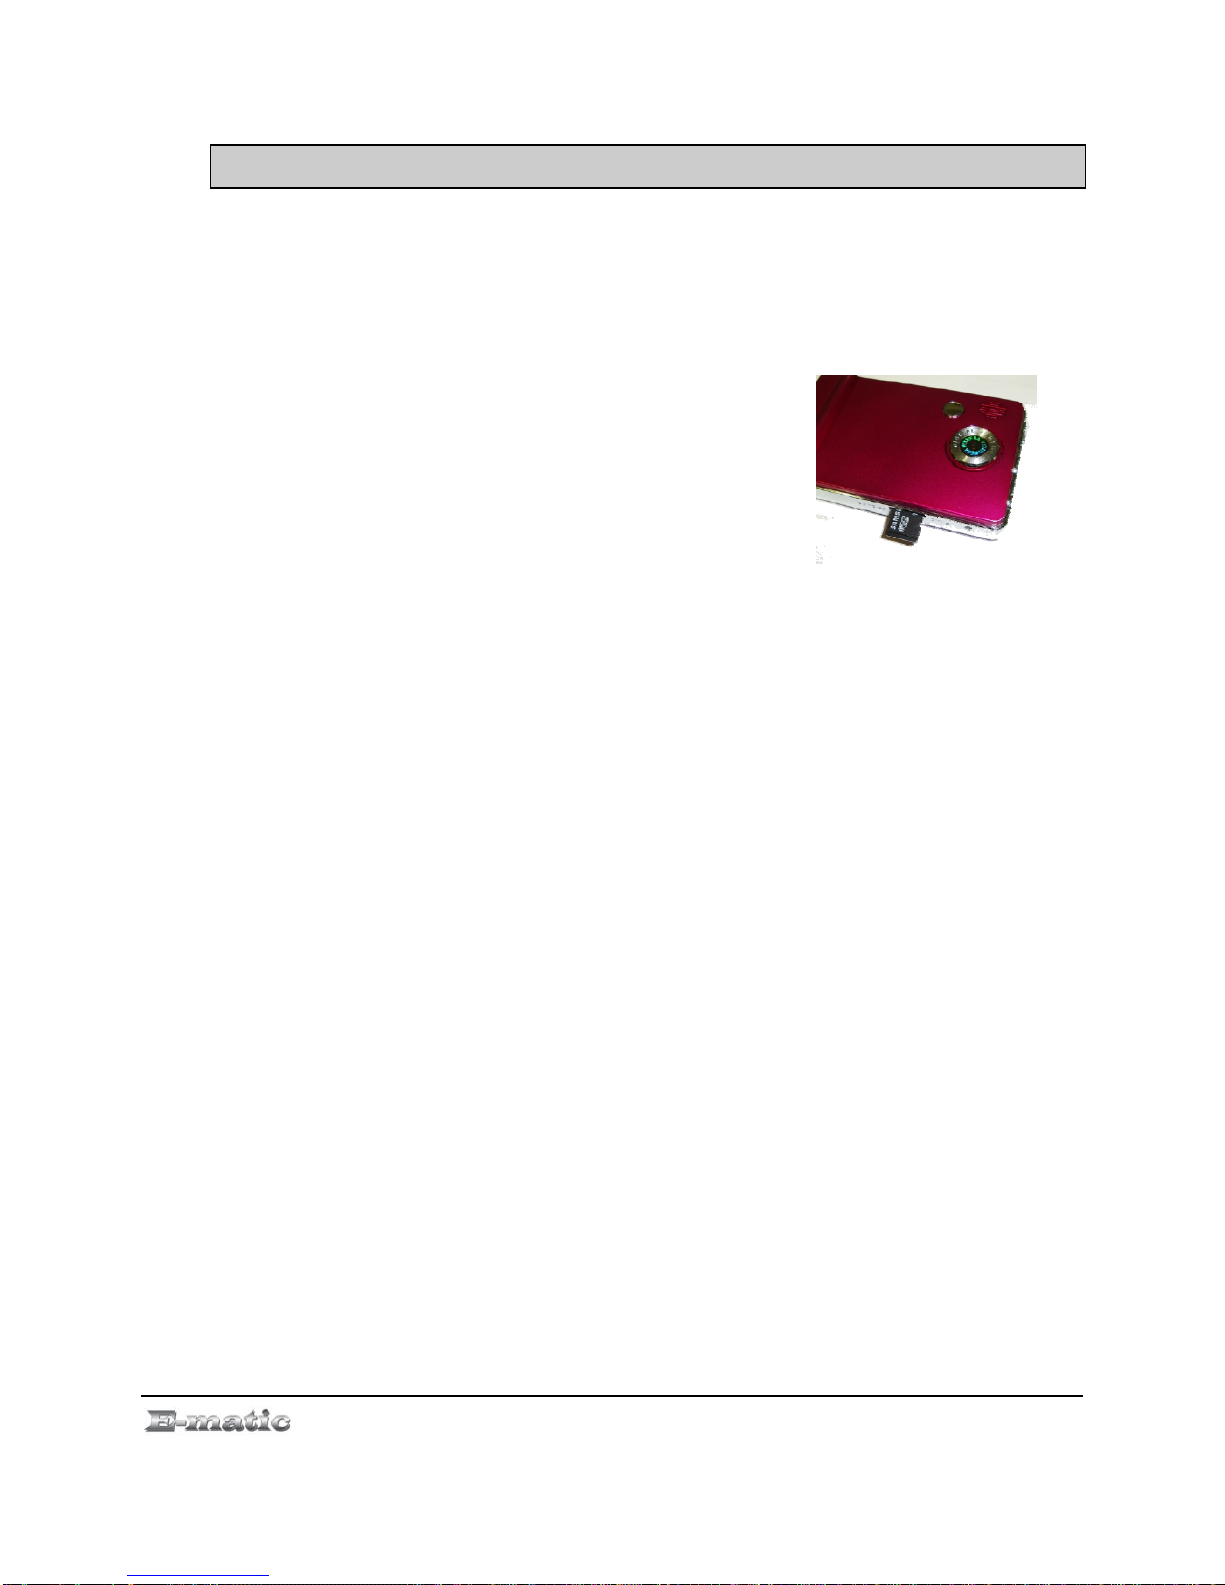
5.1 Preparing MicroSD or “TF” Cards for Use
You can expand the player's capacity by adding a MicroSD card (also
known as a TransFlash or TF card) with a capacity of up to 8GB. First,
however, it must be prepared for use by the player. Follow these
instructions to prepare the card:
1. Turn the player off.
2. Insert a microSD/TF card into the player.
3. Turn on the player.
4. Select Setting from the Mode Selector.
5. Select Player Configure from the menu.
6. Select Format Card from the next menu. The function will create the
necessary folders.
7. Use the USB cable to connect the player to your computer.
8. Access your MicroSD card through My Computer.
When in Video, Camera, and other modes, you can access files on your microSD
card. If the card is inserted there will be a “Card” directory on each menu, if you
cannot see the “Card” directory, slide the bottom menu (where it displays Songs, Dir
List, Albums, etc…) to left or right until you see it.
E4 Series User Manual Page 9 of 36

E4 Series User Manual Page 10 of 36
Part II: Player Operations

6.0 Basic Operations
6.1 Turning the Player On and Off
On: To turn the player on, move the player's
on/off switch to the right, and then hold the
button until the display turns on.
Or press the CAMERA button until the display
turns on.
Off: In any working mode, hold the CAMERA
key, or move the player's on/off switch to the
right, and then hold the button until the display turns OFF.
By default, if the player is left idle for three minutes, it will turn itself off.
Player can be configured to turn off after a different duration, or not at all.
(See “Device Settings” on page 30 )
The unit will also turn itself off if the battery becomes too weak.
Pay special
attention to whether these
instructions indicate whether
to press or press and hold a
button!
6.2 Understanding and Navigating Menus
The Mode Selector
The player does many things, including playing audio and video media
and shooting photos or video. To enter any of these modes, call up the
Mode Selector by pressing the EXIT button. When the player is turned on,
it displays the Mode Selector. Browse the modes with the stylus by
swiping your finger left to right and vice versa, and then select a mode
with the stylus or your finger by double tapping the screen.
E4 Series User Manual Page 11 of 36

The Mode Selector can be changed to a small icon style in the Settings
mode. (See “Device Settings” on page. 30).
File List
Once you have selected a review mode, (My Music, My Pictures, Video
Player, E-Book), a list of your files will appear. Highlight files using the
stylus, and select a file by double-tapping the stylus to screen.
Menus
Whether you are still in the file list, or looking/listening to a file, you can
display a menu of file and play options by using the stylus to press the
screen button (EQ, repeat or Volume).
E4 Series User Manual Page 12 of 36

In any menu or list, you can use the stylus to navigate the list, and select
with a press to the screen button. The same is true if you descend into
submenus.
Sometimes the player will display a dialog box, asking you to confirm a
change. Use the stylus to click screen button to confirm.
To back up to a previous menu, press the Exit button on the screen.
In Camera and DV Mode, the screen display in full and requires pressing
the EXIT Button (“M”).
In all viewing/listening modes, you can return to the Mode Selector by
pressing the EXIT button.
6.3 Changing the Volume
In Video Player, My Music, or Radio mode, the volume is changed as
follows:
E4 Series User Manual Page 13 of 36

1. Use the stylus to slide the VOL bar button to change the volume.
2. In Video Mode full screen playback, double click the middle of the
screen and the VOL bar will show up,
7.0 Watching Videos
7.1 Playing a Video
Use the Mode Selector to select the Video Player mode, and then select a
video.
This player will only
play videos that are or have
been converted to a
compatible video format. See
“Technical Specification” on
pg.36, for a list of supported
formats. See page. 5 for Video
Conversion.
7.2 Basic Play Operations
E4 Series User Manual Page 14 of 36

zHighlight files using the stylus, and select a file by double clicking the
stylus to the screen
zIn Video Mode full screen playback, double click the middle of the
screen and the previous, play and next buttons will show up. Use the
stylus to control Fast-forward or rewind, Play or Pause, and also
change the volume.
7.3 Video Menu Commands
In the video list screen, highlight a play list with the stylus, and then click
the file button . A dialog box shows up to confirm removal of a file.
You can select a repeat mode, by double clicking on full screen video play
to have the control box appear. Use the stylus to click your option on the
screen.
7.4 File Menu Commands
When you are viewing a file list, you can select more list option by using
stylus to slide the screen bottom folder icons, including access microSD
E4 Series User Manual Page 15 of 36

card content, this way you can switch between the files on the Local
Memory or Card Memory.
Press the EXIT button to return to the
Mode Selector. This player will only
exit by pressing the EXIT
button in video play mode. No
screen button provided for exit
to Mode Selector.
8.0 Listening to Audio
8.1 Playing an Audio File
Use the Mode Selector to select the
My Music mode, and then select an
audio file to listen to.
8.2 Basic Play Operations
E4 Series User Manual Page 16 of 36
Other manuals for E4 series
1
Table of contents
Other E-matic Portable Multimedia Player manuals


