Macpower & Tytech R2-3500 User manual

EN
R2-3500
Digital Media Player/Recorder
User Manual
May 26, 2009 - v1.0
Firmware: 20090512
The diagrams and images contained in this document may not fully
represent the actual product and are there for illustration purposes only.

R2-3500 Media Player/Recorder Table of Contents
Table of Contents
1Getting Started........................................................................................................................ 1
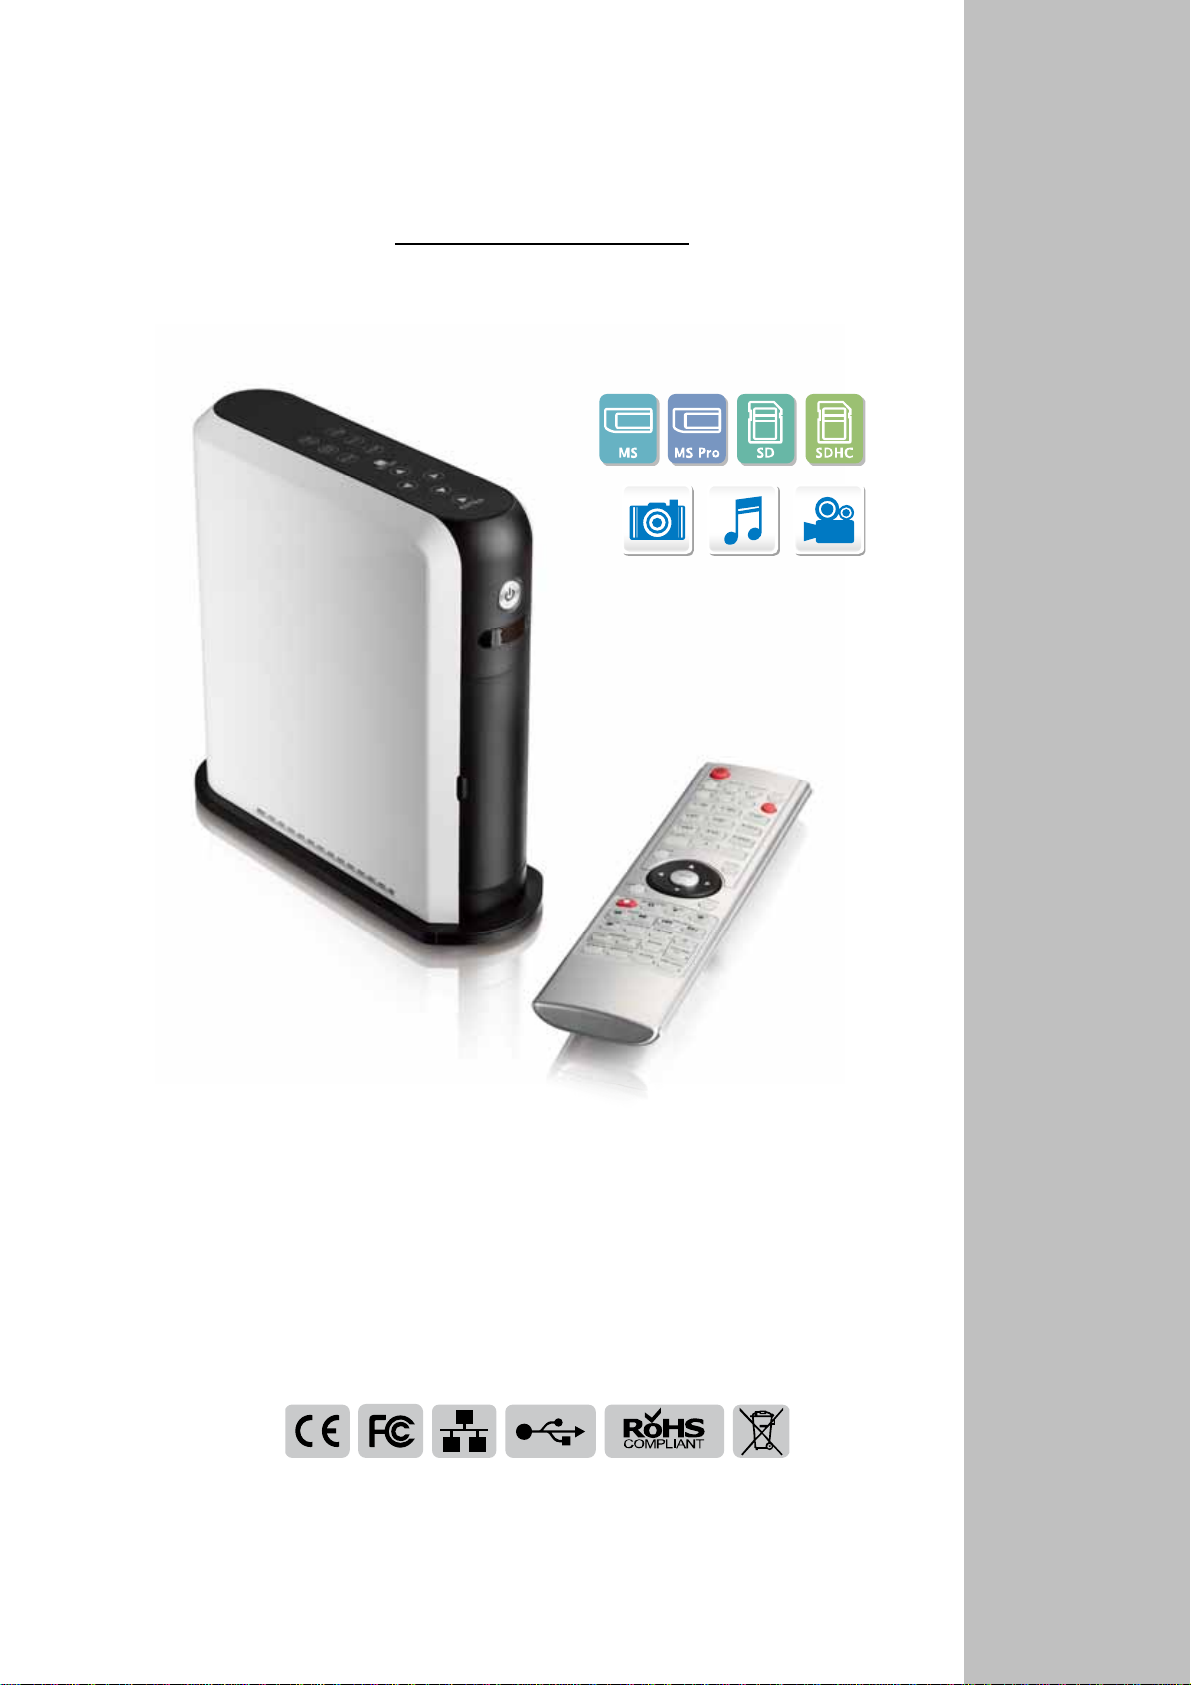
1.1 About this Device .............................................................................................................. 1
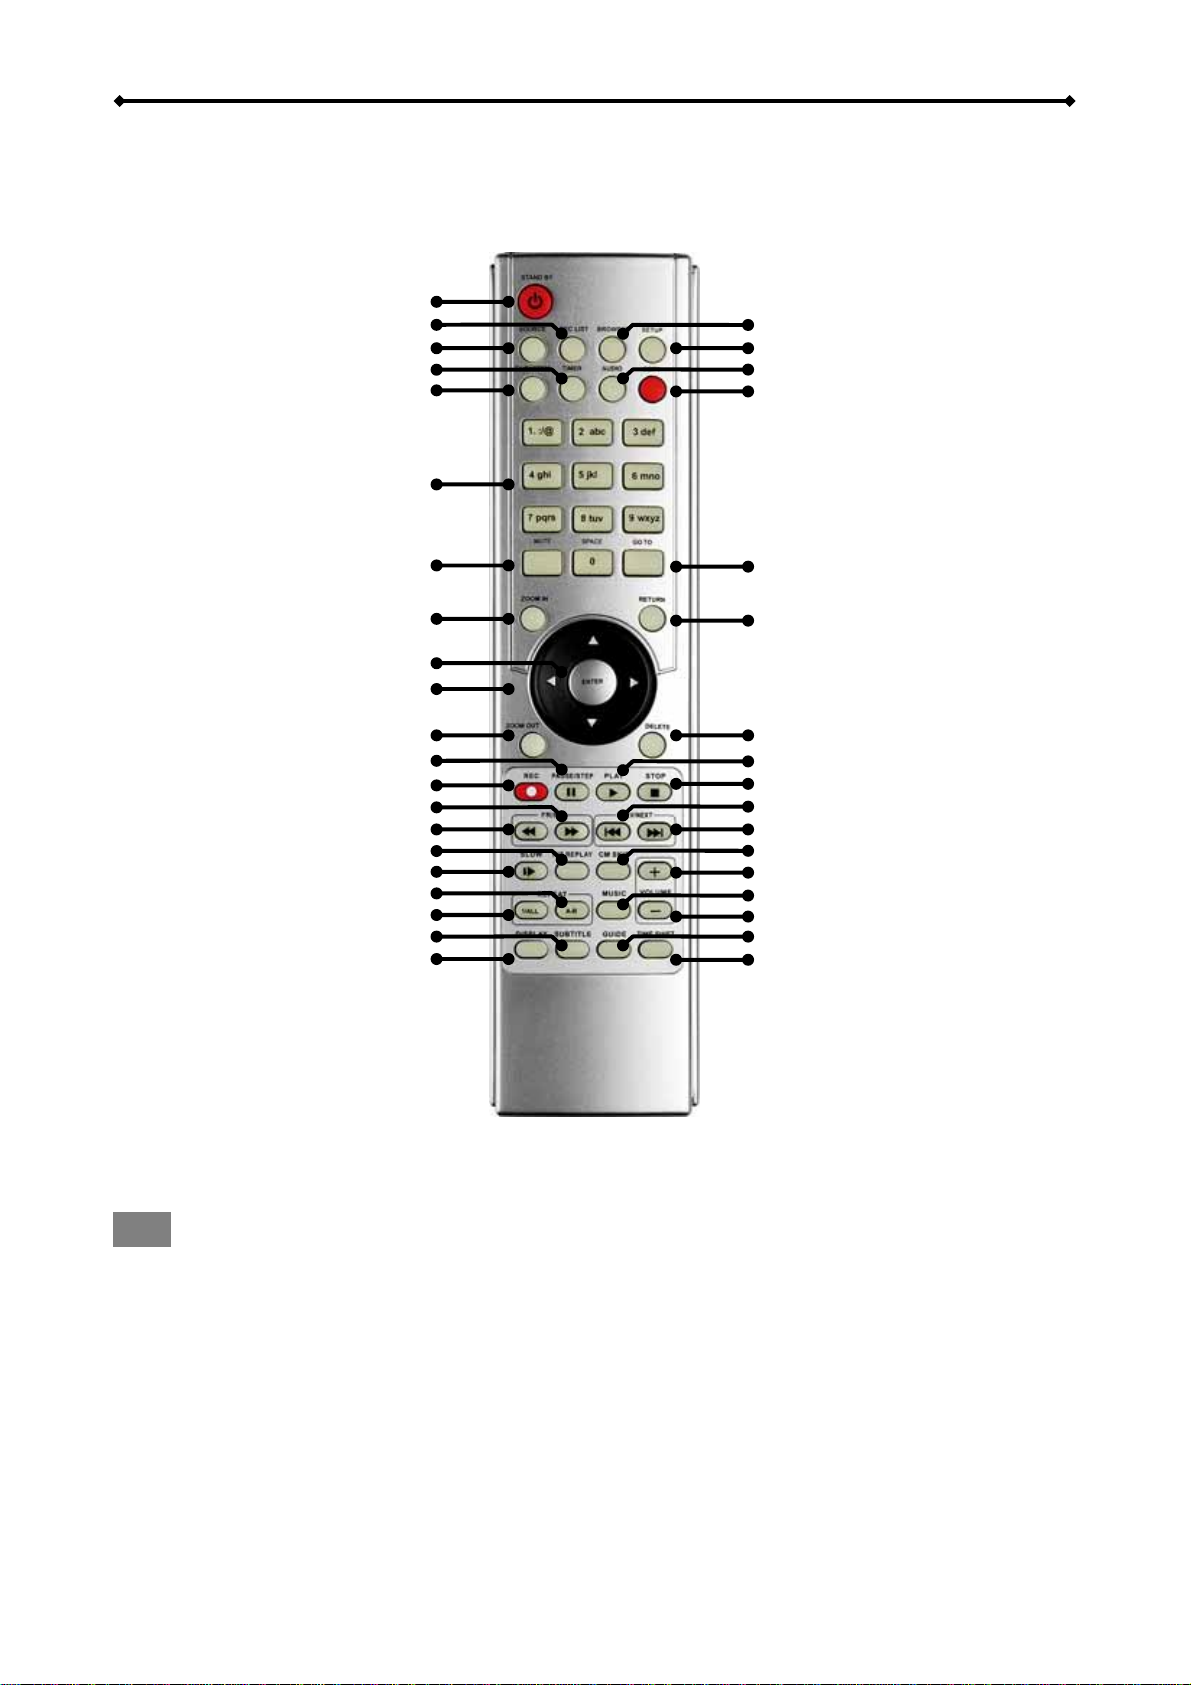
1.2 Detailed View .................................................................................................................... 2
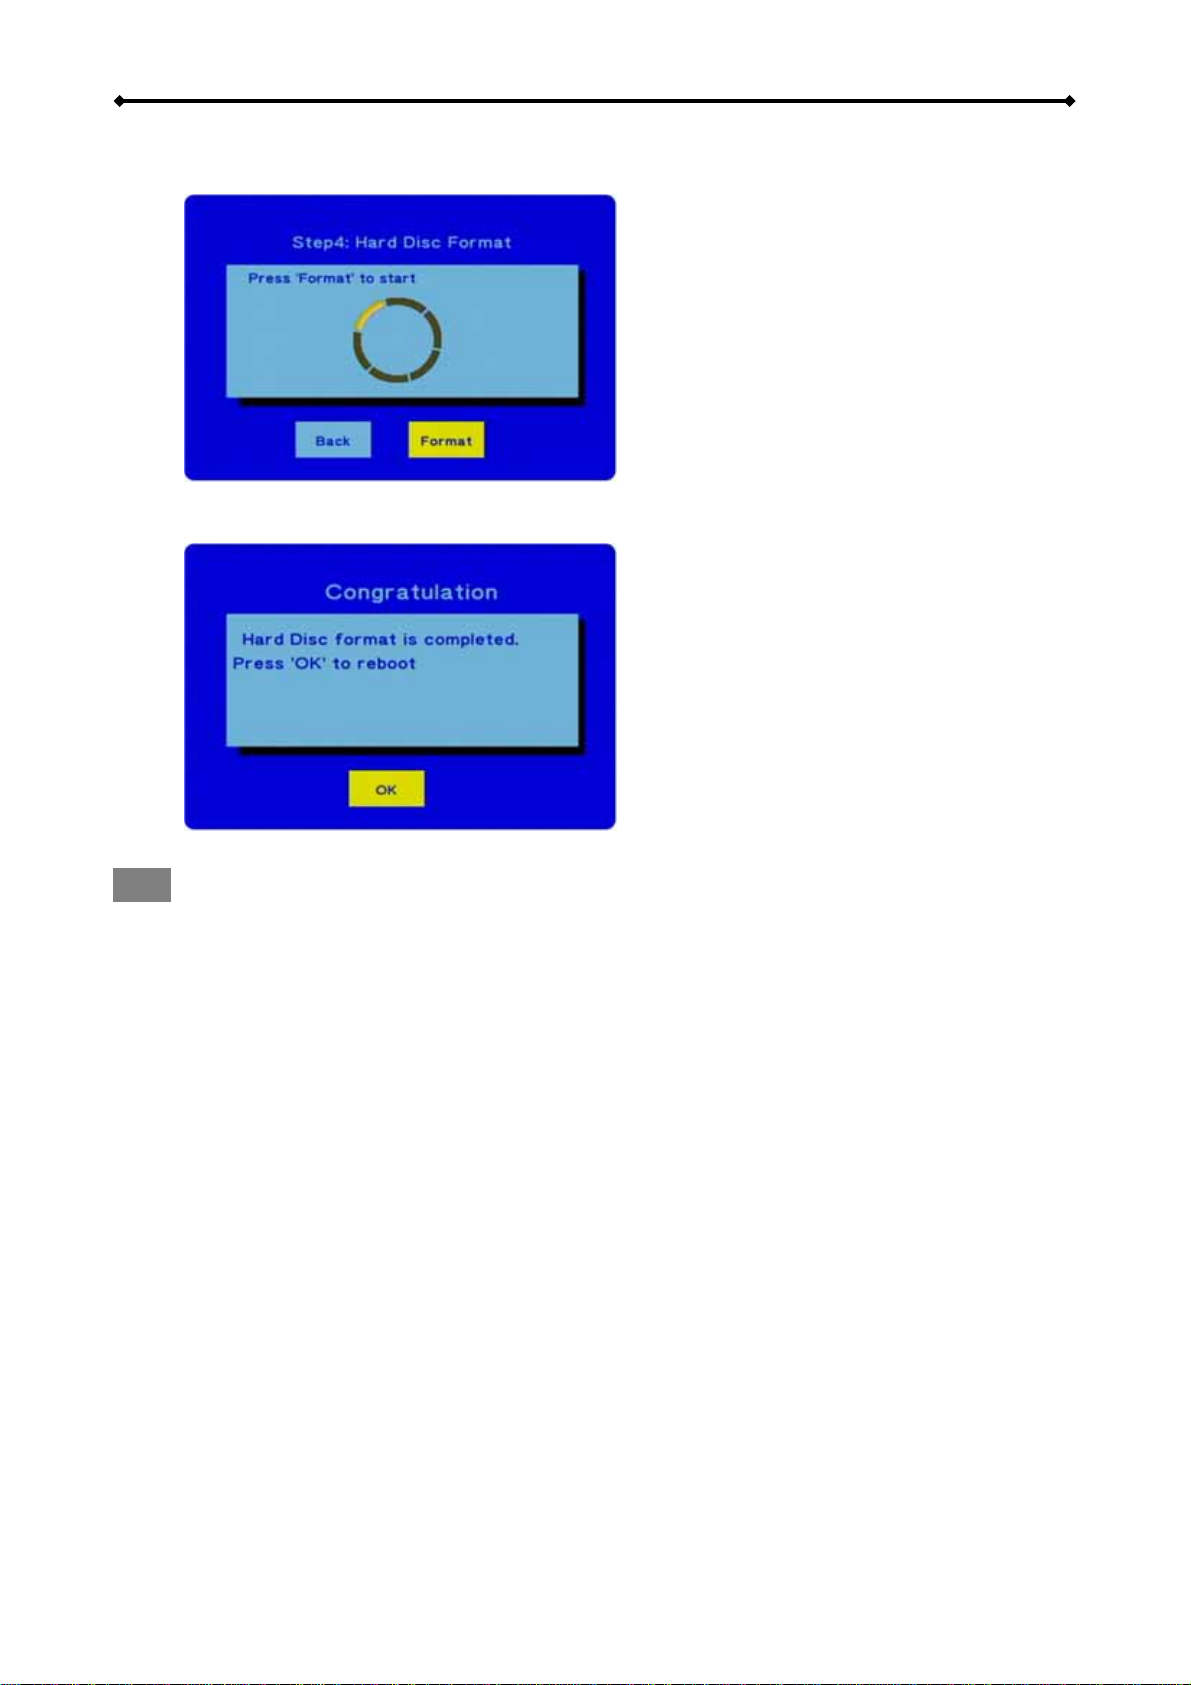
1.3 Before Use ........................................................................................................................ 6
2Basic Operation....................................................................................................................... 9
2.1 Turning on the Power........................................................................................................ 9
2.2 About the Main Screen...................................................................................................... 9
2.3 Recording (Video In) ......................................................................................................... 9
2.4 Transferring Files (File Copy).......................................................................................... 10
2.5 Playing back Media Files (Browser)................................................................................ 10
2.6 Setup Menu (Setup)........................................................................................................ 11
2.7 Scheduled Recording (Timer REC)................................................................................. 11
3Examples ............................................................................................................................... 12
3.1 Video In........................................................................................................................... 12
3.2 File Copy......................................................................................................................... 14
3.3 Browser........................................................................................................................... 16
3.4 Timer REC.......................................................................................................................22
4Setup Menu............................................................................................................................ 25
4.1 Audio............................................................................................................................... 25
4.2 Video............................................................................................................................... 25
4.3 REC................................................................................................................................. 26
4.4 Network........................................................................................................................... 27
4.5 System ............................................................................................................................ 28
4.6 Photo............................................................................................................................... 29
5Appendix................................................................................................................................ 30
5.1 Specifications..................................................................................................................30
5.2 Precautions .....................................................................................................................31
5.3 Trademarks..................................................................................................................... 32
5.4 Important Notices............................................................................................................ 32
5.5 FAQ................................................................................................................................. 32

R2-3500 Media Player/Recorder Getting Started
1 Getting Started
1.1 About this Device
The R2-3500 is a digital media player that can be connected to the TV and playback media files
from USB drives, its internal hard drive, media cards and network folders, as well as record videos
directly to its internal SATA hard drive. It supports high definition video playback, offers digital
HDMI output and features both scheduled recording and time shifting.
Page 1

R2-3500 Media Player/Recorder Getting Started
1.2 Detailed View
1.2.1 Front
Standby button
LED indication & infrared receiver
Card reader slot
(SD/SDHC/MS/MSPro)
USB#1 host port
Composite analogue
audio & video input
LED Indication
Power LED; lights up blue when the power is ON, turns purple during video recording and turns
off when system is in standby mode.
Standby LED; lights up orange when the system is in standby mode.
LAN LED; lights up yellow during network activity.
Card Reader LED; normally green but turns off when a card is inserted into the card reader.
1.2.2 Rear
Ethernet port
USB device port
USB#2 host port
HDMI digital audio/video output
SPDIF digital audio output
Composite analogue
audio/video output
YPbPr component video output
Power receptacle
Page 2

R2-3500 Media Player/Recorder Getting Started
1.2.3 Top
Pause/Step TV System
Mute
Card Copy
Home (main screen)
Record
Stop
Arrow keys for navigation
Play/Enter
Page 3

R2-3500 Media Player/Recorder Getting Started
1.2.4 Remote Control
For a detailed description of the functions for each button, please refer to the table on the next
page.
Standby
Rec List (context menu) Browser (file browser)
N/A Setup Menu
Timer (scheduled recording) Audio (audio track selection)
TV System (video output) Copy Menu
Numeric key pad
Mute
GoTo (jump to chapter/time)
Zoom In (photos/videos) Return to previous screen
Enter
Arrow keys for navigation
No function No function
Pause/Step Play
Recording Stop
Fast Forward Previous File/Page
Fast Reverse Next File/Page
Instant replay of previous 10sec CM Skip (skips 30 seconds)
Slow Motion (¾, ½, ¼, 1/8, 1/16) Volume Up
Set A-B repeat points
Music
Repeat (chapter, title, off) Volume Down
Subtitles (video subtitles) Guide Menu
Display file/status information Time Shift
Note
Insert two triple A batteries (AAA) before using the remote control the first time.
Page 4

R2-3500 Media Player/Recorder Getting Started
Button Function
Power Turns system ON or puts it into stand-by mode.
Source N/A (only one source available, Video1 = Composite audio/video)
Rec List Opens context menu to rename or delete the selected folder/file in the
browser menu. Opens context menu to add, remove and delete
shortcuts under My_Shortcuts for shared folders.
Browser Jumps to browser menu.
Setup Opens setup menu.
TV System Changes TV output (press multiple times for different outputs).
Timer Jumps to recording schedule (Timer REC).
Audio Changes audio track.
Copy Jumps to file copy menu.
Mute Mutes audio sound.
Go To Opens search window to jump to a specific title, chapter or time during
video playback.
Zoom In Zooms in during photo display (2x/4x/8x/16x) or video playback
(2x/3x/4x/8x).
Zoom Out N/A
Return Returns to previous screen and moves up by one directory.
Delete N/A
Rec Starts or stops recording.
Pause/Step Pauses playback and plays frames step by step.
Play Starts or continues playback.
Stop Stops playback.
FR/FF Fast reverse or fast forward video playback.
Prev/Next Previous or next file/page.
Slow Slow motion playback for videos.
Ins Replay Jumps 10 seconds back to replay previous scene.
CM Skip Jumps 30 seconds forward to skip commercial.
1/All Sets repeat mode to Chapter, Title or Off.
A-B Sets A-B points for repeat mode.
Music N/A
Volume Increases or decreases volume.
Display Displays time and other information during playback, time shifting and
recording.
Subtitle Turns external subtitle (SRT) ON or OFF.
Guide Displays main screen.
Time Shift Activates time shift function and starts recording. Press Play to start
playback and pause to temporarily pause playback. Time shift
recording continues until the Stop button is pressed.
Page 5

R2-3500 Media Player/Recorder Getting Started
1.3 Before Use
1.3.1 Hard Drive Assembly
The internal SATA hard drive is not required for the basic functions of the R2-3500 media player
but it is recommended to install a drive in order to make use of all the functions this device offers
and also have a convenient storage place to store your media files.
1. Remove the two screws from the bottom, push the side cover from the front to slide it off
the back and lift it off the case. Remove the screws for the metal shielding and take it off.
2. Remove the screws for the HDD bracket and lift it out of the casing. Install the hard drive,
mount it to the HDD bracket, connect the cables and then replace the assembled drive in
the casing.
3. Replace the metal shielding and fasten the screws. Align the side cover with the casing,
slide it into place and fasten the screws to finish the assembly.
Page 6

R2-3500 Media Player/Recorder Getting Started
1.3.2 Formatting the Hard Drive
Formatting the internal drive is necessary in order
for the R2-3500 media player to access the drive
and record videos or stores files on it.
Note
Formatting the hard drive will erase all data on it! If
you have some files on it already, make sure to back
them up to a different drive first, before you start the
formatting process.
1. When a new hard drive has been installed, a warning message that the drive is about to be
formatted will pop-up automatically after the system is turned on. If the drive has already
been formatted but you would like to change the partitions, go to the System category in the
Setup menu and select HDD Format. Confirm the warning message by pressing OK.
2. Use the up and down keys to adjust the size of the partitions. Select a large enough FAT32
partition to store all your future recordings. The NTFS partition will be read only for the
media player but more suitable for file exchange when connected to a computer via USB.
When done, press the Next key to continue.
Page 7

R2-3500 Media Player/Recorder Getting Started
Page 8
3. Confirm the next dialog and start formatting by pressing Format. During the process, do not
turn off the power or interrupt the device in any other way.
4. Once the formatting has completed, a new Congratulation dialog will appear. Press OK to
close it and exit the disk utility. The device will restart automatically.
Note
The R2-3500 media player will be able to write to the first FAT32 partition only. NTFS partitions
can only be used to read and play files.
1.3.3 Supported Devices
Hard Drive: 3.5" SATA-I or SATA-II HDD (1.5Gb/s or 3.0Gb/s), 20GB - 1TB
Media Cards: SD, SDHC, MS, MS Pro
USB Devices (mass storage class): USB hard drive, USB flash drive, USB card reader

R2-3500 Media Player/Recorder Basic Operation
2 Basic Operation
2.1 Turning on the Power
Connect the power supply to your R2-3500 media player and plug it into the wall socket. The
device will start up automatically. During the start up, a splash screen will be shown and as soon
as it’s ready, the main screen with further options will appear.
If you do not see the main screen after about one minute and your display stays black, check the
video connection and make sure the correct input channel has been selected. To change the video
output on the R2-3500 media player, press the TV System button on your remote control until you
see a signal.
When the device is inactive for more than 5 minutes, the screen saver will turn on. To turn it off,
press the power switch on the device or use the power button on the remote control.
Note
When not in use for longer periods of time, it is recommended to turn off the device completely by
removing the power supply from the wall socket.
2.2 About the Main Screen
After turning on the power and during the start up
procedure, a splash screen will be shown. As soon
as the media player is ready, the main screen will be
displayed.
Use the arrow buttons to highlight a menu and the
Enter button to select it.
Note
To get back to the main screen, press the Guide
button on your remote control or the Home button on
the media player’s touch panel.
2.3 Recording (Video In)
To start recording and using the time shift function, select the Video In menu. The display will
change and show the signal from the device that is connected to the AV in ports, which are located
under the front panel. The R2-3500 media player can record from a VCR, set top box, DVD player
or camcorder as an example. To return to the main screen, either press the Return button or the
Guide button. Recordings will be stored under HDD1 or USB in “My Recordings”.
[Display] Press the Display button to display the destination drive where the recordings are going
to be stored, the current time and the input source.
[Rec] Press the Rec button to start recording. Press it multiple times to select one of the pre-set
recording times in minutes (30/60/90/120/180/240/Off). Press the Stop button to stop recording.
[Time Shift] Press the Time Shift button to activate the time shift function. A few seconds after
starting it, a navigation bar will appear and you can use Play and Pause to playback. Press the
Display button to hide the navigation bar and use the Stop button to stop the recording and time
shift function.
Page 9

R2-3500 Media Player/Recorder Basic Operation
2.4 Transferring Files (File Copy)
To enter the file copy menu, select File Copy from
the main screen or press the Copy button on your
remote control. This function allows you to copy files
back and forth between different devices, such as
attached USB drives, media cards, the internal
SATA drive and shared network folders.
folders.
To copy files, select a source from where to copy
and a destination where the files are to be copied.
[Up/Down] Use the up and down buttons to
navigate the different directories and
[Enter] Press the Enter button to open the selected folder or confirm a command.
[Left/Right] Use the left and right buttons to continue to the next step or go back to the source
[Return] Press the Return button to cancel and return back to the beginning of the file copy.
[Play] Press the Play button to select the file(s) or folder to be copied. A tick will be placed beside
the selected file.
Note
The destination drive must be formatted using the FAT32 file system. The NTFS file system can
only be used as source but not as destination. The media cards can be found under USB devices.
2.5 Playing back Media Files (Browser)
To enter the browser mode, select Browser from the
main screen or press the Browser button on your
remote control. This function allows you to access
different devices such as attached USB drives,
media cards (see USB), the internal SATA drive and
shared network folders to browse for and display
your media files.
By default, it will show all types of media files. To
sort it by media type, select Music to only show
audio files, select Photo to only show images and
select Movies to only show videos.
[Left/Right] Use the left and right buttons to select one of the pre-set filters, in order to only display
certain media types.
[Up/Down] Use the up and down buttons to select the folders and files.
[Enter/Play] Press the Enter button to open the selected folder and the Play button to start
playback for the selected file.
[Return] Press the Return key to go up by one directory and return to the previous screen.
Page 10

R2-3500 Media Player/Recorder Basic Operation
Page 11
2.6 Setup Menu (Setup)
To configure the settings of the R2-3500 media player and for more details, refer to chapter 4.
2.7 Scheduled Recording (Timer REC)
To open the recording schedule, select Timer REC
from the main screen. This function allows you to
create, edit and delete recording schedules as well
as view the current status and history of the
recordings.
Select Edit to create new schedules, select delete to
remove already scheduled programs, select Status
to view the current status of the scheduled
recordings and select history for an overview of the
previous recordings.
[Left/Right/Up/Down] Use the navigation buttons to select the functions and different options.
[Enter] Press the Enter button to confirm and select.
[Return] Press the Return button to cancel and return to the previous screen.

R2-3500 Media Player/Recorder Examples
3 Examples
3.1 Video In
The R2-3500 media player can record from a VCR, set top box, DVD player or camcorder as an
example but it will only record whatever the current input on its AV in connectors is. For the
recordings to work, make sure that the device connected to the AV in port is turned on and playing
or the correct channel on your TV is selected. If there is no input, the recording will fail. If the wrong
channel is selected, it will also record the wrong channel.
3.1.1 Recording
1. Select Video In from the main screen.
2. Press the REC button on your remote control to start recording.
3. Press the REC button multiple times to select one of the pre-set times.
4. Press the Stop button to stop recording.
Page 12

R2-3500 Media Player/Recorder Examples
3.1.2 Time Shift
1. Select Video In from the main screen.
2. Press the Time Shift button on your remote control to start the time shift function. The time
shift function will be initialized and the recording starts.
3. Once the recording message disappears, you can use the Play, Pause and FF/FR buttons
for playback control just like when watching recorded videos.
4. Press the Display button to hide and show the navigation screen.
S
Viewing Point Start Time / Current Time
tart Time Current Time
Viewing Point Time Shift Buffer
5. Press the Stop button to stop the time shift function.
Page 13

R2-3500 Media Player/Recorder Examples
3.2 File Copy
3.2.1 Transferring files from USB to HDD
1. Select File Copy from the main screen or press the Copy button on the remote control.
2. Use the Up and Down buttons to select the source and press Enter to confirm it. Use the
Up and Down buttons to select the destination and press Enter to confirm it.
3. Use the Up/Down and Enter buttons to locate and highlight the file. Press the Play button to
place a tick behind the selected file. Repeat this step for any other files that you also would
like to copy.
Page 14

R2-3500 Media Player/Recorder Examples
4. Press the Right button and select the destination.
5. To create a new directory, select NEW-DIRECTORY and press Enter. Use the virtual
keyboard to name the new directory and select OK to create the new folder.
6. Once the destination has been defined, press the Right button to continue. Confirm the
dialog by selecting OK and pressing Enter.
7. The file(s) will be copied to the destination. Once finished, confirm the dialog by selecting
OK to open the Browser menu or No to continue copying files.
Page 15

R2-3500 Media Player/Recorder Examples
3.3 Browser
3.3.1 Playback Media Files
1. Select Browser from the main screen or press the Browser button on the remote control.
2. Use the Right and Left buttons to filter the content by media types (Music/Photo/Movies) or
select All to display all types.
3. Use the Up/Down and Enter buttons to locate the media file(s).
4. For images and videos, a small preview is shown. To view it full screen, press the Enter or
Play button to start playback and Stop to return to the browser window.
5. Press the Return button to go up one directory and return to the previous screen.
Page 16

R2-3500 Media Player/Recorder Examples
3.3.2 Browse the Local Network
1. Go to the Network category in the Setup menu and make sure the device is configured
correctly and has successfully acquired an IP address.
2. Select Browser from the main screen or press the Browser button on the remote control.
3. Select NET and press Enter.
4. In this example, both the computer with the shared folder and the NAS belong to
Workgroup, so select Workgroup and press Enter to browse for the shared folders in the
group Workgroup. This only works for folders on the local network.
Page 17

R2-3500 Media Player/Recorder Examples
5. Select a shared folder, in this example the Taurus LAN NAS and press Enter to access it.
6. Select one of the available shares and press Enter to access it.
7. If required, enter an ID and password to login. Select the ID and press Enter to open the
virtual keyboard in order to enter your user ID. Confirm it by selecting OK. Repeat the same
steps for the password. If you plan on accessing this folder frequently, you can add it to My
Shortcuts, making it easier to quickly find and access it again the next time, otherwise
simply click OK to confirm and login.
8. After successfully connecting to the shared folder, you can browse the media files the
same way as you would browse the files on the internal SATA hard drive.
Page 18
Table of contents
Other Macpower & Tytech Portable Multimedia Player manuals