E-Z FRAME 6X6 Chicken Coop & Run User manual

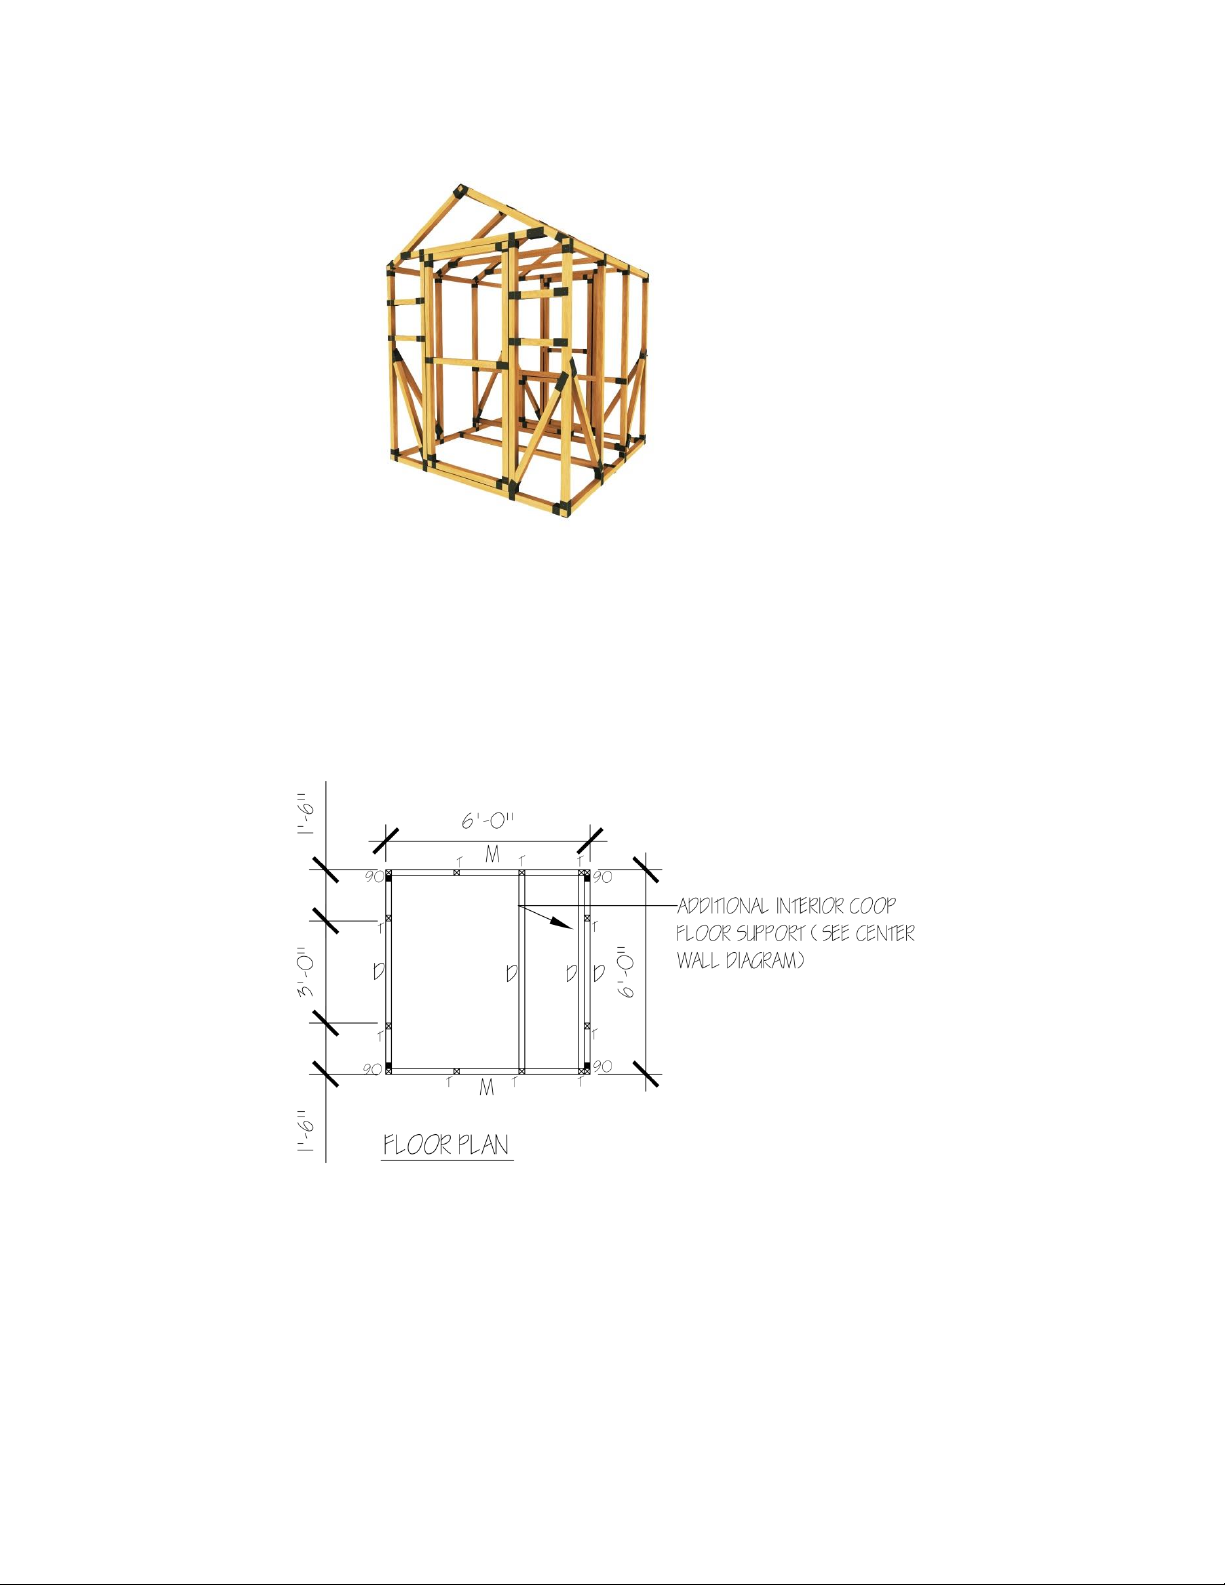
6X6 E-Z Frame Chicken Coop & Run Assembly Instructions
This kit includes:
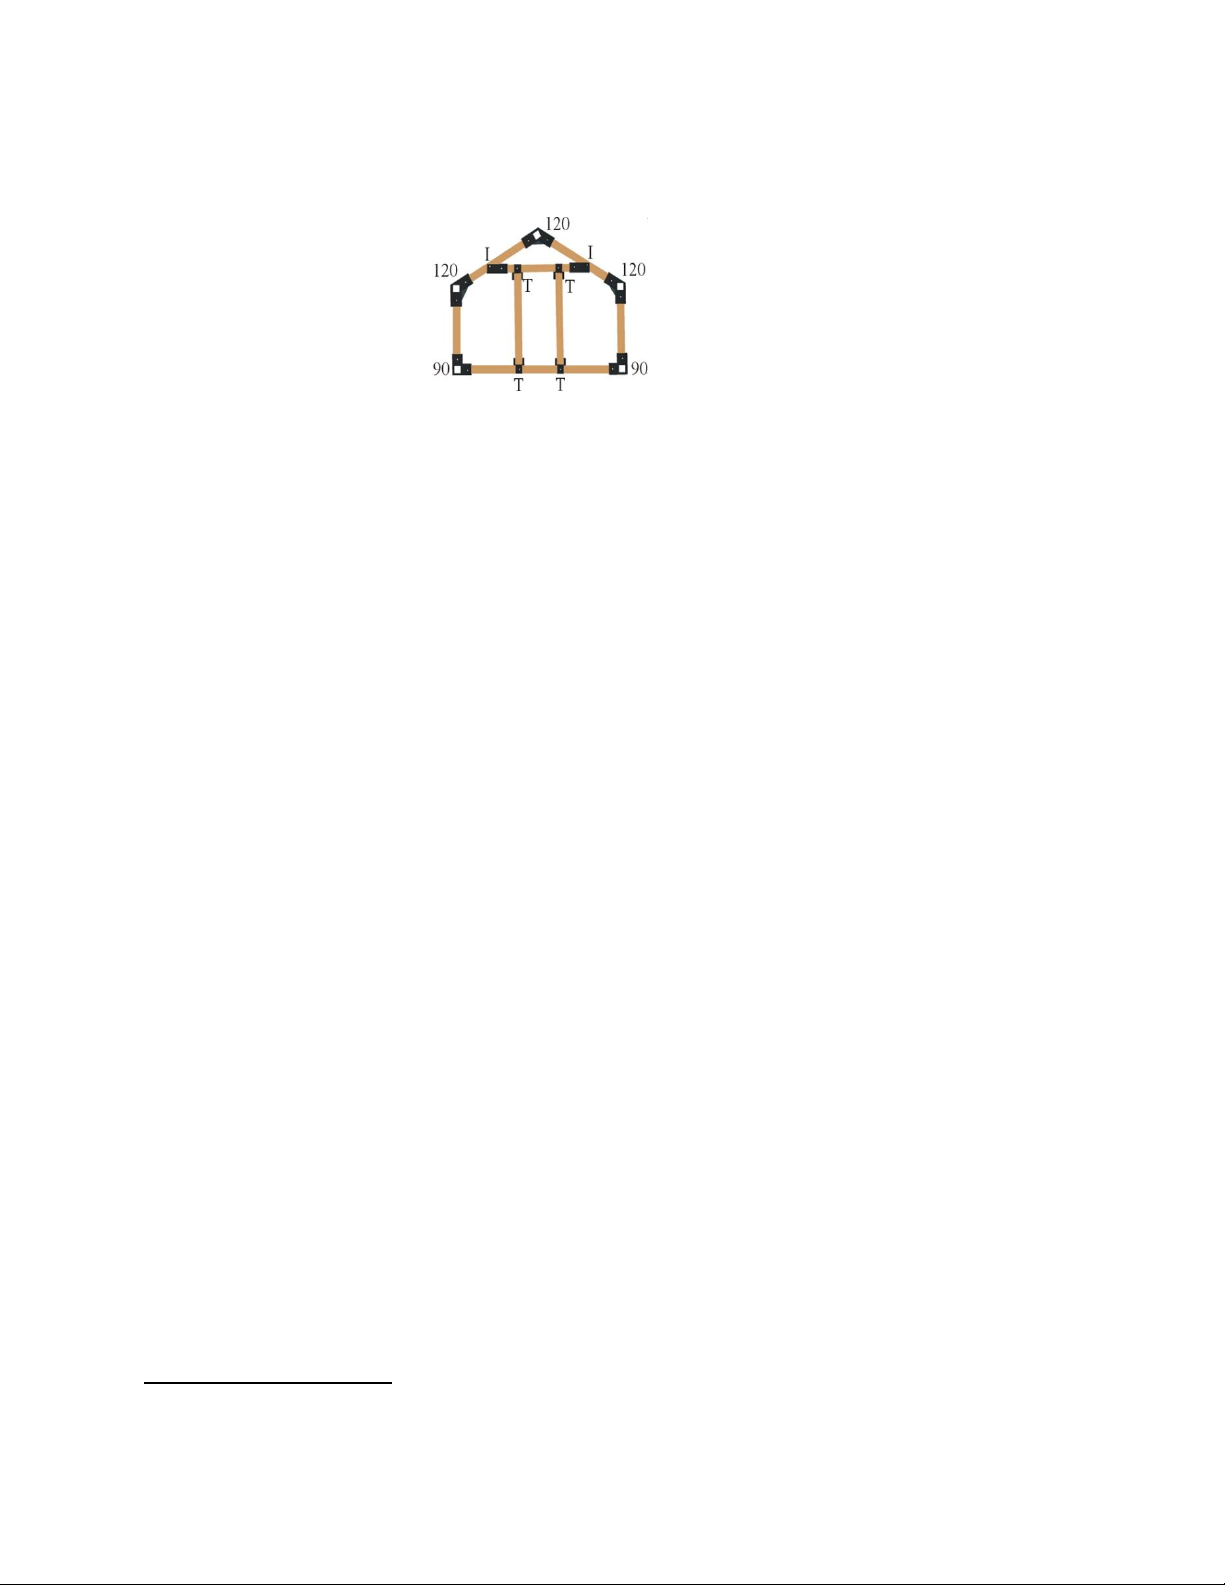
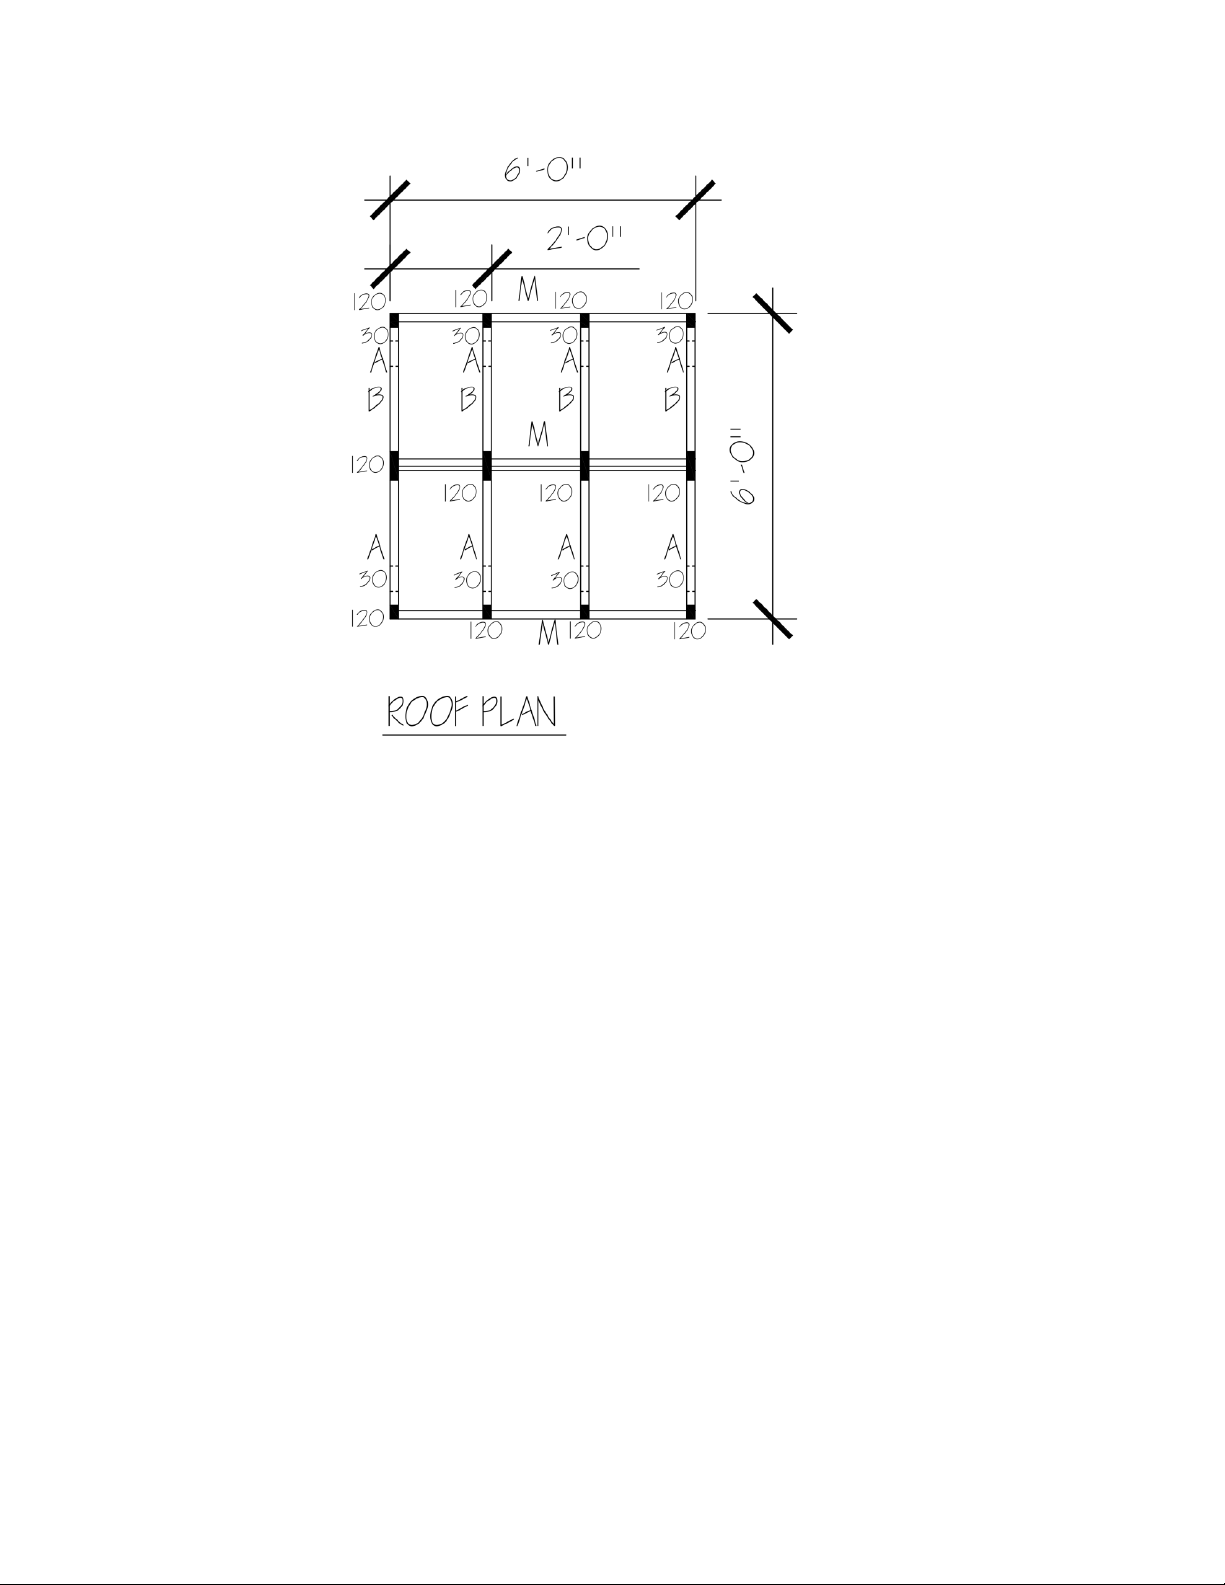
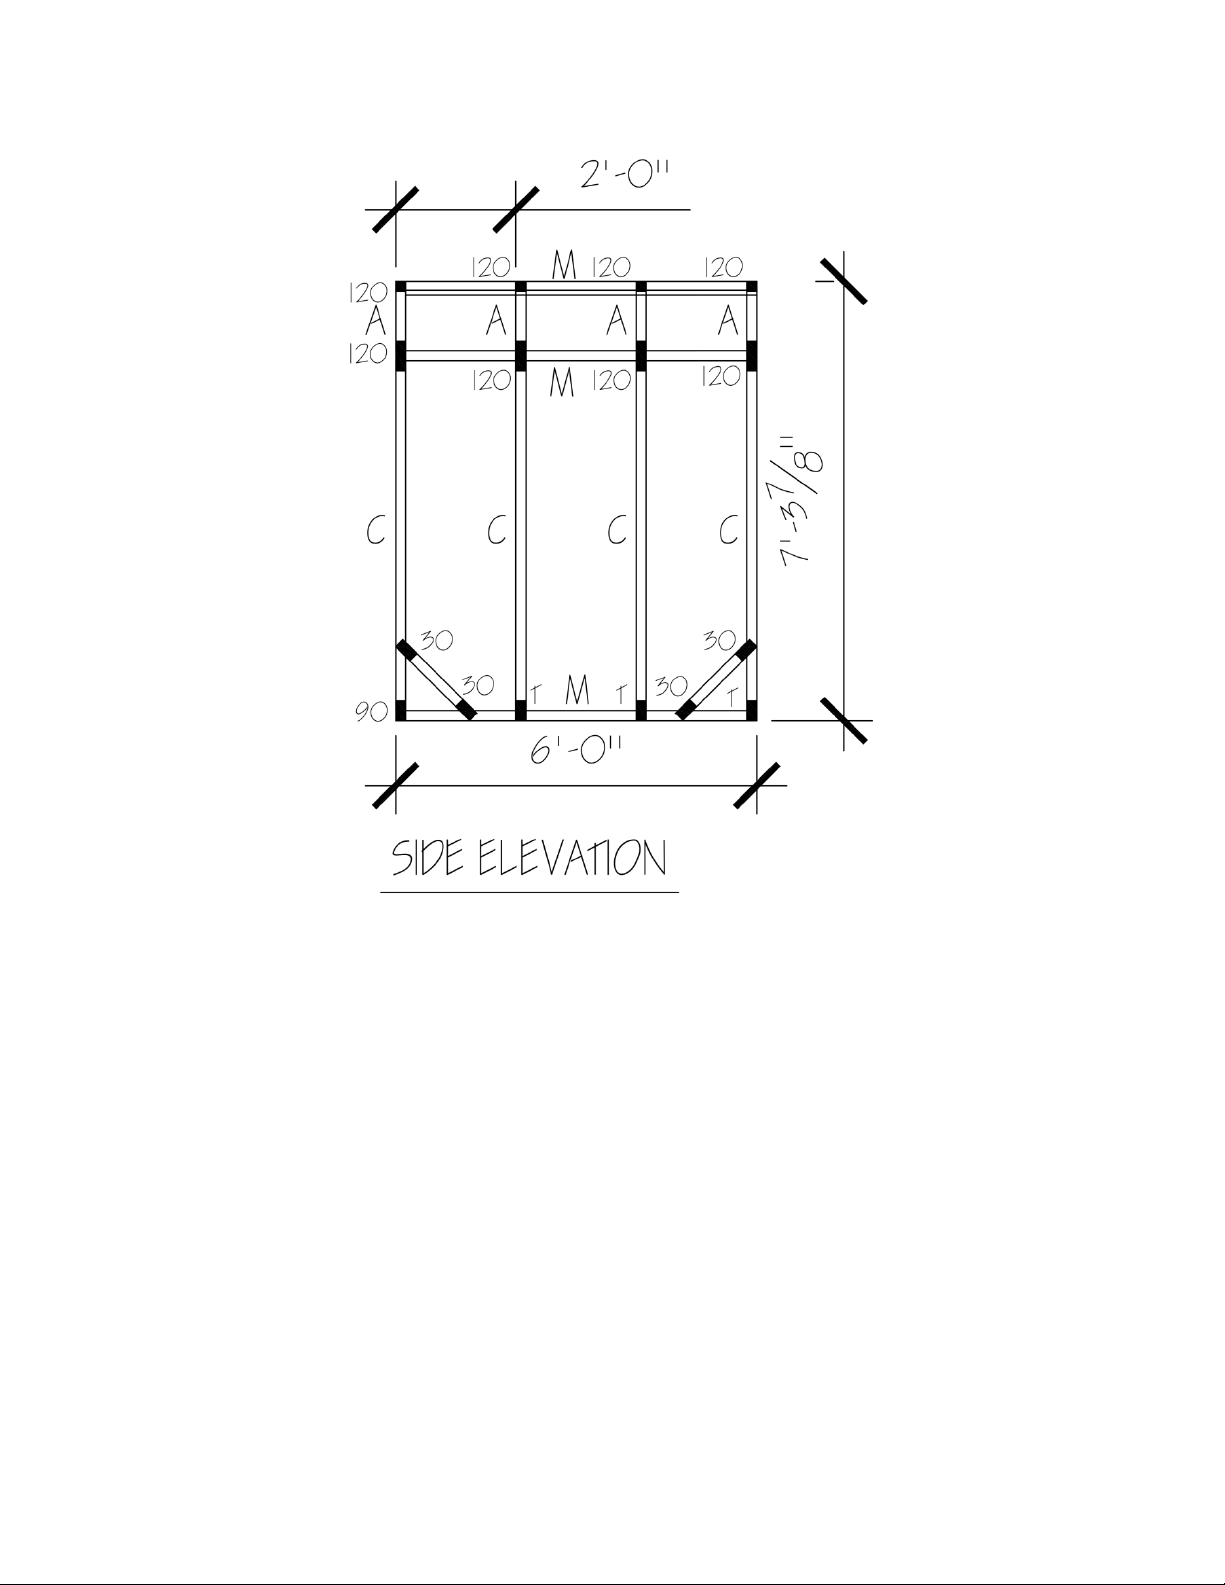
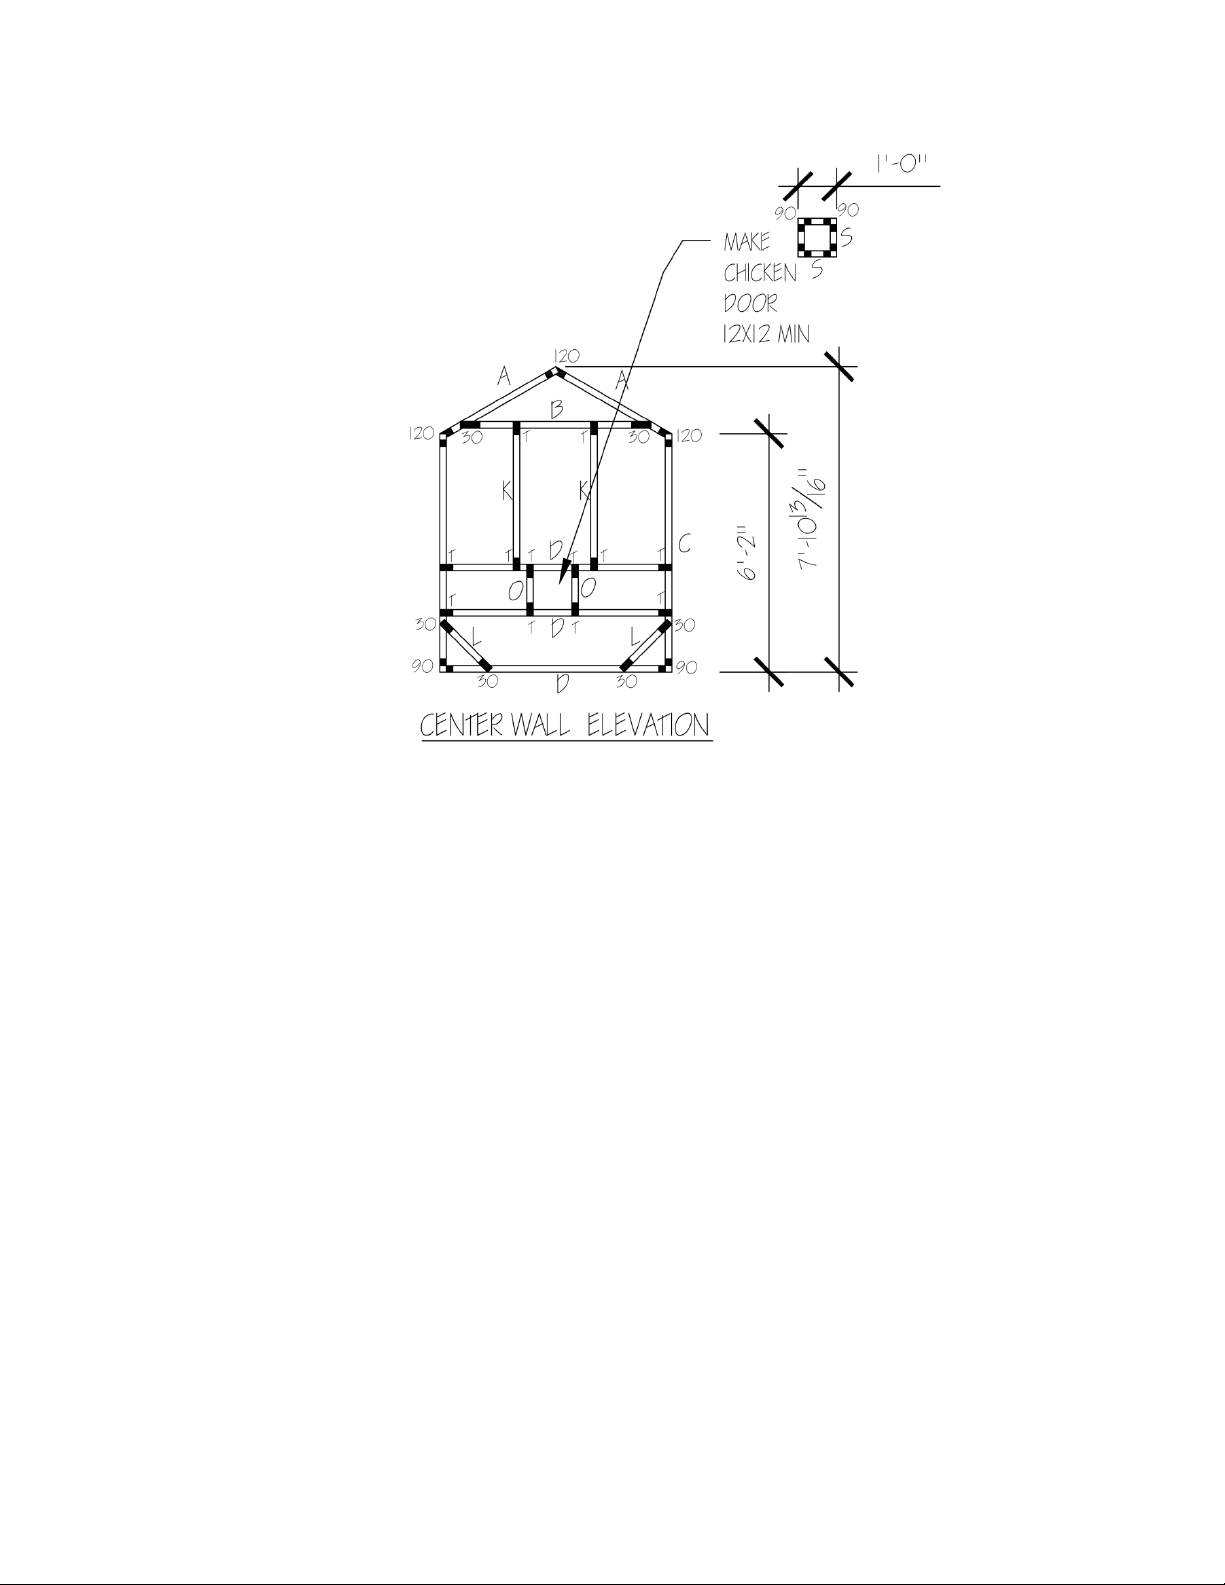
(16) 90 Degree Brackets
(12) 120 Degree Brackets
(20) I or 30 Degree Brackets
(44) T Brackets
To complete your structure project you will need to purchase:
(38) 2X2 lumber - commonly known as a 2X2 –actual dimensions vary slightly from store to store. When
purchasing your lumber it is a good idea to take one of your brackets along to verify that the lumber you are
purchasing will fit your bracket correctly. You do not want the lumber to fit too loosely or too snuggly.
2X2 lumber can come in pine, cedar, redwood or treated lumber. Treated lumber, redwood or cedar is best
if planning to place your structure directly on the ground.
(400) 1 ¼” wood screws
(6) Hinges (Be sure to buy a size hinge that will support the weight of your door)
(2) Door Latch
- Materials needed to cover your structure depending on use. This can be plastic, tarps, glass. Chicken wire,
siding or metal. Or use your imagination!
Tools needed to complete structure:
-Table saw or skill saw
-Screw Gun, Drill with Phillips bit or a Phillips screwdriver (please keep in mind there are a lot of screws
needed to fasten brackets so an electric screw driver of some sort would make the project much easier)
-Level
-Measuring tape
Assembly Instructions:
Step 1: Please make sure to read all the assembly instructions before starting your project.

Step 2: Identify all your brackets so you know which bracket goes where. The diagram below shows which bracket
is used for which area of your project.
Please note: When assembling make sure brackets are facing the directions shown in this diagram.
Step 3: Measure and cut your lumber. Cut your lumber using a skill or table saw. All cuts are straight cuts –no
angle cuts. If you are not a saw person –many local and main chain lumberyards will cut your lumber for you for
free or a minimal charge. Cut your lumber as follows:
Note: As you measure and cut your lumber (done easily with a chop saw), please make sure you label each piece
with the corresponding letter on your lumber cut list as this makes it easier to tell apart and assemble later. Wait to
cut boards H, E and G until structure is complete to adjust door as needed.
Out of an 8’ piece of lumber cut:
A = (8 ea) at 3' –1 13/16"
B = (4 ea) at 4' –3 1/16"
C = (8 ea) at 5' –10"
D = (5 ea) at 5' –8"
H = (4 ea) at 5' –9 3/4"
K= (4 ea) at 6' –1 3/4"
M=(5 ea) at 6'-0"
Out of remaining lumber cut:
E = (8 ea) at 1'-2"
G = (6 ea) at 2' –8"
L= (6 ea) at 1’ – 3 1/2”
O = (2 ea) at 1'-0"
S= (4 ea) at 8"
Assemble your structure:

Below is a diagram of an assembled structure. Your structure should look like this once assembled.
Note: When assembling your structure make sure you put a screw in each hole in each bracket to make sure your
structure is rigid and solid when completed.
Step 4: Lay out your base first using your 90 degree brackets. Make sure (VERY IMPORTANT) that you face the
brackets the way they are shown in the diagrams above. Failure to do this may make some measurements off later in
assembly and the structure not go together properly. Layout your brackets and lumber for your base per the floor
plan diagram below. Only put a single screw in piece of lumber on the door side of the building as you may have to
adjust the studs to make sure the door fits correctly depending on the size hinges you will be using.
Step 5: Next assemble your roof trusses. It is typically easier to assemble them on the ground and then put them in
to place on the stud walls. Make sure you use a level for the bottom of the truss (letter B) so they are level or
measure down from the ridge bracket down each truss board. Failure to do this may push the truss out and cause it
not to fit. Layout your roof as shown in the roof plan diagram below.

Step 6: Next you can either add each of the stud wall pieces or assemble them all together on the ground and fit
them in the base at once. Make sure you measure and evenly space all the brackets top and bottom. Next add your
angled corner bracing to make your structure solid and rigid so you can add your trusses. Add your trusses to the top
of each stud. When adding your trusses make sure the 120 degree ridge brackets are all facing the same direction so
you will be able to add your ridge board. Add your ridge and top side wall boards by sliding them through the
brackets and screwing them in to place. Make sure to measure again so all the boards are space evenly. Please see
side elevation diagram below.

Step 7: Add D and R boards to create the center wall as shown - sliding the O boards between them before
fastening. Once everything is slide in to place and centered where necessary screw in to place. Then assemble
"chicken door" (if desired) and attach using hinges. You will also add a second set of D boards as shown to the stud
next to the rear wall to support the other end of the floor right next to the rear door (please see floor plan). You will
not need a second set of R boards since you will not be covering this wall or O boards to frame a chicken door area
since it is located right next to the rear wall. You can build an optional "chicken ramp" leading to the inside of your
coop area to allow chickens to freely roam between the coop and run area and then close off while cleaning. The
coop area is a raised surface - you can adjust the height of the floor by raising or lowering your center D boards
(keep in mind if you are changing the height that this may also change the length of your R boards so prior to cutting
those decide an ideal height for the floor of your coop area. Once assembled cover the coop floor area with plywood
or other desired cover material.

Step 8: Assemble the front of your structure. Do not add screws until you have everything adjusted how you would
like them. First add your K boards by sliding in the T brackets and adding the studs. Then build your door assembly.
Attach your door assembly using the hinges you purchased. Attach them to the left or right K board depending on if
you would like a left or right swinging door. There may be a small gap on either side of the door –this is designed
so that if you purchase a non-flush hinge –the door will still open and close. If you do not wish to have a gap, you
can cut your door assembly boards slightly larger for that or adjust the K boards to compensate. Finally measure and
cut your E boards –these might be a slightly different length if you have adjusted the door assembly or K boards at
all. Securely fasten everything with screws once you feel everything is adjusted and in place how you would like it.
Please see the front elevation diagram below.

Step 9: Finally –measure your structure to determine the amount of materials you will need to purchase to cover
your structure. Always make sure you allow for seams or waste material and purchase extra. To determine the
amount of material needed for the front and rear of the structure measure the base for your width and then measure
from the base to the top of the ridge for your height.
Math hint: Measure the length and width of each section and then multiple those together to determine the sqft
needed per section to cover that. Add each section of like materials together to determine the total amount of sqft
you will need of that material.
Step 10: Stand back and admire your work!
Thanks for ordering E-Z Frames!
If you have any questions regarding your structure, please feel free to visit us at our website: www.ezframeup.com.
E-Z Frame Structures & Shelters LLC
E-Z Frame Structures & Shelters LLC and E-Z Framestructures.com are not responsible for any harm or damages to the structure or person as a
result of misuse of the product or alteration of the design or design by someone other than E-Z Framestructures.com or E-Z Frame Structures &
Shelters LLC. If you are unsure of the proper use of our brackets or structure kits, please contact us.

Table of contents
Other E-Z FRAME Farm Equipment manuals