Easy Drain S-line User manual

INSTALLATION MANUAL
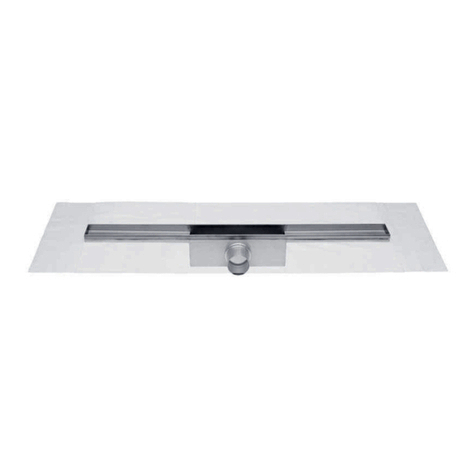
S-line - Linear shower drain
Easy Drain
®

2 S-line
Installation options ........................................................ 3
Wall mounted support ................................................... 4
Installation guide - Wall | Standard clamp drain ................. 5
Installation guide - Wall | No-hub sleeve ........................... 7
Installation guide .......................................................... 8
Installation example ...................................................... 11
Installation diagram - Wall | Standard clamp drain ............. 12
Installation diagram - Wall | No hub sleeve ....................... 13
Important assembling advice .......................................... 14
Installation notes ........................................................... 15
CONTENTS
Easy Drain
®
CAUTION! The S-line is a wall mounted drain. When using a membrane clamp to seal the
bottom layer of the shower, you should make sure that the diameter of the clamp is not too
large for a wall mounted installation of the drain. As an alternative, a no-hub sleeve can
be used to connect the drain with a discharge pipe.

3S-line
INSTALLATION OPTIONS

4 S-line
Easy Drain
®
1 2
3 4
5
WALL MOUNTED SUPPORT
ELECTRICAL GROUND

5S-line
OUTLET HOLE: DISTANCE TO WALL
A: 2 4/9” (62 mm)
B: 2 4/9” (62 mm) + WALL BOARD THICKNESS
CLAMP DRAIN* NOT INCLUDED
MAKE SURE THE CONNECTION BETWEEN THE CLAMP DRAIN
BASE AND SIPHON/DISCHARGE PIPE IS WATERTIGHT!
CONCRETE BOARD (AT LEAST ¼” ABOVE THE FLOOR)
2
34
5 6
7
1
INSTALLATION GUIDE - WALL | STANDARD CLAMP DRAIN
PAN LINER WITH ADHESIVE BONDING
SLOPED MORTAR BED
SEAL THE ENTIRE FLOOR WITH PAN LINER
REMOVE AIR POCKETS BENEATH THE LINER
*NOTE: Clamp drain may vary depending on model being used
THE TOP OF THE CLAMP DRAIN MUST BE INSTALLED AT
LEAST ½ ” ABOVE THE WOODEN FLOOR
8A

6 S-line
OPTION: CURBLESS SHOWER INSTALLATION
8B
10 11
12 13
9
Easy Drain
®
14 15
>> CONTINUE ON PAGE 8

7S-line
OPTION: CURBLESS SHOWER INSTALLATION
INSTALLATION GUIDE - WALL | NO-HUB SLEEVE
CONCRETE BOARD (AT LEAST ¼” ABOVE THE FLOOR)
2
34
5 6
7
1
PAN LINER WITH ADHESIVE
BONDING OVER THE FIRST
SLOPED MORTAR LAYER
SEAL THE ENTIRE FLOOR WITH PAN LINER
REMOVE AIR POCKETS BENEATH THE LINER
NO-HUB SLEEVE* NOT INCLUDED
*NOTE: No-hub sleeve may vary depending on model being used
INSTALL SHOWER IN COMPLIANCE WITH UPC STANDARD
8
>> CONTINUE ON PAGE 8

8 S-line
INSTALLATION GUIDE
1 2
3-A
4 5
6 7
3-B
FLEXIBLE SEALING COMPOUND FLEXIBLE SEALING COMPOUND
FLEXIBLE SEALING COMPOUND
SLOPED MORTAR BED

9S-line
8
SEAL THE ENTIRE FLOOR WITH THIN-SET MEMBRANE
REMOVE AIR POCKETS BENEATH THE MEMBRANE
9
10 11
12
13 14
MAX. TILE THICKNESS: 11/16” (18 MM)

10 S-line
15 16
17 18
41919 Zero Grating Tile Grating

11S-line
INSTALLATION EXAMPLE

12 S-line
INSTALLATION DIAGRAM - WALL | STANDARD CLAMP DRAIN
9
17
*Not included with the drain.
PLYWOOD CONCRETE
1S-line drain body
2TAF (Tile Adjustable Frame)
3TAF Grating
4Strainer
5Elastic sealant - Silicone
6Tiles
7Thin set tile adhesive
8Grout
9Pre-assembled waterproong membrane
10 Thin-set sheet membrane (entire oor!)
11 Sloped mortar bed - rst layer
12 Sloped mortar bed - second layer
13 Pan liner / Moisture resistant material
14 Pea Gravel
15 2” Clamping drain base*
16 2” Clamping ring*
17 2” Rubber sealing gasket
18 Sealant between membrane & mortar
19 Drainage pipe
20 Concrete board
3
4
5 6
7
8
10
12
11
14
18
19
16
13
2
15
20
1

13S-line
INSTALLATION DIAGRAM - WALL | NO HUB SLEEVE
*Not included with the drain.
PLYWOOD CONCRETE
1S-line drain body
2TAF (Tile Adjustable Frame)
3TAF Grating
4Strainer
5Elastic sealant - Silicone
6Tiles
7Thin set tile adhesive
8Grout
9Pre-assembled waterproong membrane
10 Thin-set sheet membrane (entire oor!)
11 Sloped mortar bed - rst layer
12 Pan liner / Moisture resistant material
13 No-Hub sleeve*
14 Drainage pipe
15 Concrete board
9
3
4
5 6
7
8
10
15
14
13
1
2
12
11

14 S-line
USA
Important assembling advice: S-line®
Suitable for renovation work and new construction
The Easy Drain S-line should only be installed by trained professionals in compliance with state and local building
codes. To achieve the best possible result, please carefully read the installation guide. If you have any questions,
please consult your supplier.
▪Please check the content of the package for completeness and
integrity before proceeding with the assembly. Do not install
the drain if any deviations are noted. Should this be the case,
please consult your supplier.
▪Prior to construction, the installation procedure and its special
considerations should be discussed with the tile setter. After
the installation of the drain body (rough) is complete, please
provide the tile setter with the complete installation guide.
▪If the drain is used for large showers with multiple heads,
please check to make sure that the drainage capacity is
sufcient. If you are unsure, please consult the supplier for
advice.
▪If you do not wish to use the second drainage level
(secondary water drainage), the joint between the shower
drain body and the TAF (tile frame) should be sealed with a
permanent sealer.
▪We recommend taping or closing the drain opening of the
shower drain with a cement cap prior to the assembly to
prevent construction debris from getting into the drainage
pipe. To prevent damage to the TAF (tile frame), it should be
kept in the package until the nal installation by the tiler.
▪Make sure the drain is level all around.
▪Install the sewage system in compliance with the local and
national codes. Note: ensure that the sewage system is
properly vented and correctly pitched.
▪Check the drainage system and the sewer system connection
for water tightness.
▪In order to prevent hollow spaces, all empty space beneath
the drain must be completely lled up and sealed with oor
pavement up to the top edge of the drain ange.
▪The seal must be in compliance with the state and local
standards.
▪When tiles are being tted, the pitch of the tiles (min. 2% per
3’3” (≈1m1)) in the shower must always be sloped towards
the drain. The tiles should be laid level or 3/64” (≈1 mm)
higher than the top edge of the tile frame to ensure good
drainage toward the shower drain.
Note: the requirements with regard to the oor gradient may
be different for walk-in showers with glass walls. Please
consult your supplier in this respect.
▪Once the tiles have been tted, the joint between the tiled
oor and the TAF (tile frame) should be permanently sealed
with an elastic sealant (maintenance joint). The adhesion
surfaces should be free of mortar, adhesive and other
adhesion-reducing materials.
▪The drain is only intended for use with waste water common
in households. Do not use other uids as well as cleaning
agents with the potential to damage sanitary equipment,
drainage equipment and raw materials.
▪If the drain is used for other purposes (e.g. swimming pools),
where it may come in contact with aggressive cleaning agents
or corrosive substances such as salt or chlorine, please consult
your supplier.
▪Construct the oor according to state and local building
codes.
▪Compliance with this installation advice is required for any
warranty claims. Deviation from the installation instructions will
void the warranty.
Caution !
▪Tile cleaning products often contain aggressive chemicals that
are abrasive in nature and may damage the drain. Please
ensure that the drain is thoroughly ushed after using any tile
and grout cleaning products.
▪10 Years limited warranty only applies when constructed
according to all installation instructions.
▪Glass gratings are not suited for wheelchair accessibility.
MAINTENANCE INSTRUCTIONS
▪Do not use abrasives and/or sharp/scraping objects to clean
the Easy Drain®.
▪The hair catcher should be cleaned periodically to remove
any dirt that may have collected.
▪We recommend the use of Easy CLEANSET for daily
maintenance and cleaning of your Easy Drain®.
Typing and printing errors reserved. Easy Sanitary Solutions BV excludes all liability for any damages whatsoever associated with the use and/or the installation
of the drain. Easy Sanitary Solutions BV a priori excludes any liability whatsoever.

15S-line
INSTALLATION NOTES

Easy Drain
®
Easy Sanitary Solutions
Nijverheidsstraat 60
7575 BK Oldenzaal, The Netherlands
tel: +31 (0)541 200800
email: info@esspost.com
www.easydrain.com
ESS PRODUCTS ARE PATENTED AND REGISTRATED TRADEMARKS MADE BY ESS
E50.01.00.01.48 | 09.14
Easy Drain®USA Collection
2663 Townsgate Rd.
Westlake Village, CA 91362
T: 855 627 3626
F: 855 627 7928
email: sales@easydrainusa.com
www.easydrainusa.com
Table of contents
Other Easy Drain Plumbing Product manuals
Easy Drain
Easy Drain Waterstop Wall Installation and operating instructions
Easy Drain
Easy Drain Multi Installation and operating instructions

Easy Drain
Easy Drain Compact TAF Installation and operating instructions
Easy Drain
Easy Drain Vinyl Installation and operating instructions
Easy Drain
Easy Drain Compact FF Installation and operating instructions
Popular Plumbing Product manuals by other brands

Fleurco
Fleurco ABT4836-3 installation manual

Everpure
Everpure Exubera Pro 3 Tap Faucet EV9333-52 brochure

Brizo
Brizo Odin T67375 Series quick start guide

Luxart
Luxart Gioviale GV137 installation instructions

Black & Decker
Black & Decker Price Pfister 15 Series quick start guide

Schier
Schier GB-1000-L installation guide