Easylife EasyDry Deluxe User manual

Imported and distributed by Easylife Group Ltd, London NW1 0JP
Support Line: 0333 030 0777
For more innovative products from Easylife please visit:
www.easylifegroup.com
IN5280-1 © 2019 Easylife Group Ltd
PANTONE 072 C
PANTONE 123 C Paper weight 60gsm
everyday solutions
™
Est. 1992
DISPOSAL
• Please respect the environment!
• Dispose of the packaging according to the local recycling regulations.
• Dispose of the appliance at the end of its life span according to environmental consideration
TECHNICAL SPECIFICATION
Power consumption: 300W
Operating voltage: 230V
Operating temperature: Up to 55°
Maximum load: Each shelf 5kg and total 15kg
Power cord length: 1.5m cable
Measurement:
Open: H147.5xW72xD67cm
Folded: H147.5xW72xD9cm
21m
of heated
drying
space
EasyDry Deluxe 3-Tier
Foldaway Heated Airer
INSTRUCTION MANUAL
Model No. EL5280 (BK-703-TO)
Please read carefully before use and keep for future reference
Support Line: 0333 030 0777
For more innovative products from Easylife please visit:
www.easylifegroup.com
everyday solutions
™
Est. 1992
Includes
optional
locking
wheels &
timer
TROUBLE SHOOTING:
Problem Solution
The Foldaway Heated Airer is not heating up. Check its plugged in and the on/off switch is
illuminated

PANTONE 072 C
PANTONE 123 C
Support Line: 0333 030 0777
For more innovative products from Easylife please visit:
www.easylifegroup.com
Paper weight 60gsm
everyday solutions
™
Est. 1992
BEFORE FIRST TIME USE:
Carefully unpack the Airer and remove any packaging, place the unit on a level, dry surface ready
for use.
NOTE: The appliance must be placed on a level, dry surface at least 1.5 meters away from any
heat or water source.
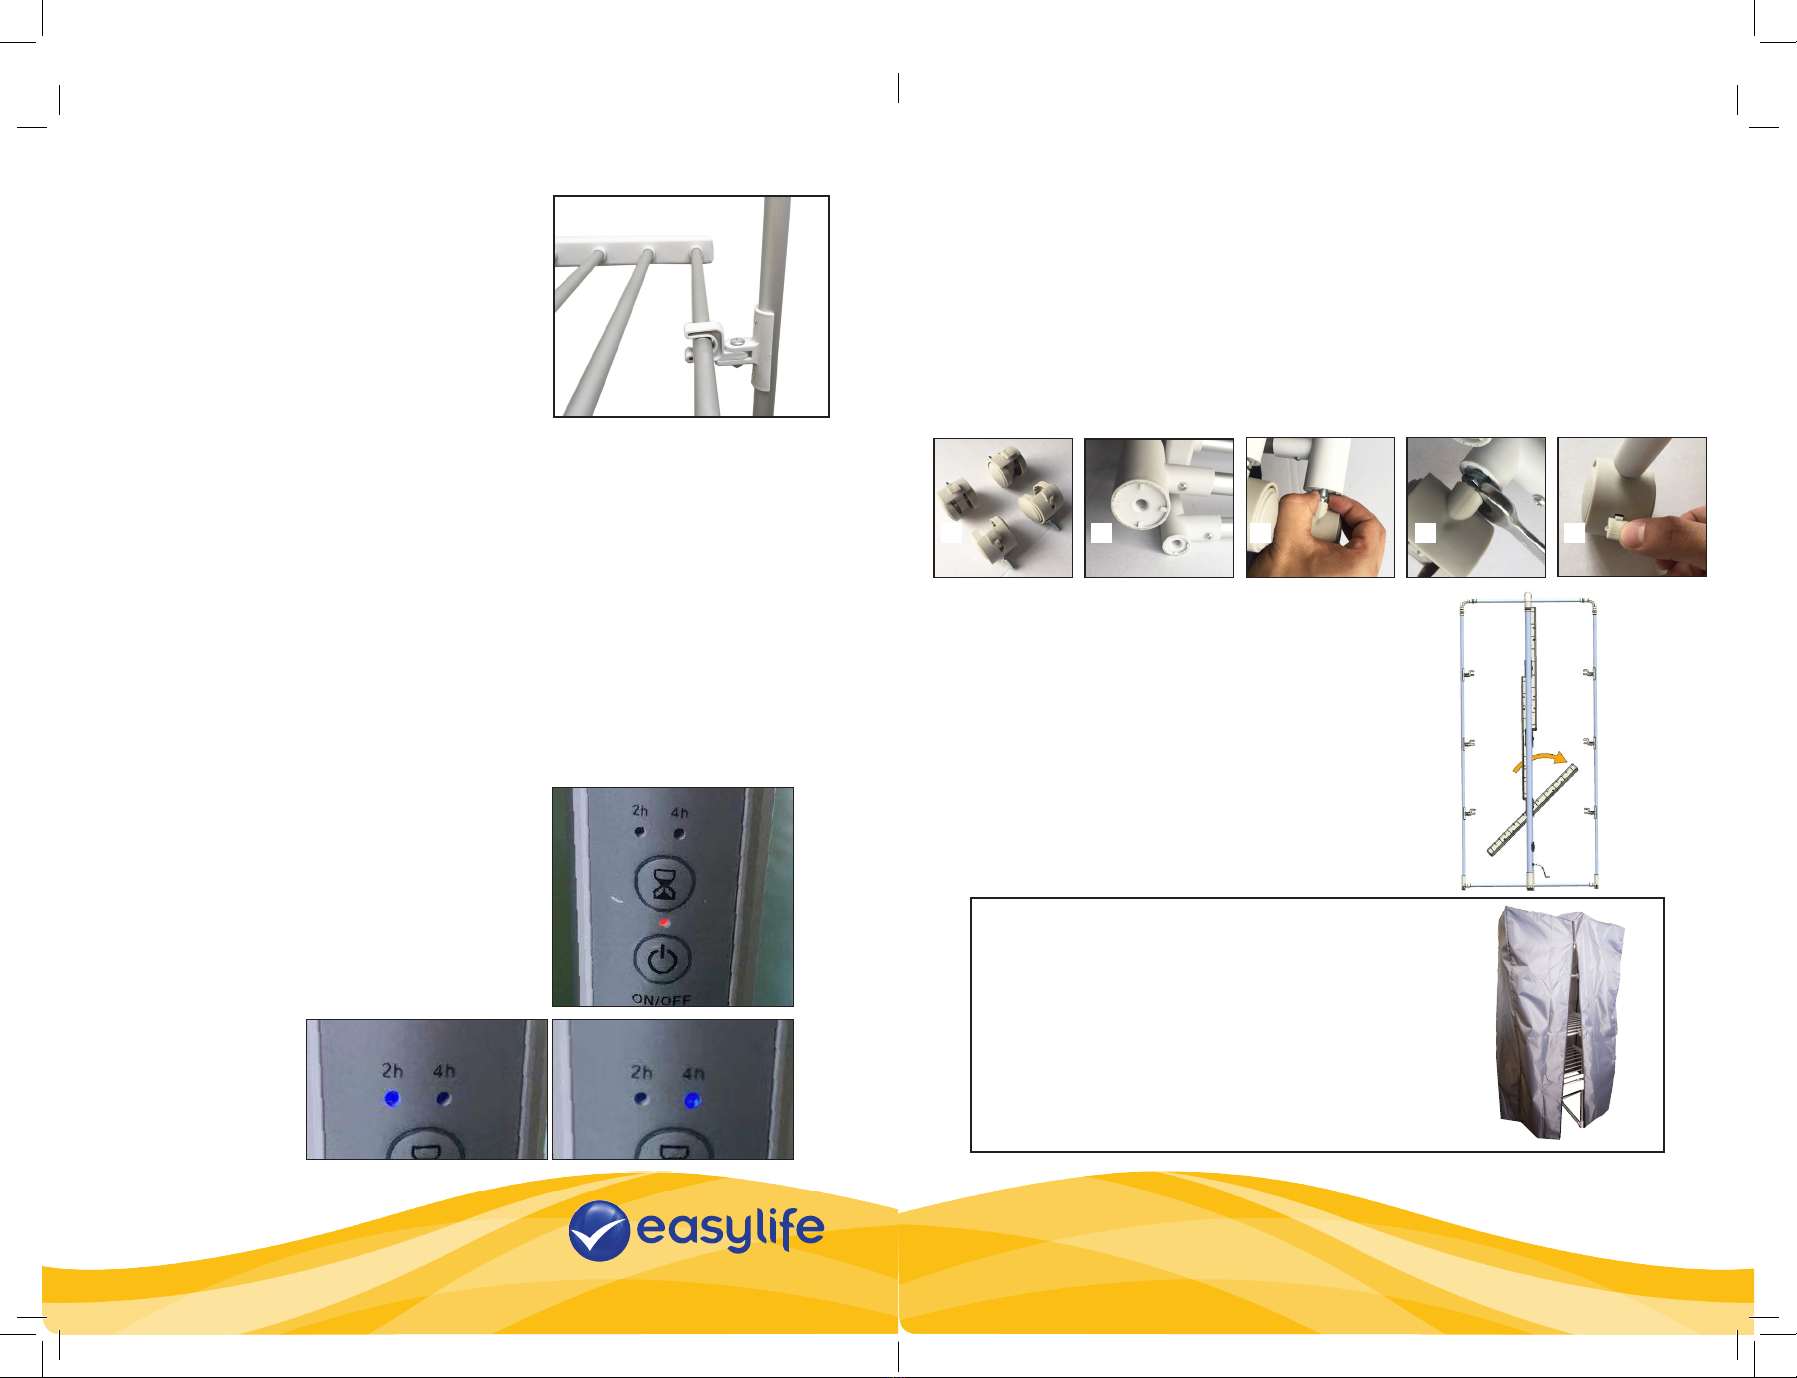
Open out the
supports to 90°
SAFETY INSTRUCTIONS
When using this EasyDry Foldaway Heated Airer, please follow these basic safety precautions.
WARNING: This appliance can be used by children aged from 8 years and above and
persons with reduced physical, sensory or mental capabilities or lack of experience and
knowledge if they have been given supervision or instruction concerning use of the appliance in a
safe way and understand the hazards involved. Children should be supervised not to play with the
appliance. Cleaning and user maintenance shall not be made by children.
Please read all instruction before using.
1. Please do not use the appliance if it has been dropped or damaged in any way.
2. Check the power cord regularly for signs of damage. Never attempt to repair the appliance
to replace the cord yourself as this may lead to severe injury or electric shock. Call customer
service for replacement.
3. Never pull and carry the Airer by its power cord. Do not allow the power cord to touch hot
surfaces or sharp edges. Do not let it trail over the edges where it may be pulled by children or
tripped over.
4. Ensureallpackagingmaterialsareremovedbeforetherstuse.
5. Make sure your electricity supply matches the voltage shown on the ratings label.
6. Do not connect this appliance to an external timer or remote-control system.
7. We recommend to always plug directly into a wall socket. However, an extension lead may be
used. The electrical rating of the lead should be at least as great as the appliance
8. The Airer is for household and indoor use only. It is not suitable for commercial use or outdoor
use. It must only be used for its intended purpose.
9. To protect against electric shock, do not immerse the appliance, power cord or plug in water or
other liquid.
10. The appliance must be placed on a level, dry and heat resistant surface.
11. Always switch off and unplug the Airer after use, leaving it to cool down completely before storing
it away.
12. Do not wind the power cord around the appliance.
13. This Airer only operates in an upright position.
14. Do not leave plugged in overnight.
15. Do not use any accessories or attachments with this appliance other than those recommended
by seller.
16. Ensure the Airer is folded out securely before loading it with laundry and switching it on.
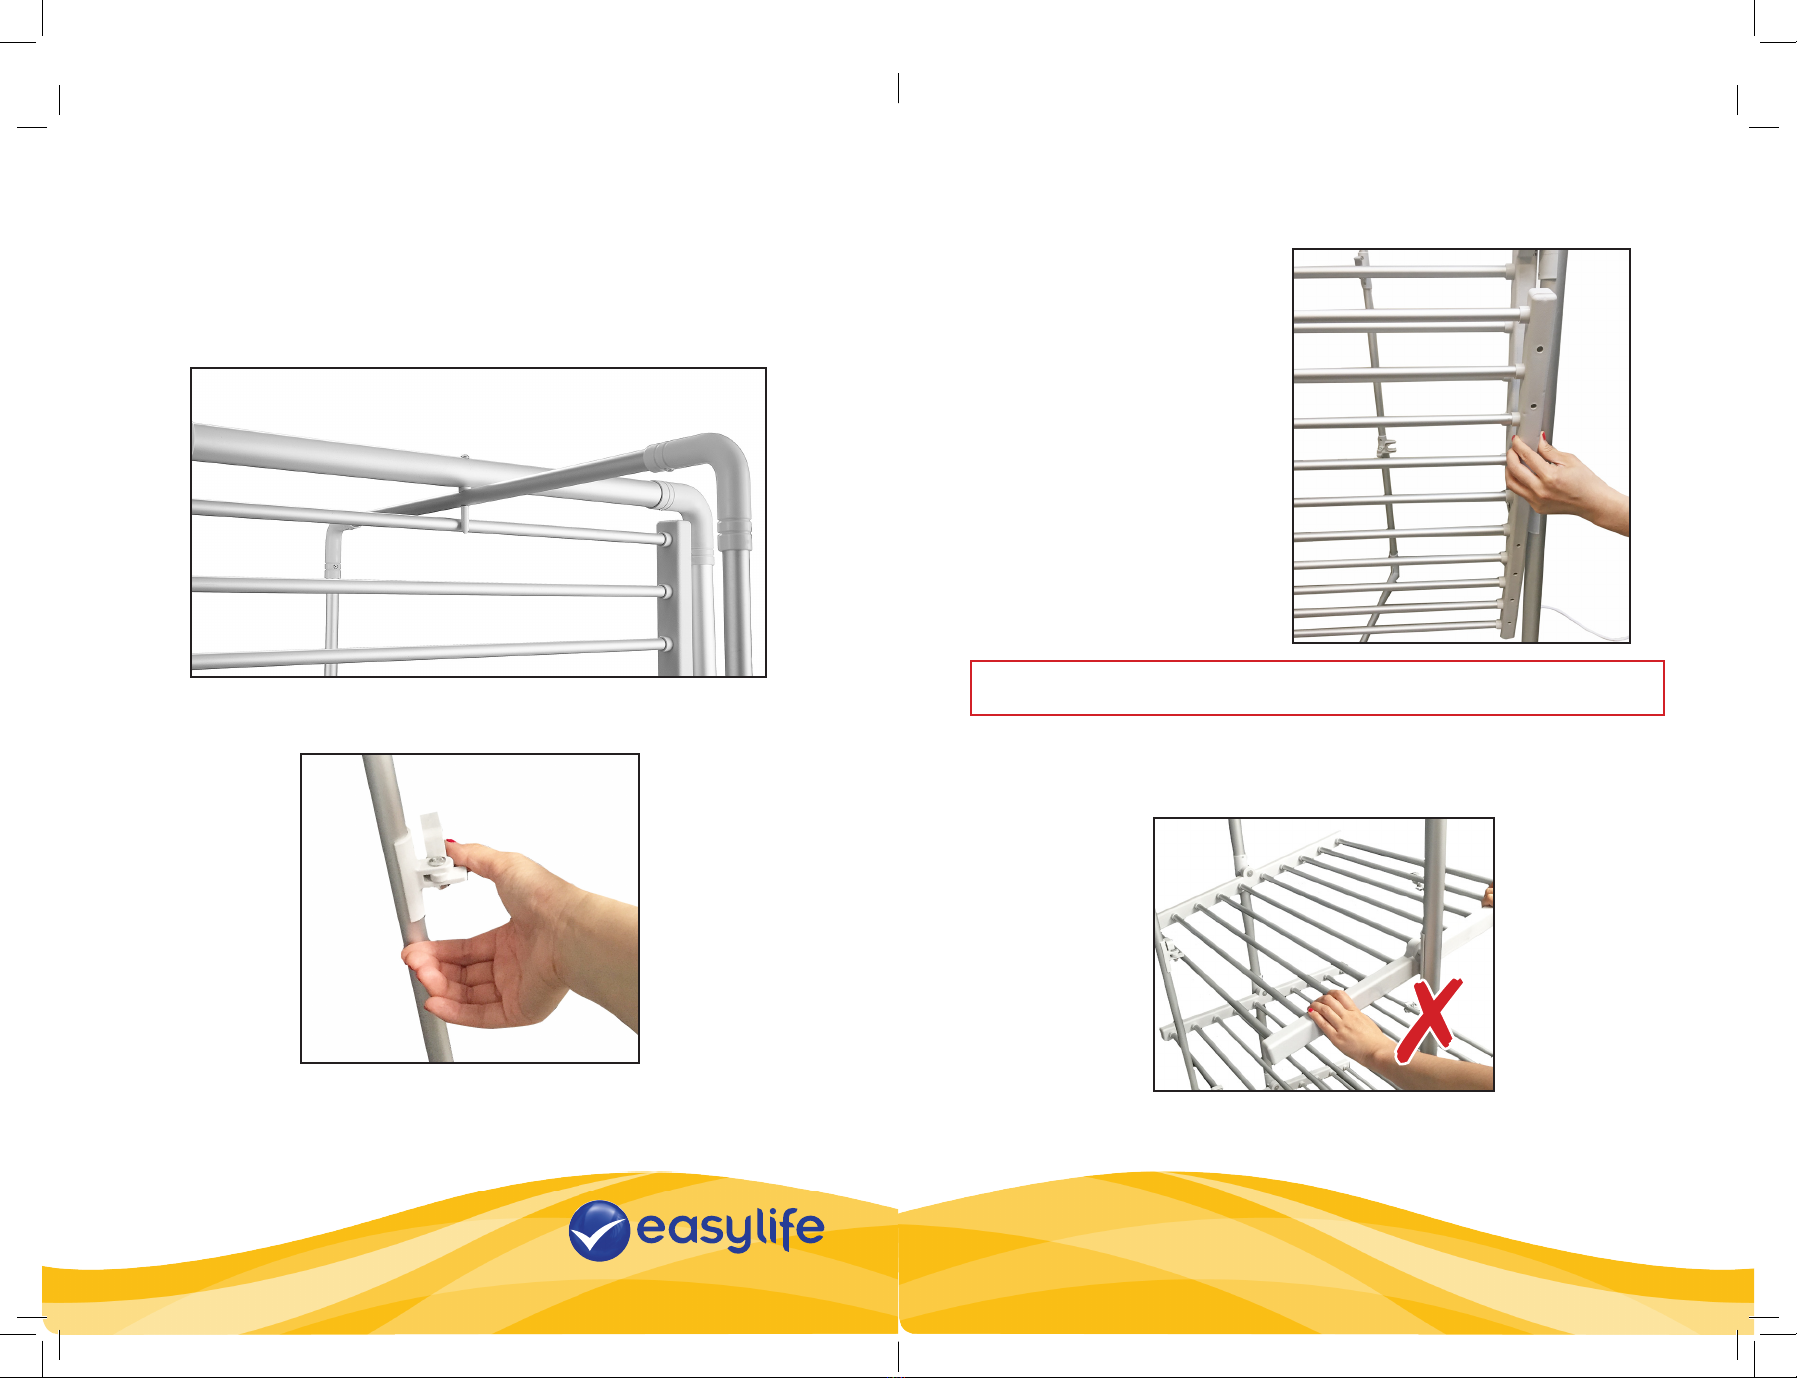
17. When opening and closing the Airer, never use force. The mechanisms should move freely and
easily.Keepngersawayfromthefoldingparts
18. Do not overload the Airer, the maximum load of the Airer is 15kg. Load evenly across the surface
to avoid the Airer tipping over.
Dear Customer,
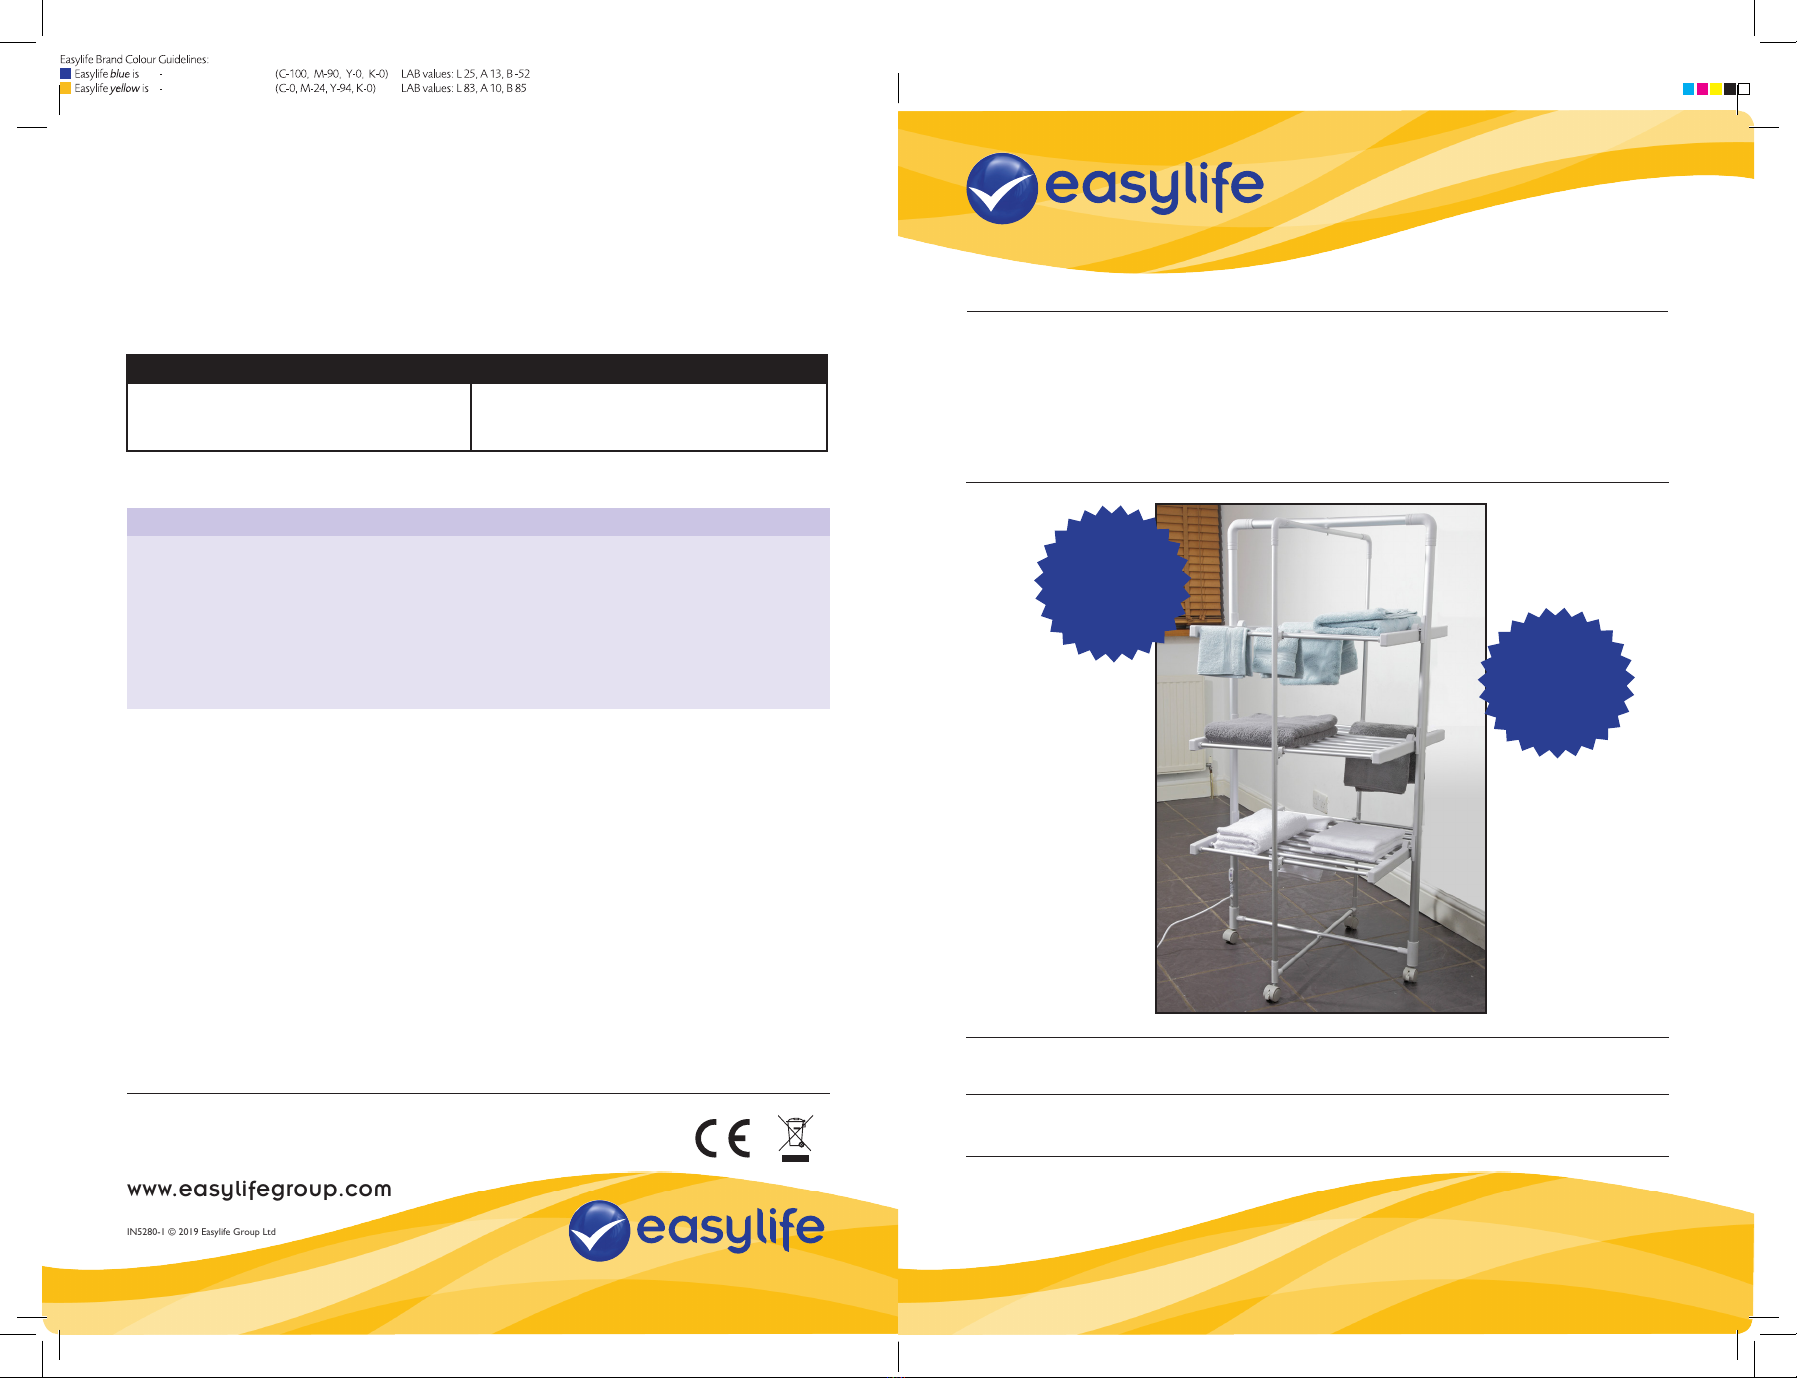
Dry your washing - whatever the weather
You’ve got washing to dry and it’s raining cats and dogs. That’s no problem with the
EasyDry Foldaway Heated Airer. Much kinder to clothes than a tumble dryer, its heated
rails (300W) dry clothes naturally and gently. Costing less than 6p an hour to run, it
handles a hefty 15kg of laundry thanks to its impressive 21m (69ft) of hanging space.
Takingupnomoreoorspacethananarmchair,itsthreetiersofheatedrailsare
perfectforat-dryingdelicatesandcanbeeasilyadjustedforhanginglongitems-
dresses, trousers and towels. With a 2 or 4 hour timer (if needed), it’s made from robust,
yet lightweight aluminium, weighs just 7.8kg and comes with a set of detachable castor
wheels. Mains-powered with a 1.5m lead, it measures H143cm (147cm with castors) x
W72xD67cmandfoldsattojust8cmforeasystorage.
2 3
Timer
Button
On/Off
Button
Control Panel
CAUTION: The plastic bubble bags used to wrap this appliance, or the
packaging may be dangerous. To avoid risk of suffocation, keep these
bags out of reach of babies and children. These bags are not toys.

Support Line: 0333 030 0777
For more innovative products from Easylife please visit:
www.easylifegroup.com
everyday solutions
™
Est. 1992
HOW TO SET UP THE AIRER:
1. Place the Airer on a dry level surface near a socket, with plenty of space around it.
2. Open out the supports to a 90° angle
3. Slide all the shelf support clips (found on the two thinner supports), until they are
facing straight out.
4. Stand at the side of the Airer that has the on/off switch and open out the shelves,
starting with the bottom shelf rst, then the middle and then the top.
NOTE:There is a stopper on the top rail to ensure that the top shelf cannot be over rotated.
IMPORTANT: If you force the shelf to rotate more than 90°(see image below)
you will break the shelf mechanism and invalidate the warranty.
Open out the supports to a 90° angle
TO OPEN
Shelves open in sequence -
bottomshelfrst,
then middle,
and top shelf last.
TO CLOSE
Shelves close in sequence -
topshelfrst,
then middle,
and bottom shelf last.
4 5

Support Line: 0333 030 0777
For more innovative products from Easylife please visit:
www.easylifegroup.com
everyday solutions
™
Est. 1992
5. Now use the shelf support clip to secure the shelf, as
shown in the picture.
VERY IMPORTANT: The shelves should not be forced. They
naturallyndtheirposition.
HOW TO OPERATE THE AIRER:
Ensure the Airer is folded out securely before loading it with
laundry and switching it on.
1. Make sure your electricity supply matches the voltage shown on the ratings label then plug in
the Airer.
2. Press On/Off button on the control panel. When it is on, the red indicator light will turn on.
3. The Airer will heat up in 3 minutes.
4. Load evenly across the surface to avoid the Airer tipping over.
Clothes should be damp, not soaking wet. Wring out all excess water rst.
Do not overload the Airer, the maximum load of the Airer is 15kg.
5. WhenyouhavenishedusingyourAirerswitchoffbypressingtheOn/Offbuttonagainand
unplug. Leave to cool down completely.
6. Tofoldclosed.StartwiththeTOPshelfrst,thenthemiddleandthenthebottom.Nowfold
thesupportstogethersotheAirerisfoldedat.
HOW TO USE TIMER:
1 Press On/Off button on the control panel. When it is on, the
red indicator light will turn on.
2 Press timer button to set Airer to 2 hours and press the
same button again to change setting to 4 hours. When
desired time has been selected, the corresponding light will
turn blue and the red light will turn off.
3 The Airer will stop heating and switch off automatically after
set hours have ended.
WHEEL ASSEMBLY:
To attach the wheels you will need a 12mm spanner.
BeginbylayingthefoldedAirieronasmooth,atsurfacebeforeyoustartassembling.
1. There are 4 wheels (Fig. 1), one for each of the 4 main supports (Fig. 2).
2. Screw each wheel into the holes at the base of each support (Fig. 3)
and tighten using a 12mm spanner (Fig. 4).
3. Lock and unlock the wheels using the brake on the wheels (Fig. 5)
1 2 3 4 5
HOW TO HANG LONG ITEMS:
Unfold the Airer and open out the bottom shelf
Leave the top two shelves in an upright position
and hang your clothes from the top rail.
The shelves should not be forced. They naturally
ndtheirposition.
Easylife Airer Cover
It keeps the heat contained and speeds up drying,
saving time and money.
The front panel unzips for easy access and a mesh
ventontopallowsairowtoaidevendrying.
Phone or order online, using code EL5281
6 7
Red light = On
2 Hour Timer = Active 4 Hour Timer = Active
Table of contents
Other Easylife Dryer manuals
Popular Dryer manuals by other brands

AEG
AEG TR3051TW user manual

Remington
Remington AC-2015 Use & care guide

Whirlpool
Whirlpool LE6150XS Use and care guide

GE
GE DDE5100M Use and care guide

Electrolux Professional
Electrolux Professional QuickDry QDC N1130 Series installation manual

Bosch
Bosch WTL 6301 Instruction manual and installation instructions

Asko
Asko T743C Mode d'emploi

Miele
Miele PDR 914 Operating and installation instructions

Miele professional
Miele professional PT 7186 Vario Operating and installation instructions

Hotpoint
Hotpoint TVFG 85C Futura Instruction booklet

Hoover
Hoover aqua vision Instruction book

Schulthess
Schulthess starLine 7730 operating instructions