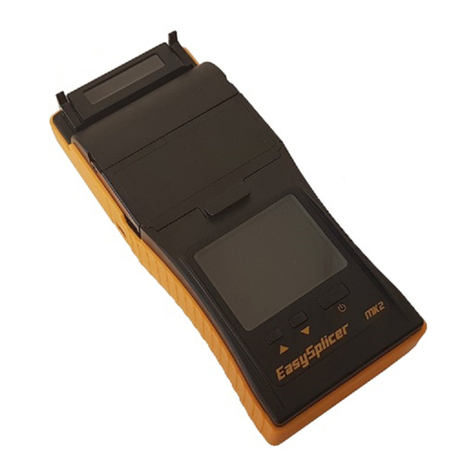
EasySplicer PRO User manual

EasySplicer PRO
USERS MANUAL
1

Table of Contents
Introduction..........................................................................................................................................3
Disclaimer.............................................................................................................................................3
Application...........................................................................................................................................3
EasySplicer PRO components..............................................................................................................3
Basics....................................................................................................................................................3
Quick Start ! ......................................................................................................................................
Turn On the EasySplicer PRO..............................................................................................................
Automatic Calibration !........................................................................................................................
Electrodes !...........................................................................................................................................
Singlemode or Multimode? .................................................................................................................
Time to splice!......................................................................................................................................5
Oven operation – sleeve protection!.....................................................................................................6
Basic Operation....................................................................................................................................7
KeyPad.............................................................................................................................................8
Clean electrodes...............................................................................................................................9
Calibrate...........................................................................................................................................9
Oven operation...................................................................................................................................10
Dedicated buttons...............................................................................................................................11
RESET ..........................................................................................................................................11
SET................................................................................................................................................11
ARC...............................................................................................................................................11
X/Y.................................................................................................................................................11
HEAT.............................................................................................................................................11
Setup – Menu system..........................................................................................................................12
Para................................................................................................................................................12
Setup..............................................................................................................................................13
Func...............................................................................................................................................1
Maint..............................................................................................................................................15
Heat................................................................................................................................................16
Arc.................................................................................................................................................17
State...............................................................................................................................................19
Info.................................................................................................................................................20
Technical Specification.......................................................................................................................21
Supplier...............................................................................................................................................22
2

Introduction
The EasySplicer PRO incorporates all the best a Swedish designed Fusion splicer can
offer.
NOTE: EasySplicer PRO is a high precision instrument and should always be handled
with care
Disclaimer
SB Scandinavia AB reserves the right to modify the product in any way without prior
customer notification or any other form of notice.
In no event shall SB Scandinavia AB be liable for any damages of any type, incidental,
indirect, consequential or other, originating from or relating to this manual or the
information contained herein. While SB Scandinavia AB tries to make the user manual
complete and accurate, it may contain mistakes, and the user uses it solely at his or her
own risk.
Application
Splicing and protection of most common types of SMF and MMF.
EasySplicer PR components
The following components are included and standard for splicing in the field:
Item Description Quantity
1 EasySplicer PRO 1
2 Power supply 1
3 Fiber cleaver 1
4 Fiber holders 250μm (black) 1 pair
5 Fiber holders 900μm (blue) 1 pair
6 Fiber holders Loose tube (red) 1 pair
7 Stripper 1
8 Carrying bag 1
Basics
NOTE: The EasySplicer is a rugged field instrument designed to withstand field
environment. However, to ensure best performance, it is important to keep maintenance as
described later in this manual.
3

Quick Start !
Turn n the EasySplicer PR
Make sure that that unit is properly charged if operated by the internal battery-pack.
Charge the unit at least 6-8 hours before using it the first time.
- Turn on the EasySplicer PRO by pressing down the “ON”-symbol
The splicer “beeps” and starts in “ready-mode” after a few seconds.
Automatic Calibration !
When starting up the unit calibrates itself automatically in regards to air-pressure
and temperature.
Should You encounter problems when splicing (i.e. bad splice and/or no splice)
then calibrate the unit manually (see chapter 4.2 Calibration).
Electrodes !
* Before beginning to splice You should verify that the electrodes are in good
(operational) condition.
Check the electrodes as the splicer probably has been stored for a while and lately
been in transport.
If needed clean the electrodes as described in section X by using the “CLEAN
ELECTRODES” function (see page 21).
Singlemode or Multimode?
It´s very important to setup the correct fiber-type in the splicer before doing the
calibration. For ex. Select Singlemode fiber in the “Menu” if You are using a
Singlemode fiber.
- Press the “Menu-button” (step with the arrows to the “Menu-button” and select it)

- Move with the arrow-buttons around in the display and select the “Para-function”
with the “Enter-button”
- Select the “Para-mode” and chose the suitable Cable-type/program (select with
the “Enter-button”).
For simplicity we recommend You to use the following programmes only:
Prog 0 Auto/SM-SM For Singlemode
Prog 1 Auto/MM-MM For Multimode
There are a total of 40 programmes in the list but most are to be used with
special settings and special cables.
There is no need to use most of them unless You are sure of the purpose of the
individual programmes. Please contact our support if You have any
questions/comments.
Time to splice!
Place 250 fiber in the black holders ,900 fiber/pigtail in the blue holders and the 900
loose coat/loose tube in the red holders.The fiber should “stick-out” some 3-4cm (as seen
in the pictures).
5

- Don´t forget to put on a shrink-tube (sleeve) over one of the fiber-ends before You start
* Strip and clean the fiber (for detailed instructions see page 15)
* Place the fiberholders in the cleaver and cleave the fiber.
* Place the fiber holders in the splicer.
Make sure that the fiber ends are being
placed in the V-Grove (both left, right).
Close the lid of the Splicer and the EasySplicer PRO will move together the fibers
and splice them together automatically. The whole process will be shown in the
display (live video from both X/Y cameras) and take less than 10 sec. An automatic
pull-test will be performed after the splicing. Finally, the splicer will show the
estimated splice loss (in dB) or, if the process failed, “Bad splice” (if so, re-do the
operation from “strip and cleave” above).
ven operation – sleeve protection!
Open up the oven (with the lifting arms –left/right on the lid).
Open the main lid and open the lids of the fiberholders. The newly spliced fiber is
ready to be moved.
Lift out the fiber gently and move the shrink-tube (sleeve) in place over the spliced
area. Place the shrink-tube in the oven according to its size.
6

Close the oven lid and the oven operation will start automatically.
The oven is default set for 30 seconds.
The splicer is ready for another splice while the oven is in operation (simply start the
above process again).
Basic peration
The EasySplicer PRO is handled and controlled with the keypad. All selected
parameters will be shown on the Display.
7

KeyPad
1. Power On/Off A. Splice
2. Power LED B. Arc
3. Enter C. Heat (oven)
4. Menu/back D. Oven On
5. Left E. Swap cameras (video)
6. Up F. Reset
7. Right
8. Down
Enter the Menu-system with Menu-button (nr 4).
Step up/down with the arrow-keys and select Your choice with the Enter-button.
Go back with the Menu-button (nr 4).
Select immediate, manual, operations on the keypad on the right hand side,
for ex. force splicing and oven operation.
Switch between the cameras with the X/Y-button.
8

Clean electrodes
If You are getting continuous “bad splices” it might be a good idea to try to
clean the electrodes (dirt is always in the air and for ex. moisture can oxidize
the electrodes making the spark weaker so it can´t melt the fiber-glass
properly).
- Open up the main lid and press the ARC-button one time to enable the
“clean electrodes function (takes a few second for the splicer to adjust).
Then press the ARC-button repeatedly 3-5 times.
The spark should be a straight fine line of light going between the electrodes
and it should be barely soundless.
N TICE, don´t try to touch or interfere with the spark as it can cause
significant injuries which are very hard to heal/treat. Always operate the
EasySplicer PRO with cautiousness
Calibrate
The EasySplicer PRO is continuously calibrating the strength of the spark in
accordance with the surrounding environment (temperature and airpressure).
It can happen that the weather situation changes very fast (from for ex. sunny
to rainy) and under such conditions it will be of good use to calibrate the unit
manually before starting to splice.
Performing a Calibration:
- Make sure You have the correct fiber-type selected (SM/MM). See below
“Para”-setting, page 17.
- Strip, clean and cleave one fiber from each side (left/right) and place in their
fiberholders. Then place them in the splicer.
- Always clean the fiber with alcohol, isopropyl or similar. Make sure not to
touch the fiber with anything after cleaning as it will become dirty.
Place the stripped and cleaned fiber across the v-groove (see picture below).
- Press the “Menu button” and select “ARC”.
- The unit will reset for this operation (Arc Calibration will be shown in top of
the display).
- Press the “Enter button” and the unit will perform the calibration.
9

Successful Calibration
- Simply redo the above steps if the unit is unsuccessful with the operation.
You can see a full calibration video at:
Oven operation
Use the HEAT function to manually run the oven program. Normally, when a
splice is done the oven program will be executed automatically.
-But under some circumstances You might want to operate the oven
manually.
If so, place a fiber with a shrink-tube (sleeve) in the oven compartment
and press the HEAT-button. The oven will start and the red-LED will lit.
The oven will run for as long as the oven time is set (factory preset is 30 sec.)
Change oven-time (and other heating parameters) in the “Menu”, in the
section “Heat”.
Use the “up/down” buttons to move around and the “left/right” buttons to
change values. Step out from this menu with the “menu”-button.
10

Dedicated buttons
RESET
Reset the splicer to start postion (Stand by). EasySplicer PRO is ready to start any
operation.
SET
After “Reset” press this button and the splicer will go to “Automatic”-mode. Stepping
between; alignment, splicing, oven-operation, splice-information and back to
alignment again.
ARC
For testing and looking at the arc. Open up the main lid and press the button.
N TICE, don´t try to touch or interfere with the spark as it can cause significant
injuries which are very hard to heal/treat. Always operate the EasySplicer PRO with
cautiousness
X/Y
In Standby, press X/Y to switch between camera modes:
X/Y Standard view x125
X/Y Magnified view x250
X Camera magnified view x250
Y Camera magnified view x250
- back to Standard view
HEAT
Force oven-operation according to set parameters. See above P10, Oven-
operation, for more info about settings.
11

Setup – Menu system
Press the “Menu”-button in Stand by mode to enter the Meny system. Chose
the wanted sub-menu. Select the wanted sub-menu with the “Enter”-button.
Para
For setting fiber-type and splice parameters. The EasySplicer PRO can
handle Singlemode-, Multimode-, DS- (Dispersion shifted) and NZDS-
(Non-zero dispersion shifted) cables.
- Here You also set the correct fiber type BEFORE You calibrate the
splicer.
For simplicity we recommend You to use the following programmes only:
Prog 0 Auto/SM-SM For Singlemode
Prog 1 Auto/MM-MM For Multimode
Prog 2 Auto/DS-DS For DS
Prog 3 Auto/NZ-NZ For NZDS
12

Move with the “up/down” buttons and change value with the “left/right”-buttons.
Save and go back with the “menu”-button.
There are a total of 40 programmes in the list but most are to be used with
special settings and special cables.
There is no need to use most of them unless You are sure of the purpose of the
individual programmes. Please contact our support if You have any
questions/comments.
Setup
In this menu You can setup/change various parameters like “Camera
Brightness” and “Menu Language”.
Here You can also set “Auto Power Off” (default) to “Auto Power On” .
13

When being in “Auto Power On”-mode the machine will shut down itself after
10min inactivity.
“Tension On” (default) means that the machine will perform a 2 Newton’s
pulling on the fiber to test the quality of splicing (after a complete splice) . If
the pull test fails, it means that the fusion failed.
Func
There are the following features to set/enable in the “Function”-mode:
8.1. Motor Push Test
For testing the motors when in Stand by mode (and no fiber in the
splicer). Select the function and then press the “Enter”-button a
second time to execute the operation. The motors will go in and out
and place themselves in “Ready”-mode (Stand by).
2. Date/time
Set the proper date/time.
3. Export Records
If You want to make records and documentation of Your splice results
then You can download the internal memory (up to 4000 memory
positions) to a USB-stick.
Connect a USB-stick to the splicer and select this function. The splicer
will transfer the memory-positions to the USB-stick and “beep” when
ready.
1

4. Software Updating
Connect a USB-stick with the new firmware for the EasySplicer PRO
and select this function. The splicer will “beep” when ready.
Maint
In the “Maintain” mode You can check/test the following:
1. Motor adjust
You may run the motors manually left/right (with the “left/right arrow”-
buttons).
To get back in Stand by mode (Ready mode) press the “RESET”-button.
2. Electrode Stabilize
Use this function when exchanging Your worn out electrodes with new ones.
This function will burn away oxid which might have occurred on the
electrodes during transport or longtime storing.
3. Fusion Records
Enter this function to learn about the individual splices made. They are
registrated in chronological order. Chose and memory position and press the
“Enter”-button to learn more in depth details about that splice.
15

4. Fusion Numbers
Telling about total number of splices made in machine.
Heat
In the “Heat”-section You control the following oven-parameters:
1. Heating time
Default heating time for the oven is set to 30 sec. Adjust it with “left/right”-
arrows. The oven time can be set in steps of 1 sec. according to Your needs.
2. Temperature
Default temperature for the oven is set to 180 degrees Celsius. Adjust the
temperature with “left/right”-arrows. The temperature can be set in steps of
+/- 5 degrees Celsius according to Your needs.
3. Show Temper
Displays the oven temperature when in operation. Default setting is “Off”.
Change value with the “Enter”-button.
16

4. Pre-Heat
For doing the oven procedure faster. When enabled it will keep the oven
temperature at about 100 degrees C. Remember that this will reduce the
operational time when running on battery.
Arc
1. Arc test
Strip, cleave, clean and place fibers int the fiberholders (left/right). Close the
main lid and enable the function. The EasySplicer Pro will then check the Arc.
2. Arc Calibration
- Make sure You have the correct fiber-type selected (SM/MM). See below
“Para”-setting, page 12.
- Strip, clean and cleave one fiber from each side (left/right) and place in their
fiberholders. Then place them in the splicer.
- Always clean the fiber with alcohol, isopropyl or similar. Make sure not to
touch the fiber with anything after cleaning as it will become dirty.
Place the stripped and cleaned fiber across the v-groove (see picture below).
- Press the “Menu button” and select “ARC”.
17

- The unit will reset for this operation (Arc Calibration will be shown in top of
the display).
- Press the “Enter button” and the unit will perform the calibration.
Successful Calibration
- Simply redo the above steps if the unit is unsuccessful with the operation.
You can see a full calibration video at:
18

State
This section will tell the status and about the surrounding environment of the unit.
1. Pressure
Current air-pressure
2. uter Temperature
Last measured outdoor temperature in Celcius
3. Inner Temperature
Last measured indoor temperature in Celcius
4. Remaining Capacity
Remaining battery capacity in %
19

Info
Information about Your EasySplicer PRO
1. Software Version
Tells about the software version of Your EasySplicer PRO. Check at:
www.easyplicer.com to find latest firmware.
2. Hardware Version
Tells about Your units specific hardware.
3. Serial Nr
Serial nr of Your EasySplicer PR
4. FPGA
Processor version of the splicer.
20
Table of contents
Other EasySplicer Measuring Instrument manuals
Popular Measuring Instrument manuals by other brands

Bms Bulut Makina
Bms Bulut Makina MX-3 Operational manual

Louroe Electronics
Louroe Electronics ASK-4 101E Installation and operating instructions

Bosch
Bosch Professional LR 60 Original instructions

Precisa
Precisa XM 60 operating instructions

Siemens
Siemens SITRANS FUS060 HART operating instructions

National Instruments
National Instruments FD-11605 quick start