Eazy V3 Automated Electronic Coffee Tamper Press User manual

User Guide
Read these instructions before rst use. Please retain this booklet for future reference.
Automated Electronic Coee Tamper Press
30 Kg
2018-21-08 13:24:00 TUE
23oC 30% RH
2 Press
1290 250P/D
15 k g
25 Kg
20 Kg
15 Kg
10 Kg
1
2

EAZYV3 USER GUIDE PAGE 2
This image is called the “Mayan DreamSpell’ and is based on an image from the Dresden Codex.
The Mayan princess is in the arms of the god Chaac, a god of fertility, agriculture and
reaping and sowing benets from nature.
Her prime objective is to dream for abundance.
In this drawing her dreams come true.
The creator of this dreamspell wishes everyone abundance.

EAZYV3 USER GUIDE PAGE 3
Contents
Section 1 4
1.1 Safety Precautions for the EazyV3 Press 4
1.2 Introduction 5
1.3 Product Parts 6
Section 2 7
2.1 Key Features: Press 7
2.2 Key Features: Screen 8
2.3 Key Features: Screen 9
2.4 Key Features: Navigating Menus 10
Section 3 11
3.1 Use 11
Section 4 12
4.1 Settings: Tamping 12
4.2 Settings: Date and Time 13
4.3 Settings: Set Cafe Name 14
4.4 Settings: PIN Use and Screen Lock 15
Section 5 16
5.1 Care Instructions 16
5.2 Filter 17
5.3 Press Counters 18
Section 6 19
6.1 Warranty 19

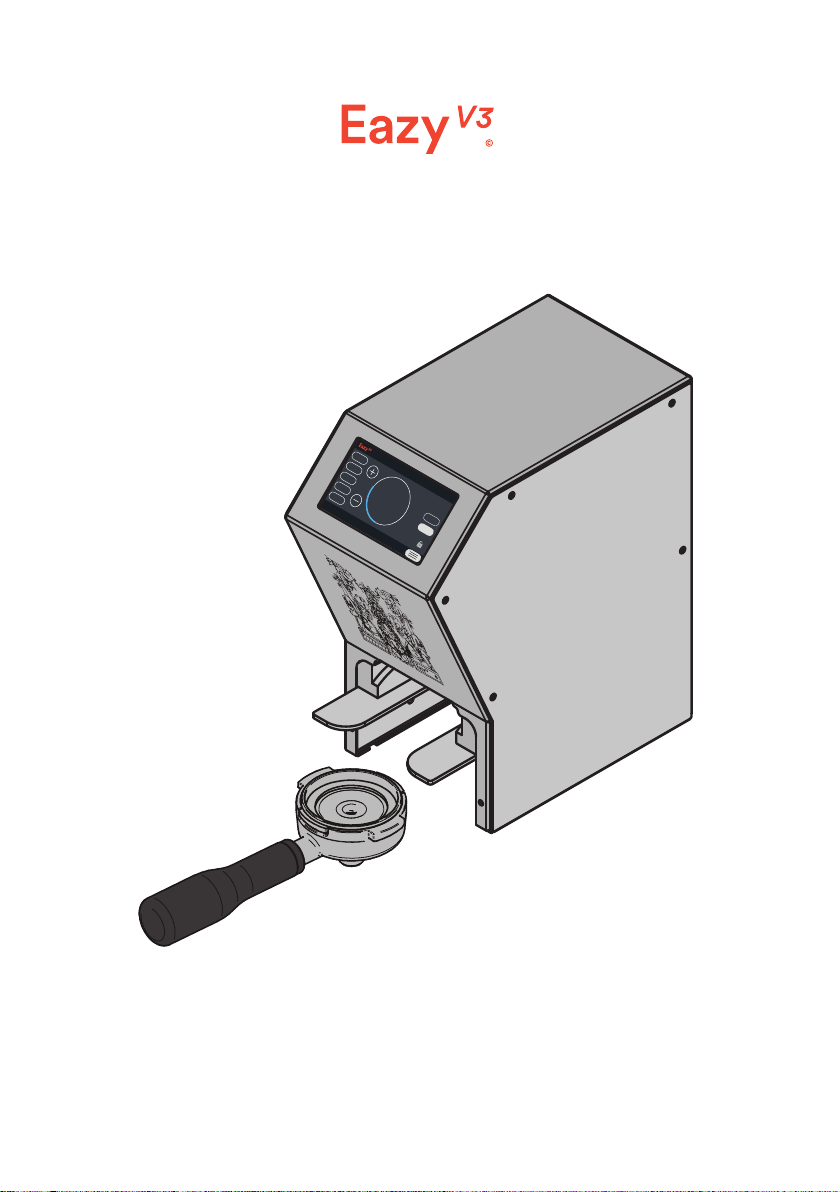
EAZYV3 USER GUIDE PAGE 4
1.1 Safety Precautions for the EazyV3 Press
DANGER: Electrical parts are electrically live when the
power switch is o.
Read all instructions before using and save all instructions provided with the press.
1. Children should be supervised to ensure that they do not play with the appliance.
2. This appliance is intended to be used in household and similar applications such as:
• sta kitchen areas in shops, oces and other working environments;
• farm houses;
• by clients in hotels, motels and other residential type environments;
• bed and breakfast type environments.
3. Always disconnect the appliance from the supply if it is left unattended and before
assembling, disassembling or cleaning.
4. This appliance shall not be used by children. Keep the appliance and its cord out of
reach of children.
5. This appliance can be used by children aged from 8 years and above if they have been
given supervision or instruction concerning use of the appliance in a safe way and if
they understand the hazards involved.
6. Cleaning and user maintenance shall not be made by children unless they are aged
from 8 years and above and supervised. Keep the appliance and its cord out of reach
of children aged less than 8 years.
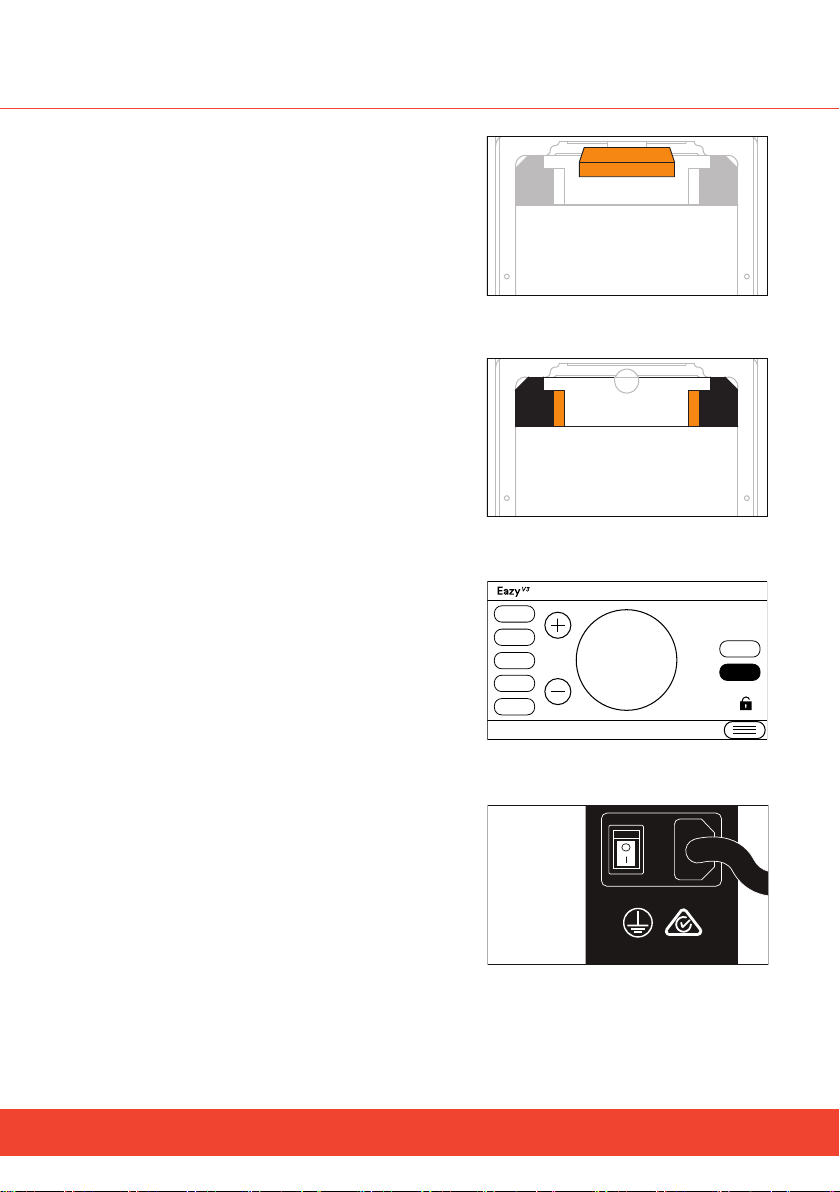
7. If you circumvent the workings of the machine, you may hurt your hand.
8. The EazyV3 must be connected to the electrical voltage requirements as specied in
the ratings label located on the EazyV3.
9. Use of product near the proximity of water presents a hazard. Keep away from water
at all times. Do not place or store the press where it can fall or be pulled into a sink.
10. When using electrical appliances, basic safety precautions should always be followed.
11. Do not use the press for any purpose other than its intended use as specied in this
user guide.
12. Do not use press when portalter is empty. Coee must be inside of the portalter
prior to use.
13. Always unplug immediately after using. Always turn the power o at the power outlet
before you insert or remove a plug. Remove by grasping the plug: do not pull on
the cord.
14. Do not use the press with an extension cord unless this cord has been checked and
tested by a qualied electrical technician.
15. This product is not intended for use by persons with reduced physical or sensory
capabilities or lack of experience or knowledge unless they have been given
supervision or instruction concerning use of the appliance by a person responsible for
their safety.
16. This product is not a toy. Keep out of reach of children.
17. Do not let the power cord of the press hang over the edge of a table or bench top or
touch any hot surface.
18. Do not operate the press with a damaged cord or if the press has been damaged in
any manner.
19. Keep hands and ngers outside of the press. Do not place ngers in place of
tamping head.
20. Only change the tamper head when the press is switched o from the power supply.

EAZYV3 USER GUIDE PAGE 5
Manufacturer’s note
This press has been solely designed for the compression of ground coee. Any other
use is understood to be improper, and consequently hazardous.
The manufacturer cannot be held responsible for any damage as a result of improper or
incorrect use not consistent with the procedure as set out in this user guide.
The EazyV3 is a fully-automated electronic pressure loaded coee tamper which is
designed to replace the need for baristas to manually tamp ground coee. The EazyV3 is
designed to prevent injury to the barista by automating the tamping process, and reducing
the likelihood of repetitive strain injury.
The EazyV3 will eliminate 3 critical coee making variables:
1. Ensuring consistent tamping pressure
2. Ensuring each compression is level
3. Giving the barista control over the tamping depth
The EazyV3 is the rst electronic tamper which provides additional assistance to
baristas through the inclusion of temperature and humidity sensors, further eliminating
environmental variables, likening the coee making process to a science.
The EazyV3 has important safety and maintenance features.
In this manual, the terms ‘press’ and ‘tamper’ are used interchangeably.
The EazyV3 is proud to be 100% Australian owned and made.
The EazyV3 has been tested to and certied as compliant with the following Global Certications:
IEC 60335-2-14 Edition 5.2
IEC 60335-1 Edition 5.2
EN 60335-2-14:2006 + A1:2008 + A11:2012/AC:2013
EN 60335-1:2012/AC:2014 + A11:2014
EN 62333:2008
AS/NZS 60335.2.14:2013
AS/NZS 60335.1:2011 + A1-A3)
AS/NZS CISPR 14.1:2013 (CISPR 14-1: 2011 Ed 5.2)
CFR FCC Part 15
Subpart B
ANSI C63.4: 2014
1.2 Introduction

EAZYV3 USER GUIDE PAGE 6
1.3 Product Parts
HOME SCREEN
BRACKET
TAMPER HEAD
PORTAFILTER IS INSERTED AS PER THE ARROW SHOWN.
* Portalter shown for instructional purposes only
30 Kg
2018-21-08 13:24:00 TUE
23oC 30% RH
2 Press
1290 250P/D
15 k g
25 Kg
20 Kg
15 Kg
10 Kg
1
2

EAZYV3 USER GUIDE PAGE 7
2.1 Key Features: Press
Tamper heads
The tamper head is the base of the press which
compresses ground coee.
The head is available in a 58.4mm size.
Bracket
The bracket supports the portalter while the press
is operating by holding the portalter in place as
the tamper head compresses the coee.
Home Screen
The touch screen controls the functionality of the
press. The key features of the screen are explained
on page 8.
Power switch
The EazyV3 can be turned on and o using the
power switch at the rear of the machine.
Diagram 2.3
Diagram 2.1
Diagram 2.2
Diagram 2.4
Input Voltage: 220 - 240Vac
Frequency: 50Hz
50W
30 Kg
2018-21-08 13:24:00 TUE
23oC 30% RH
2 Press
1290 250P/D
15 k g
25 Kg
20 Kg
15 Kg
10 Kg
1
2

EAZYV3 USER GUIDE PAGE 8
2.2 Key Features: Screen
1 - Temperature and Humidity Reader
The temperature reader shows the temperature of the location of the press at any given
time. The humidity reader will assist the barista to determine how coarse or ne to make
their coee grind and how much pressure they wish to exert on ground coee.
2 - Date and Time
To set the time and date, please refer to page 13. The time display is in 24 hour format.
3 - Compression Cycle
This home screen shows the number of times the tamper compresses ground coee per
cycle when in use. To change the mode, refer to page 12.
4 - Pressure Display
The tamping pressure is displayed in the centre of the home screen, and is set to 15 kilos by
default, as shown in diagram 2.4. To adjust pressure, refer to page 12.
5 - Press Reader
The home screen displays how many cycles the tamper has been pressed on a over the
lifetime (total) of the machine, and on a particular day.
30 Kg
2018-21-08 13:24:00 TUE
23oC 30% RH
2 Press
1290 250P/D
15 k g
25 Kg
20 Kg
15 Kg
10 Kg
1
2
1 - TEMPERATURE AND
RELATIVE HUMIDITY
READER
Diagram 2.4
2 - DATE AND TIME
3 - COMPRESSION
CYCLES
4 - PRESSURE
DISPLAY
5 - PRESS READER

EAZYV3 USER GUIDE PAGE 9
2.3 Key Features: Screen
Startup Screen
The startup screen displays the cafe name.
The name shown on the startup screen can be
customised.
To set the name, please refer to page 14.
Lock
The padlock indicates that the screen is locked and
adjustments cannot be made to the press settings.
The lock setting prevents all settings from
being modied.
To lock the screen, refer to page 15.
Diagram 2.5
Diagram 2.6
15 k g
2018-21-08 13:24:00 TUE
2 Press
30% RH
23oC
250P/D
Cafe Name

EAZYV3 USER GUIDE PAGE 10
Diagram 2.7
Diagram 2.8
Main Menu
The main menu can be accessed via the menu
button, as shown on the right side of diagram 2.7.
The options accessible from this menu can be
viewed in diagram 2.8.
Menu Icons and Buttons
Select icons as required.
To exit the main menu selection, press the left
arrows button shown in diagram 2.8.
Sub menu selections can be made by pressing the
text, as shown in the example diagram 2.9.
To return to a previous menu, press the left arrows
button.
Keyboards
Use the shift arrow to toggle between uppercase
and lowercase letters. Upon entering the keyboard
screen, the previous entry is cleared. To save a new
entry, press OK.
2.4 Key Features: Navigating Menus
Diagram 2.9
Diagram 2.10
Main Menu
Guide
Device Safety Precautions
How To Use
How To Lock / Unlock Screen
Enter Cafe Name SPACE
OK
X
Q W E R T Y U I O P
A S D F G H J K L
Z X C V B N M

EAZYV3 USER GUIDE PAGE 11
3.1 Use
Diagram 3.1
Diagram 3.3
Step 1
Turn on the tamper. Touch anywhere on the screen
and enter the PIN.
Step 2
Program the tamper to compress either once or
twice and to compress desired kilos.
Refer to ‘Settings’ on page 12 for how to adjust
tamping mode.
Step 3
Place ground coee into portalter.
Step 4
Place portalter inside bracket (as shown in diagram
3.3). The tamper head will lower down and press
once the portalter hits the sensor. Preset pressure is
reached once rst compression is completed in the 1
press cycle, and after the second compression in the
2 press cycle. The rst compression in the 2 press
cycle represents half of the preset pressure amount.
SAFETY ALERT: Do not touch any part of the machine
while tamping is in progress.
Diagram 3.2
2 Press
15
k g 1
2

EAZYV3 USER GUIDE PAGE 12
4.1 Settings: Tamping
Number of Compressions/Cycle
Press the 1 or 2 button on the home screen to adjust the number of times the tamper
compresses when in use.
If you select the 2 press cycle and the tamping pressure is set on 20 kilos for example,
the rst press would be 10 kilos and the second press would be 20 kilos — the same rule
applies throughout the range of the tamping pressure selections.
Adjusting the tamping pressure
From the home screen, press the +/- buttons to adjust the pressure. Pressure can be
modied in one kilo increments from a minimum of 10 kilos up to 30 kilos.
The 50 kilo function is only available on the single press cycle, and is accessed by pressing
the pressure display circle (not recommended for daily use).
For the 1 and 2 press cycles, the minimum weight that can be set is 10kg.
Quick selection weight options are available in 5 kilo increments to 30kg on the left of the
home screen. Selections may be modied using the +/- buttons.
Note: Adjustments to all settings can only be made when the screen is unlocked.
SELECTED
TAMP PRESSURE
Diagram 4.1
30 Kg
2018-21-08 13:24:00 TUE
23oC 30% RH
2 Press
1290 250P/D
15 k g
25 Kg
20 Kg
15 Kg
10 Kg
1
2

EAZYV3 USER GUIDE PAGE 13
4.2 Settings: Date and Time
Adjusting the date and time
1. From the home screen, press the menu button > ‘Settings’ > ‘Day and Time’
2. Enter the required information in a YYYY/MM/DD/HH/MM/SS format as required.
3. Once all changes are made, press menu again to save the setting.
Note: Adjustments to all settings can only be made when the screen is unlocked.
DATE AND TIME
Diagram 4.2
OK
X
Enter Date & Time
1 2 3
4 5 6
78
0
9
yyyy/mm/dd/hh/mm/ss

EAZYV3 USER GUIDE PAGE 14
4.3 Settings: Set Cafe Name
Diagram 4.3
Cafe Name
Update the cafe name
1. From the home screen, press the menu
button > ‘Settings’ > ‘Cafe Name’.
2. Enter the message using the keyboard, as
shown in diagram 4.4. The output will be
shown in the top bar.
3. Save the input by pressing the ‘OK’ button. Diagram 4.4
Note: The ‘Cafe Name’ is shown on the device start-up screen.
Enter Cafe Name SPACE
OK
X
Q W E R T Y U I O P
A S D F G H J K L
Z X C V B N M
CONFIGURABLE
CAFE NAME

EAZYV3 USER GUIDE PAGE 15
4.4 Settings: PIN Use and Screen Lock
Diagram 4.5
PIN Use
When PIN is required
The PIN is required to start the EazyV3, and to
ensure safe use, it is required at all times to clean
the press.
The EazyV3 has a default PIN of “1234”. Enter this
pin on start-up.
How to reset the PIN
1. From the home screen, press the menu
button > ‘Settings’ > ‘Set / Reset PIN’.
2. Enter the current PIN and press OK
3. Select ‘Yes’ to change PIN.
4. Enter a new PIN (max. 4 numbers) and press ‘OK’.
5. Press ‘Yes’ to conrm and re-enter the new PIN.
6. Save the new setting by pressing ‘OK’.
Screen Lock
When the padlock icon is locked, this indicates that
the home screen is locked, as shown in diagram 4.6.
How to lock screen
1. From the home screen, press the padlock icon.
2. The screen is then locked.
How to unlock screen
1. From the lock screen, press the padlock icon
2. The screen is then unlocked.
Note: the screen will automatically lock after
approximately 1 minute.
Diagram 4.6
15 k g
2018-21-08 13:24:00 TUE
2 Press
30% RH
23oC
250P/D
OK
X
Enter PIN
1 2 3
4 5 6
78
0
9

EAZYV3 USER GUIDE PAGE 16
5.1 Care Instructions
Diagram 5.1
Maintenance
To clean the tamper head, use a dry brush, damp
sponge or cloth. Do not immerse the machine
in water.
How to clean
1. From the home screen, press the menu
button > ‘Care’ > ‘Cleaning Mode’ press ‘Start’
and enter your PIN.
2. The tamper head will be lowered while the
screen displays the message shown in Diagram
5.1. When the base stops moving, turn the
machine o at the power switch.
3. Clean it using a dry brush, damp cloth
or sponge.
4. When you have nished cleaning, turn the
machine on at the power switch.
5. To move the base to its original position, press
‘Stop’ and re-enter your pin.
SAFETY ALERT: To ensure safe use, the PIN is required at
all times to clean the machine.
Cleaning Mode
Stop

EAZYV3 USER GUIDE PAGE 17
Replace lter
1. From the home screen, press the menu
button > ‘Care’ > ‘Cleaning Mode’ press ‘Start’
and enter your PIN.
2. The tamper head will be lowered while the
screen displays the message shown in Diagram
5.1. When the base stops moving, turn the
machine o at the power switch.
3. Unscrew the tamper head by turning
clockwise. Inside the chamber from where the
tamper head came, there is a loose fabric lter.
This can be pulled out using a small screw-
driver or pointy pliers. Filter is depicted in
diagram 5.2.
4. Gently push the new lter inside the chamber.
5. When replacing the lter, it should not obstruct
the tamper head.
6. Screw back the tamping ange.
7. When you have nished replacing the lter,
turn the machine on at the power switch.
8. To move the base to its original position, press
‘Stop’ and re-enter your pin.
Diagram 5.2
5.2 Filter

EAZYV3 USER GUIDE PAGE 18
Total (usage over the lifetime of the machine) and
daily press counters are both shown on the home
screen of the EazyV3, as shown in diagram 5.3
To see a historic list of press counters per month (as
shown in diagram 5.4), from the home screen, press
the menu button > ‘Information’ > ‘Press Counters’.
A maximum of 11 months and month to date is
shown in the Press Counters screen.
5.3 Press Counters
Diagram 5.3
Diagram 5.4
30 Kg
2018-21-08 13:24:00 TUE
23oC 30% RH
2 Press
1290 250P/D
15 k g
25 Kg
20 Kg
15 Kg
10 Kg
1
2
Motor Counter: 1290
Counter History
AUG 18
JUL 18
JUN 18
MAY 18
APR 18
MAR 18
FEB 18
JAN 18
DEC 17
NOV 17
OCT 17
SEP 17
690
600
0
0
0
0
0
0
0
0
0
0

EAZYV3 USER GUIDE PAGE 19
6.1 Warranty
This document sets out the warranties that are given
by EazyV3 Pty Ltd ACN 616 385 338 (“EazyV3 Pty Ltd”
or “our”) in relation to the Product purchased from or
manufactured by EazyV3 Pty Ltd.
1. Denitions
Australian Consumer Law means the
Competition
and Consumer Act 2010 (Cth)
, Trade Practices
(Australian Consumer Law) Amendment Regulations
2010 (No. 1) as amended from time to time and any
other associated regulations as enacted from time
to time.
Customer or you means the party who acquired the
Product from EazyV3 Pty Ltd for that party’s use.
EazyV3 means EazyV3 Pty Ltd ACN 616 385 338 of
PO BOX 195 South Yarra, Victoria 3141 Australia.
Manufacturer, we, or us means EazyV3 Pty Ltd.
Product means the EazyV3 Electronic Press.
Warranty Period means the period specied in Item
2 of the Schedule. The warranty period commences
from date of purchase.
Supplier means the authorised distributor or retailer
of the Product that sold you the Product in Australia.
2. Warranty
(a) The benets of this warranty are in addition to all
other rights and remedies which the Customer may
have under the Australian Consumer Law.
(b) Our Product comes with guarantees that cannot
be excluded under the Australian Consumer Law. You
are entitled to a replacement or refund for a major
failure and compensation for any other reasonably
foreseeable loss or damage. You are also entitled to
have the Product repaired or replaced if the Product
fails to be of acceptable quality and the failure does
not amount to a major failure.
(c) We warrant the Product for all parts defective in
workmanship or materials for the period of 12 months
from the date of purchase (Warranty Period). If the
Product proves defective within the Warranty Period
by reason of improper workmanship or material,
we may, at our own discretion, repair or replace the
Product without charge.
3. Limitations
(a) The Customer must read and follow all set up,
usage instructions and directions in this user guide.
If the Customer fails to do so, it may invalidate this
warranty, the Product may not function correctly and
the Product may suer other damage.
(b) This Warranty does not apply should the defect
or failure of the Product be attributable to misuse,
abuse, accident or non-observance of manufacturer’s
instructions.
(c) Subject to any statutory provisions to the contrary,
EazyV3 has no responsibility or liability for damage to,
or loss of, any business prots or other consequential
damage under any circumstance and EazyV3’s liability
is expressly limited to the repair or replacement of the
defective Product.
(d) This warranty is immediately void if:
(i) Any serial number is removed or defaced; or
(ii) The Product has been serviced or otherwise
repaired by a person not authorised to do so by
us or where non-approved replaced parts
are used.
4. Repair or Replace
(a) The warranty granted under clause 2 is limited to
repair or replacement only.
(b) During the Warranty Period, EazyV3 will replace
or repair the defective Product so long as the damage
does not arise from:
(i) Any modication of the Product, including
tampering with or any attempt to disassemble
the Product;
(ii) Any misuse use of the Product by the
customer or anyone from whom the Customer
has legal responsibility (including a minor);
(iii) Any use or operation of the Product outside
of the physical, electrical or environmental
specications of the Product;
(iv) Failure for any reason to follow the directions
for use given in any user guide applicable to the
Product; or
(v) Inadequate or improper maintenance of
the Product.
(c) Any parts of the Product replaced during repairs
or any Product replaced during the Warranty period
remain the property of the manufacturer.
(d) In the event of the Product being replaced during
the warranty period, the warranty on the replacement
Product will expire on the same date as for the
warranty period on the original Product, which
is replaced.
5. Warranty Claim Procedure
(a) To obtain the benet from this warranty,
the customer:
(i) must have read the user guide provided with
the Product before operating the Product; and
(ii) contacted EazyV3 within the Warranty Period
and within 7 days of the discovery of the
claimed problem.
(b) The customer may make a claim under this
warranty by completing and sending the Warranty
Registration Form to EazyV3 (available to download
from www.eazyv3.com.au).
(c) On receipt of the form, EazyV3 will contact the
Customer to determine the extent of the issue with
the Product, and where possible resolve the issue.
(d) If there is an issue with the Product that is covered
by this warranty the customer must arrange for the
alleged defective Product to be delivered to EazyV3.
6. Transportation costs
All transportation costs incurred in returning the
defective Product to EazyV3 for repair or inspection,
and the cost of returning them to the Customer must
be paid by the Customer.
7. Statutory Notice
Our Product comes with guarantees that cannot be
excluded under the Australian Consumer Law. You
are entitled to a replacement or refund for a major
failure and compensation for any other reasonably
foreseeable loss or damage. You are also entitled to
have the Product repaired or replaced if the Product
fails to be of acceptable quality and the failure does
not amount to a major failure.
Company Name:
Postal Address:
Telephone Number:
Email address:
EazyV3 Pty Ltd
PO BOX 195 South Yarra, Victoria 3141
+61 412 315 098

Visit eazyv3.com.au
© EazyV3 Pty Ltd Australia 2018
Table of contents
Popular Kitchen Appliance Accessories manuals by other brands

Nostalgia Electrics
Nostalgia Electrics TACO TUESDAY TTTCSB10BR Instructions and recipes

Maytag
Maytag 8171413T installation instructions

Bartscher
Bartscher KV1 Original instruction manual

Honeywell
Honeywell Piezo Evelope Assembly 396079 installation instructions

KitchenAid
KitchenAid FT quick guide

Dash
Dash DCAF150UP1 manual