ECCO SAFETY GROUP Gemineye EC2028-WC User manual

Page 2 of 6
Notes:
1. Larger wires and tight connections will provide longer service life for components. For high current wires it is
recommended that terminal blocks or soldered connections be used with shrink tubing to protect the connections. Do
not use insulation displacement connectors (e.g., 3M Scotchlock type connectors)
2. Route wiring using grommets and sealant when passing through compartment walls. Minimize the number of splices
to reduce voltage drop. High ambient temperatures (e.g., under-hood) will signicantly reduce the current carrying
capacity of wires, fuses, and circuit breakers. All wiring should conform to the minimum wire size and other
recommendations of the manufacturer and be protected from moving parts and hot surfaces. Looms, grommets,
cable ties, and similar installation hardware should be used to anchor and protect all wiring.
3. Fuses or circuit breakers should be located as close to the power takeo points as possible and properly sized to
protect the wiring and devices.
4. Particular attention should be paid to the location and method of making electrical connections and splices to protect
these points from corrosion and loss of conductivity.
5. Ground termination should be only be made to substantial chassis components, preferably directly to the vehicle
battery.
6. Circuit breakers are very sensitive to high temperatures and will “false trip” when mounted in hot enviroments or
operated close to their capacity.
When drilling into any vehicle surface, make sure that the area is free from any electrical wires, fuel lines, vehicle
upholstery, etc. that could be damaged.
!
Caution!
MONITOR EC7000B-WM
Screen Size 7” (4:3) and (16:9)
Controller 4 Camera
Voltage 12-32 VDC
Power Approximate: 7W
Mirror Imaging Yes (via Camera and Monitor Switch)
Resolution 800 (W) x RGB x 480 (H)
System PAL/NTSC
Viewing Angle L/R/U/D: 60º/60º/45º/60º
Visible Area 154X86mm
Contrast 400:1
Split Screen Feature Quad View Split Screen
AV Compatible No
DVR Compatible No
Audio No
Brightness 400cd/m2
Light Sensor Auto Dim
Camera Selection 1-4 Via Trigger Wires
Connection: CAM DC plug/2 wire
Connection (Monitor Pigtail) Male 6pin/5 wire
Housing Plastic
Mounting Pedestal
Mech. Vibration Pedestal Bracket - 3G
Weight 1.50 lbs / 0.67kg
Dimensions (WxHxD) 176(W) x 123(H) x 27(D)mm
Operating Temp -4°F to 158°F / -20 to +70 oC
Remote Control Yes
Approvals FCC,CE,RoHS
Trigger voltage 12 - 32V
Distance 30 - 100 meters
CAMERA EC2028-WC
Image 1/3 CCD
Voltage Requirement 12-32V
Eective Pixels 628(H) x 582(V)
Power Consumption 5W
Lens Size 1/4”
Lens Angle 120°Horizontal/90 Vertical
Audio No
Light Sensor Auto Switch B&W
Infrared LEDs 18
Housing Aluminum Alloy
Mech. Vibration 8g
Mounting Rear/Front
Weight 1.20 lbs / 0.54kg
Dimensions (WxHxD) (L) 90x (W) 60.5x (T) 56.5 mm
Operating Temp. -4°F to 158°F / -20 to +70 oC
IP Rating IP66
Approvals FCC,CE,RoHS
Current Consumption 500mA Max
Video Delay 150ms
Frame Rate 25fps
System PAL
Page 3 of 6
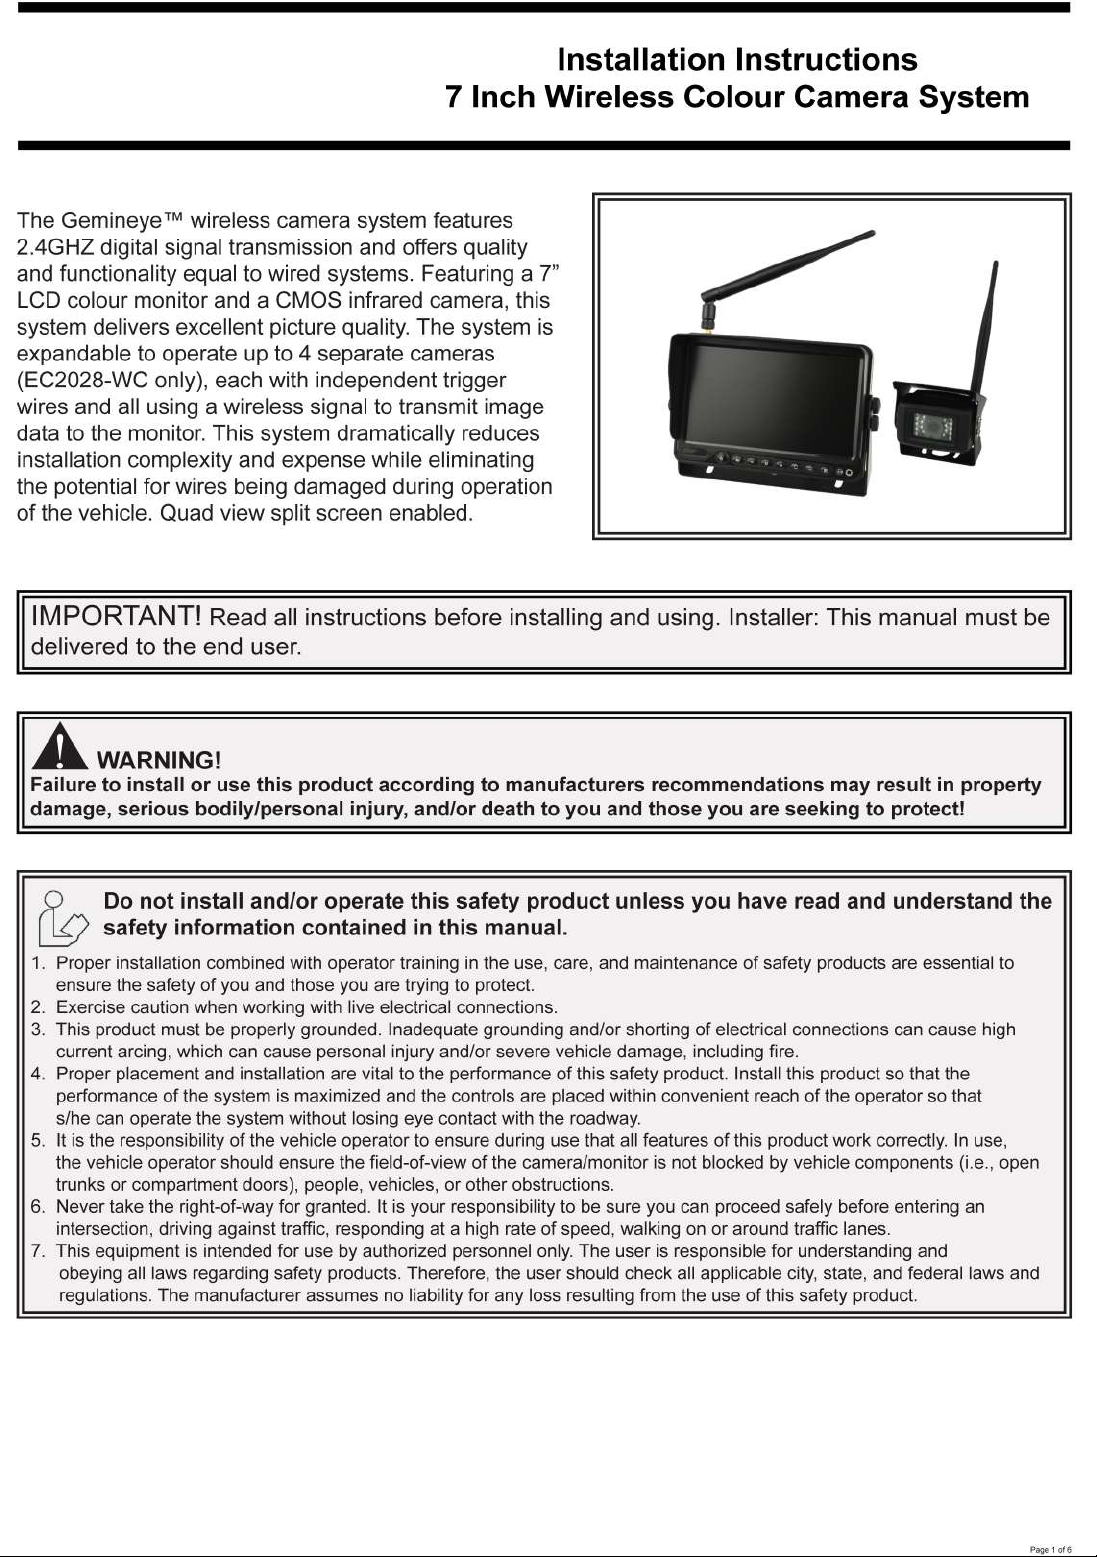
Important! Mount the camera at a location that provides the best view of the area immediately behind the vehicle.
Generally, mounting locations toward the top of the vehicle provide the best eld of view. Lower mounting locations
reduce the eld of view and increase the likelihood of damage from road spray.
Important! Waterproof all connections whether inside or outside the vehicle by using sealant and wrapping with
insulation tape. Wrap tape tightly, overlapping by one-half widths so there are no gaps.
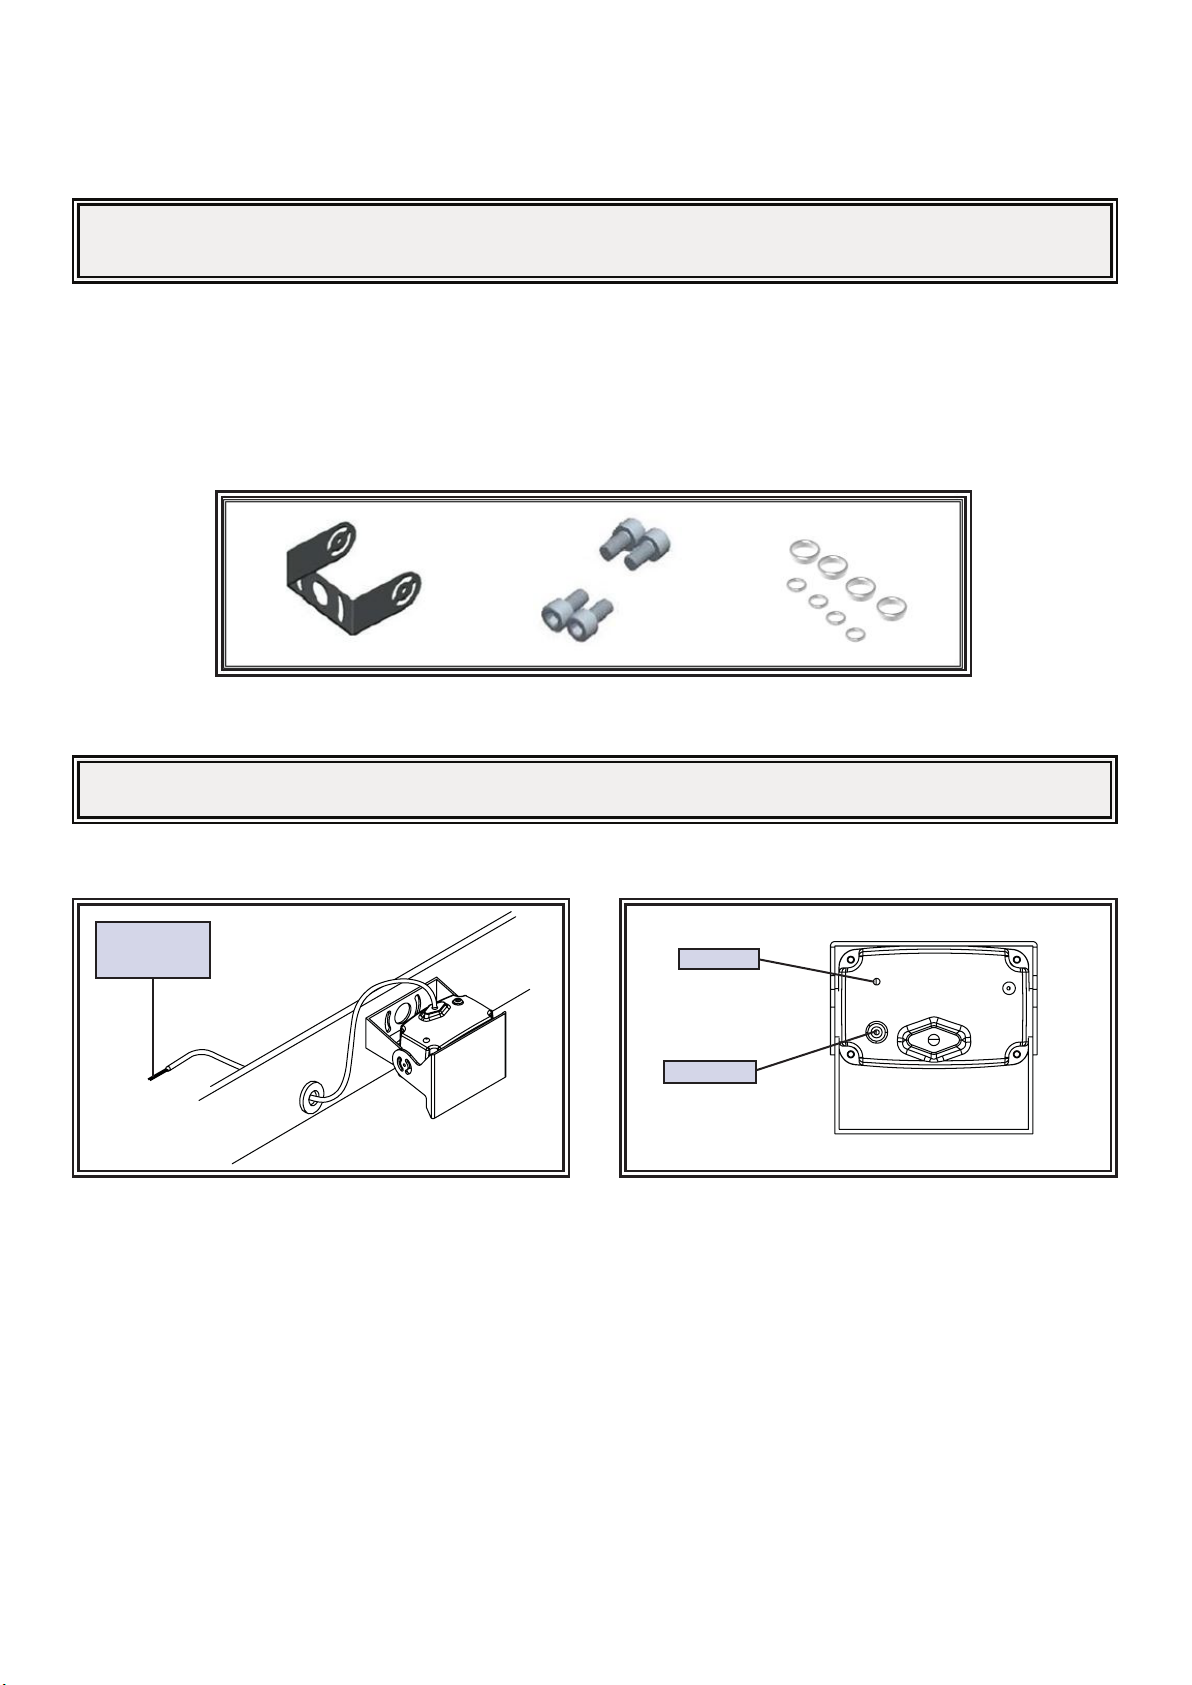
Two Wires
DC12V (RED)
GND (BLACK)
Pair Button
RF socket
Pairing:
When monitor is in the PAIR function and 50 sec countdown is in progress, press and hold for 5 seconds PAIR button
on the back of camera for successful pairing process.
1. Find an appropriate location for installation.
2. Drill holes according to the size of U-bracket and x the U-bracket.
3. Drill a 3/4” (19mm) hole next to U-bracket.
4. Install the camera on U-bracket.
5. Connect the camera tail with the extension cable from inside the vehicle.
6. Loosen the hex head screws and adjust the camera’s position to get the best view angle in the monitor.
Wiring: Picture depicted is for reference only.
Camera Model EC2028-WC
Installation, Wiring and Function
Installation:
Page 4 of 6
WARNING!
To prevent accidental shock, DO NOT OPEN THE MONITOR CASE. Opening the monitor case will expose
the inside of the monitor to conditions that could adversely aect performance. Any evidence of
tampering with sealed components will void the warranty.
!
Important! Do not expose the monitor to water, it is not waterproof. Any water that leaks into the monitor could
cause extensive damage.
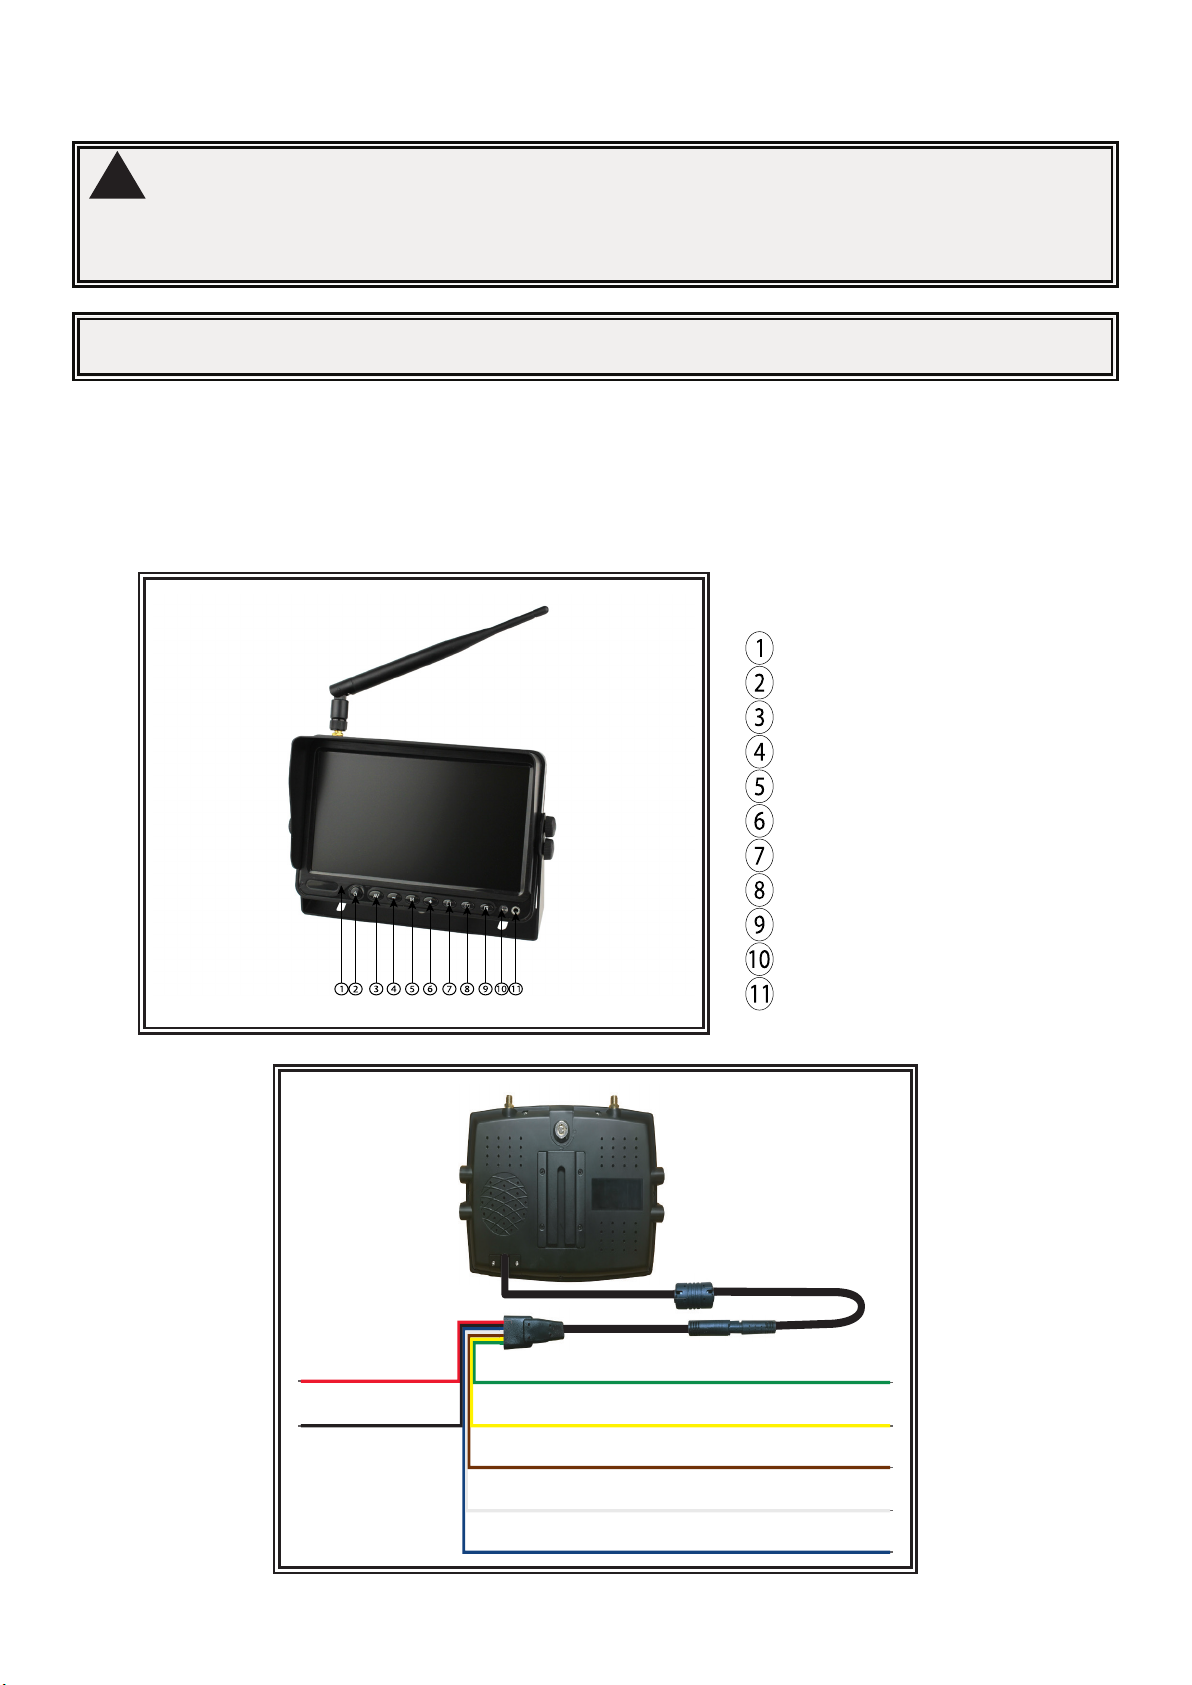
Light sensor
Power On/O
AV Switchover
Analogue decrease/ Volume decrease
Menu
Analogue Increase/ Volume increase
Blank keystroke
Blank keystroke
Blank keystroke
Remote receiver
Earphone Jack (N/A)
SD card (Keys provided) ECANTE-5ECANTE-5
Power (RED)
Ground (BLACK)
Camera #1 - Optional trigger (GREEN)
Optional trigger wire, user selected split/quad view (YELLOW)
Camera #2 - Optional trigger wire (GREY)
Camera #3 - Default reversing, optional trigger wire (BLUE)
EC7008-WM
8 Pin
Camera #4 - Optional trigger wire (BROWN)
PCY-EC7008-WM
Monitor:
Model EC7000B-WM
Installation instruction of using pedestal base:
1. Select suitable position on vehicle and x the base support.
2. Fix the monitor to the base support and adjust the view angle.
3. Put on the sun-visor and connect the monitor with the Pigtail cable.
Monitor Parts Identication
Page 5 of 6
CH
CH
MENU
MODE RESET TIMER
GRID 16:9
4:3 SEL
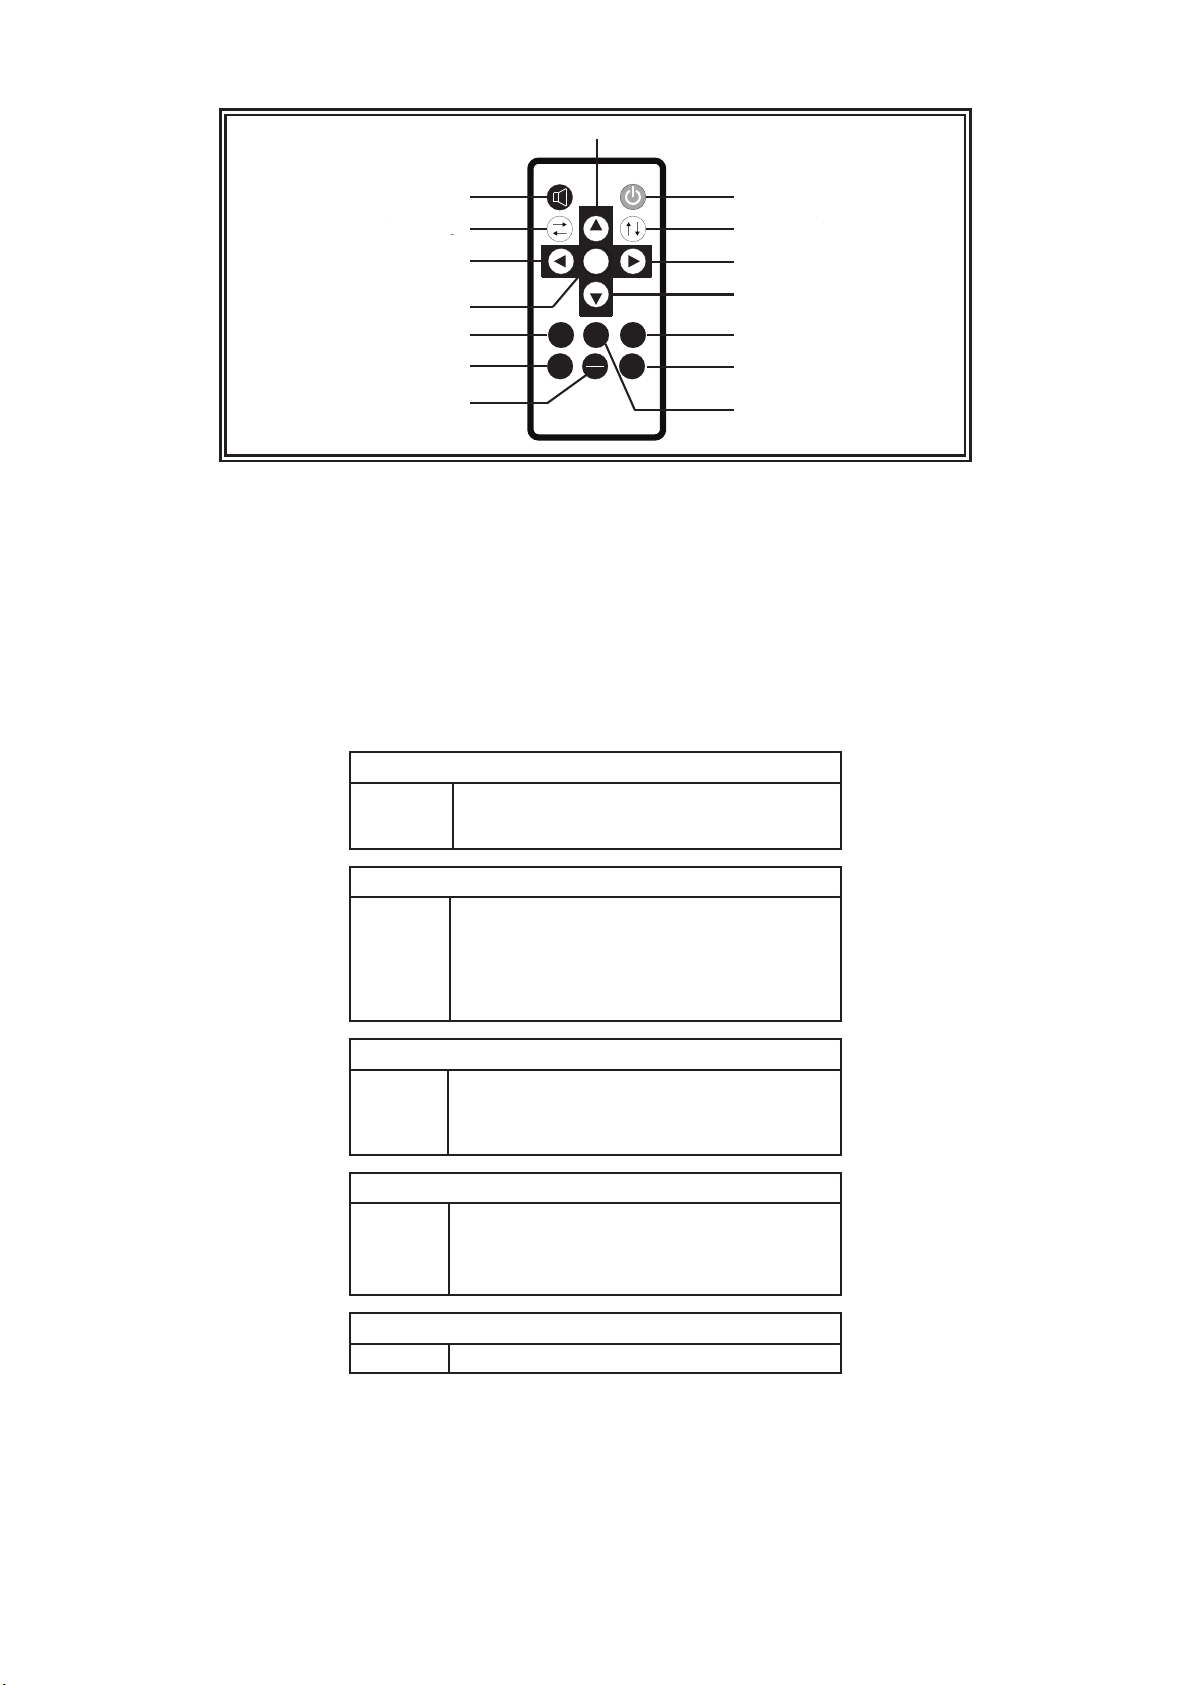
REMOTE CONTROL
Power on/off
Mute
Horizontal Mirror/Normal Image Vertical Mirror/Normal Image
Volume Up
Volume Down
Menu
Standard, Vivid, Soft,
Light, and User
Reversing Benchmark
Screen Mode (16:9/4:3)
Analog Increase
Analog Decrease
Sleep Timer(0-240 mins)
AV Switchover
Reset
Analogue Increase
Power on/o
Vertical Mirror/Normal Image
Volume Up
Analog Decrease
Sleep Timer (0-240 mins)
AV Switchover
Reset
Mute
Horizontal Mirror/Normal Image
Volume Down
Menu
Standard, Vivid, Soft,
Light and User
Reversing Benchmark
Screen Mode (16:9/4:3)
Remote:
Menu Operations:
Press the Menu button on the remote control or the Menu button on the monitor to get to the Menu selection.
Use the Volume Up & Volume Down on the remote control or Analog Increase & Analog Decrease on the monitor to toggle between
menus.
Use CH up & CH down button on the remote or Menu button on the monitor to highlight function you want to change.
Use the Volume Up on the remote control or Analog Increase on the monitor to change value.
Wait 15 seconds for Menu to close itself.
PICTURE
Bright
Contrast
Color
Reset
Adjust brightness setting. 0 - 100
Adjust contrast setting. 0 - 100
Adjust color setting. 0 - 100
Reset the device.
OPTION
Camera 1
Camera 2
Camera 3
Camera 4
Rotate
Pair
Set trigger delay 0-15s
Set trigger delay 0-15s
Set trigger delay 0-15s
Set trigger delay 0-15s
Change camera view - Mirror/Normal
Pair with Camera ON/OFF
SYSTEM
Language
Source
Guide lines
English/Deutsch/Francais/Espanol/Portugal/Italiano
Change input source
Display reversing guide lines
PRESET
AV1
AV2
AV3
AV4
VGA
ON/OFF
ON/OFF
ON/OFF
ON/OFF
ON/OFF - N/A
VOLUME
Volume 0 - 100 - N/A
This manual suits for next models
1


