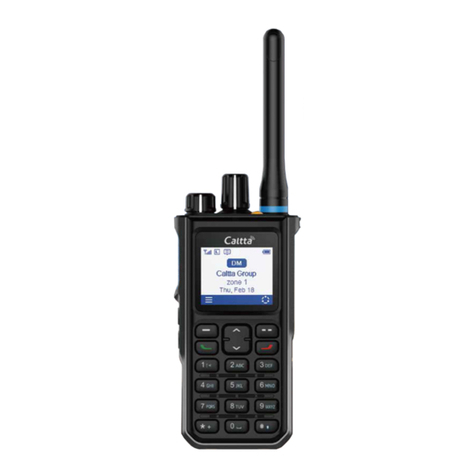
eChat e360 User manual

e360
ENGLISH
Quick Start Guide
Broadband Portable Radio

11
LEGAL INFORMATION
Copyright ©CALTTA TECHNOLOGIES CO., LTD. 2020
No part of this publication may be quoted, reproduced, translated or
used in any form or by any means, electronic or mechanical, includ-
sion
of CALTTA TECHNOLOGIES CO., LTD.
Violators Will Be Prosecuted.
CALTTA TECHNOLOGIES CO., LTD. reserves the right to make
guide without prior notice.
to the actual product. The accessories provided with the product
may vary with product models and functions.

2
1. GET TO KNOW YOUR RADIO
1.1 Components
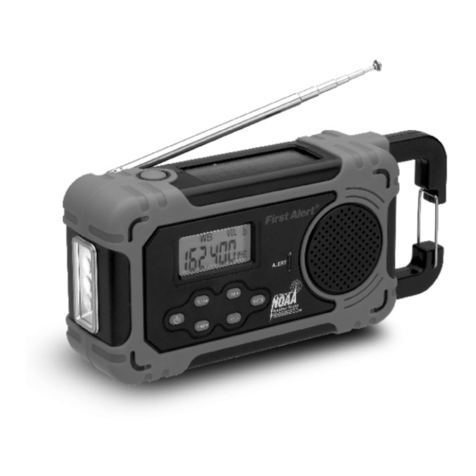
The e360 radio is a trunking voice intercom product based on the
public network data service, which can be used in the LTE/WCDMA
networks. With the help of 4G technology, the e360 achieves high-
speed data connection, so that you can communicate with others in
real time.
NOTE:
Before using the radio, read all the instructions contained in
the manual and with special care, those relative to safety.

3
1.2 COMPONENT DESCRIPTIONS
No. Name No. Name
1 F1 (Function 1) button 6 LCD screen
2 PTT button 7 SOS button
3F2 (Function 2) button 8 Antenna
4Power button 9 Earphone/USB Type-C Interface
5 Channel/Volume knob 10 Nano-SIM Card Slot
2. SYMBOLS DISPLAY
The main screen of Android system is the starting point for you to
access all Android system functions on your radio. You may study
the status of the radio by the status bar on the top of the screen.
The following icons may be displayed on the LCD.
Icon Status
GPS location ON
Charging
No SIM Card

4
Icon Status
Mute
Signal indicator
Data service indicator
Earphone connected
2.1 LED INDICATOR
The LED indicator indicates the operating status of the radio.
No. Working Status
LED Indicator
Color Period
1 Charging Red Solid
2 Full charge Green Solid
3 Login failed Red Flashing
4 Group selecting mode Green Solid
5 Floor request successful Red Solid
6 Floor request fail Red Flashing
7 Answer the group call/half-duplex private call Green Solid
8 Power on progress Green Solid
9 Power off progress Red Solid
10 Extremely low power (less than 10%) Red Flashing

5
3. GETTING STARTED
3.1 Insert the battery
1. Insert the battery by pushing up from lower left corner in the back
2. Install successfully, ensure the battery contacts match up with
the contacts in the radio.
3.2 Insert Nano-SIM card
Insert a valid Nano-SIM card into the radio before using.
The Nano-SIM card can be used in any corresponding format radio
(the new radio will automatically read the Nano-SIM card).
1. Power off the radio.
2. Open the cover of Nano-SIM card and insert it in the right direc-

6
tion.
3. Close the cover of Nano-SIM card.
NOTE:
• Please power off the radio before removing Nano-SIM card. It is
inadvisable to insert or take out the Nano-SIM card if connected to
external power source.
• Please avoid touching the metal plane area of the SIM card to
prevent damaging the information held inside. Store the Nano-SIM
card in a place away from electricity and magnetism.
3.3 Battery charging
There are two ways of battery charging, one is desktop charging,
the other one is USB cable charging.

7
Desktop charging:
1. Place the radio in the desktop charger and the radio will be
charged automatically.
2. After charging is completed, take out the radio.
USB cable charging:
3. Connect the charge/data cable to the USB Type-C interface of
the radio.
4. Connect the other end of charge/data cable to the charger, and
then connect the charger to AC power socket. Battery, radio and
charger will be moderately hot during charging, this is normal.
5. After charging, disconnect the charger from AC power source.
NOTE:
• Under the circumstance where data transmission is not supported,
the in-built data cable is for charging only.
• The lithium ion battery attached with the radio can be used after
ore
thorough use, so that the battery can reach its optimum usage
state.
• If the battery voltage is too low, the radio will automatically power

8
off.
• If the battery will be not used for a long period, please take it out
from the radio and store it in a cool, dry place.
3.4 Power on
Press and hold the power button for 3~5s under the power off
mode, after green indicator is lit, the LCD screen displays the power
on picture, prompting that the radio is powering on.
3.5 Power off
Press and hold the power button for 3~5s under the standby mode,
after red indicator is lit, the LCD screen displays the power off
picture, prompting that the radio is powering off.
3.6 Adjust the volume
Rotate the channel/volume knob to adjust the volume under the
standby mode, LCD screen displays the current volume level and
the radio broadcasts the voice assistance at the same time.
3.7 Light up the screen
Press the Power on/off button to light up the screen.

9
4. BASIC OPERATIONS
4.1 Log in eChat system
After the radio is powered on, it will automatically detect the data
network and eChat account setting, then login eChat system after
detection and voice prompt the user name and group name of the
current account.
If the radio cannot login eChat system, please check the following
information.
Problem type Possible cause Possible solution
Nano-SIM card Nano-SIM card data service
abnormal.
Please check whether the
Nano-SIM card data service of
the radio is normally activated
validity.
Account problem
Whether the eChat account
and password are set in a
wrong way.
Whether the eChat account
has a period of validity.
Whether the eChat account
has been occupied.
Please consult eChat service
provider.
4.2 Initiate group call
4.2.1 Standby mode
1. Press PTT button to initiate voice call to the current group. The
LCD screen will display relevant information whether the call is initi-
ated successfully, together with prompt tone and indicator prompt.
2. When the call is initiated successfully, you may press and hold

10
the PTT button to talk.
3.
4.2.2 Group selecting mode
1. Press the channel/volume knob to switch to the group selecting
mode.
2. Rotate the channel/volume knob to switch to the required group.
3.
for 10 seconds to select the current group automatically.
4. Press PTT button to initiate voice call to the current group. The
LCD screen will display relevant information whether the call is
initiated successfully, together with prompt tone and indicator.
5. When the call is initiated successfully, you may press and hold
the PTT button to talk.
6.
4.3 Answer the group call
The radio will join the PTT group call automatically when it receives
the PTT group call.
4.4 Floor request
4.5 Initiate half-duplex private call
1. Press the channel/volume knob to switch to private call mode.
2. Rotate the channel/volume knob to select the required online
member of the working group.

11
3. Press PTT button to initiate private call to the current member.
4. Press F2 button to end the private call and the radio will return to
the last working group automatically.
4.6 Answer half-duplex private call
1. The radio will exit from the current working group immediately
after receiving the private call.
2. The radio will join the half-duplex private call automatically and
keep in the listening status.
4.7 Initiate full-duplex private call
1. Press the channel/volume knob to switch to private call mode.
2. Rotate the channel/volume knob to select the required online
member of the working group.
3. Press and hold F1 button to initiate full-duplex private call to the
current member.
4. Press F2 button to end the full-duplex private call and the radio
will return to the last working group automatically.
4.8 Answer full-duplex private call
1. When receiving a full-duplex private call, there will be a voice
2. Press PTT button to answer the full-duplex private call.
3. Press F2 button to reject the full-duplex private call and the radio
will return to the last working group automatically.
NOTE:
You may rotate the channel/volume knob to adjust the volume

12
during a private or full duplex call.
5. ADVANCED OPERATIONS
5.1 System software upgrade
1. The radio will automatically detect if there is a new version when
it is connected to Wi-Fi or the data service is available.
2. In case of a new version, the radio will show and broadcast a
prompt message. The user should start the version upgrade pro-
cess in system settings.
3. When the upgrade progress has started, the LCD screen will
show a prompt. If the radio is powered off in the upgrade process,
the version update will fail.
5.2 eChat application upgrade
1. When the radio is connected to the network and logged in suc-
cessfully, if the server has a new eChat application version, it will
push to the radio automatically, and the radio will start to download
the new version package in background.
2. When the package download completes, the radio will show a
prompt message.
3.
and start to install the new version; if you don’t press PTT button in
5 seconds, you will abort the upgrade.
4. After the new version is installed, the radio will delete the pack-
age and reboot the eChat application.
5.3 Wi-Fi network settings

13
e360 supports setting up Wi-Fi network via CPS, including add,
-
imum of 5 Wi-Fi networks. Please contact with solution provider to
6. SYSTEM SETTINGS
Press and hold F2 button under the standby mode to enter system
settings, and the content that can be set up includes:
LCD level;
Network mode;
Wi-Fi;
Bluetooth;
APN information
Language;
System updates;
Voice assistance;
About phone;
NOTE:
The various settings are selected by rotating the channel/volume
The radio will exit the system settings when pressing PTT button
to initiate or receive a call, and the current setting that has been
6.1 LCD level
1. Press and hold F2 button to enter system settings under the
standby mode.

14
2. Rotate the channel/volume knob to switch to LCD level setting.
3. Press the channel/volume knob to change the current LCD level,
press the channel/volume knob can set from 1-5 cyclically.
4. Press F2 button to exit the main menu.
6.2 Network mode
1. Press and hold F2 button to enter system settings under the
standby mode.
2. Rotate the channel/volume knob to switch to Network mode
setting.
3. Press channel/volume knob to view the network mode list and
current network mode.
4. Rotate the channel/volume knob to choose other network mode,
press channel/volume knob to set the network mode (system will
card).
5. Press F2 button to go back/exit main menu.
6.3 Wi-Fi
1. Press and hold F2 button to enter system settings under the
standby mode.
2. Rotate the channel/volume knob to switch to Wi-Fi setting.
3. Press channel/volume knob to enter the Wi-Fi setting.
4. Press channel/volume knob to turn on/off Wi-Fi.
5. If Wi-Fi is on, you can see the Wi-Fi list.
6. Rotate the channel/volume knob to select the Wi-Fi and press

15
knob to connect the Wi-Fi network which preset by the CPS.
7. Press F2 button to go back/exit main menu.
6.4 Bluetooth
1. Press and hold F2 button to enter system settings under the
standby mode.
2. Rotate the channel/volume knob to switch to Bluetooth setting.
3. Press channel/volume knob to enter the Bluetooth setting.
4. Press channel/volume knob to turn on/off Bluetooth.
5. If Bluetooth is on, you can view the Bluetooth device list. Rotate
the channel/volume knob to choose the right Bluetooth device and
press the knob to connect.
6. Press F2 button to go back/exit main menu.
6.5 APN information
1. Press and hold F2 button to enter system settings under the
standby mode.
2. Rotate the channel/volume knob to switch to APN information.
3. Press channel/volume knob to view the APN list and current APN
information.
4. Rotate the channel/volume knob to select other APN options.
5. Press channel/volume knob to change to other APN.
6. Press F2 button to go back/exit main menu.
6.6 Language
1. Press and hold F2 button to enter system settings under the
standby mode.

16
2. Rotate the channel/volume knob to switch to language setting.
3. Press channel/volume knob to view language list and current
system language.
4. Rotate the channel/volume knob to select other language.
5. Press the channel/volume knob to change to other system lan-
guage.
6. Press F2 button to go back/exit main menu.
6.7 System updates
1. Press and hold F2 button to enter system settings under the
standby mode.
2. Rotate the channel/volume knob to switch to system updates.
3. Press channel/volume knob to enter sub-menu of system up-
dates.
4. Rotate the channel/volume knob to select “Local update” or
“Remote update”.
5. Before select the “Local update”, please prepare the update.zip
6.
7. If you select “Remote update”, you will enter the remote system
updates page.
8. Rotate channel/volume knob to select “ONLINE UPDATE” menu.
9.
system will checking updates, if there is new version it will update.
If there is no new version, the radio will have a prompt of “Your
software is up to date”.
10. Rotate channel/volume knob to select “OK” and press to con-

17
11. Press F2 button to go back/exit main menu.
6.8 Voice assistance
1. Press and hold F2 button to enter system settings under the
standby mode.
2. Rotate the channel/volume knob to switch to Voice assistance
setting.
3. Press channel/volume knob to turn on/off Voice assistance.
4. Press F2 button to exit the main menu.
6.9 About phone
1. Press and hold F2 button to enter system settings under the
standby mode.
2. Rotate the channel/volume knob to switch to About phone.
3. Press channel/volume knob to enter About phone menu and view
current information.
4. Press F2 button to exit the main menu.
Press some buttons under standby mode to enter some function
operations or other settings, these operations and settings include:
Message;
Default dispatcher;
Application version;
6.10 Message
1. Press F1 button to enter message list under the standby mode.
2. You will see the text messages and broadcast messages.

18
3. Rotate the channel/volume knob to see previous/next message.
4. Press F2 button to exit message list.
6.11 Default dispatcher
1. Press and hold F1 button to enter dispatcher list under the stand-
by mode.
2. Rotate the channel/volume knob to view the dispatchers.
3. If there are more than one dispatchers, rotate the channel/vol-
ume knob to choose the dispatcher and press the knob again to set
it as the default dispatcher.
4. Press F2 button to exit this settings.
6.12 Application version
1. Press F2 button to enter application version information.
2. The current application version will be displayed on LCD screen.
3. Press F2 button to exit.
MAIN TECHNICAL SPECIFICATIONS
Frequency
LTE FDD-LTE: Band 1,3,4,5,7,8,20,28
WCDMA Band 1,4,5,8
Technologies LTE/WCDMA/Bluetooth 4.0
Size(H*W*D) 115.5 * 54.5 * 34.5 mm (Without Antenna)
Weight About 250g (with antenna and battery)
Display 2.4inch color LCD, 240x320
Battery 18.87Wh(5100mAh,3.7V)
Interface Type-C (Data/Audio/Charging)

19
Memory (RAM+ROM) 512MB + 4GB
WLAN 802.11b/g/n,2.4GHz
Location GPS/Glonass
Speaker Front: 36mm Professional Speaker
Card Slot Nano SIM x 1
Charging Desktop Charger / USB Type-C(Optional)
Dust and Water Resis-
tance IP54
1. Risk of explosion if battery is replaced by an incorrect type.
Dispose of used batteries according to the instructions.
2. Adapter shall be installed near the equipment and shall be easily
accessible.
3. The product shall only be connected to a USB interface of ver-
sion USB Type-C.
4. This product can be used across EU member states.
SOFTWARE RELEASE
2.x
(x means 0, 1, 2, 3,…9 Arabic numbers).
ACCESSORIES
This radio is designed to operate with the accessories supplied by
CALTTA and included in the Standard Package.
Table of contents
