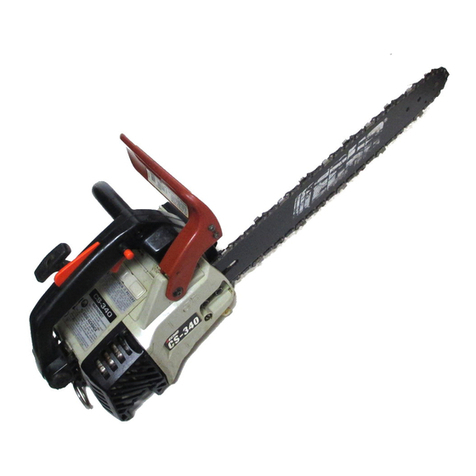
Echo CS-300, CS-340, CS-345 User manual

X7503203102 X750003241
04/03
Chain Saw
InstructionManual
MODELS : CS-300
Serial Number 03001001 - 03999999
CS-340
Serial Number 03001001 - 03999999
CS-345
Serial Number 03001001 - 03999999
WARNING DANGER
Readrulesforsafeoperationandinstructionscarefully.ECHOprovidesanInstruction
ManualandaSafety Manual.Bothmustbereadandunderstoodforproperandsafe
operation.

2
RULES FOR SAFE OPERATION
A. Kickback Safety Precaution for Chain Saw Users
WARNING!
KICKBACKmayoccurwhen thenose ortip ofthe
guide bar touches an object, or when the wood
closesinand pinchesthe sawchainin thecut.
Tip contact in some cases may cause a lightning
fastreverse REACTION,Kicking theguidebarup
andbacktowards theoperator. Pinchingthesaw
chainalongthetopof theguide barmaypush the
guide bar rapidly back towards the operator. Ei-
therofthesereactionsmaycauseyoutolosecon-
trol of the saw which could result in serious per-
sonalinjury.
Donotrelyexclusivelyuponthesafetydevicesbuilt
intoyoursaw.Asachainsawuser,youshouldtake
several steps to keep your cutting jobs free from
accidentor injury.
1. With a basic understanding of kickback, you
canreduceoreliminatetheelementofsurprise.
Suddensurprisecontributestoaccidents.
2.Keep a good firm grip on the saw with both
hands, the right hand on the rear handle, and
theleft handonthefronthandle,whenthe en-
gineisrunning.Useafirmgripwiththumbsand
fingersencirclingthechainsawhandles.Afirm
grip will help you reduce kickback and main-
taincontrol of thesaw. Don’t’letgo.
3. Make sure that the area in which you are cut-
ting is free from obstructions. Do not let the
noseoftheguidebar contacta log,branch, or
anyotherobstruction whichcouldbe hitwhile
youareoperatingthesaw.
4. Cutathigh enginespeeds.
5. Donotoverreachorcutaboveshoulderheight.
6. Follow manufacturer’s sharpening and main-
tenanceinstructions forthe sawchain.
7. Onlyusereplacement barsandchains speci-
fiedby themanufacturerortheequivalent.
B. Other Safety Precautions
1. Donotoperateachainsawwithonehand!Se-
rious injury to the operator, helpers, bystand-
ers,oranycombinationof thesepersons may
resultfromone-handedoperation.Achainsaw
isintendedfortwo-handeduse.
2. Do not operate a chain saw when you are fa-
tigued.
3. Usesafetyfootwear; snug-fittingclothing; pro-
tectivegloves;andeye,hearing andheadpro-
tectiondevices.
4. Usecautionwhenhandlingfuel.Movethechain
sawatleast3m (10feet)fromthefuelingpoint
beforestartingtheengine.
5. Donotallowotherpersonstobenearthechain
sawwhenstartingorcuttingwiththechainsaw.
Keepbystandersand animals outofthe work
area.
6. Donotstartcuttinguntilyouhaveaclearwork
area,securefooting,andaplannedretreatpath
fromthe fallingtree.
Copyright©2003 ByEcho,Incorporated
All Rights Reserved.

3
CONTENTS
Page
RulesforSafe Operation..................................................................................................2
TechnicalData .................................................................................................................4
Emission Data .................................................................................................................5
Description ......................................................................................................................5
Nomenclatureof Parts......................................................................................................6
PreparationforUse..........................................................................................................7
Fueland Lubricant............................................................................................................8
Operation.........................................................................................................................9
CuttingInstructions ......................................................................................................... 11
MaintenanceandCare...................................................................................................15
Chain and Guide Bar Combinations...............................................................................18
SettingtheSaw Chain....................................................................................................18
Troubleshooting..............................................................................................................20
Storage..........................................................................................................................21
Correct Use of Chain Brake ...........................................................................................22
ServicingInformation......................................................................................................24
7. Keepallpartsofyourbodyawayfromthesaw
chainwhen theengineisrunning.
8. Before you start the engine, make sure that
thesaw chainis notcontacting anything.
9. Carrythechainsaw withthe enginestopped,
the guide bar and saw chain to the rear, and
themufflerawayfromyourbody.
10.Donotoperate achainsaw that isdamaged,
improperly adjusted, or not completely and
securely assembled. Be sure that the saw
chain stops moving when the throttle control
trigger is released.
11. Shutofftheenginebeforesettingthechainsaw
down.
12.Useextremecaution when cuttingsmall size
brushandsaplingsbecauseslender material
may catch the saw chain and be whipped to-
wardyou orpull youoff balance.
13.When cutting a limb that is under tension, be
alert for spring back so that you will not be
struck when the tension in the wood fibers is
released.
14.Keep thehandles dry, clean,and freeofoil or
fuelmixture.
15.Operatethechain sawonlyin well-ventilated
areas.
16.Do not operate a chain saw in a tree unless
youhavebeen specificallytrainedto doso.
17.Allchainsawservice,otherthantheitemslisted
intheInstructionManualmaintenanceinstruc-
tions,shouldbeperformedbycompetentchain
saw service personnel. (For example, if im-
proper tools are used to remove the flywheel
or if an improper tool is used to hold the fly-
wheelin ordertoremovetheclutch,structural
damagetotheflywheelcould occurandcould
subsequentlycausetheflywheeltoburst.)
18.When transporting your chain saw, use the
appropriate guide bar scabbard.
19.SparkarrestormufflersapprovedtoSAEStan-
dard J335b are Standard on ECHO Chain
saws to reduce the possibility of forest fires.
Do not operate the chain saw with a loose or
defectivemuffler.Donotremovethesparkar-
restorscreen.


4
TECHNICAL DATA
* Technical data subject to change without notice.
ledoM 003-SC043-SC543-SC
noisnemiDHxWxL mm022x532x062542x532x083
hcni7.8x2.9x2.016.9x2.9x0.51
thgieWyrd,daehrewoPgk)bl1.7(2.3)bl3.7(3.3)bl5.7(4.3
rabediugdnaniahctuohtiW
enignEepyT
lm
rednilycelgnis,ekorts-owt,delooc-riA
tnemecalpsiD).ni.uc38.1(1.03).ni.uc30.2(4.33
roterubraC otengaM gulPkrapS retratS noissimsnartrewoP
epytmgarhpaiD metsysIDC:otengamleehwylF Y8-MPBKGN retratslioceR hctulclagufirtneccitamotuA
leuFoitarerutxiMdnelBrewoPohcEhtiwoitar1:05
MT
.lioekorts-2 ,lohoclalyhtemgniniatnocleufesutonoD.dedaelnuenatco98 .EBTM%51rolohoclalyhte%01nahterom
yticapaCknaTL ).S.Uzolf6.8(52.0
liOniahcdnaraB)liorotomro(lioniahcdnarabOHCE
yticapaCknaTL ).S.U.zo.lf5(51.0
rabediuG
niahcwaS
dradnatS.ni21dradnatS.ni41dradnatS.ni61
lanoitpO.ni61,41lanoitpO.ni61,21lanoitpO.ni41,21
noitacirbuLpmupliocitamotuaelbatsujdA
dradnatS serutaef eldnaHpoTeldnahlanoitnevnoC draugdnahraeR
,draugdnahtnorF ,ecivednoitarbiv-itnA ,ekarbniahC,tuokcollortnocelttorhT relffumrotserrakrapS,rehctacniahC

5
DESCRIPTION
TheECHOproductyoupurchasedhasbeenfactorypre-assembledforyourconvenience.Duetopackaging
restrictions, guide bar and saw chain installation and other assembly may be necessary.
Afteropeningthe carton, checkfordamage. Immediately notifyyourretailer or ECHODealerof damaged or
missing parts. Use the contents list to check for missing parts.
CONTENTS
1 - PowerHead
1 - GuideBar
1 - SawChain
1 - InstructionManual
1 - SafetyManual
1 - WarrantyRegistrationCard
1 - LimitedWarrantyStatement
1 - KickGuardInstallationManual
1 - Scrench
1 - Echo Power Blend TM 2-stroke oil sample
EMISSION CONTROL
EPA Phase II
IMPORTANTENGINEINFORMATION
ENGINEFAMILY: 2EXHS.0334RA
DISPLACEMENT: 33.4 CC
THIS ENGINE MEETS U.S. EPA PAHSE II EMISSION REGULA-
TIONS FOR S.O.R.E. REFER TO OWNER'S MANUAL FOR
MAINTENANCE SPECIFICATIONS AND ADJUSTMENTS.
EMISSIONCOMPLIANCEPERIOD :300 HRS.
EMISSION DATA
PRODUCT EMISSION DURABILITY
The300 hour emission durability compliance period is the timespan selected by the manufacturer certifying
theengineemissionsoutputmeetsapplicableCaliforniaand/or U.S. EPAemissionsregulations,provided
thatapprovedmaintenanceproceduresarefollowedaslistedintheMaintenanceSectionofthismanual.
The emission control system for these engines are
EM(EngineModification).
An Emission Control Label is located on the
engine. (Thisis an EXAMPLEONLY, informationon
labelvariesbyengineFAMILY).

6
1. Handguard
(Chainbrakeactuatinglever)
2. Throttlecontrollockout
3. Throttlecontroltrigger
4. Sprocketguard
5. Chaincatcher
6. Aircleanercover
7. Purgebulb
8. Guidebar
9. Sawchain
10. Fronthandle
11. On / Off switch
12. Rearhandguard
13. Fuel tank cap
14. Pull starter
15. Oil tank cap
16. Throttlecontrollatch
17. Tipguard
18. Muffler
19. Lanyardring
CS-345
NOMENCLATURE OF PARTS
CS-300, CS-340
18
18
19

7
B
A
PREPARATION FOR USE
UP
Themachine maybe deliveredwith guide bar (A), tip
guard,and saw chain (B) separated. Install guide bar, tip
guard,and saw chainas follows:
WARNING DANGER
SawChainissharp!Alwaysweargloveswhen
handlingassembly,otherwiseseriouspersonalinjury
may result.
CAUTION
1. All adjustments should be made cold.
2. Alwayswear gloves when working onchain.
3. Do not operate with a loose chain.
GUIDE BAR AND SAW CHAIN
• Follow the instructions enclosed with tip guard to
installguard to guidebar.
• Removetwoguide barnuts and removesprocket
guard(D).
• Mount guide bar (A) on studs, and slide toward
sprocket to make saw chain installation easier.
• Install saw chain (B) as shown, with cutters facing
forward.
IMPORTANT
Becertaintensioner (C) fitsinto lower adjusterhole
beforetighteningguidebarnuts.
NOTE
Movechainbrakeleverfullyrearwardtoinstall
sprocket guard to saw.
• Installsprocket guard (D), and tighten guide bar nuts
fingertight.
• Adjust saw chain tension, as instructed in “Adjust-
ment,ChainTension.”
ADJUSTMENT, CHAIN TENSION
• Loosentwo guide bar nuts.
• Turn the adjuster screw clockwise until the chain
touches the bottom of the bar.
• Hold the bar nose up and tighten the chain until there
is no clearance between the bar and chain.
• Tighten both guide bar nuts with bar nose held up, to
eliminateclearance.
• Pull the saw chain around the guide bar by hand.
Loosen the adjustment, if you feel tight spots.
• Start the engine and run at low speed. Stop and
readjust,if necessary.
A
B
D
C
D

8
FUEL STATEMENT
GASOLINE - Use89 Octane [R+M/2](midgrade or higher)
gasoline or gasohol known to be good quality. Gasohol may
contain up to 10% Ethyl (grain) alcohol or 15% MTBE (methyl
tertiary-butylether).Gasoholcontainingmethyl(wood)alcohol
isNOTapproved.
TWO STROKE OIL - Atwo-stroke engine oil meeting ISO-L-
EGD(ISO/CD 13738)and J.A.S.O. FC Standards must be
used.EchobrandpremiumPowerBlend TM Universal2-Stroke
Oilmeets thesestandards. Engineproblems due to inadequate
lubricationcaused by failure touse an ISO-L-EGD andJ.A.S.O.
FC certified oil, such as Echo premium Power Blend TM, will void
the two-stroke engine warranty. (Emission related parts only
arecoveredfortwoyears,regardlessoftwo-strokeoil used, per
the statement listed in the Emission Defect Warranty Explana-
tion.)
MixingInstructions
1. Fillanapprovedfuelcontainerwithhalfoftherequired
amountofgasoline.
2. Addthe proper amount of 2-stroke oil to gasoline.
3. Close container and shake to mix oil with gasoline.
4. Addremaininggasolineandremix.
5. Installfuelcontainer capand wipeany spilled fuelfrom
containerandsurroundingarea.
IMPORTANT
Stored fuel ages. Do not mix more fuel than you expect to
use in thirty (30) days, ninety (90) days when a fuel stabi-
lizer is added.
Stored two-stroke fuel may separate.ALWAYS shake fuel
containerthoroughlybefore eachuse.
IMPORTANT
Spilled fuel is a leading cause of hydrocarbon emissions.
Some states may require the use of automatic fuel shut-
offcontainerstoreduce fuel spillage.ContactyourECHO
dealerfororderinginformation.
CHAIN LUBRICANT
Properlubrication ofthe chainwhile in operation reduces friction
between the chain and the guide bar to a minimum and assures
alongerservice life.
• use bar and chain oil of high quality for this purpose.
• Donot use used or reclaimedoil to avoid various oiler
problems.
• Use ECHO bar and chain oil.
• When ECHO bar and chain oil is not available:
Use motor oil, etc.
• Usebar and chain oil ofthe following grades:
SAE NO. 30 ..... in summer
SAE NO. 10 ..... in winter or when cutting resinous trees.
• Whenrefueling, also refill chain oil.
50
FUEL AND LUBRICANT
Oil
Gasoline
FUELTANK OILTANK
Fuel Mix Chart
50:1
TANKINDICATION
).S.U()CIRTEM(
SAGLIOSAGLIO
.laG.zo.lFretiL.cc
1
2
5
6.2 1.5 8.21
4
8
02
08 061 004

9
CS-345
CS-300
CS-340
A
A
B
C
Securely hold the saw.
OPERATION
WHEN THE ENGINE IS COLD
• Movechainbrake leverfully forward toengage chain brake
beforestarting.
• Fill the fuel tank with fuel.
• Fill the chain oil tank with lubricant.
• Turnswitch (A)to “RUN” position.
• Pull choke (B) all the way out (close position).
• Push purge bulb (C) 10 times.
• Pull starter handle several times until first firing sound is
heard. (Holdmachine with your knee or foot.)
• Push choke (B) all the way in. (open position)
• Pullstarter handleagain.
WHEN THE ENGINE IS HARD TO START
• Press throttle control lockout down while holding throttle
trigger, and push in throttle control latch.
• Pullstarter handle.
• Whenengine starts, immediatelysqueeze throttle trigger
to release the latch.
WARNING DANGER
Clutchengagesandchainwillrotatewhenengineisstarted
withthrottlecontrollatchengaged.Makesurebarandchain
arenottouchinganythingwhenstartingthesaw.Afterengine
starts, release throttle trigger to idle engine. Never use the
throttle control latch for cutting. Use only when starting the
engine.
NOTE
Do not pull starter rope out to the maximum possible position.
Do not allow recoil handle to snap back against the casing.

10
STARTINGWARM ENGINE
• Ensure that there is fuel and chain oil in the tanks. (If fuel
tankwas emptiedduring previous operation, refill tank and
pushpurge bulb 10 times.)
• Turnswitch (A)to “RUN” position.
• Pullstarter handle.
• Choke may be used if necessary, but be sure to push it
back on first firing sound.
NOTE
If engine does not start after 5 pulls, use cold start
procedure.
RUNNING
• After engine starts, allow it to return to idle.
• Movechainbrake leverfully rearward torelease chain
brake.
• Squeeze throttle trigger with throttle control lockout
graduallyto increaseengine speed.
• Sawchain startsmoving whenthe enginereaches
approximately4200 rpm.
• Ensureproper acceleration and lubrication of chain and
bar.
• Do not run the engine at high speed unnecessarily.
• Be sure that saw chain stops moving when throttle trigger
isreleased.
STOPPING
• Release throttle trigger and turn switch (A) to STOP
position.
NOTE
If engine does not stop, pull choke out fully to stop
engine.
Checkand repair stop switch beforestarting the engine
again.
CS-345
CS-300
CS-340
A
A
CS-345
CS-300
CS-340
A
A

11
Kickback
CUTTING INSTRUCTIONS
GENERAL [NOTE]
ReadtheECHO“CHAIN SAW SAFETYMANUAL”includedwith
your chain saw for additional cutting and safety instructions.
In all circumstances the operation of the chain saw is a one-
man job. It is difficult at times to take care for your own safety,
so don’t assume the responsibility for a helper as well. After
youhave learned thebasic techniques of using the saw, your
best aid will be your own good common sense...
The accepted way to hold the saw is to stand to the left of the
sawwith your left hand onthe front handlebar and yourright
handon the rear handle so you canoperate the throttle trigger
withyour rightindex finger.
Before attempting to fell a tree, cut some small logs or limbs.
Becomethoroughly familiar with the controlsand the re-
sponses of the saw.
Start the engine, see that it is running properly. Squeeze the
trigger to open the throttle wide open and start the cut. If the
chainis properlysharpened, the cutting should berelatively
effortless. It is not necessary to press down hard to make the
saw cut. Pushing the saw too hard will slow the engine and
cutting will actually be more difficult.
Somematerial mayadversely affect the housings ofyour
ECHOchain saw.
(Example: Palm TreeAcid, fertilizer, etc.) To avoid housing
deterioration,carefully remove allpacked sawdust around
clutchand guide bar area andwash with water.
CAUTION
Do not let the tip of the bar touch anything while the engine is
running.At cutting speed the chain is moving at a high rate of
speed. Should the tip contact a limb or log while the chain is
moving,thetip willbepushed upwardwithconsiderable force.
This is known as kickback.Avoid it!
CAUTION
Wear suitable hearing protective device such as ear muffs or
ear plugs to protect against objectionable or uncomfortable
loudnoises.

12
2”
45°
2”
CAUTION
A falling tree can seriously damage anything it may hit - a
car, a house, a fence, a power line, or another tree. There
are ways to make a tree fall where you want it, so first
decidewhere thatis!
Beforecutting,clear thearea aroundthetree.You willneed
goodfooting while workingand you should be able to work
thesaw without hitting any obstacles.Next, selecta pathof
retreat.Whenthetree beginstofallyou shouldretreataway
from the direction of fall at a 45 degree angle to avoid the
trunk kicking back over the stump.
Begin the cut on the side to which the tree is to fall. Cut a
notch about 1/3 of the way into the tree as shown. The
position of this notch is important since the tree will try to
fall “into” the notch. The felling cut is made on the side op-
positethe notch andat alevel about2” abovethe bottom of
the notch. Do not try to cut through to the notch with the
fellingcut. The remaining wood betweenthe notch cutand
felling cut (about 2”) will act as a hinge when the tree falls,
guiding it in the desired direction. When the tree starts to
fall, kill the engine, place the saw on the ground and make
your retreat quickly.
To fell big trees with a diameter exceeding twice the bar
length, start the notching cuts from one side and draw the
saw through to the other side of the notch. Start the back
cuton one sideof thetree, pivotingthe sawthrough to form
the desired hinge on that side.
Then remove the saw for the second cut. Insert the saw in
thefirst cut,very carefullyso as not to cause kickback. The
final cut is made by drawing the saw forward in the cut to
reachthe hinge.
Limbing a fallen tree is much the same as bucking. Never
limb on the tree that you are standing. When limbing, cau-
tion is the word. Be careful of the tip touching other limbs.
Always use both hands.
FELLING A TREE
DIRECTION
OFFALL
Direction of fall Hinge
Fellingcut
First cut
Notch
Second cut
One-third tree
diameter
LIMBING

13
Don’t cut with the saw overhead or the bar in a vertical posi-
tion. If the saw should kick back you may not have good
enoughcontrol to prevent possible injury.
Bucking is the sawing of a log or fallen tree into smaller
pieces. There are a few basic rules which apply to all
buckingoperations.
Keep both hands on the handles at all times.
Support logs if possible.
When cutting on a slope or hillside, always stand uphill.
Keepin mindthat thewood is heavy and thatit willbend and
pinchthe sawif improperly supported.
The trunk will weaken at the point where you make the cut
unless the tree is lying on perfectly flat ground or supported
asshown.
If you make the cut with the tree on the ground, don’t let the
saw’s chain dig into the earth; it is harmful for the saw, and
you stand a good chance of being struck by flying debris. To
cutthe trunk,use thebucking and two-cut sequence shown.
The first cut should be no deeper than one-third the trunk
diameter.
WARNING: KICKBACK IS DANGEROUS
Kickback is generated when the rotation of the chain is ar-
rested for some reason. The most dangerous effect of this
actionoccurs whenthe nose ofthe barcontacts another ob-
ject, the chain is momentarily stopped and all the energy of
the engine throws the bar upwards and backwards towards
theoperator.
The chain saw industry and government agencies have at-
temptedtoprescribevarious safetydevices,butthe best pro-
tection is to avoid kickback.
Comply with the Safety Precautions as listed on page 2 of
this manual.
BUCKING
Uphillposition
FINISHCUT
FIRSTCUT Board or flat stones
KICKBACK
• Improper thrust cutting.
• When the bar nose hits another tree, etc.

14
INFORMATION
Kickback Safety Features
Thefollowing featuresare recommended for this model as KickbackSafety Features.
• Double Guard Low Kick Type Guide Bar orAsymmetrical Low Kick Type Guide Bar
Note: Your saw chain can be equipped with either of these bars.
Reduced nose
radius
NOTE
UseOregon®replacement guidebars.
Thefollowing guide bars may be considered tohave equivalentkickback energy.
• Sprocket nose guide bars of the same length and nose radius, same pitch and having the same number of teeth.
• Ahard nose guide bar having the same length and nose radius as a sprocket nose bar.
• Low Kick Guard Link Type Saw Chain
Thelow kick guard link chainmust be maintainedcorrectly. Follow instruction“SETTINGTHE CHAIN”in Instruction
Manual.
• Front Hand Guard (Chain Brake Actuating Lever)
Thefront handle guard mustbe installed correctly andkept in good condition.
• Chain Brake
Chainbrake must be maintainedcorrectly.Follow instruction “CORRECTUSE OF CHAIN BRAKE”in Instruction
Manual.
WARNING DANGER
Usingimproper replacementcomponentsor removingsafety devices may result in serious orfatalinjury.
DoubleGuardBar

15
MAINTENANCE AND CARE
AIRFILTER
• Checkbeforeeveryuse.
• Pull choke (A) all the way out (close position).
• Loosenboltandremoveaircleaner(B)coverandfilter(C).
• Lightlybrush dust off filter, andinspect for damage.
A
B
C
D
E
F
G
H
J
AUTOMATICOILER
• Thedischargevolumeoftheautomaticoilerisadjustedto3
to4cc/mm(@7000rpm)priortoshipmentfromthefactory.
• Always check oil discharge when in use.
• Turn adjusting screw (D) counter-clockwise to increase oil
volume,clockwisetodecreaseoilvolume.
OILSTRAINER
• Checkperiodically.
- Do not allow dust to enter into oil tank.
- Cloggedoilstrainerwillaffectthenormallubricating
system.
- Pick it up through oil port.
- If the strainer (E) is dirty, wash it in gasoline.
- When the inside of the tank gets dirty, rinsing the tank
out with gasoline will clean it.
FUELSTRAINER
• Checkperiodically.
- Do not allow dust to enter fuel tank.
- Cloggedstrainerwillcausedifficultyinstartingengineor
abnormalitiesinengineperformance.
- Pickupthefuelstrainer(F)throughfuelinletportwitha
piece of steel wire, or the like.
- When the strainer is dirty, wash it in suitable cleaning
fluid.
- Whentheinsideofthefueltankisdirty,rinsingthetank
out with suitable cleaning fluid will clean it.
GUIDEBARANDOILHOLES
• Cleanaftereachuse
- Cleanthegrooves(G)oftheguidebarwith,forexample,
asmallscrewdriver.
- Clean oil holes (H) with a wire.
• Reverseguidebarperiodically.
SPROCKET
• A damaged sprocket (J) will cause premature damage or
wearofsawchain.
- Whenthesprockethaswornout0.5mm(.020”)ormore,
replace it.
• Check sprocket when you install new chain. Replace it if
worn.
• Cleansprocket,clutchandbarmountareabeforeinstallation
ofbar.
IMPORTANT
Sometreesapandresinsarecorrosive.Thoroughlywashthe
guidebarandsprocketareasaftereachuse,thencoatmetal
parts with light oil.

16
SPARK PLUG
• Checkperiodically
• Gap = 0.65mm (.026 in.)
• Replace if either electrode is worn, or if the insulator
is fouled by oil or other deposits.
• Torque = 145 – 155 kg*cm (125 – 135 in. lb.)
CAUTION: Donotover-torque.
COOLING SYSTEM CLEANING
• Removesparkpluglead.
• Removetwo(2)mufflercoverscrewsandmuffler
cover.
• Removefour(4)recoilstarterhousingscrewsand
starterhousing.
• Use a stiff bristle cleaning brush (do not us a metal
brush)toremovedirtfromcylinderfinsinmufflerand
ignition coil areas.
CARBURETOR ADJUSTMENT
EngineBreak-In
Newenginesmust be operatedaminimum duration oftwo
tanksoffuelbreak-inbeforecarburetoradjustmentscanbe
made.Duringthebreak-inperiodyourengineperformance
will increase and exhaust emissions will stabilize. Idle speed
canbeadjusted as required.
HighAltitudeAdjustment
Highaltitudeadjustmentmayberequiredforproperoperation
ofthis engine.
IMPORTANT
Engineoperationataltitudesabove2000feetmayrequire
adjustmentofthecarburetorhighandlow-speedneedles.
Turnthehigh-speedneedlelean(CW)untiltheengine
runsbetween10,500and11,500maximumRPM.Below
2000feetaltitude,turnthehigh-speedneedlerich(CCW)
untiltheenginerunsbetween10,500and11,500maxi-
mumRPM.

17
B
A
Beforestarting the unit for adjustment, check thefollow-
ing items:
• Thecorrect spark plug must be clean and properly
gapped.
• Theair filter elementmust beclean andproperly
installed.
• Themufflersparkarrestorscreenandexhaustport
must be clear of carbon.
• Thestandardbarandchaincombination(seepage4)
must be installed to the power head, and properly
tensioned.
1. Startengine andrunforseveralminutestoreach
operatingtemperature.
2. Stopengine.Removegrommetcover(A)over“H”and
“L”limiterneedles.
3. TurnHIspeedneedle(H)CCW(counterclockwise)to
stop.Turn LO speedneedle (L)CCW (counterclock-
wise) to stop.
4. IdleSpeedAdjustment.
• Start engine and turn “idle” speed adjustment screw
(B) CW until the saw chain begins to move, then turn
the screw CCW until saw chain stops moving. Turn
screw CCW an additional 1/4 turn.
5. Accelerate to full throttle for 2-3 seconds to clear
excess fuel from engine then return to idle. Accelerate
to full throttle to check for smooth transition from idle
to full throttle. If engine stops or stalls after full warm
upreturnthe unit toyourauthorized ECHO dealerfor
repair.
6. Check HI speed RPM at W.O.T. (Wide Open Throttle).
HIspeedRPM shouldbe set between10,500 and
11,500RPM’s.
7. Check idle speed and reset if necessary. If a tachom-
eteris available,idle speedshould beset between
2,700and 3,300 RPM’s.
CAUTION!
• When starting, idling adjustment speed should be
adjusted not to rotate the saw chain.
• Whenthere istrouble with the carburetor, refer to
yourdistributorordealer.

18
WARNING DANGER
Useofreplacementsawchainand/orguidebarotherthanthatspecified,oroperationwithoutthe“tipguard”inplace,may
cause severe kickback resulting in serious injury.
Onlyusesawchaindesignatedas,“LOW-KICKBACK,”thatmeetstheANSIB175.1-2000Standard,andtheEchoguide
barspecified.
CHAIN AND GUIDE BAR COMBINATION
The following combinations may be used on CS-300, CS-340 or CS-345.
*Reducednoseradiussymmetricalbars(OREGONname—DoubleGuard)
SETTING THE SAW CHAIN
For setting saw chains, round file (4 mmø: 5/32”) and flat file are used.
• To keep correct position and correct angle, use the file holder.
-Round fileand flat file are available from your Echo Dealer.
• File cutters as below.
Type:91VG
HOLDFILEHOLDER
LEVEL
Depth
gauge
ONEFIFTHOFFILEDIAMETER
REMAINSABOVECUTTEREDGE
To sharpen othertype chain,follow chainmanufacturer’sinstructions
30°
PUSHFILEAS SHOWN
Keep this angle
1/5
• Placethe depth gauge toolfirmly on guide bar so that depth gauge protrudes. Then file top of depth gauge with flat file
until flat with top of the gauge tool.
- Besure to round off thefront edge of the depth gauge.
Sharpen bottom
edge
Depth gauge
tool Remove
until flat
with tool
Round
off the
edge
ledoM raBediuG hctiP
eguaG
niahCwaS rebmuN drauGkciK rebmuN
htgneLN/POHCE
003-SC 043-SC 543-SC
.ni21 .ni41 .ni61
105473021* 102573041* 107573061*
050.8/3 050.8/3 050.8/3
540719 250719 750719
94982 94982 94982

19
30°
85° 60°
91
0.64 mm (0.025”)
Parallel
Number
indicates Chain
type
Number
indicates
Chaintype
91S
(SPROCKET)
(DRIVELINK)
• Properlyfiled cuttersare shownbelow.
(Top plate angle) (Sideplateangle) (Top plate cutting angle) (Depth gauge)
• When setting of the chain is finished, soak it in oil and wash away filings completely before using.
• When chain has been filed on the bar, supply sufficient oil to it, rotate the chain slowly to wash away the filings before
usingagain.
• If the chain saw is operated with filings clogged in the groove, the saw chain and the guide bar will be damaged
prematurely
• If the saw chain becomes soiled with resin, for instance, clean it with kerosene and soak it in oil.
CHAIN TYPE AND SPROCKET PITCH
Sawchain shouldbe usedwith corresponding pitched
sprocket. To identify chain type and pitch of sprocket,
check as follows.
• Chain type number (A) is stamped on drive link.
• Sprocket pitch (B) is stamped on clutch drum.
AB

20
Fuelisnot
reachingcarburetor
Fuelis notreaching
cylinder
Enginedoesnot start(or,is difficulttostart)
Enginecranks
Thereis fuelin thetank
Fuelisreaching carburetor
Fuelisreaching cylinder
Thereisspark athigh
tensioncord end
Thereisspark atplug
Startingprocedures
correct
Nospark athightension
cordend.
Nosparkatplug
Fueldoes not
keeprunning
Acceleration
andlowspeed
function
defective
Carburetor
overflow
Enginedoes
notcrank
○○○○○
○○○
○○○
○○○
○○
○○○
○○○○○○
○○○○○
Fuel strainerclogged ................................... Clean.
Fuelpipe clogged ......................................... Clean.
Suctioninsufficient ....................................... Makesufficient.
Strainerclogged ........................................... Clean.
Carburetorout oforder .................................Disassemble andcheck.
C.D.I.module defective ................................Removeandreplace.
Ignitioncoil defective.....................................Removeandreplace.
Wireconnectiondefective .............................Reconnect.
High-tension cordconnectiondefective ......... Repairas necessary.
Switchis grounded .......................................Switchon.
Insulatorcracked .......................................... Replaceplug.
Sparkgap incorrect ...................................... Adjust.
Coveredwith carbon.....................................Clean orreplace.
Fouledwith fuel ............................................Cleanorreplace.
Startingprocedures incorrect ....................... Startcorrectly.
Lowandhighspeedneedle ........................... Readjust.
settingtoo lean
Table 1
Meteringlever springtoostrong ....................Readjust.
Fuelpump diaphragmdefective .................... Replace.
Fuelpassage cloggedwith dust ....................Disassembleandclean.
Fuelleakingfromfixingsurfaces .................. Retighten allscrews.
ofcarburetor
Airvalve,fueltankcap doesnot
worknormally ............................................... Replaceor Clean.
Fuel pumpdoesnot operate .......................... Check impulsedrilling.
Fuelinlet needlevalve cloggedwithdust .......Clean.
Meteringlever springnot placed
indent oflever .............................................. Correct.
Mufflerstickywith fuel .................................. Fuelmixture istoorich
Startthe engineseveral times
withchokerodfullyopenand
runatfast idleuntil engine
doesnotsmoke.
Bearingdamaged .........................................Disassembleand replace.
Pistonand/or cylinderseized ........................ Disassembleandreplace.
Crankshaftworn .......................................... Disassembleandreplace.
Crankshaftcontacting crankcase .................. Disassembleand replace.
TROUBLESHOOTING
Poorperformance ofthe engineand/or cuttingmechanism can normally be prevented by carefully following these
instructions.
Poorperformance caneasily becorrected even by a beginner.
Whenthe engine does not function properly check the following three (3) points first.
• Isthe engine compressionadequate?
• Is fuel system in good condition and is enough fuel being supplied?
• Is electrical system in good condition and is spark plug operating normally?
When there is serious trouble with the unit, do not try to repair it yourself but have your distributor or dealer do it for you.
Fordetailed TROUBLESHOOTINGrefer totables 1and 2.Locate the problem on the following chartsand repairas
necessary.
Other manuals for CS-300, CS-340, CS-345
2
Table of contents
Other Echo Chainsaw manuals

Echo
Echo shindaiwa CS-501SX User manual

Echo
Echo CS-4510-18 User manual

Echo
Echo CS-440EVL Operating and installation instructions

Echo
Echo CS-370ES Mounting instructions

Echo
Echo DCS-1600 User manual

Echo
Echo CS-310 User manual

Echo
Echo CS-8000 Instruction Manual

Echo
Echo CS-310 User manual

Echo
Echo CS-370 User manual

Echo
Echo ECCS-58V User manual